The Grow Awards 2026 🏆 


Likes
30
Share
@TerpTurtle
Follow
Full blood moon harvest
9 day dry @ 58-63RH 60-65F | Glass Jar Cure with inert gas
Shadow realm potency, Taste just like apple cider
Fast finisher, stays small & tight node spacing


Likes
3
Share
@No_Clout
Follow
This is week 11 since germ in two days, I was hoping someone can tell me how long left and when to start flush probably 30/70 orange to white pistil ratio, I’m also seeing some yellowing and some tips of the leaves going purple. I think theirs two, three weeks left but id love to hear someone’s two cents on it all cause this is my second grow and first autoflower, it was estimated 10 week from seed but I know that’s a rough estimate.

Likes
10
Share
@Jardin33ro
Follow
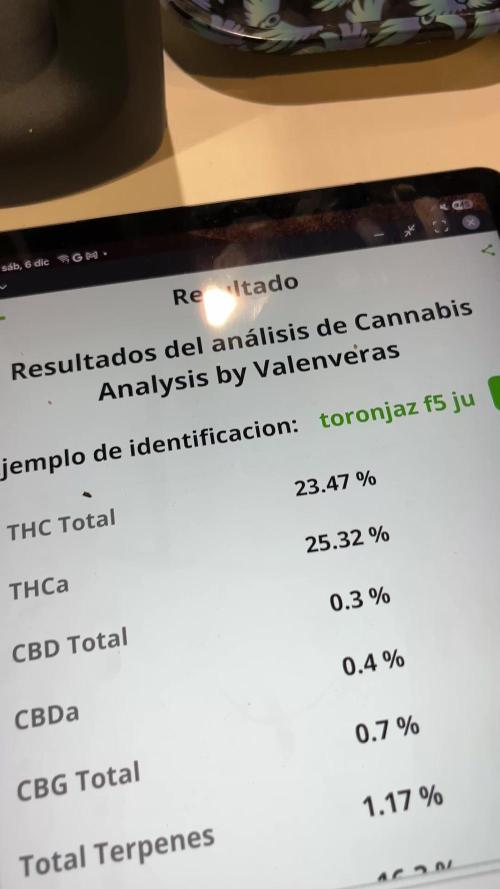
Buenas gente! Esta semana se nota tremendamente el engorde de los calices, y algunos comienzan a cerrar de a poco! Una maravilla en cuanto a terpenos!! Tuve el honor de cortar unas flores para analizar en la expocannabis uruguay, les dejo un video con esa info de una de los 4 fenos. Empezamos a lavarr, primer uso del flawless asi que nos ponemos con el lavaditooo!! Venimos bien de bien. Saludos Jardin33ro 🇺🇾


Likes
12
Share
@rickhaZe
Follow
-comenzamos la 2da semana de vegetacion con los 11 ejemplares de bsf seed y una cabeca de preto de maconha seed banco brasileño.
- aumentamos 100 ml o 0.1 l de agua, ya vamos en 400ml.
- hay una critical 2 que quedo mas pequeña, seguramente debe ser error de genética u de fabrica.
- esta semana seguimos fertilizando con grotek, al dia 17.


Processing
Likes
1
Share
@nausicaahime
Follow
week 6
last vegetative week, due to tent size
no pre flowers yet
no thrips this week.
leaves with 9 tips now
57cm height (+ pot)
flowermind (4ml + 0.5g)
LST + Defoliation + bending
started putting some banana skin on a jar filled with water for flowering
looking pretty, right?
Likes
6
Share
@Lordviper28
Follow
This week went by good plant have some very good bud sites developing on them this strain has done very good and overall happy with the way they are growing

Likes
247
Share
@PremiumBudsEU
Follow
Hello Growers and Sponsors
Hope you all are doing well 🙏
my lemonade haze girls have doubled their mass in the last 2 weeks, they smell much more intense now, when i smell the buds or rub the leaves it actually smells like i cut open a lemon 😀
i will now reduce the fertilizer dose even further but leave calmag 1ml/l for another week, the trichomes slowly turn from clear to milky and the end is near.
I will harvest when I have at least 100-90% milky trichomes and 10-5% amber.
these plants have not shown any signs of overfeeding, stress or any other disease the whole grow so far, i am slowly reducing the light intensity as well as DLI, the plants are in the final stages of flowering.
Thank you for taking the time to accompany and support me 👊
I appreciate it very much, stay healthy friends 🙏

Likes
23
Share
@Fatnastyz
Follow
10-18
Water. Let her dry out a bit. Seems i got heavy handed. Ugg. Lifting pots from here out!
Seems she a little mad at me, but still holds course.
10-19
This am, burn and yellowish. From over feed and water.
Flushed, uggg 1213 ppm to 550ish
Full dry backs. Uggggg. Hated to flush since I just watered. But just got it done, before more burn. Should be ok. 🤞

Likes
57
Share
@Nebula420
Follow
Gorilla Zkittle grow well, everything is good, no have any problem.
Gorilla Zkittle amazing beautiful plant, have a very frosty buds.
Gorilla Zkittle smell is strong, amazing smell of fruits, strawberries, cherry blossoms and sweet chocolate
Thanks to everyone who follows my grow reports, and Barney's Farm for nice genetics.

Likes
16
Share
@RFarm21
Follow
Boas growmies.
Foi regada dia 15 Dezembro com 2L de água. Runoff pH: 6.3/ EC: 2.39
Aumentei muito a alimentação devido à quantidade de folhas amarelas( espero estar a fazer bem, e visto que é um solo lightmix decidi carregar um pouco mais para suprir as necessidades.)
É o meu 2 round com esta strain, embora desta vez tenha tido uma deficiência de nitrogenio por culpa minha, há uma coisa que não muda: a produção de tricomas. 😋


Likes
17
Share
@JonnyKush
Follow
day 73
I was not ready for all this! 🤣🤣 they literally exploded, even though the buds of El Patron are much thinner than the purple queen I have in my tent, I had to tie them up so that the weight of the flowers didn't break the branches. I have to say that 6 photoperiods are too many for my 1m x 1m x 2m tent. in addition to this I have noticed that they are very hungry. like me and give me some advice. thanks for stopping by, have a nice day and happy cultivation 💚🌳💚🌳💚🌳
Likes
6
Share
@rvabudman
Follow
Graduated, and am off from work for a few weeks, so went overboard on photos. Plant is doing well, leaves are starting to turn yellow (strain trait).
Can't wait for the harvest and being able legally gift my xmas ornaments to my cousins during our "cousins walk" at our family xmas party.


Likes
30
Share
@HeavyHittah
Follow
I think they're budding a bit slowly this week but I did do a heavy defoliation at the start so may have stressed them a little. They have finally finished stretching also. Theyve gotten bigger than I expected lol.. I'm seeing thc now and they are starting to smell nice.
EC increased to 1.4 this week
Ppfd increased 610 to 700 by the end of the week . Will leave it at 700 now until the end . Don't want them to be stressed .
Likes
1
Share
@sunshinegroww
Follow
What cani say its doing her things and looking rather happy has a big 🍁 and smells stinky and potent short plant im expecting big yield but see how it goes
