The Grow Awards 2026 🏆 


Likes
2
Share
@Comfrey
Follow
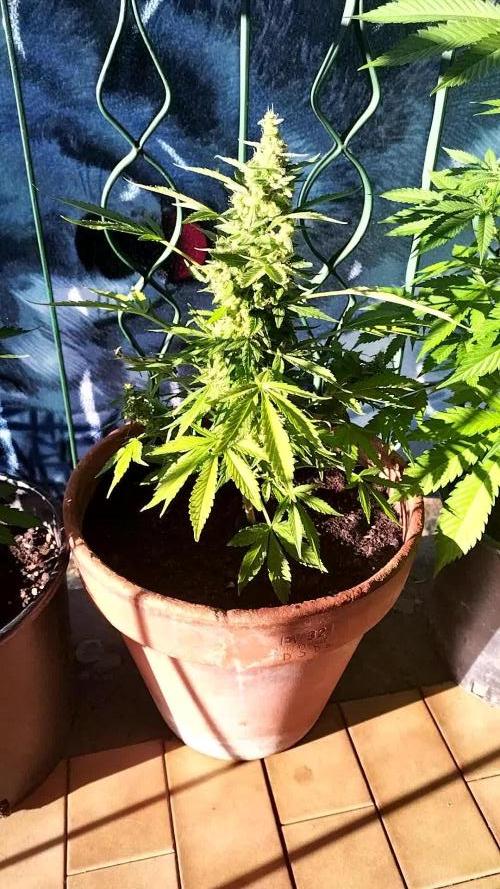
Das Pflänzchen wird zur Pflanze. Bis jetzt läuft es gut. Die Entscheidung, in den Kompost 20% Kokosfasern einzumischen war richtig.
Dieser Strain war eine spanische gratis
Samenspende des Saatgutlieferanten meiner Wahl. 😊 5 Samen haben sie beigelegt. Beim ersten Versuch habe ich die Samen draußen zum Keimen bringen wollen, das hat gar nicht geklappt. Alle vier Strains sind noch unter der Erde verfault. Es war zu kalt und zu nass.

Likes
19
Share
@CannabisAprendiz
Follow
Hola , en este cultivo de sugar black rose que es la primera vez que la cultivó quede muy contento con todo el desarrollo que llevó a cabo la planta, desde un inicio del cultivo se desarrollaron de buena manera , muy vigorosas y resistente a los estrés que pudieron vivir dentro del cultivo como temperaturas un poco más elevada durante el día además de una muy buena resistencia también a la escasez de agua .
Su Olor es maravilloso en floración un olor dulces muy llamativo y toques a gasolina senti.
En las ultimas semanas de floracion tomaron un color morado muy bello dejando la planta hermosa visualmente y un olor fantástico.
estas niñas fueron cortadas el 23 de febrero , fueron secadas cerca de 20 días y posterior a eso pasaron a frasco para su curado .
he probado las flores secas y la verdad es que el toque dulce es muy marcado al fumar muy rica variedad que sin duda la cultivare nuevamente para buscar los mejores sabores y conservar algunos clones ya que esta vez no realice seleccion de ninguna.-

Likes
4
Share
@Mr_nugs_lover_David
Follow
This lady looks absolutely gorgeous, she's got big beautiful leaves, I cannot wait to transplant this lady and make her become a beautiful fat bush! Let's do this! I'm very glad to be working with this strain this 2021 outdoor season, this lady has been Transplanted after 34 days since planted to her definitive 30L texpot, let's see how this lady performs!!


Likes
70
Share
@ICEGrow
Follow
In einer Woche wird angefangen mit spühlen. Ansonsten läuft es perfekt.
Ich kann es kaum erwarten!!!

Likes
9
Share
@Phaleg
Follow
After a previous fresher week, heat is back and daytime temperature reach 25-27° C again, plants are now flowering and the only automatic is close to be ready (about 2 weeks left I think). I will inspect triconomes with my lenses and microscope.
2x ICE 78cm (+6cm) & 69cm (+2cm) === No idea why this difference!
White Widow 85cm (+5cm)
Cookies Gelato 90cm (+5cm)
Do-Si-Dos Automatic 39cm (same as last week)
Likes
7
Share
@HookahCli
Follow
Está creciendo bastante bien, algunas están haciendo crecer las ramas satélite, las LK parecen que no, se nota 1 semana de retraso, también se nota en los nodos que tienen 1 menos.
La siguiente semana cambio de fotoperiodo a 12/12.
Likes
Comments
Share


Likes
38
Share
@Green_Mountains
Follow
I started these seeds on Friday, January 29, 2021. Planted them on Sunday, January 31st in Happy Frog soil in a manure pot.
I've struggled with keeping the temp below 80F while keeping the humidity up. It was around 57%. I had to turn my exhaust fan on medium and the temp is currently 75.7F and the humidity is at 49%. This is with 2 cool mist humidifiers in a 2X4 foot tent. I do have 2 other small fans blowing as well. One inside and one at the intake vent outside the tent.
This is my first grow so any advice will be greatly appreciated!! I'll post the end of week one pics later this weekend!
Processing
Likes
47
Share
@Techpuffin
Follow
I managed to turn the negative heat temperature in to something positive by introducing co2 to the environment.
As a result of the diy co2 method some of branches grew up by 1.5 inches in 2days!
Will continue to utilise co2 in the box for now.
I also had to adopt the defoliation method
Way to many leaves could cause problems by raising the moisture level in the box.
As a result of the defoliation a lot of light is reaching the bottom of the box.
Which means I can grow other small plants in the box.
I switched to bloom NPK ratios.
Slowly introducing the raw mix.
It’s doing fine and as allways no tip burns
Likes
18
Share
@xtchill
Follow
Week 8 of the bubble banana gum
Looks fantastic again and the buds are formed awesome.
Going to start flushing for 2 weeks and then the big chop

Likes
14
Share
@TrickzGrowz
Follow
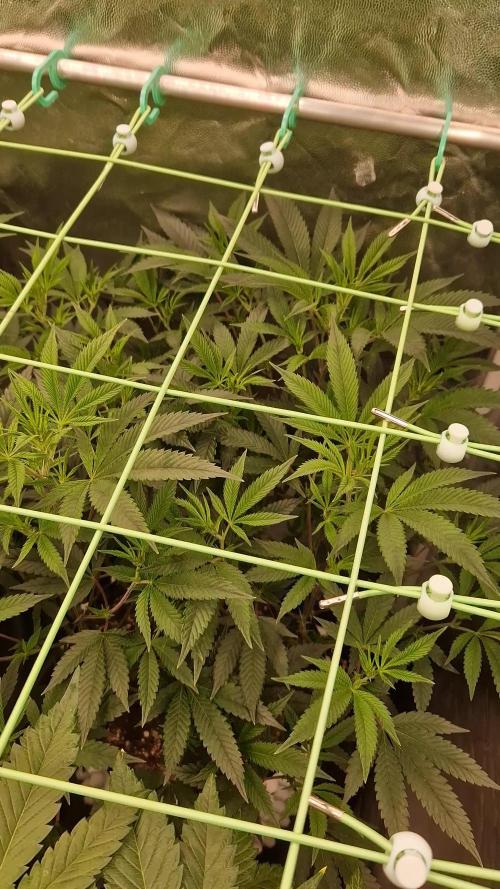
Sie hält sich bis jetzt noch mit dem Stretch zurück. Hat sich aber trotzdem gut auf ihren Viertel verteilt.
Likes
19
Share
@sellem
Follow
This week marked the start of flowering - they were showing sex and soon you could make out the little preflower budsites on both of them! This week also marked the start of their explosive grow-stretch phase. Looking back, i should have trained way more aggressive. but not TOO aggressive! on Day 21, i adjusted a prexisting stake too hard and plant Bs main trunk snapped in the middle. (I only fully noticed this in the next week, i just heard a snap but didnt visually see anything, the crack really formed over the next couple of days) A shock for me as an inexperienced grower - but again, as with everything so far, the BPP just. did. not. care. at all. i supported her with some stakes from below and rubbercoated garden wire, but honestly, the plant took good care of itself. Note to self - train early, train evenly, and test flexibility BEFORE adjusting :P
Ramped up PPFD to about 600 and Watering to 1,5L on Day 21 and 2L on Day 25. They were getting thirsty!
Day 21 was the last time i added root juice with 1 ml/L, and Day 25 i began adding Flowering Nutes and Stims with BioBloom and Topmax, 1ml/L each per plant. PH with both waterings was 6,5. Didnt measure Drain PH cause i was lazy.
Also defoliated leaves that were blocking out future budsites.
So far, they didnt care about topping, staking them down, defoliating, and Plant B also didnt care 1 bit about being literally ripped in half. i am impressed.
Likes
62
Share
@OwlGang_Uk
Follow
Time Is Winding Down On The Girls Scout Cookies In The 3 Gal Pot It’s Starting To Show A Nice Purple Color On The Buds. All The Girls Are Highly Scented And Frosty. The Lemon OG Looks Like It’s Going To Be The Frostiest Of Them All. . .The Purple Power Is Still Drying But It Shrink Up Pretty Bad I’ll have An Update For You Next Grow.
Height Chart:
Girls Scout Cookies: 31 inches (3gal)
Stardawg: 35 inches
Girls Scout Cookies: 40 1/4 inches (5gal)
Gorilla Glue: 33 1/4
Lemon OG: 42 inches


Likes
18
Share
@ZombieKushAddicted
Follow
Awe strain, very productive, strong, and i’m In love with this terps🤪🤤🤤🤤

Processing
Likes
21
Share
@420cfm
Follow
Wow. They are very crystallized now. Buds are fattening up every day. Lots of orange hairs and milky trichromes. Plan to go to 8 weeks if I can and flush week nine. Will see how they go but so far so good.


Likes
27
Share
@Reaper
Follow
next time i have to veg more then 4 weeks to increase yield. it finishes quickly and big yield for the short veg time. im also very happy with the optic 4 wich made the buds dense from top to bottom. i might upgrade to cocos or hydro next grow, or maybe both ;)

