
Likes
Comments
Share


@JackTheSparrow
Follow
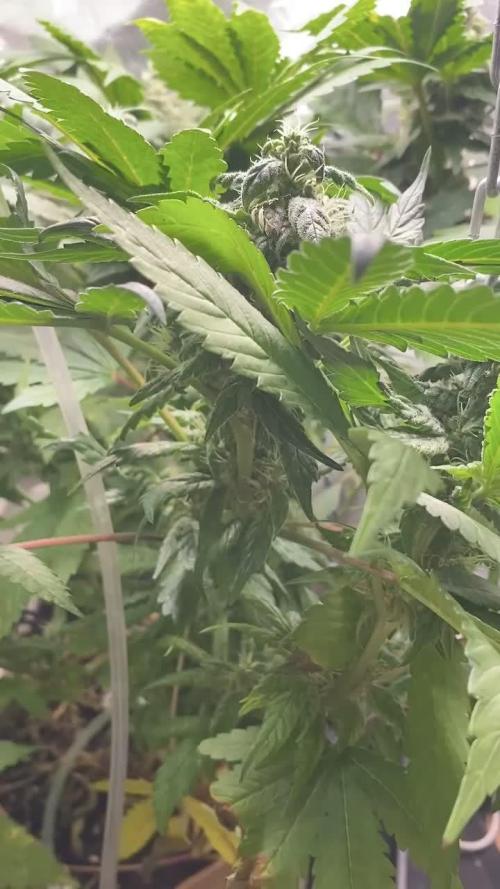
I started LST and some ScrOG, a little late but everything looks fine. very very dense plant
Likes
60
Share


@Professor_Chaos
Follow
Beginning of week...
I went ahead and gave the medium a little bit of a flush today. Finally figured that its gonna take 3L to get a decent amount of runoff.. Seems to dry out pretty fast too.. Might need to water daily.. For sure every other day, if not. I know that I shouldn't water the entire medium when she's this young because the roots dont go out that much, but the medium was a bitch to get wet.. Literally took about a week.. But she is doing great.. Her stems are giving out purples! I know seedlings tend to do that.. But I've never seen damnnear all the stems purple. I can't really get a pic of it cuz my camera/phone sucks.. But trust me, it's there lol. Gorgeous plant!
Mid week..
So I've been watering once daily.. One day I will give nutes and the next just plain pH'd water.. So basically just water, feed, water, feed.. This is to avoid the dreaded salt build-ups! Today was just water but the runoff came out at like 700 PPM.. I never even put that much in! This shouldnt be an issue.. I need a better watering can. Just been using 1L bottles woth a screw on sprinkler head.. Its not a bad idea.. Especially for smaller grows.. But I'm going to get a 1 gallon watering can with a sprinkler head.. It should help me be able to spread the water out more evenly across the entire medium. But that 1L bottle with the srinkler cap is perfect for my other nano grow I got going ("*TC* created my own feminized strain" diary). But going to Home Depot today to get that new watering can.. I like the idea of the sprayer jugs.. But those things take like an hour to use up a gallon.. I love spending time with my girls, but damn! Lol.. But as for the lady.. She is doing great! Not sure why the leaves almost ALWAYS get kinda wavy.. I think I read that it MAY have something to do with calcium deficiency.. But I dont understand how that would be possible. I keep the pH at 6.3 (even the runoff comes out a 6.3) and I know I'm putting PLENTY of CALiMAGic.. maybe it's just the way these plants grow.. Its only the first 2 or 3 sets of leaves that do it.. Just weirds me out a little.. She is beginning to sprout some little branches! So excited! I can't wait to bend her over and start some LST!!! She is very happy and super healthy! By the end of this week the next set of leaves should be pretty big and I'm sure branches will be shootin out too! So happy! 😊
Next day...
So she still looks great.. No burns, no deficiencies.. But I went ahead and just gave a little dose of Silica and a little CalMag.. Cuz the PPM was coming out at 700 PPM yesterday.. It was 6.3 pH and 300 PPM going in.. But the runoff still came out at 700 PPM.. Wtf.. I need to get a better watering can.. So I can at least start running a gallon thru the medium.. I'm gonna just leave it for now, I suppose. Gonna try and get a watering can tonight... Hopefully.. But she is still growing nicely and looking nice and green, so I guess I can't complain too much.
Almost end of week..
I'm starting to think I need to raise my light up or turn the power down a bit.. My plants almost always stay very short and stout to where it makes it difficult to begin LST.. Its obviously too early to be trying it now.. But just something I've been thinking lately.. Help save some electricity too.. Oh yeah, so I got a new Mars Hydro TS 1000 and I noticed that some of the reds (not deep reds) are a little dim.. Almost as dim as the deep reds.. There should only be 2 deep reds, but at 50% power it looks like at least 5 or 6 of the reds are a little dull or not as bright as the others.. At 100% its kinda hard to see but that's expected cuz its bright as fuck lol.. Idk.. I could just be tripping.. But it shouldnt hurt anything.. I hope. But as for the girly.. She's doing great.. Just ordered some FloraKleen to help with major salt build-ups and to help with the pre-harvest flush.. But so far, not major salt build-ups.. Nothing I had to put her into the sink and go crazy with the shower head for at least lol.. But she's happy and perfectly healthy as far as I can tell.. I love growing cannabis!!! It's soothing to the soul.. Being one with nature.. I've even sprouted a cantaloupe in my tent lol.. Gonna see if I can keep it in there and harvest some fruit! I wanna get some morning glory and have it running up the tent and then when its time to flower a photoperiod, it will produce some gorgeous flowers along with the cannabis flower.. Just a thought I've had.. Will be updating with pics tomorrow! Cant wait till next week! That's when the exploding growth happens!!!
End of week..
Today was just a plain pH'd water day.. Going in: 6.2 pH at 240 PPM.. Runoff: 6.0 pH at 500 PPM.. With my luck, the moment I was finished, Amazon dropped off the FloraKleen (and some trellis netting).. I dont think FloraKleen is meant to be used in between feedings like that tho.. Unless the runoff PPM is just outrageous, I'm not gonna use the FloraKleen.. But it is a great addition to the Flora family! Lol.. Anyways.. I noticed 2 pistils/calyxes (preflower) already.. They are both at the same node, but opposite sides of the main stem.. I hope she still has at least 2 more weeks of veg before flowering.. 3 weeks would be perfect and ideal.. But I can work with 2.. But she is happy.. So I'm happy! On to the next!!!...

Likes
6
Share


@Pepeu420
Follow
Experiência muito boa, já estou com um clone da mesma florindo novamente
Não percam a oportunidade planta incrível!

Likes
2
Share

@TheStonedChef
Follow
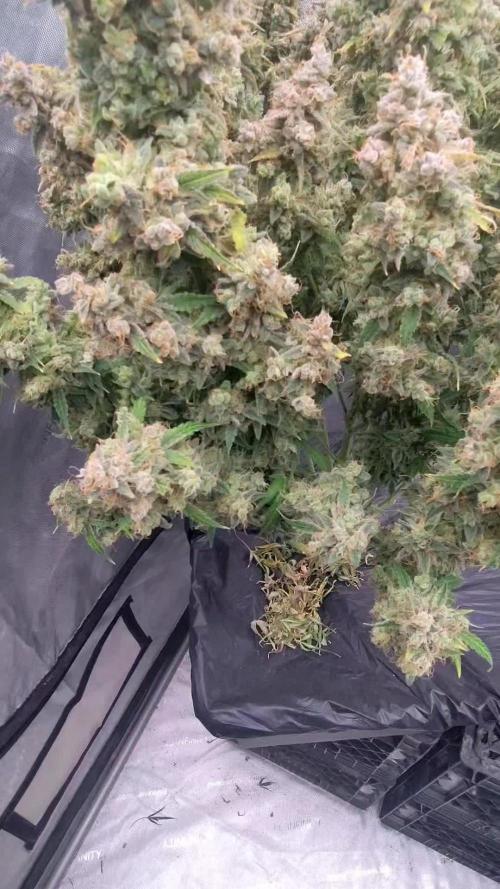
Finally finished on day 90 she's a beast and the colors are amazing dense sativa buds I'll be harvesting tonight
Likes
44
Share


@Prototype0181
Follow
I'm really happy with how they are doing. This strain or pheno's i got are stacking like crazy, and there's already a Distinct smell around these two. I'm tempted to do a full run of these badgirls in the near future.
Rock on Growmies 🌱

Likes
2
Share


@EyeMKing
Follow
Started the first top dressing of Gaia Green All Purpose and Power Bloom at a 50/50 ratio of 1tbsp/gal each.


Likes
3
Share


@Encuentra
Follow
20/11 : F+10
22.11 : 1 L of water
24.11: ras
26.11 : 0.75L of fertilizer. No more insects, humidifier + water spray worked :D
27.11 : nothing, ras
Likes
90
Share


@MerryNipple
Follow
Runtz T:
8 weeks of flowering .
Indica trend at 75%.
Stretch small x2 max.
Terpenes: Chem Zkittlez gas fruity candy.
Large production of high quality resin.
Thc 24-29%
Lemon T x Runtz original cut .
https://linktr.ee/merrynipple
https://www.instagram.com/merry.nipple/
https://www.thehighchameleon.com/
https://demetearthsystem.com/
https://budtrainer.com/
-10% on your order with my promotion code : Merry

Processing
Likes
2
Share


@Ab_87
Follow
1-Starting the week strong, plant is looking good. Not sure if the buds should be bigger or not but according to the strain it’s a 70-80 days flowering time so I still have plenty of time to see those buds fattening up.
2-Added 75W full spectrum LED to increase quality of pictures. In my opinion, totally worth it. Got to see my plant from a different light was amazing. Everything is looking good and the soil is still slightly moist. Probably water tomorrow. Separated all the branches to allow more light to penetrate the middle of the plant.
3-Soil completely dry, water plant with flowering nutrients. The smell seems to be a little stronger today.
4,5,6-No major changes.
Likes
13
Share

@smoking_hills9
Follow
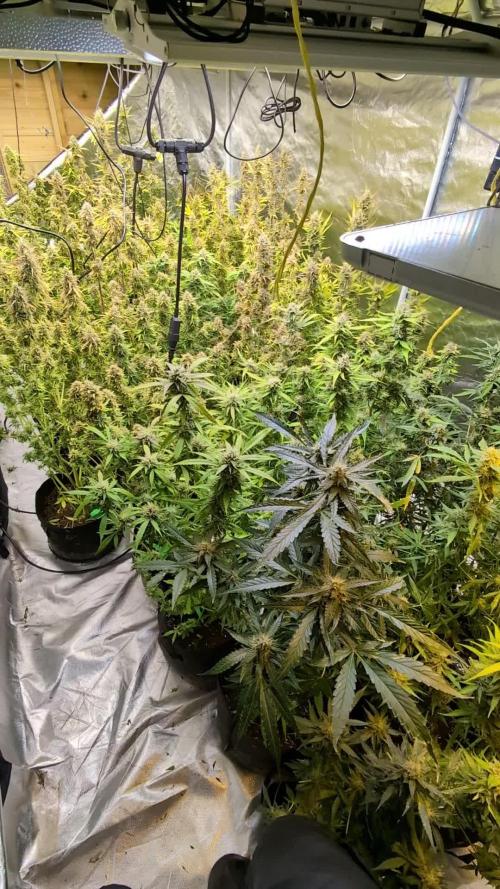
Last final defoliation done, now buds are fully exposed to the lights and the best part, harvest trim will be easier. Still it took me around 8 h altogether to defoliate all of them. Tones of buds and frost , amazing smells. Won't rush will give it a bit more to swell.

Likes
8
Share


@Aldo90
Follow
I was going to upload the process, but the wiser side of me said no. So I've edited it out and some of the evaporation process can be seen. Bho/wax/honey whatever we care to call it

Likes
Comments
Share


Likes
2
Share

@GingerGarageGrow420
Follow
Strain: Chill Out OG F4
Day 28 of Flower
Day: 77 from sprout
Medium: Fox Farm Ocean Forest
Light: Vivosun VS2000 at 75%
VPD: 1.5 kPa (changed)
Light Distance: 12 inches
Watering: By hand, ~18 oz daily
Nutrients: pH Perfect Advanced Nutrition Grow, Bloom, Micro 2 ml / L, 1 ml / L big bud
Pistols and terps looking great
25 inches
Likes
27
Share


@adam_pawloski87
Follow
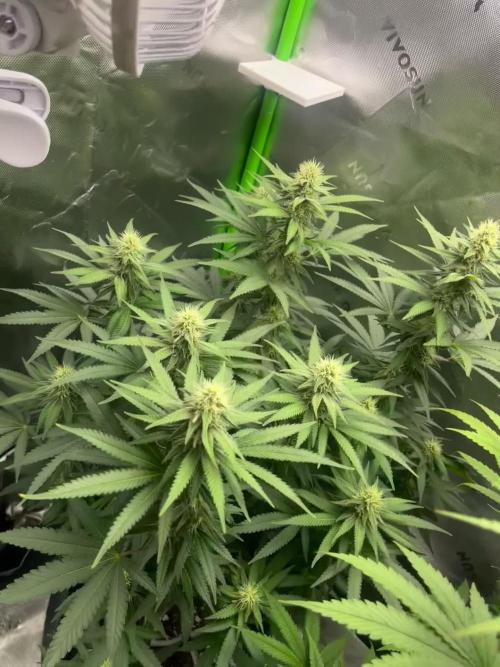
Let’s go day 43!!!! Week went real well , girls started preflower so sometime this week I will be switching up the nutrients for flowering! We are stable and looking super healthy! Can’t wait to see what these ladies do this week! Hope you all enjoy !
Likes
6
Share


@SAC87
Follow
This grill went really well. In growing three different strains it did pose a bit of a problem later in flower due to differing light conditions needed by the three different plants. The Cali Kush being more Indica required less light and the jack Herer needed a bit more to finish nicely. This caused some light stress to the Cali Kush which caused late flower Hermes but didn’t cause any long-term problems like seeds or burn. All in all I’m happy with 600 g from a 4 x 4 tent and a 480 W light. This is especially true when you add in the Gaia Green and how easy it makes growing.


Likes
4
Share

@HoneyBlunt42
Follow
It's blooming beautifully. It's been on automatic watering all week. A 5mm tube is attached to the roots. Currently, a 5-liter bottle lasts 2-3 days per plant. I'm thinking of installing a 15-liter canister so I can go at least a week without having to look at it.
Currently, the 5-liter tank with the solution is pumped with oxygen by an aquarium aeration stone and a 2.5-watt Hailea pump (a powerful one, but that's the only one I had in stock).


Likes
1
Share


@Mr_Motalovah
Follow
Hello Growers and Tokers!
Welcome to another run where I'll be testing something from a local breeder.
The cultivar is Orange Apricot x Mimosa from Mallorca Breeders.
This cultivar is a treat, I've had the delight of smoking this grown from the actual breeder.
If it comes out anything like that I'll be more than happy.
Frosty buds, very oily, very tasty, very hard, very nice, very everything! It was a 10/10 smoke
Let's hope we have a 10/10 grow to have some 10/10 nugs.
Strain description from breeder:
Genetic Background: Orange Apricot x Mimosa
Type: Feminized
Sativa 50% Indica 50%
THC:
CBD:
Yield Indoor : gr/m2
Height Indoor: 0 - 0 cm
Flowering time: 8 - 9 weeks ( 55 - 60 days)
Aroma:
Effect:
Expectations and training method:
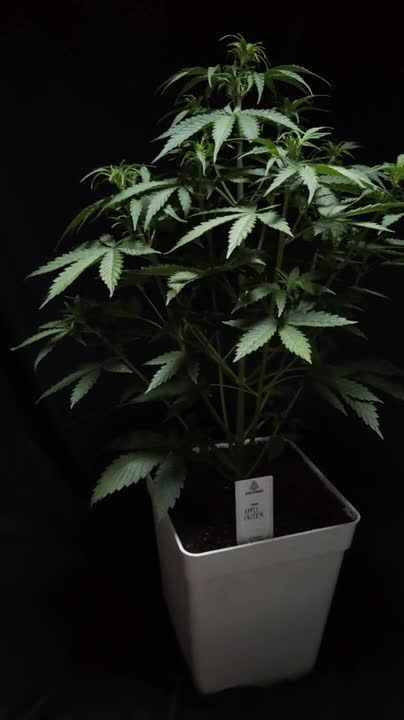
I know these genetics are a bit delicate so I’ll be taking things very easy.
The breeder suggests waiting until the fan leaves come out to decide the training technique.
If the fan leaves are thinner then it’s leaning more towards Orange Apricot and will be a bit more sativa and has more ramifications so most likely LST. Thicker fan leaves would be leaning towards Indica which is what I actually want, the Mimosa side. Breeder recommends topping this Pheno to increase yields. Let’s hope they’re Mimosa leaning..
As for the yields I’m not expecting more than 40 grams per plant but always shooting for more.
I’ve already smoked this strain grown by the breeder and other local breeders, which is what made me want to grow it myself. I expect nothing but trichomes and terps from these ladies.
Equipment used in this cycle:
Tent: Dutch Masters 120x240x220cm
Lights:
1 x Mars Hydro TSW2000
1 x Mars Hydro FC3000
Ventilation:
Garden HighPro - ProFan TT Extractor Fan - 150mm
Garden Highpro - ProActiv Carbon Filter - 150mm
Garden Highpro - ProFan Oscilating Clip Fans - 25cm
Blauburg - Inline Fan - 125mm
Humidifier:
Garden Highpro - Humipro Digital Humidifier - 4 liters
Pots: Garden Highpro 11L Fabric pots
Medium: Biobizz Light Mix
Nutrients:
Grotek - Mycrorizo
Plagron- Alga grow, Alga Bloom, green sensation and royal sugar.
PH down
Calmag
Measuring instruments:
Hygrometer/Thermometer - Govee:
EC Meter - HM Digital: COM-80S Hydrotester
PH Meter - Vanguard Hydroponics
Happy Growing! 😃
Likes
36
Share


@TaterheadJohnson
Follow
She was pretty much on AutoPilot all week. Growing and drinking like crazy.Running out of head room and i hope she gets the point here soon lmbo… More below ⬇️⬇️⬇️
8/16: Trimmed down dead/half dead leaves from bottom of plant. Feels good to see just all green without the couple of eye sores. She still a sexy girl!
Topped of rez with the rest of her nutes in half gallon jug. I’m n to half gal jug of water before next nutrient batch mix.
8/17: Just been topping off the rez all day! She has been drinking heavy!
Will need to mix another batch of nutes tomorrow.
8/18: Mixed new batch of nutes today. Mixed in gallon jug. Split into half gallon jug. Topped off rez with full half gallon jug then some plaint water from half gallon jug.
8/20: Mixed another batch of nutes for the week.