
Likes
Comments
Share


Likes
16
Share


@DabBod
Follow
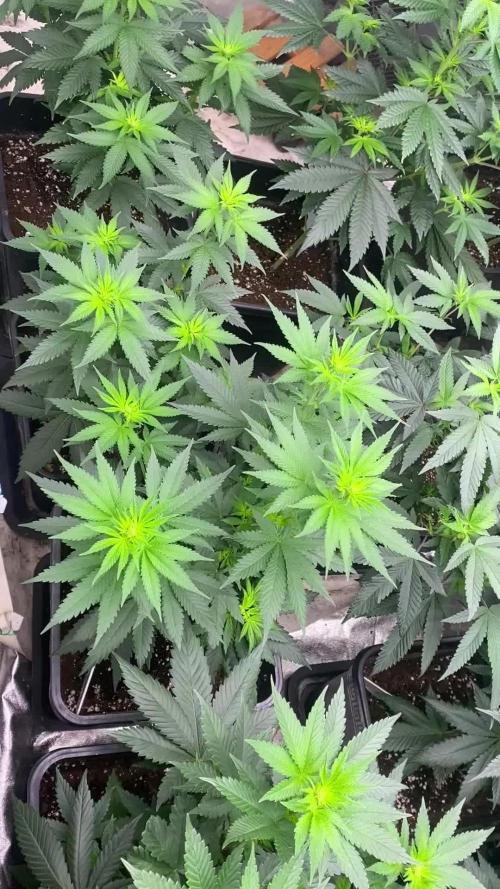
This week went well no real problems besides underestimating the amount of water I would need to prepare following the transplant. I’m noticing some older leaves showing some curling at the tips especially on the second pheno, I’m going to let it ride for the next week as it could be attributed to the transplant although the signs point to n tox I’m using slow release dry amendments as directed I don’t think this is the case. I may add the trellis net next week if the second pheno can catch up in heigh.


Likes
14
Share


@VB_Grows
Follow
Hi everyone!
The plants are going nicely. All of them were topped on Day 14. Started giving 2ml of Advanced Nutrients Grow, Micro, Bloom - They took it very well.
Amnesia Haze - I'm going to mainline this plant with 2 branches only
Apricot - Got stretched more than other plants, so I started doing LST on Day 16.
Other plants - I'm going to mainline and test with 4 and 6 branches. For now, Im gonna let the branches grow a bit to maintain even canopy.
Temp doesn't go up more than 27-28 which is perfect at day and at night, goes down at 21 around.
Humidity day 55%, night 75%.
Happy growing!
-----
UPDATE Day 18
- Did some adjustments on the LST on day 17 and day 18.
had a surprise guest in one of the pots but now we are good (the video) 👽
Likes
4
Share


@OHighOBoyz
Follow
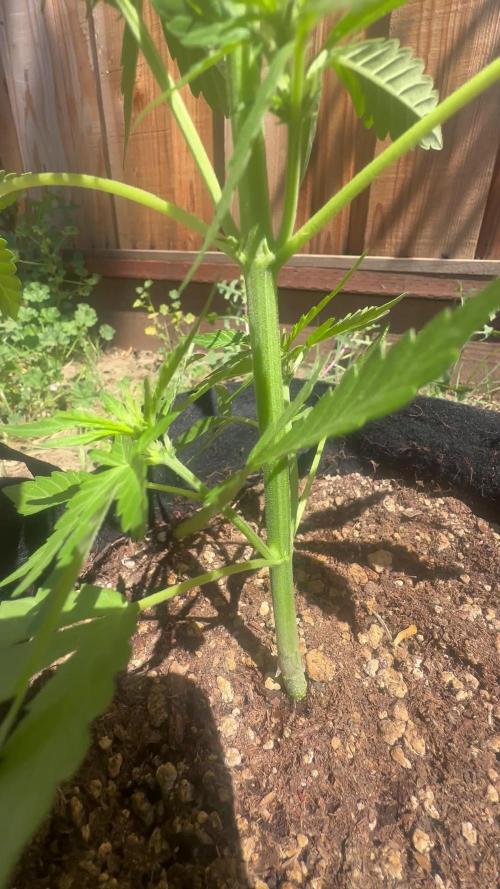
Plant is showing tremendous growth even after the stem partially breaking from the LST clip, But plant hasn’t yellowed or wilted and continues to grow so it’s still pulling nutrients fine.

Likes
128
Share


@Hawkbo
Follow
Taken On Day 63, miscalculated last week they were started 12/18/17. Fat buds on the two big ones and real sticky, can't make out the smell yet but it's pretty strong at this point. Added some tnbnaturals co2 today idk how well it works but I figured I would try it out. Mainline one is a week or so behind in terms of maturity but is getting fed whatever is in the res it's hooked up to. Flushed all 3 due to salt build up early in the week which is why the tips are burnt and some calmag deficiency and yellowing. 1-2 more weeks I think.


Likes
10
Share


@startingtogrow1234
Follow
i know she wants bigger pot.the only thing i have to do is to reduce light on upcoming week and want to see her flowers very soon.
Likes
5
Share


@WillWeedon
Follow
Watering 3 times a day (200ml/per plant)
Turned MarsHydro from 50% to 70% power
Still dont have a fan for plants😓
Want to try LST
Likes
21
Share


@VicFor
Follow
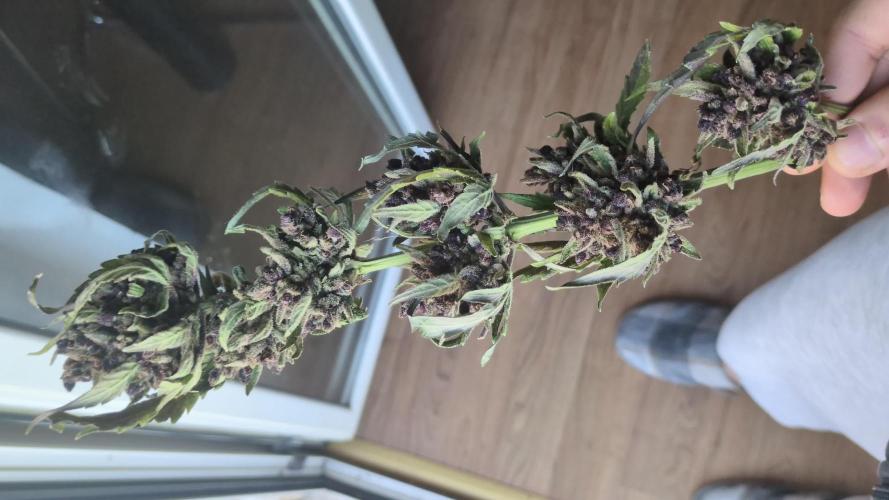
So I chopped the plant today on day 48, so now it’s drying time. I’ll be back in one week to see the results.

Likes
4
Share

@grimm420
Follow
It’s so damn tall! I’m starting to see bud development and I appreciate the space between the buds, I’ve seen other people’s indoor grow on Reddit and they look amazing! Hoping to see similarities getting closer to harvest. Gave its first feed of Lotus Bloom Nutrients and is now drinking about half a gallon of r.o water. It’s giving the faintest dank smell but I know that will change soon.


Likes
48
Share


@AsNoriu
Follow
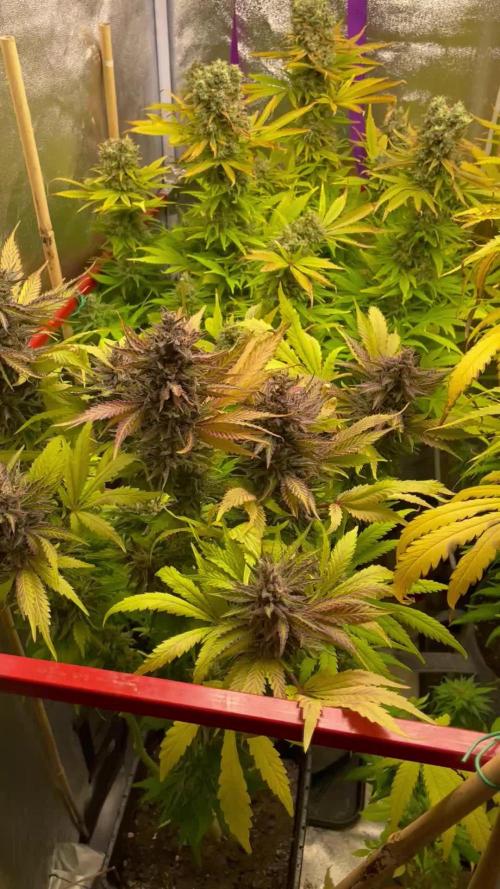
Day 57. Statement :
Even with hard beginning - thats my best run ! Zamnesia is AMAZING !!!
With veg hiccups, they still bushout to really nice plants in less than 7 weeks. Now Blue Dream is targeting my roof, Kalini Asias are thick as f@ck. Runtz very dense plants, thought they would be a bit bigger ...
They drink every 36 hours, hard to keep up with work, but i do my best not to screw up with them ;)
This week : feed, water, water. Defoliation too !!!
Day 59. That game - "who will reach sealings" - I don't like !!!!
Moved lights two days ago ... Soon i will need axe for my roof !!! ;)) That Monster Blue Dream is insane !!!
Hope will do heavy defoliation in two days, maybe this will shock her ;))) other plants keep up with her and canopy is even without all three Blue Dreams. Huge plants.
Day 60. Video is showing how less space is left, but they just keep climbing !!! ;))
Day 61. Thinking to defoliate all girls tonight, but maybe i will do it after next watering. Had to reposition them, loads of branches need to be chopped, some didn't see light for last two weeks( Curly, looks like sh$t, will never reach light). Girls are too big for my setup and i really hope it will be enough light and HEIGHT for them...
And so Defoliation has started !!! Hope everything will go fine !!!
All done !!
With the thought " WHAT HAVE I DONE !!!!??????!!!!!" i go to try to fall asleep ;)))
Happy Growing !!!

Likes
4
Share

Likes
3
Share


@TGriner420
Follow
This week was a real breeze! She's gaining a ton of weight on the bud sites and she's really growing nicely! She's starting to bud around the flowering sites and really finishing nicely. The formation of bracks and the formation of the buds is my favorite part because that's when you get to see somewhat of the final picture and the time the flower is most colorful! Now the second best part is harvesting the flower for smoking which will be occuring soon! The smell on these girls is very invigorating!! She's putting out a smell of a Apple Tart! You can smell the Apple Strudel right away when you open up the tent! I can't believe how big she's got and how beautiful they are coming along! I have to say that this is one of my favorites to grow and my favorite smelling strain! I also love the way the flowers are stacking on the colas!!! The frost on top of the cola leaves is insane! During the day I drop the humidity down to 45-50% and then at night I raise the humidity up to 60-65% which helps a ton with flower promotion during the flowering stage! Also, I raise the temperature during the day to 80° and at night I lower the temperature to 55°-60° which helps mimic the autumn temperatures that aids a ton in flower production in the flowering stage!!! I'll be stopping the two Apple Strudel Auto's from receiving any synthetic nutrients soon and flushing them once harvest is closer. It will be within the next two weeks or so! I do that because they'll stop taking nutrients in and start to self canabulize as a normal (ending) part of plant life. Then I'll give the two ladies plain pH balanced H20 for the next 2 weeks to flush any and all nutrients out of them. Then three days of darkness. Finally I'll chop them down to hang in my harvesting closet for 7-14 days with a dehumidifier on at 65% humidity. Then I'll place the flower into the trimmer and then into the grove bags for the last step in harvesting! The grove bags will keep the flower at 58-62% humidity. They also help keep the flower fresh longer, the Terpenes fresh, the Terpenes flavors, and from becoming moldy or dried out! I've used both these and the mason jars with boveda humidity packs but to me the grove bags are a must and a go to fail safe!!! All you do is hang your buds upside down at 60/60 or 65/60 for 7-10 days or until the braches snap and make that noise. Thanks and as always stay safe, stay high, and stay blessed!


Likes
11
Share

@Cesilko
Follow
Tak tu máme 56. Den květu a holky se pořád drží. Příští týden bude sekačka. Ať to roste.


