
Likes
Comments
Share


@pifflestikkz
Follow
Harvest day !!! 😲
Look at her colours 🤤💚
From a 2L pot she has finessed some gorgeous flowers. Smells like cherries and pine notes , can't wait to see how she cures!!
Big shout out to Divine Seeds 💚 again!!
For this cultivar, I'll be doing this in a sog so she can boast a full tent next time round 😈
Thanks everyone for dropping in, commenting and liking.
Stay high growmies ✌️💚

Likes
28
Share


@Salgeezi
Follow
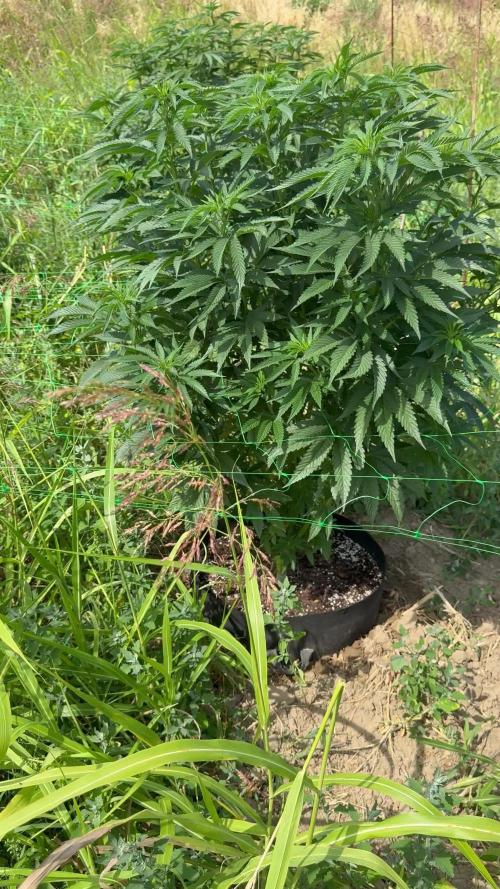
Ended up cutting all of the front left plant this week and majority of the back two plants. Guna let the lowers get some light for a few more days. Really noticing all the tiny ass buds. Hopefully I'll make something out of them. First run with a net and I just left way too many branches/bud sites for this size of plants they were. Buds look good though. Flushing last plant and will be cutting in a few days.

Likes
1
Share


@FarithAriasFajardo
Follow
Aquí las fotos de esta nueva semana de vegetación para ambas plantas, cumpliendo así la white widow 23 dias de plantada y la zinfandel 16. La fotos corresponden al 21, 24 y 27 de abril. Por ahora no hay nada más que agregar. Ya que esta semana solo agregué algo de sustrato en ambas y el riego fue de agua reposada con una bomba dando oxígeno por 24hr y un ph de 6,1 a 6,5. Lo que no sé es si realizar alguna tipo de poda más adelante o si mejor las dejo crecer como son, ya que no sé mucho. Existe el temor de dañarlas o estresarlas demasiado. Lo pensaré, también recibo cualquier consejo u observación con ellas!


Likes
Comments
Share


@gr3g4l
Follow
Una semana bastante plácida, ya no fue necesario preocuparme por atar los cogollos, las dejé tal cual estaban .

Likes
14
Share


@danieljeremiah2911
Follow
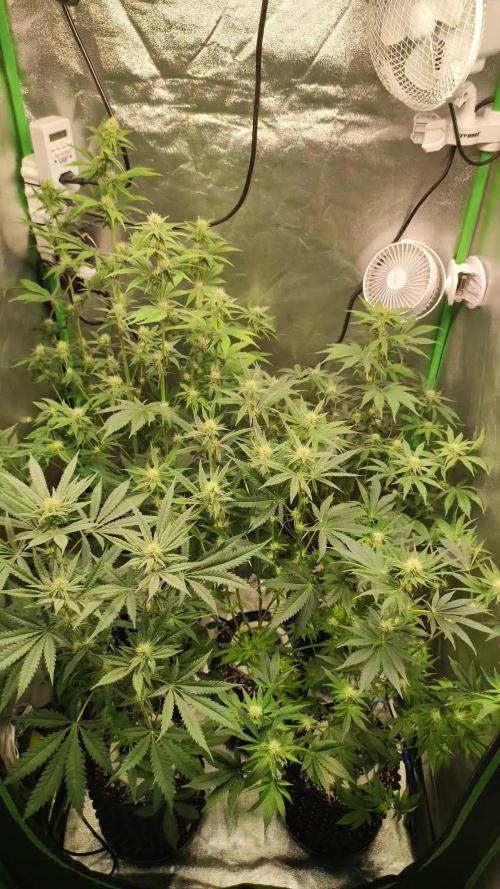
This was a beautiful week. Massive THC production my trichromes are covering the white widow plant in crystals. Its an icy plant with its sunscreen on. Looking absolutely gorgeous. I finished defoliation. Removed most all of the fan leaves so the plants can focus on bud production and amp up those clusters. The blueberry plant is starting to fruit up as well. It will end up going an extra week so its production is right on point. The white widow plant is just some crazy good genetics. Of my 7 new nursery plants the two white widows that I have are head and shoulders above the rest of the plants. I am excited to see what the 12/12 from seed does for them with our new super soil setup.
The plants have received their full doses of flower food and flower finisher. They are going to ride out the week on just water because they started to burn with the influx of the flower finisher. It seems to absorb more potently than the regular flower food does. I will does the plants some of the flower finisher food about halfway through the next week so as not to burn the plants. After that we will flush the soil with just water for the remainder of the grow so as not to have any extra nutrients flooding the plant before harvest.

Likes
11
Share


@MrMoMoGroW
Follow
Everything Is okay 😁 the girls stay very Happy and micorrize change the games 😁 . I adding Black humus and Bat guano too improbe and protect the microbial live in the medium.
Stay tuned for updates✌️✌️✌️
Little update... My cat ruined a branche 🤬 and I cut... The bud weight 26 grams wet... Not bad for 5 week 😁

Processing
Likes
10
Share


@Barcelona_Farmers710
Follow
Pasamos a segunda de flora a pesar del calor que hace empieza oler un poco y esto... enseguida ya llega nuevo equipo para ver si mejora un poco todo esto. Espero que os guste Farmers!🍁
Processing
Likes
33
Share


Likes
17
Share

@Salokin
Follow
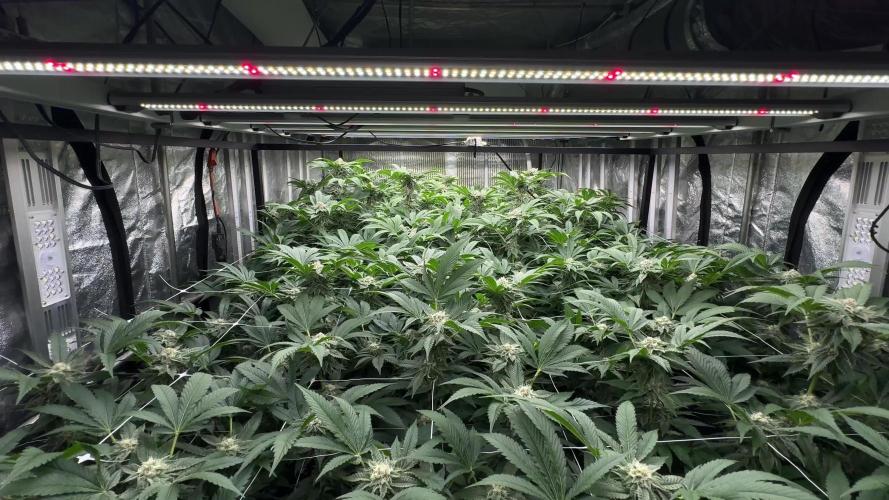
Week 5 Flower | GMO × Triangle Mints BX
Week 12 overall — halftime, and everything is going according to plan. This is the point in the run where the work put in during veg and early flower either shows or doesn’t. In this case it’s showing. The buds are forming nicely across the board, every site that was kept is stacking, and the canopy is sitting exactly where it needs to be. No drama, just execution.
The structure on this cut continues to impress. The tight internodal spacing that defined her in veg is now translating into dense, compact bud formation along every retained site. The trichome coverage is already visible to the naked eye and building fast — a good early sign of what the finish line is going to look like. The GMO influence is clearly present in the calyx stacking and overall density, while the Triangle Mints BX contribution is showing in the frost and the way the sites are filling from the base up rather than just at the tips.
Height holding at 110cm, lamp still at 30cm distance — maxed out, pushing every photon into the canopy. Watering steady at 3.3L per plant per 24h, the ladies are drinking consistently now. pH locked at 6.2, EC pushed up to 2.0 mS/cm to keep pace with the escalating demand of the bulking phase. Humidity tightened down to 50% — botrytis prevention becomes the priority from here, no compromises. Day temp 27°C, nights up slightly to 25°C to keep the differential managed without stressing the plants.
Smell has stepped up to strong. The GMO × Triangle Mints BX is making itself known — the room has a presence now that wasn’t there last week. A candy gas profile is developing, exactly the kind of nose you’d expect from this cross, and it’s only going to intensify from here as the resin production ramps up through the back half.
Nutrient stack: Canna CalMag Agent 1.1 ml/l, CANNA Aqua Flores A+B at 4.6 ml/l each, CANNA PK 13/14 stepped up to 0.5 ml/l continuing the gradual increase in line with demand, Aptus Regulator 0.1 ml/l, Green Planet Rezin 1 ml/l — and Plagron Green Sensation introduced at 0.5 ml/l, right on schedule. The full flower programme is now running. Feed rotation stays unchanged — two full feeds with the complete stack, third is 50/50 osmosis and tap, pH’d, carrying only CalMag.
The second half starts now. Let’s see what she’s got.
Next update Sunday. Stay tuned.
Likes
97
Share


@CANNASIM
Follow
GENERAL COMMENT.
So the RQS STRESS KILLER AUTO is down. Now we have the NL to manoeuvre and try to keep her alive for the final flush.
RQS NORTHERN LIGHTS AUTO COMMENT.
Many but slim colas emerged, showing extreme spotting and deficiencies, but gained weight since last week and started turning purple, first time that happens.
So now the final flush started and hope, afraid taste could be off, because of the problems i ran in with her, probably a good strain to considere light feeding, the smell is very gentle, a good strain to do stealth.
10-14 day to go! Yield could be amazing but will be common because of the locks, nothing out of the curve in my opinion, something to retry and correct to deal with this strain. Not turned on or off by her just feeling neutral and glad she made it.
Trichomes wise she is just ready, mostly cloudy, she will finish with some amber will do a nice sleeping aid.
Trim job will be a pain on this one because i will clean all the small affected spotted leaves.
Processing
Likes
Comments
Share


@Mario91
Follow
Ha avuto problemi di temperatura nel primo mese di crescita che l'hanno rallentata molto,anche il vaso da 10l era diventato inadeguato e ho aggiunto 20 litri

Likes
Comments
Share


@jojopfoh
Follow
transplanted on the 23 of feb from the solo cup to the 1 gal pot and given it's first nutrient feed. It is growing very quickly. I added a fan to the tent to promote a surdy stalk
Likes
11
Share


@kauilmayel1996
Follow
Super cepa...
estoy muy contento con el olor...
la resina es increible
Pequeña pero poderosa
Super impresionado y feliz con fast buds...
espero tener la oportunidad de creceras autos con un buen clima frio...
Unas colas muy bonitas...
una experiencia muy buena con esta cepa...

Likes
13
Share

@Radagast_
Follow
16.07.
White Runtz
Day 78#
Nothing special is happening, yesterday the plant was at the end of its eleventh week.
Now I water every other day.
Stay High and Keep Growing!!!

Likes
9
Share


@Northstar_cannabis
Follow
Healthy and consistent growth. Plant is a little smaller, i think that's due to location in the tent. Buds look good.
Likes
7
Share


@MadeInGermany
Follow
Hey everyone ☺️.
This week the food was increased to 4 ml per liter of water, as they can still tolerate a little more.
I'm curious how it will develop this week.
Otherwise there is not really anything to tell this week ☺️.
Stay healthy 🙏🏻 and let it grow 🌱
You can buy this Strain at
https://thecaliconnection.com/original-sour-diesel.html
You can buy this Nutrients at
https://greenbuzzliquids.com/
Type:
Original Sour Diesel ( Clone )
☝️🏼
Genetics:
Fem seeds- Original Sour Diesel to Original Sour Diesel BX3 RVSD Male
Reg seeds- Original Sour Diesel x Original Sour Diesel BX3 Male
👍
Vega lamp:
2 x Todogrow Led
Quantum Board 100 W
💡
Bloom Lamp :
2 x Todogrow Led
Cxb 3590 COB 3500 K 205W
💡💡☝️🏼
Soil :
Canna Coco Professional +
☝️🏼
Fertilizer:
Green Buzz Liquids :
Organic Grow Liquid
Organic Bloom Liquid
Organic more PK
More Roots
Fast Buds
Humic Acid Plus
Growzyme Big Fruits
Clean Fruits
Cal / Mag
Organic Ph - Pulver
☝️🏼🌱
Water:
Osmosis water mixed with normal water (24 hours stale that the chlorine evaporates) to 0.2 - 0.4 EC. Add Cal / Mag 2 ml per l water every 2 waterings . Ph with Organic Ph - Pulver to 5.8 .


Likes
4
Share

@Bncgrower
Follow
Defoliation done on the last day of the week, everything's fine so far. The flowers have already started to give off a wonderful scent, everything is going as expected. Looking forward to the next few weeks... ✌️
Likes
18
Share


@CRK00
Follow
12th Week Report 02/01/20 - 09/01/20
I was away from home for 1 week and everything was done on 07/01/20.
07/01/20
Luckly there is no mold and humidity now is stable at 55%.
There is more or less half reservoir and I'm waiting to fill it, probably CMXL is almost ready to be flushed.
Now CMXL is just fattening.
As "planned" LSD got the final cut and from her undeveloped branches were trimmed just leaves without any pollen. When she will be dry, she will be used for making Hash/Butter.
Last Update 07/01/20
See you guys ;)


