
Likes
Comments
Share


@dwotTV
Follow
Starting my first grow in the new tent with my first Night Owl seeds. Grabbed these from seedslocker a few months ago and they've been sitting in my seed vault in the fridge since. Popped them in a glass of water at 8pm on 10/18. Broke out the AC Infinity propagation system and added a bit of RO water to some coco pucks. About 24 hours later they sunk in the glass and had opened up a bit with root peaking out, so into the pucks they went on the evening of 10/19. No real movement on 10/20, turned the heat pad off because they were a little warm. Morning of 10/21 the first Compound V was starting to pop through the soil, 2nd one followed a couple hours after and before noon all 3 were making their way out. Opened vents on the dome to let them breathe a bit more. 10/22 continuing to grow really strongly, looking good. 10/23 some roots out the bottom, time to go into the tent. Transplanted and seem happy, dialing in the temp and humidity and airflow, some odd higher temp days still around this time of year with some heavy fluctuations but it will normalize out.
The tent has been stood up and cooking a bit w/ the lights blazing and a dehumidifier running to dry out our soil a bit. Had issues with fungus gnats last grow and I'm trying to prevent that this time. Ordered some beneficial nematodes as a line of defense and sprayed soil with a good soak of neem oil as a precaution after drying out. Sticky traps show no gnats so far. Soil is Coast Of Maine Stonington Blend Aeration Formula, a 70 / 30 Coco / Perlite blend that I've used before. I have Coast of Maine dry nutrients and Fox Farm liquid nutrients, will likely try to stick to the dry nutrients unless fungus gnats emerge again. Soil is in 5 gallon fabric pots. I added 2/3 cup of Stonington Blend Plant Food and 1/3 cup of Wiscasset Blend Earthworm Castings to each pot along with some Mycorrhizal Fungi spores and worked it in.
I have been using the AC Infinity self watering bases but as I'm running 6 total plants this grow I've ordered the new Vivosun self watering bases to compare them.


Likes
65
Share

@tantrumrage
Follow
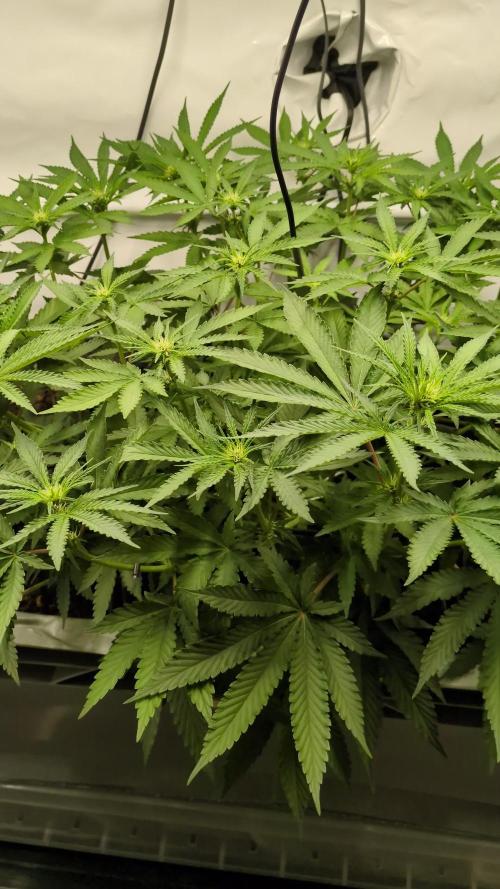
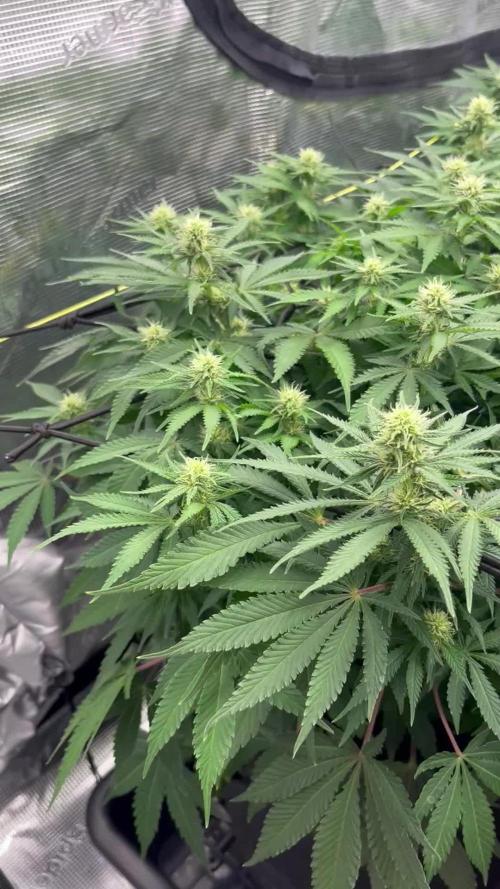
Day 61 for The Tropical Ice Cream One 🍦
She stretched quite a bit and is now officially in week 1 of flowering. The canopy is already nice and flat so I've kept training to a minimum. She seems to be enjoying herself: VPD is around 1.3 and PPFD between 700-800. Bud sites are developing nicely and I'm excited to see how she performs over the next couple of weeks.
Thanks for checking in and see you next week. Happy growing 🌱
Processing
Likes
4
Share


Processing
Likes
64
Share


@MadeInGermany
Follow
Hi everyone :-)
This week will be a short update because there is not much to report :-)
It is developing well ;-) and will have some time to grow 👍
Strain
Blue gelato 41 clone from mother (Barney's Farm)
☝️
Genetics: Blueberry x Thin Mint Girl Scout Cookies x Sunset Sherbert
👍
Vega lamp: 2 x Todogrow LED Quantum board 100 W.
💡
Flower lamp: 2 x Todogrow LED Cxb 3590 COB 3500 K 205 W.
💡 ☝️
earth:
Canna Terra Professional +
☝️
Fertilizer:
Canna Terra Vega, Canna Terra Terra Flores, Rizotonic, Cannazym, CANNA Boost, Pk 13/14, Canna Cal / Mag, Canna Ph - Grow, Canna Ph-Flores
☝️🌱
Water:
Osmosis water mixed with normal water (24 hours stale that the chlorine evaporates) to 0.2 EG. Add Cal / Mag to 0.4 Ec Ph with Organic Ph - to 6.0
💦 💧

Likes
5
Share


@Brendanfromtherose
Follow
I'm cutting the nutes big time trying to get to 300ppm and I'll start flushing, main cola starting to show a purple reddish hue through the buds and sugar leaves, looks lovely just wondering should I be worried
Update: reducing nutes still before flush, some buds going slightly purpley/reddish colour, still looks great just wondering what could be

Likes
5
Share


@Tacofever88
Follow
My first outdoor grow.
This is around week 9 of growth. I got these 2 clones from someone and grew them indoors for about a month or so before hardening them off.
They have been through plenty of training and topping and even more since this picture. As of 5 days ago they were nice and wide so I'm excited to see the growth since the.
I have done a great deal to keep deer and bugs at bay. Neem oil, dog and human urine, dried blood, ground pepper and powdered, oregano, garlic and onion. The site is very difficult to access. Poison ivy, thorns, steep ravine and large logs to climb over. No paths there and I take different ways constantly, as well as through some fertilizer in my wake.
There's a small creek near by and a larger one it fees into about 75 yards away.
There's 3 bags of FFOF and 1 bag happy frog between the 2 holes, with amino acids and great white mixed in as well as some water polymer crystals.
Likes
3
Share


@Taylor_Spliff_13
Follow
January 26
Gave the plants an increase dose of nutrients on the 25th and today I noticed the FS were getting a bit of burn on the tips so I flushed the soil with about 4 gallons of pH 7 water. They're looking better today. RB has a few crispy lower leaves, I think because it has less soil and dries out quicker. I'll probably have to water it daily. The SwCDLC didn't bat an eye at the increased nutrient level. Both SS's are growing ok. The 3 gallon SS is larger then my micro grow one for obvious reasons. Both of the larger plants showed sex a few days ago so I know they're female and the stretch is underway. Hopefully start getting a few small buds next week!

Likes
11
Share

@ZhulenejJohny
Follow
Dnes máme 19.den květu. Pijou jak o život, palice se krásně formujou. Zítra jdu na defo. Peace👽

Likes
3
Share


@Willy_Balls
Follow
26.07
Moved the girls to 7l pots. About 5 l of medium coco/perlite 70/30.
They will be rooting for a couple of days with gentle light around 400 ppfd.
Co2 - 600-800ppm
Likes
19
Share


@NomadGrowDad
Follow
I’ve had to remove the humidifier to manage the RH. I also had to remove the carbon filter that lost its efficacy when I pumped the RH during seedling stage.
QueStion. Which location in my 4x2 tent ? At canopy? Between canopy and light? Above light?


Likes
22
Share


@BlumenBot
Follow
12/22 - all 3 seeds of critical kush went to shit, 1 didn't pop and 2 molded before the root came out of the shell...no bueno.
I decided to run Purple Kush instead. I ran this before in my original crappy cabinet so I'm hoping for much better results this time around!
...growing so fast!!!
12/23 - and now it's on its own for a week!!!


Likes
8
Share


@Piro420
Follow
Finally the stretched stopped.
Cut about 10 tops bent about 20 with 90s. Still right in the lights. They are looking very happy even though they are so close to the light ( thanks to high c02 levels most likely.)
Another week or 2 before I cut the temps and co2 levels down.
Been trimming all leaves below light line.
Stinky and brutally sticky I feel like Clark griswold with pine sap when ever I am bending the tops and such..
I think even with them being in the lights I will still get a few pounds of premium flower to smoke :)
Likes
2
Share

@00110001001001111O
Follow
:
Total Days - 62
Total Flower nights - 22
Overcrowding is playing out. HST is done by end of this week. Plants are healthy and likely predisposed to be taller plants, but overcrowding did not help. Better canopy management would have helped.


Likes
19
Share


@Dutch_Grower
Follow
Few lower leaves turned yellow, i gave them some more nutes with water. Everything is okay now.
Every friday around 7 pm new upload.
Don't forget to like (helps with the algorithm)
Thank you, have a nice one!
Likes
3
Share


@SimplyGrowLogical
Follow
I probably missed a week of pics but when your ladies explode like this there’s a lot of work to be done!


Likes
2
Share


@Saintvicious
Follow
Just keep watering as it drys. Supporting buds along the way that are getting too heavy. Smells like skunk and gas. Little fruit but not much. Trics still getting thick. Look forward to it finishing. Tricomes still cloudy. Little amber on sugar leaves but it's still going strong. Some leave fading finally to fall colors.