


@dwotTV
Follow
Transplanted in the afternoon of 10/23 because they were rooting out of the pucks. Got some humidity dome cups coming tomorrow and another inline fan to handle intake to try to dial in things a bit more.
Growing well as the week ends, #1 is the big guy so far, growing really well.
Sprayed with Neem Oil on 10/24
Fed Light Fox Farms Blend on 10/25
Treated with NemAttack on 10/26


@Crashoverite
Follow
Hi everyone.
Welcome to my🍌💜👊 week update.
Hope everyone keeping well and having a great week.
Daily updates and uploads so if week not over yet. Please revisit to see full week content😊
Thank you all for such amazing support 😊🤗💜
So far everything is going great. No issues at all. Both girls started preflower on Tuesday and already I can see that they started stretching nicely. Scrog net will be installed by the end of this week.
Week 5
13-19 Nov.
13/11 day 36
First runoff experience for girls. Loaded both pots with approx. 2.5 ltr each in 4 stages of 500-700ml. Runoff 100-150ml from each. Runoff PH 5.9. Nutrients for this watering were same as on previous week and added only calmag. Next watering possibly Friday but with new measurements.
14/11 day 37
Both 🍌💜👊 girls started preflower on same day. Xena is catching up quick to her larger sister and possibly soon they will be sharing this growing space 50/50
15-16/11 days 38-39
Just happy and healthy days 😁 nice steady growth.
17/11 day 40
Second watering for this week. 5.5l beetwen both. Runoff Ph 6.1
19/11 day 42
Most busiest day so far. Both girls got very bushy in last few days and they stretched enough to install scrog net. Before installing net applied selective defoliation on both girls. 8-10 fan leaves from each.
It's the end of this amazing week 😁
Thank you all again for such a great support 🤗✌️💚

shorts_status_processing


@Master_weeda
Follow
Bonjour à tous les padawans et les maîtres jedis
Pour cette semaine 4 au jour 23 ma plante fais 17 centimètres et son sixième noeud apparaît je décide donc de pratiquer un LST sur ma plante.
Pour ce j'utilise du fil de fer galvanisé que je plante directement dans le substrat en faisant attention de ne pas endommagé les racines car n'oublions pas que ce qui pousse dessus pousse aussi dessous.
Jour 17 je pulvérise du une solution composé d'une cuillère à café de savon noir mou dilué dans un litre d'eau en prévention d'éventuels nuisibles.
Je corrige mon LST suivant la pousse de ma plante ...
Pour ma par c'est la manière dont je procède mais petit rappel de la technique du LST:
Quand commencer à appliquer la technique LST
De nombreux cultivateurs commencent la manipulation dés que les plantes possèdent entre 3 et 6 nœuds ou une paire de feuilles. Durant cette première étape de la croissance, le tronc encore flexible est pliable sans risque qu’il ne se casse, même si au fur et à mesure du développement de la plante il sera de plus en plus difficile de le plier. Nous pouvons continuer à guider la croissance des branches durant toute la culture, même durant la floraison, ce qui pour cette étape représente un grand avantage face à la taille, qui n’est pas du tout recommandé une fois que la formation des têtes commence, cela stressera en effet la plante, ce qui aura pour effet de retarder la récolte.
Comment appliquer la technique de guidage LST
Si nous sommes prudents, la flexibilité naturelle des fibres du cannabis permet de plier leur tronc et branches avec une relative facilitée, même durant la floraison des plantes.
En utilisant une corde fine, nous pouvons accrocher la pointe de la plante à la base du pot par exemple ou à un tuteur que nous aurons planté dans le substrat. Nous plierons le tronc avec précaution et nous le fixerons avec la corde, à partir de là, nous pouvons augmenter progressivement la tension de la corde, chaque jour un peu plus, jusqu’à obtenir la position souhaitée. Soyez attentif à la réaction de la plante, essayez de ne pas appliquer trop de pression sur la corde et rappelez-vous que la flexibilité des branches peut varier d’une plante à l’autre.
Pour obtenir de meilleurs résultats, il suffit de suivre quelques règles simples. Pour commencer, nous devons choisir une corde fine mais pas trop pour ne pas blesser les troncs au fur et à mesure qu’ils grandissent et qu’ils deviennent plus gros.
Nous pouvons utiliser des crochets en plastique souple ou de n’importe quelle autre matière flexible pour éviter d’endommager les plantes. Spécialement en intérieur, utiliser des cordons en plastique de couleur (voir les diaries de @Silky) est très pratique pour voir facilement les accroches et faciliter le travail au milieu du réseau formés par les cordes, les tuteurs, les mailles ou les supports que nous aurons dans la culture. Bien entendu, en culture extérieure et surtout en guerilla nous ferons juste le contraire et nous utiliserons des matériaux de couleur qui n’attirent pas l’attention pour que notre jardin reste discret.
Pour stresser les plantes au minimum, la mieux est de réaliser ces manipulations le soir ou juste après que les lampes en intérieur s’éteignent, ce qui leur permettra de se remettre durant la nuit. Normalement, le jour suivant nous pourrons observer comme les pointes des branches que nous avons pliées se dressent de nouveau vers le haut à la recherche d’une source de lumière.
Je combine un pincage d'Apex au LST cela me permettra d'avoir une canopé plus homogène donc une meilleure pénétration lumineuse et par conséquent un meilleur rendement.
Que la force soit avec vous💪


@DrewbieDoobieNoobie
Follow
These were all pretty Uniform in height and weight even with #3 being replanted 2 weeks in, lots of Haze smell diesel and pungent on the front end and some sweet at the tail, I should of let these go a few more weeks I think it would be better. I have read and have heard that the flowering time the breeders recommend is based on a 1000w set up. and light plays an important roll in yield as far as flowering goes Its all about time. and maybe next time I will grow these to a more perfect pant. but this round as a grower I give myself a 6 out of 10 got some buds to some and turned the trim and larf to hash, not a huge return and the Trichomes were mainly in the 25 micron range with a minimal amount in the 76 micron bag. so My thinking is that these were all small and under developed trichomes, this leans into my theory that they could have gone another 3 or for weeks, Failure has been my greatest teacher and I really enjoy this hobby. Next grow will be an Organic Dry Amendment Auto Flower with new lights no more Blurple import lights. I got my 1st vaccine shot. hope you all are staying safe and lifted.
BDH#1 13 oz wet
42gm buds
30gm larffy trim
BDH#2 13 oz wet
26gm buds
42gm larffy trim
BDH#3 13oz wet
20gm buds
42gm larffy trim
TOTAL 39oz wet
TOTAL 94 gm buds 97gm larffy buds



@dinosdarko
Follow
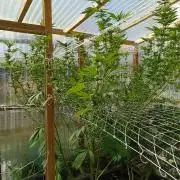
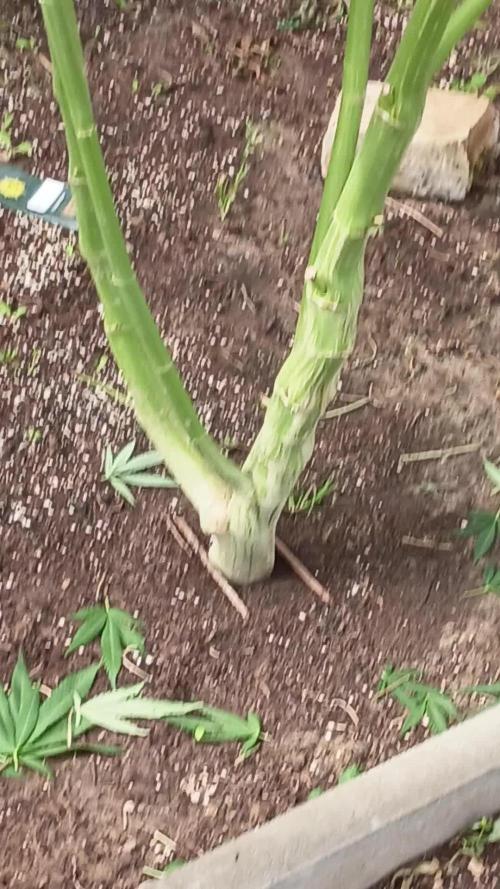
🌿 Gewächshaus-Monster - Update Papaya Frosting (Barney's Farm) 🌿Überblick & Wachstum:Wir sind offiziell am Ende der 3. Blütewoche angekommen und meine Papaya Frosting von Barney's Farm mutiert zu einem absoluten Baum! Der hormonelle Wachstumsschub (Stretch) ist glücklicherweise schnell vorbei, was auch Zeit wurde – die Dame hat eine gewaltige Show abgeliefert und steht aktuell bei einer beeindruckenden Höhe von 2,40 Metern. Gebogen.Training & Struktur: Ich habe sehr viel Arbeit in die Selektion und das Training in der frühen Phase gesteckt. Ich habe die Pflanze auf 5 Hauptbeine selektiert (Main-Lining) und die Haupttriebe kontinuierlich von links nach rechts gezogen. Das Ergebnis? Ein absolut verrückter Kronendurchmesser von knapp 3 Metern von allen Seiten! Der gewaltige Hauptstamm verholzt extrem stark und misst an der Basis bereits stolze knapp 7 cm im Durchmesser. Um diese enorme Masse an Pflanzenspitzen abzufangen, nutze ich ein Doppel-Netz-Setup. Das erste Scrog-Netz sitzt bei 1,40 m und das zweite, obere Netz ist fest bei 2,50 m montiert. Aktuell haben die höchsten Spitzen noch genau 10 cm Platz, bis sie das zweite Netz erreichen. Da der Stretch durch ist, wird sie in den nächsten Tagen perfekt in das obere Netz einrasten. Das wird ihr genau die physikalische Stabilität geben, die sie für die schwere Blütenproduktion in den nächsten Wochen braucht. Der Abstand zwischen den Knotenpunkten (Internodien) beträgt ca. 2,5 cm super kompakt und gesund.Entlaubung & Umgebung:Diese Woche steht eine radikale Pflegeeinheit auf dem Programm. Bei einem Durchmesser von 3 Metern bildet sich verdammt schnell ein undurchdringlicher Dschungel. Ich habe ein gründliches Lollipopping durchgeführt und das untere Drittel der Pflanze komplett freigeputzt. Alle schattigen, winzigen Blütenansätze und großen Fächerblätter unten sind weg. So wird 100 % der Energie aus dem dicken Stamm direkt in die oberen Hauptbuds geleitet. Außerdem verbessert es die Luftzirkulation am Boden massiv, wie man auf den Bildern am freigelegten Stamm gut sehen kann.Zur Umgebung: Mein Gewächshaus ist 4 m breit, 8 m lang, 3 m hoch und steht auf einem tiefen Fundament. Ich habe das große Glück, alle großen Fenster (1,70 m x 1,20 m) und die große Haupttür rund um die Uhr (24/7) komplett offen lassen zu können, da das Gewächshaus in einem gesicherten Garten steht. Zusammen mit einem durchgehenden, 3 cm breiten Luftschlitz im Dach funktioniert der Kamineffekt perfekt, um Feuchtigkeit sofort abzuführen und Kondenswasser zu verhindern.Bewässerung & Düngung:Dieses Monster hat einen gewaltigen Stoffwechsel und bekommt alle 4 bis 5 Tage Durst. Ich gieße immer erst dann, wenn die oberen 2–3 cm der Erde trocken sind, damit das organische Bodenleben in den tieferen Wurzelzonen aktiv und glücklich bleibt.Klares Wasser hinterher: Direkt im Anschluss gieße ich massiv 40 bis 50 Liter normales Leitungswasser nach. Das spült die Nährstoffe tief ins Erdreich, wo das riesige Wurzelsystem sie perfekt aufnehmen kann. Die Pflanze liebt diesen Rhythmus und zeigt keinerlei Mängel oder Überdüngungszeichen. Die ersten wunderschönen weißen Härchen (Stigmen) ploppen überall auf und stapeln sich dicht an dicht. Da es sich um die extrem harzreiche Papaya Frosting handelt, zeigen sich jetzt schon die ersten glitzernden Trichome an den jungen Blüten. Auf in Woche 4 für das echte Anschwellen der Buds und den berühmten Cali-Frost! 🚀


@CuriosityWebster
Follow
Starting to get the tent more dialed in, got a Govee heater off Amazon and I got it connected to my WiFi and set parameters on it and it works great! Considering getting the humidifier to link up to the same app to fine tune the tent even further!
Some small gnats from the fox farm ocean soil but nothing bad whatsoever, put some sticky traps out (and there’s some dirt stuck on the trap that’s not all bugs)
And spayed some crop control on the soil around the seedlings to help prevent bugs


@DonPerion1983
Follow
So exactly 12 weeks old today I’m checking trichomes every other day atm as there still clear!! Hopefully another week of feeding nutrients then the flush before harvest! Still happy for my first grow! The girls scout cookie auto plant has been impressive and the bcn critical has also grown steady!! Leaves are turning more yellow and bud hairs seem to be curling over more each day which is a positive! Feeding every two days, trying to starve them as much as possible! Do I reduce my light hours in the last two weeks of harvest???


@Robom069
Follow
right side black domina
left side acid dough
i think the dough gonna give a much better result
good grow still i guess


@microgrowshow
Follow
One of my favourite plants to grow so far. I learned a TREMENDOUS amount, especially all the ins and outs of supercropping. Although I did end up breaking my stalk, she turned out quite nice! I can definitely see myself supercropping plants in the future just to play around. The terpenes are also really nice on this girl. I can't wait to make some bubble hash and rosin. And I generally can't wait to grow this girl again knowing what she needs now in terms of training. Will also be nice to see the difference with organic dry amendments vs the FF wet nutrients I used.


@NMGDOC
Follow
I was flushing all the plants since August 9.
You can see in the videos with de microscope ( I really try my best, but it was pretty difficult) the trichomes looks cloudy and some of them looks amber. Maybe in the videos you can't see it because my hand was really shaky.
August 17: all the plants were in dark.
August 18: i cleaned all the plants, buds, leafs, everything..., spraying water to remove the rests of potasic soap.
Today august 18, during the nigth, i'm going to harvest all the ladies.
In the past 3 days i didn't watering the plants and the smell was stronger.
August 19:
Before dry
-Critical Kush: 150g
-Red dwarf: 60g
-Syrup (2 plants): 270g
-Lemon (4 plants): 570g


@DogDoctorOfficial
Follow
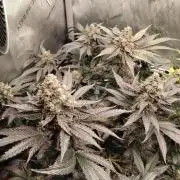
I love growing and i love the GD community, we are like a big canna family and its a pleasure and an honor to be part of this all. Thank you all for being here , for growing and believing in this beautiful healing plant . Growers love to you all



@Hexahydrat666
Follow
Ich hätte den beiden gerne noch etwas mehr Zeit geben aber die Raubmilben haben das Problem mit den Thripslarven nicht in den Griff bekommen. Die Biester haben im Zelt ordentlich Party gefeiert und sich kräftig vermehrt so das ich mich entschlossen habe zu ernten damit ich genug Zeit habe zu trocknen und das Zelt zu desinfizieren bevor die nächsten Pflanzen einziehen. Beim nächsten Grow werde ich stärker auf die ersten Anzeichen für einen Schädlingsbefall achten. Das war das erste Mal dass ich Thripslarven im Zelt hatte weshalb ich sie nicht gleich entdeckt habe. Ich hätte nicht gedacht dass die Mistviecher so klein sind das ich sie mit dem bloßen Auge kaum sehen kann und ich auf die Fraßspuren hätte achten müssen .Man lernt halt ständig dazu😃



@Cannabeast40
Follow
Welcome back to yet another short update☺️
Transplanted and filled with tender care and love 🤗 A bit colder temperatures then inside the veg tent , but I’m not worried at all🤩
Videos show the process, hope you enjoy 💯💚
See you next week🤩
------------------------------------------------------------------------------------------
Light source:
Medicgrow SpectrumX
880W LED
Build in PPFD
4 controllable spectrums V1, F1, VS, FS
Visit https://medicgrow.com/ for more informaton.
Light measurement:
Apogee MQ-610 & Apogee DLI-600.
Fertiliser:
Organics Nutrients
https://www.organicsnutrients.com/en/
Green Buzz Nutrients
Discount Code: GD42025
Grants 25% with a minimum Order value at 75 Euro.
https://greenbuzzliquids.com/en/shop/





@MedicaL
Follow
54 den květu.Gaston 51 nabral na váze, tak jsem to musel vyvázat.Terpenový profil je výrazný. 2 týdny tam ještě bude, takže zálivka už pouze odstátá voda 💦


