Likes
Comments
Share


@I_Identify_As_A_Dan
Follow
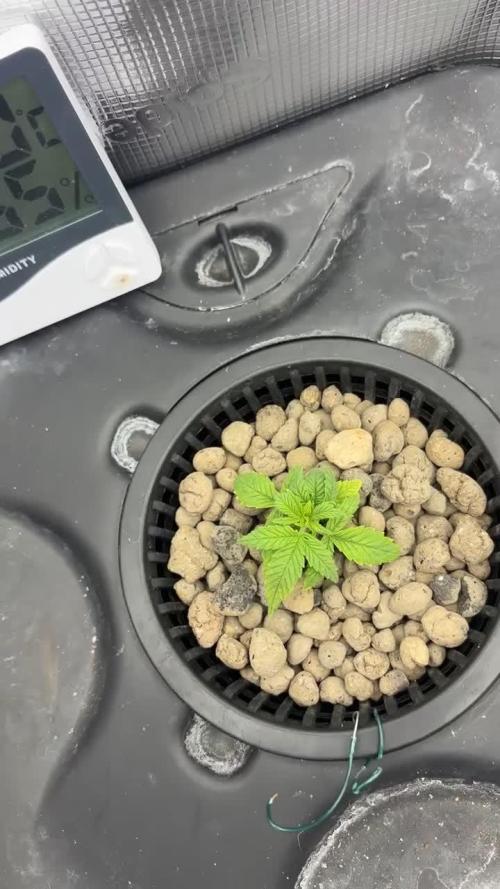
Day 42
Shes really starting to pack on the some size, shes going to be a great yielder i think.
Have a new dehumidifer arriving next week which is needed right now.

Likes
Comments
Share


@HIAZ_urbanbudfarmer
Follow
She could have done a little better, mistreated a little on my part! Irregular feedings.


Likes
65
Share


@HAPPYWEEDS
Follow
Fast and easy harvesting. I let it dry before trimming to make this part easier. We did earlier defoliation and gentle lollipoping so there wasn't too much work left after that. I would have liked to give it a few more weeks of ripening but it started to get too hot. Very pleased with the result and I think it can be given even more potential!

Likes
9
Share


@TheGreenGroomer
Follow
🌿 Grow Update: Week 6 of Flower 🌸
Hey growers,
We're cruising through Week 6 of flowering, and I gotta say, things are looking solid in my grow setup. This being my first rodeo, I'm pretty stoked with how it's all turning out.
The plant's rocking a deep green, which could be a bit of nitrogen overload or just her natural vibe. Regardless, she's thriving, Ive been so stupid letting her get so big in a 5gallon i wouldn't be surprised if she is rootbound..
Got a bit of a snag with some lower bud sites getting overshadowed by the top canopy. Didn't want to push my luck with more defoliation i cant really at this point of flower, but hey, it's all a learning experience next round, I'll be more surgical.
Already thinking about the next grow — tossing in a couple of plants in 5-gallon pots, keeping veg short and sweet at 4-5 weeks. Gonna tighten up the training game for sure.
Despite the lower buds not getting as much love, the top ones are coming along nicely. She's a thirsty one, so I'm hitting her with 4 liters at lights on and another 2 liters a few hours before lights off to keep that coco from drying out.
Got about 3-4 more weeks to go, and I'm itching to see how it all pans out. Can't wait to see the final yield and taste the goods. Here's to a killer harvest ahead! 🌿💧✂️🌸 #GrowLife #Week6 #FirstTimer #HarvestCountdown


Likes
18
Share


@Hashy
Follow
Week 10
Light cycle=12/12
Light Power=150w
Extractor controller settings
High temp= 24c
Low temp= c
Temp step=0c
High Rh= 50%
Low Rh= %
Rh step=0%
Speed max=10
Speed min=1
Smart controller settings (during lights on).
Lights on=10.01-21.59
Radiator on= below 22.0c
Radiator off= above 23.0c
Dehumidifier on= not in use
Dehumidifier off= not in use
Smart controller settings (during lights off).
Lights off=22.00-10.00
Radiator on= below 18c
Radiator off= above 19c
Dehumidifier on= not in use
Dehumidifier off= not in use
Fri 23/2/24
💧💧💧💧💧💧💧💧💧💧💧💧💧💧💧💧
Method= automatic
Feed=bloom nutes.
Neutralise=0.1ml/L
Silicon=1.0ml/L
Calmag=0.5ml/L
Terra Bloom=3.0ml/L
Sumo Boost=2.0ml/L
P/K 9/18=1.0ml/L
Easy Ph down=0.1ml/L
Ec=1.9 PH=6.8/6.8
Time start=12.00pm
Finish time=13.45pm
(11×5 minute runs with 5 minute gaps)
Total flow rate=190ml/min
Flow rate per plant=47ml/min.
Total volume made=13L(L)
Total volume left=2.4L
Total volume used=10.6L
Volume per plant=2.6L (Est)
Runoff.
Total runoff=2.5L
Ec=2.2 PH=6.2/6.3
💧💧💧💧💧💧💧💧💧💧💧💧💧💧💧💧
#3 (Day 64)(Day 26 flower)
📋 tray is just high enough that they aren't sat in runoff.
Sat 24/2/24
#3 (Day 65)(Day 27 flower)
📋 nothing
Sun 25/2/24
#3 (Day 66)(Day 28 flower)
📋 Lowered light power from 150w to 140w
Mon 26/2/24
#3 (Day 67)(Day 29 flower)
📋
Tue 27/2/24
💧💧💧💧💧💧💧💧💧💧💧💧💧💧💧💧
Method= automatic
Feed=water
Neutralise=0.1ml/L
Easy Ph down=0.ml/L
Ec=0.2 PH=6.8/6.8
Time start=12.00pm
Finish time=13.45pm
(11×5 minute runs with 5 minute gaps)
Total flow rate=190ml/min
Flow rate per plant=47ml/min.
Total volume made=13L
Total volume left=4L
Total volume used=9L
Volume per plant=2.25L (Est)
Runoff.
Total runoff=0.5L
Ec=1.8 PH=6.5/
Didn't run as should because forgot to plug it in.
💧💧💧💧💧💧💧💧💧💧💧💧💧💧💧💧
#3 (Day 68)(Day 30 flower)
📋
Wed 28/2/24
#3 (Day 69)(Day 31 flower)
📋
Thur 29/2/24
#3 (Day 70)(Day 32 flower)
📋 I feel sorry for this one as she is cramped into the corner, getting less light then the others and it's hard work getting the camera past the other ones to get any pictures. She is still doing fine though.
Back soon.
Take it easy.


Likes
9
Share


@Southwest_budders21
Follow
Pink Wafers!
Day 16
Building up a nice root system at the minute and will start topping and Training over the next week or so. Had a bit of stretch but got that under control and will root pot very soon aswell ✌️🏻🇬🇧🏴

Likes
18
Share


@Onlygrow99
Follow
Hola!
22/03/23 - Llevamos 60 días desde que empezamos a germinar las semillas, estamos en la 3ª semana de floración.
He tenido que subir la luminaria por que las plantas han pegado estirón y se han plantado a menos de 10cm del led.
He instalado la malla scrog por la parte media de la planta para sujetar las ramas y en poco tiempo pondré una segunda malla para sujetar las partes altas.
A partir de aquí mi prioridad es no tocarlas para no estresarlas de ninguna manera. Solo buenos riegos, buenas temperaturas y música.

Likes
59
Share


@Ganjagrandaddy
Follow
Day 56 (flowering day 16): My stars of the show right here. These plants are beasts. I can only imagine how they would grow outside.
I managed to get #1 as she had just gone to sleep. Her wilted look is due to having enough light for the day so she has dropped off like granny after Christmas Dinner while the kids carry on .lol The structures on these are amazing. They have een slower to flower and I expect a mid Jan 2020 harvest.
#1 Sleeping beauty has not missed a beat the whole grow. She continues to wring every last morsel of nutrition from her soil. Tons of bud sites and each branch is looking like a mini version of a whole plant!!.
#2 has een moved to the outside for more ligjt and so I can watch her more. she has shown signs of calmag issues so I have made sure to keep that up with the mega crop too.
#3 while a lot less wide , has a very thick under belly to her branching. she should support a lot of weight.
These ladies will benefit from the earlier harvested strains by getting a light each it seems. let's see what 300w each can do for their lady two weeks.
Merry Christmas all
Likes
19
Share


@clueless_smoker
Follow
17/01
So I have had serious doubts about my 300W CFL grow light since day 1 so I decided to instead opt for a Mars Hydro TS1000. Looking forward to seeing if there's any difference!
With regards to my previous grow question, my tap water, while drinkable tastes terrible and has a higher than normal amount of chlorine which i heard is terrible for plants. Hence the RO water. Got hit by a really cold spell last week and I struggled to keep the tent above 16 degrees C but it's starting to get back to normal now so hopefully will see some good growth :)
20/01
So I may have set her back by a couple of day's with the new light, apart from the apparent change in wavelength from CFL to led that can cause some stress I also gave her 100% on the dimmer. Just a quick note to any newbies out there, the Mars Hydro TS1000 gives you a recommended distance from the canopy for each stage of growth but not recommended power, if your girl is at my stage of growth use 25-30%.
On the bright side she has adapted nicely and no lasting damage seems to have been done. Seeing signs of growth all over and she's back to praying :)
23/01
She recovered from the change of light nicely! She's growing like a superstar now and just got her first feed today. Gonna take it easy on the nutrients, really don't wanna stress her out anymore. I have been turning up the light strength daily and she's currently happy at 50%.


Likes
6
Share


@Mr_nugs_lover_David
Follow
It was such a nice experience for me with this strain, first time ever growing her, she had a little bit of long internodes and thought she wasn't gonna be very productive, however the nuggets are so so hard and compact and the quality is just brutal, doesn't even look like she's s been outdoor grown, I love this strain for the rare strong smell like very sweet and floral with that strange diesel notes mix the sweet tones, I would love be growing her my whole life, I definitely will keep growing this lady FOR SURE!. thank you so much and hope you guys enjoy! 💎🙏🔝💚

Likes
37
Share


@MrJones
Follow
Cream Mandarine XL-Auto #2 / FOOP Nutrients
======WEEKLY GOALS =======
🌞Environment - 80F and 50%Humidity - using Humidfyer as needed.
💧 Feeding - Feeding with FOOP Canna Organic Nutrient Line
🍃Training / Keeping Stems Stable and Strait
🕷️ IPM - Will be using Green Cleaner" 1 OZ per Gallon, and CannControl from Mammoth alternating between product each month for Integrated Pest Management.
🔅 Vegetation & Flower Kingbrite 240W QB288 v3 LM301H 4000k+ 660nm Red x2 - Maintianing 575 PPFD
========Plant Update===========
🌱 Plant - Week 6 started today, the plants are doing great very healthy, will need to do another IPM treatment in the mornting.
===========================
▶️Monday 03.29.21 / These girls are re well into flower, they are soundly in the 9/10 week glide path, they should start building up this week, may need to remove a few more leaves.
▶️Tuesday 03.30.21 / These look great every day, and have gotten too tall!! Feeding about 30 ounces per day.
▶️Wednesday 03.31.21/ Decided to cut the FOOP to 60%, feeding 30 ounces per day.
▶️Thursday 04.01.21 / Decided to cut the FOOP to 60%, feeding 30 ounces per day.
▶️Friday 04.02.21 / Decided to cut the FOOP to 60%, feeding 30 ounces per day.
▶️Saturday 04.03.21 / Decided to cut the FOOP to 60%, feeding 30 ounces per day.
▶️Sunday 04.04.21 / Decided to cut the FOOP to 60%, feeding 30 ounces per day.
Likes
3
Share


@BushDoctor740
Follow
Well she is really doing well with the recent LST and will have lots of colas.Ill start training the other branches later on this week but she’s looking great day 22
Likes
7
Share


@Krissci
Follow
Ending 1st week of flowering
Mainlining for 1st time
8x Nodes, topped 3x
Tied down to create even canopy
Flavour & yield is my biggest aim
Day 3 - Tie down training and defoliation. Both strong growers..
WC2 is the biggest so far
Likes
40
Share
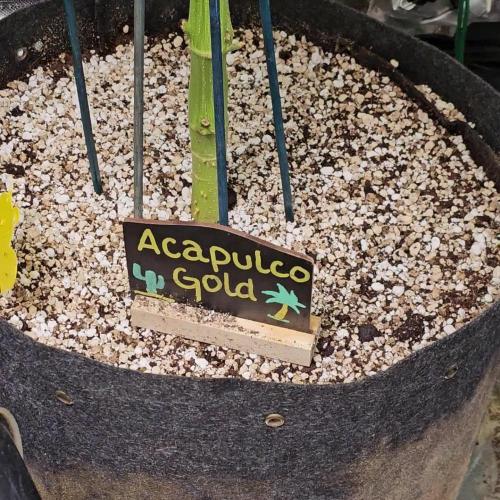

@Kirsten
Follow
Acapulco, gold has gone absolutely crazy, and we have so many branches. I have lollipoped her this week, too.
She is still stretching, hopefully that's gonna end real soon, because we have no room left in the tent, and we're getting light burn.
I have been moving the plant around to maximise the light exposure and minimise the light stress and heat damage, she has been drinking a fair amount.
I'm just trying to get the fungus gnat population under control with some sticky traps.
Here is what I did this week.
ACAPULCO GOLD Top dress:
🧡 1/2L Canna Coco
🧡 1/3L Perlite
Amendments:
💚 1/4 Cup Diatomaceous Earth
💚 1/4 Cup Ground Cinnamon
💚 1 TSP Ecothrive Grow
💚 1 TBSP Ecothrive Bloom
💚 2 TBSP Ecothrive Life Cycle
💚 1 TBSP Ecothrive Charge
Top dressed 27.8.25.
27.8.25:
I watered with 6.5L of dechlorinated water PH'd to 5.8 with;
💜 1 TSP CAL-MAG
💜 40 ML FLOURISH
💜 1/2 TSP BUD EXPLOSION
💜 1 TSP MEGA CROP PART A
PH: 5.8
PPM: 910
28.8.25:
I watered with 4L of dechlorinated water PH'd to 6.5 with;
💜 1TSP Sea K(elp) Greenleaf Nutrients
PH: 6.5
PPM: 418
29.8.25:
I watered with 4L of dechlorinated water PH'd to 6.5 with;
💜 1ml Trace
PH: 6.5
PPM: 321
31.8.25:
I watered with 4.5L of dechlorinated water PH'd to 6.2 with;
💜 2ml Trace
💜 1 TSP Biosys
PH: 6.2
PPM: 373
Thanks for checking out this week and for hanging out in the comments 😁💚✌️🌱🤞

Likes
13
Share


@Andres
Follow
she has 103 days and I'm going to leave 120 days to knock her out. she still enjoys the sun and the outdoors and she s feeding every 10 days with red bird guano... 80%ambar