
Likes
Comments
Share


@PalmaGrow
Follow
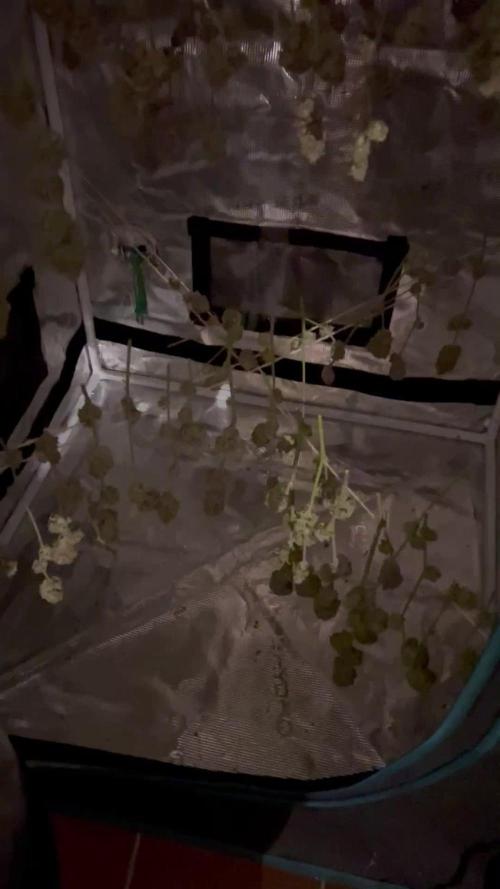
29 - 4 noviembre
Crecimiento regular sin ninguna poda y libremente
31/10 se realiza riego nutricional con fotohormona y fertilizante orgánico NPK h micro elementos

Likes
65
Share


@MadeInGermany
Follow
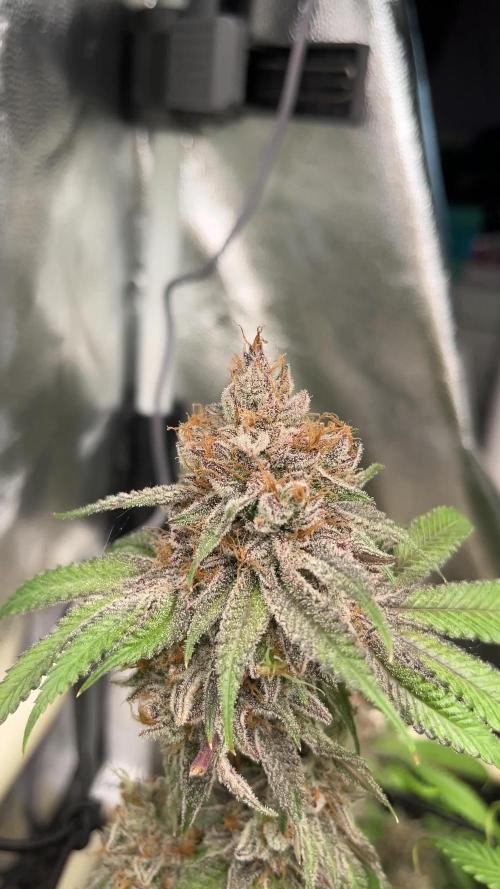
Flowering day 87
since time change
to 12/12 h.
Hey guys :-)
The Grinspoon blooms and blooms 😂
She keeps getting new pistils but the trichomes are starting to turn milky :-) .
I think it can be harvested in the next 14-20 days 👍.
Would even be a faster phenotype this time :-)
The last one had 136 days.
Was poured 3 times with 1 l each (groundwater see description at the bottom)
Everything was made clean.
Fresh osmosis water is applied and the plants are sprayed and checked.
Stay healthy 💚🙏🏻
👇🏼👇🏼👇🏼👇🏼👇🏼👇🏼👇🏼👇🏼👇🏼👇🏼👇🏼👇🏼
You can buy this Nutrients at :
https://greenbuzzliquids.com/en/shop/
With the discount code: Made_in_Germany you get a discount of 15% on all products from an order value of 100 euros.
👇🏼👇🏼👇🏼👇🏼👇🏼👇🏼👇🏼👇🏼👇🏼👇🏼👇🏼👇🏼
You can buy this strain at :
https://www.barneysfarm.com/dr-grinspoon-5
Water 💧 💧💧
Osmosis water mixed with normal water (24 hours stale that the chlorine evaporates) to 0.2 EC. Add Cal / Mag to 0.4 Ec Ph with Organic Ph - to 5.8 - 6.5
MadeInGermany


Likes
5
Share


@ROY4L_GU4RD
Follow
Week 2 I didn't do much in the tent I was actually away from them for 2 weeks and had no problems. With auto pot system, you fill it up and forget about it.
Babies are still a little deficient but they'll start to correct themselves in another week or two. I didn't have any footage for this week so I decided to post a video of the 2nd run of rainbow cake. The frost on this strain is unbelievable. Check it out and let me know what you think about it in the comments

Likes
5
Share


@Growerofherb
Follow
Doing great, considering moving indoors to get better light maybe. Because eventually I'll have to keep her on the porch with not direct sunlight
Likes
3
Share


@Mr_nugs_lover_David
Follow
In this week I decide to top her to break the apical dominance and start training her on the next weeks,let's keep on working and growing,enjoy life growmies!! 💚 🌱 ❤️💛

Likes
3
Share


@Promi
Follow
I ran into a Gaul Stone issue.. hospital.. so no pic from week 12 ^^ very much non effort grow ;) The three I took out, stayed dark and dry. Trimmed the leaves and hung em to dry (14 days).
The last 5 went dark last day of week 12, they weren't 50/50 yet, but I got a bit sick of waiting hehehe
They only got water the whole week.

Likes
6
Share


@Hempy_The_Kid
Follow
Planted may 1st. Sprouted may 3rd. Will be grown half indoors and half outdoors when weather permits. Right now under 400w MAXSISUN PB4000 light.

Likes
6
Share


@AcidBurn_40
Follow
21.02.24 BT 32
Mahlzeit Buddy's 🙂
Den Lady's geht es Wunderbar Sie haben alle beide auf gehört sich zu Strecken.
Jetzt geht es langsam los und die Buds Plustern sich auf.
Jeden Tag bis Dienstag werden noch da und da ein paar Blätter entfernt aber ohne Sie zu stressen max 2 pro Pflanze am Tag.
Es sind auch nur die Blätter die Bud's verdecken
Heute gab es wieder lecker Futter 😋 Hesi Blüh Complex 5ml auf 1L Wasser , Hesi Booster 2ml auf 1L Wasser ,Hesi Phosphor + 0,4ml auf 1L Wasser und Hesi SuperVit.
Alles zusammen ergab ein Super Nährstoff Trunk der Sie jetzt erst mal für 4 Tage versorgt .
Skunk #1 riecht sehr stark aber das war klar und immer sehr sehr fein.
Der Typische Skunk Geruch wird von einer schönen Zitronen 🍋 note abgerundet.
Tangerine Sugar riecht sehr süß und fruchtig.
Tricome bilden alle beide sehr gut, der Nodien Abstand der Skunk #1 ist definitiv kleiner somit gehe ich stark davon aus das sich fast ein dicker kolben zeigen wird und das an allen Haupt und Seitentriebe.
Tangerine Sugar wird auch schöne Bud's zum Vorschein bringen aber halt keine durch gehende kolben 🙂
Ihre Triebe sind definitiv nicht so kräftig gewachsen wie die von der großen Schwester aber verstecken brauch Sie sich auch nicht.
Mögen all eure Lady's Gesund und brächtig Wachsen und euch mit schmackhaften Stuff versorgen 😉
Danke für vorbei schauen bis zum nächsten Update✌️😊

Likes
25
Share

@MistaOC
Follow
Final Week – Late Flower
The final week was essentially a clean finish to the run. The buds swelled further, becoming dense and well structured. Despite the ongoing mildew issue, the situation remained controlled and never spiraled out of hand.
Lowering nighttime humidity below 50 % clearly helped slow down further spread. The focus was on maintaining stable conditions and consistently removing affected leaves.
Overall, the positives clearly outweigh the negatives: strong plants, solid bud development, and very relaxed handling thanks to Biotabs and the automatic irrigation system.
Now it’s simply about finishing strong and harvesting.
Likes
6
Share


@Hashishi
Follow
Lemon tree can endure pain, cold & hot weather, seedling is really a strong genetic, huge root mass for 2 week seedling, now I'm using Biobizz soil + dry leaves on top from past harvest
Likes
3
Share


@Akisan
Follow
The stealth bucket seems to have scarred a few of the leaves that’s been trying to grow out on the sides.

Likes
12
Share

@Jardin33ro
Follow
Ya comenzamos con el lavado! Flawless para terminar con un buen sabor y buena ceniza! Tratamos de bajar la EC lo mas cercano a 0 que pueda. Esta es la ultima semana antes del corte, asi llegamos a las fiestas con flores secas y frescas! Muy contento por como se ha dado todo este ciclo, pero con muchas ganas de corregir ciertas cositas que he ido aprendiendo en este cultivo, muy agradecido con la planta y con este aprendizaje! Felicidad absoluta
En la expocannabis de Uruguay pude analizar 2 muestras, f5 y f2. El f5 tiene mayor thc y mas % de terpenos! Mas presencia de limoneno, luego linalol y un poco de myrceno! Mientras el F2 tiene mas presencia de Myrceno, limoneno y linalol. Menos thc que f5 y menos terps, esto ya es otro nivel! Entender quimicamente como esta tu flor, esto otro juego! Saludos Jardin33ro
Likes
6
Share

@DogDoctorOfficial
Follow
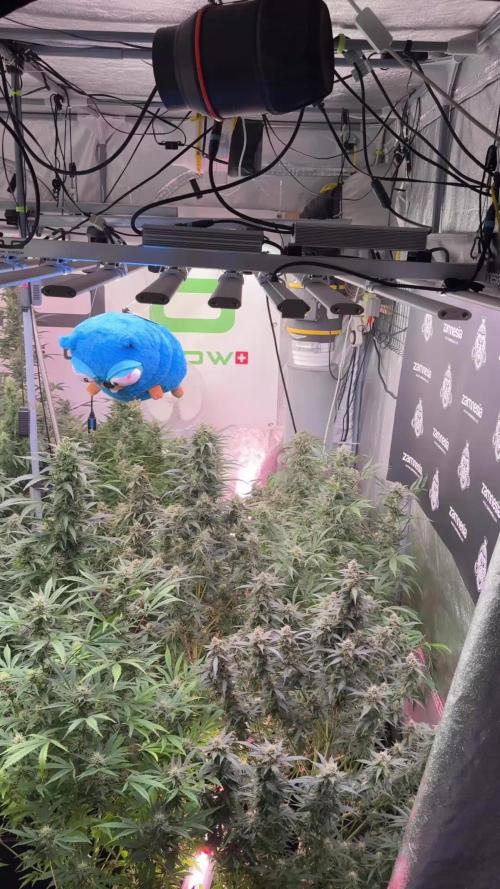
🌱 Week 11 from Seed — Week 7 Flower
LSD — The Observation Phase
We’ve reached that point in the run where the work becomes less visible… but more important than ever.
For anyone just joining us, this run has been built on consistency. From seed to now, we’ve maintained stable environmental conditions — temperatures, humidity, feeding, and watering practices have remained unchanged because the plant has been responding exactly how we want. No need to fix what isn’t broken.
This is key:
progress doesn’t always come from doing more — sometimes it comes from doing less, but doing it right.
⸻
👁️ What This Week Is
This is a monitoring week.
At this stage, the plant is fully focused on flower development. Buds are stacking, structure is defined, and now the priority shifts from pushing growth… to protecting it.
Our role right now:
* Stay consistent
* Stay present
* Stay observant
We’re still hand watering, still giving them that direct attention, still reading the plant daily. Not reacting — interpreting.
⸻
⚠️ What This Week Is NOT
This is not the time for:
* Big changes
* Heavy feeding adjustments
* Unnecessary stress
And most importantly —
this is not the time to “get bored” and start doing things just to feel productive.
Because right now, overdoing is more dangerous than underdoing.
⸻
🔍 The Importance of Observation
Even if it looks like “nothing is happening”… everything is happening.
This is where experience shows.
We’re actively watching for:
* Early signs of mold or bud rot
* Humidity pockets within the canopy
* Powdery mildew risks
* Any late-stage deficiencies or imbalances
Catching something early here makes all the difference. Waiting too long can cost the entire run.
So yes — it might look calm.
But this is one of the most active mental phases of the grow.
⸻
🌿 Presence Over Action
There’s something else here that doesn’t get talked about enough:
Just being there matters.
Walking into the room.
Looking at them closely.
Understanding their rhythm.
You start noticing the small things — the details that don’t show up in charts or numbers.
This is where growing becomes less mechanical… and more intuitive.
⸻
🔮 What to Expect Next Week
We’re moving deeper into flower maturity.
You can expect:
* Continued bud swelling
* Increased density
* More pronounced aromas
* Resin production becoming more visible
What not to expect:
* Explosive vertical growth (that phase is behind us)
* Major structural changes
From here on, it’s refinement.
⸻
🧤 Mr. Baggy Report
Mr. Baggy is still on duty, as always —
making sure everything is exactly where it should be.
Quiet week for him too… but we all know those are the ones where he’s watching the hardest 👀
⸻
🤝 Shoutouts
As always — this doesn’t happen alone.
Shoutout to:
* The Grow Diaries platform
* The community following along week after week
* The OGs who’ve been here since day one
* The new eyes joining the journey
* The supporters, the critics, the silent watchers
* The genetics behind this LSD run
* And everyone who takes a moment to learn, share, or grow alongside us
From grower to growers — respect.
📡 DELETED @ 1K Please stay tuned.we never quit https://www.youtube.com/@TheDogDoctorOfficial NEW 🙏 Thank you for your patience and continued support.
FOR DISCOUNT CODES AND MORE JUST FOLLOW THE LINK https://website.beacons.ai/dogdoctorofficial
📲 Don’t forget to Subscribe and follow me on Instagram and YouTube @DogDoctorOfficial for exclusive content, real-time updates, and behind-the-scenes magic. We’ve got so much more coming, including transplanting and all the amazing techniques that go along with it. You won’t want to miss it.
GrowDiaries Journal: https://growdiaries.com/grower/dogdoctorofficial
Instagram: https://www.instagram.com/dogdoctorofficial/
YouTube: https://www.youtube.com/@dogdoctorofficial Deleted by Youtube - https://www.youtube.com/@TheDogDoctorOfficial NEW
Vimeo : https://vimeo.com/dogdoctorofficial Under construction stay tuned ⸻
Explore the Gear that Powers My Grow
If you’re curious about the tech I’m using, check out these links:
🔆 Lighting & Environmental Control
• Future of Grow — Advanced LED lighting technology
https://www.futureofgrow.com/
DISCOUNT CODE: DOG20
• Lumiflora — Under-canopy LED lighting
https://lumiflorade.com/
• TrollMaster — Environmental controllers and automation gear (past collaboration)
⸻
Genetics
• Zamnesia Seeds — Genetics used in this project
https://www.zamnesia.com/
⸻
🌱 Soil, Substrates, Boosters & Root Support
• Plagron — Substrates, bio mixes, and supportive products
https://plagron.com/en/
⸻
🎒 Storage, Curing & Preservation
• Grove Bags — Curing and storage solutions
https://grovebags.com/
⸻
📸 Photography Equipment & Tools
(Not sponsors, but part of my creative toolkit)
• Sony A6700
• Sony full-frame macro lens + few more
• Stacking photography workflow - learning
• iPhone (for behind-the-scenes shots)
We’ve got much more coming as we move through the grow cycles. Trust me, you won’t want to miss the next steps, let’s push the boundaries of indoor horticulture together!
As always, this is shared for educational purposes, aiming to spread understanding and appreciation for this plant. Let’s celebrate it responsibly and continue to learn and grow together.
With true love comes happiness. Always believe in yourself, and always do things expecting nothing and with an open heart. Be a giver, and the universe will give back in ways you could never imagine.
💚 Growers love to all 💚
📸 P.S. – The Eye Behind the Lens
All photos in this diary (for now — except for the ones showing the camera, which I took with an iPhone) are taken with a Sony A6700 paired with a Sony full-frame macro lens and a few more.
Photography is part of the story — it’s how we share the fine textures, the glow, and the quiet details that words can’t always capture.
I’ve also started experimenting with photo stacking — a technique where multiple images, each taken at a slightly different focus point, are layered together to create one perfectly sharp image from front to back.
It’s not digital enhancement or AI; it’s pure photography — a way to reveal the plant’s beauty in microscopic depth, from trichome to petal.
You’ll even see a few shots of "ghost me" capturing the shots — camera, lens, setup — because every grow deserves not just to be cultivated, but documented like art.
FOR DISCOUNT CODES AND MORE JUST FOLLOW THE LINK https://website.beacons.ai/dogdoctorofficial
NEW DISCORD - Official Server Invite Link : https://discord.gg/ksjAkA5T74

Likes
Comments
Share


@JardineiroBr
Follow
Muitos problemas com a temperatura e ainda viajei e a iluminação desativou passaram 5 diss sem luz, terminar esse cultivo e vou dar uma melhorada nas técnicas.
Likes
28
Share


@Trickybis82
Follow
Will grow again for sure shout out to @420fastbuds for the strain what a all round great plant!!!!

Likes
Comments
Share


@Jbcultivates
Follow
This plant was a show-er for sure! The plants sprung up from the very beginning with huge leaves and thick colas! Nice purple hues and dense nugs! Would definitely grow again!

Likes
Comments
Share


@Another_song
Follow
Ok so it was 12 week One day a strong wind arose.And she was practically pinned to the ground

Likes
34
Share


@PEAKYPLANTERS
Follow
Happy day to all of you, brothers of the Weed!
This extraordinary strain really has something surprising, indeed I will tell you more .... I believe that this 11L pot is of the right size and the right breathability for this girl who is going very strong so far .... appropriate .. . I think two buds have grown on one stem!😊
A kiss to everyone
Likes
2
Share


@ripp3rzcr3rz
Follow
Preparing the plants for pre-flowering stage with another defoliation (two times) + LST

Likes
3
Share

