




Likes
15
Share


@MG2009
Follow
05/20/2021
Wreak is putting on a glitter show the video does it no justice, sparkling is all I can say. She battled through PM break out and is doing well. Her smell is strong, i will be more descriptive later.....
Likes
11
Share


@Badassxwar
Follow
So one thing about this strain that was kind of a bummer was the smells were literally all over the place in a great way. Sour gummies worms from the keef, diesle/gas from the leaves, and lemon hard candy/carrots/dab carts from the buds but when smoked it, the floral taste was so rounded that the other smells never came thru except the purple one that had tight smaller buds, had a lemony taste still. (Remember had to cut early from braking).
On the other hand, the way this plant grew had me in a state of personal amazement. I was actully super excited telling my friends that it got TOO BIG for the branches. Buds stacked perfectly on every plant. The topping and recover time went smooth. She shaped nicely right before flower. And back to my negative statement that I had..... the smells were INCREDIBLE!!! I recommend it to everyone soly for the smells.

Likes
27
Share


@RDWCGrowing
Follow
1/20/2023- So much to do pre grow and over the next 16 days, absolute first order of business is that I have to take down my current Grow---TIMBER-- Then I have a list of things I have to get done in order to be ready to start this grow 1 Feb.
With that said
T - 2 days until start 48 hour Flush
T - 2 days until Start 48 hours of Light
T - 4 days until TIMBER!!!
Items that need to be done before 1 Feb 2023
1. I need to clean the tent out
2. I need to clean the equipment- Proper Sanitization between grows in Hydro is a must!!!
3. I need to get the hole in the ceiling above my tent repaired- For my last grow I had a deep sink installed in my grow room, to make Hydroponics a little bit easier and have a water source in the same room. The seals on the pipes they were installing broke and leaked through the ceiling causing some damage all the way across my grow room, I was already weeks into my grow and couldn't risk them working above my tent and it would have been very awkward positon for them to be working in as well, so have to get this done quickly between chop and germination.
4. I have to install my new light- I was using a Vivosun 4000 and for this grow I am switching up to a Spider-farmer SF 7000.
1/20/23- For this upcoming grow I am working with M/F photo seeds so I ordered 4 Sex determination kits. I recieved my my 4 Sex determination testing kits from Rimrock Analytics today. I will be using these to test my plants at week 2 of Veg so that when/if I take clones I know I am taking them off females. As well as I don't want to accidently pollinate my tent during this grow I am looking for big beautiful buds not seeded buds. :-)
1/24/2023- Harvest of current grow- Started at 2:00pm and finshed wet trim and firt batch into the freeze dryer.
1/25/2023- Next batch into the freeze dryer and cleaning all my equipment for this Grow.
T-1 Day until the workers are supposed to be here to fix the hole in the Grow Room.
T-3 days until I instll my new Gorilla Grow Tent and my New Light Spider Farmer SE-7000 for this grow.
T-7 Days until Start of Germination
1/26/2023- Harvest is done ran through the Freeze dryer and dry tim completed.
1/27/2023- Grow Room repairs completed. Hole is gone Letting the paint dry before I install the new tent.
T-2 days until Install the New Gorilla Grow tent and the new Light
T-3 days until I put the hydro equipment in the new tent
T-5 days until Germination
1/29/2023- Day 0- Final Pre Germination activities
Germination Start T-3 days
The paint on the ceiling was dry and it was time to finish prepping for Germination. I got the following items knocked off my list.
New 4X4 Gorilla Grow Tent is up and ready
New Spider Farmer SE-7000 Light is installed- Thanks Moony Grows for the suggestion and for the Code that got me some money off and free shipping (Moonygrows)!! I turned the lights all the way up to max and set the timer to 18/6 0600-0000. I will keep an eye on the temperature and humidity without my plants and see how hot it gets with the new light.
I put my Hydro system back together and put in 40 gallons of water into it, time to monitor for leaks the next few days.
I Setup my cloning machine for Germination Days 3-11
1/30/2023
let me break down the situation, ROOM in the TENT.. Enough said.. No really I tried putting my exhaust system up in the new tent with my new light, The light is so big corner to corner that it really didn't give me enough room for the lights be be raised, with the exahust hanging the buckets my plants are Starting in are 2 and 1/2 feet off the ground, great for plenty of room for roots but not so great for upwards space for the plant to grow. In a 6' 11 tent with the exauhst in side and hanging that only gave me a little over 4 feet of grow room to play with. My last grow if you saw my diary, anyone could tell I was struggling to keep the buds off the lights. No good, Since space was such an issue I was running my carbon filter inside on the ground but It really needed to be up sucking the heat out not shooting the cool out. With that setup I was sucking air through the filter and pushing it out the tent at a bottom exhaust hole cold out. Wasn't doing me any good for my heat. I was hitting temps of up to 85 degrees. I bought a portable AC unit and have been running it in the grow room to try and keep temps below 85 and I have had to lower the power on my lights during grow also not ideal.. With that said a friend of mine MoonyGrows (Check out his diary) took the time to look at my issue send me a picture of my grow tent setup with detailed instructions on how to suck the air out from the top but putting my filter and fan on top of my tent so no room issue and I am sucking the air out from the top where the heat is instead of pushing the air out from the bottom where the cool is... THANK YOU MoonyGrows For taking the time to help me get this straightened out.. Now I have room and I have the exhausts working right and now my temps with everything at 100% are topping out at 80 this dropped the temp by 5 + degrees at 100% max.
T-2 days until Start of Germination
Prepped my seed tray with humidity dome
Prepped my Rapid Rooter plugs. I Used RO water, and I added a few drops of Hydrogen peroxide to Oxygenate the water. I then PH balanced between 5.7-6.0 the same that they will be getting in the Cloning Machine and when they get to thier final grow pod. I perfere the 5.8x range and I hit 5.84 for these rapid rooters. If you want to see a complete video on the process HowWeedGrow has an amzing video that shows step by step how to do it and explains it better than I ever could including how to plant the seeds. Which I will cover when I get to that step on Wed. https://www.howweedgrow.com/how-germinate-weed-seeds-cannabis-rapid-rooters/
1/31/2023
T-1 day until Germination Start
All set and ready have my Rapid Rooter plugs ready to go have my seeds out.. Have my seed tray warming up tonight. Tomorrow morning right into the Rapid Rooter then strait into the tray. I will spray the dome to start the humidity in there.
2/1/2023
Germination Day!!
Let the games begin!
0600am Put the seeds into the Root Riots. And then put the seeded Root Riots into their first home the Seed tray. I have them under the light 24/7. Sprayed the dome
7:30pm Sprayed the Dome to keep humidity going on the dome.
2/2/2023
Day 1 of Germination
Sprayed the Dome in the morning
Sprayed the Dome in the evening
2/3/2023
Day 2 of Germination
Roots are starting to come out the bottom of the root riot plugs and the heads are slowly popping out of Number 4 just below the surface.
Afternoon- Number 4 has popped up
Evening- Number 3 has popped up as well. Happy Dance!!
2/4/2023
Day 3 - Germination
Surprise Surprise Surprise- all 4 have now poked their heads up.. Happy day!! 100% Germination succeeded.
Now major milestone to track is how many are female and how many are male.
I will take look at the roots this afternoon/evening and see if they have enough root to go into the cloning machine for the next 7 days before they go into their Hydro Pods.
Day 3 - Germination - Evening..
Roots looked good and they were tall enough to make it into the cloning machine.
Now that they are all in the cloning machine I have switched the lighting to veg state 18 on 6 off.
2/5/2023
Day 4 - Germination - Morning
All the Ladies (fingers crossed) looking great stretching nicely and look nice and green, Photo synthesis underway....
UPDATE!! After a very interesting POD cast on FSTS by Dr. Bruce Bugsbee from Utah University, I have shifted my lighting to 24 hours on through seedling and then I am going to shift to 20 hours on the rest of Veg.
2/6/2023
Day 5 - Germination
While Checking on my conditions inside the new tent last night, I found that the Humidity was down to 39 Percent. I added an AquaOasis Cool Mist Humidifier, the reason I selected this humidifier is that I needed one that could be turned on and off utilizing my Inkbird Humidity Controller IHC200 that I have my Pro Breeze Dehumidifier currently running with.
Root structures are starting to get there about 1/4 of an inch.
2/7/2023
Day 6 - Germination
Everything seems on track more roots poking out of each today. They are each getting a little taller as well.
Checked in the evening and number 3 was drooping the Root riot plug on the bottome was dry and the roots were not in the water yet. I raised the water just enough that the longest root that was sticking out is now hitting the water.
2/8/2023
Day 7 - Germination
Everything looked good while checking in on them this morning number 3 is now full up and no droop again.
2/9/2023
Day 8 - Germination
T-2 days until Plant into Forever Pods and we start week 1 of Veg .. :-)
Surprising thing to me is that number 1 and 2 were later in popping then 3 and 4 but the roots are growing longer in 1 and 2.
2/10/2023
Day 9 - Germination
Number 1 and Number 2 are definitely ready for transplant today.. Based on how they were yesterday and where they are today I am hoping by tomorrow 3 and 4 are ready. Today they look to me where 1 and 2 did yesterday.. I really hope 3 and 4 catch up by tomorrow since..
T-1 day until transplant to new/ final home for grow.
Need the roots long enough to have some clay down in the basket to keep the root riot out of the water and only roots in the water..
2/11/2023
Day 10 - Germination
Today they got placed in thier forever Home, 7 days from Sprout and 7 days until Week 1 Start.
PPM- 180 this is water out of the Tap
Temp Water: 70.7
Temp Tent: 77
Humidity: 40% I have a humidifier going 24/7 to try and bring this up.. I also have Humidity Domes on each plant.
2/12/2023
Day 11 - Germination
Sprayed the domes, all are looking good.. Nothing much to do at this phase but Keep monitoring the PH level in the system and making sure they have a comfortable home.
T-6 days until Week 1 start
2/13/2023
Day 12 - Germination
Sprayed the domes, They were looking a little yellow today so I moved the light down to assist. Nothing much to do at this phase but Keep monitoring the PH level in the system and making sure they have a comfortable home.
T-5 days until Week 1 start
2/14/2023
Day 13 - Germination
Sprayed the domes, They were looking a little Florissant yellow today, with what looks like slight burn on the tips, I talked with a fellow grower and we agreed that It was probably that I was drowning them, Yes you can drown you plants even in Hydro, but only early on.. :-) It usually happens with the water being too high, which soaks not only the roots but the medium (root Riot plug in this case). I lowered the water from touching the bottom of the pot to about 1" away. This will probably take 3-4 days to resolve. I will continue my daily monitoring.
T-4 days until Week 1 start
2/15/2023
Day 14 - Germination
Sprayed the domes, continue my daily monitoring they look a little darker green instead of lime green now that I lowered the water levels in the system, so I think that I might have resolved the issue but it will take a few days for recovery to happen.
T-3 days until Week 1 start
2/16/2023
Day 15 - Germination
I looked in on them this morning, 3 and 4 look like they are doing well and recovering nicely. Number 1 not so much it has brown spots on the leaves, this very well can still be a side effect of the overwatering but I decide to go ahead and add Nutes earlier than I was planning just incase. I was going to wait until Saturday but I think intervention is necessary now especially after drowning them early on.
I added 1/2 what I am planning on adding for week 1 start. I also think I am going to adjust my chart to add 1/2 2 days after plant from now on. I don't think it would hurt it to have some Nutes to pull from.
.25ml/Gal Calmag = 12.5ml
1ml/gal GH FloraMicro= 50ml
1ml/gal GH FloraGro = 50ml
1ml/gal GH FloraBloom = 50ml
T-2 days until Week 1 start = I will drain the system and start it over on Saturday with Week 1 Nutes.
2/17/2023
Day 16- Germination
I didn't even want to post today after looking in on them this morning, 3 of the 4 are now showing signs of dronwing.. Brown spots on the leaves, the water levels were still too high.. I drained about another inch out of the tanks.. Will see how quick they recover.. I start week 1 tomorrow and will have to ensure my water levels are at least 1" away from the basket on this round.

Likes
24
Share


@TerpTurtle
Follow
Took some clones, Transplanted into 25 gallon pots, Flipping to flower
Likes
4
Share


@Ryno1990
Follow
Snow Panda fast flowering photo starting veg from seedling stage she grew weird as she is missing one side of her cotyledon leafs as they did not grow
The Snow Panda is starting t9 come along good at the ending days of week 1 of veg now in a 1 gallon pot
Likes
3
Share


@CannaBossBizz
Follow
The Moby Dick ist gettin bigger every day. Lovely plant.
Did top her and some LST so every branch's gettin enough light. Stay tuned for more 🤙🏽
Likes
22
Share


@GrowGermany
Follow
I am very satisfied with the result. despite the difficulties she has grown very nicely.
i have learned a lot and am already looking forward to my next grow.
thank you for your support and advice.
Likes
2
Share

@Josers
Follow
Week 2
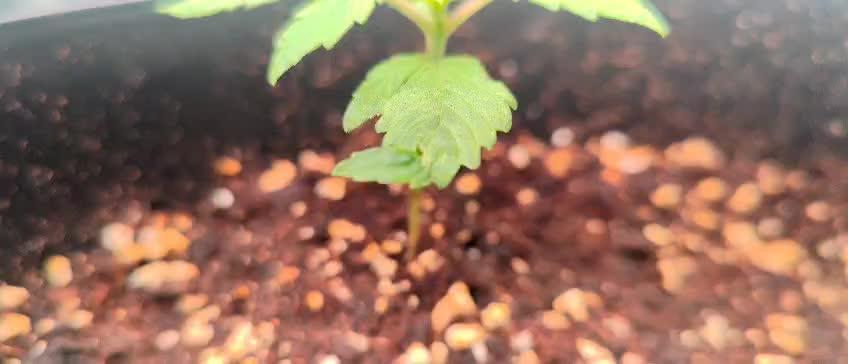
I finally made it to get a QB panel led. So i hope these lights help me to grow more efficiently
Seedling number 1 is growing faster than number 2 but both seem to be healthy.
I water two times a week with 2Lts each plus Hesi's root complex and Calmag


Likes
57
Share


@nonick123
Follow
Día 34 (27/05) Riego con 750 ml H2O + Regulator 0,15 ml/l + P-Boost 0,5 ml/l + CaMg-Boost 0,25 ml/l + TopBooster 0,2 ml/l - pH 6.2
Día 35 (28/05) Riego 750 ml sólo H2O pH 6.2
Día 36 (29/05) Riego con 750 ml H2O + Regulator 0,15 ml/l + P-Boost 0,5 ml/l + TopBooster 0,2 ml/l - pH 6.2
ANDF es superdemandante de Magnesio. Como aún está en preflower, hago una aplicación foliar de sales de Epson a 4 g/L
Día 37 (30/05) Riego 750 ml sólo H2O pH 6.2
ANDF está creciendo muchísimo! Una genética muy potente!
Día 38 (31/05) Riego con 750 ml H2O + Regulator 0,15 ml/l + P-Boost 0,5 ml/l + CaMg-Boost 0,25 ml/I +TopBooster 0,2 ml/l - pH 6.2
Día 39 (01/06) Riego 750 ml sólo H2O pH 6.2
Día 40 (02/06) Riego con 750 ml de Té de Compost de Floración
ANDF no para de crecer y demandar Magnesio! Le aplico 4 gr de Sales de Epsom como Top dress
💦Nutrients by Aptus Holland - www.aptus-holland.com
🌱Substrate PRO-MIX HP BACILLUS + MYCORRHIZAE - www.pthorticulture.com/en/products/pro-mix-hp-biostimulant-plus-mycorrhizae

Likes
3
Share


@Gbomb
Follow
Trichromes all milky and a little amber - plants are going to be in complete darkness until they get chopped. Will update harvest when complete

Likes
Comments
Share


@Cannabisii
Follow
The GG#4 is in a 5 gallon pot while the GSC are in 3 gallons. All of them are looking great! The GSC look super healthy compared to the first round.

Likes
9
Share


@Arcadios
Follow
I think this is the first week where I've started to have some issues on just about every plant. The buds still look awesome and healthy, but I'm being a bit paranoid that the rest is gonna go down quick. They all have leaves that are starting to yellow a bit.
Temp: Trying to push the temp up. Its 70-80 but usually closer to 70.
Humidity: Closer to 60, trying to get it down with a new dehumidifier soon.
Critical Kush - Minor yellowing
Quarter Pounder - Had some spots on this on Thursday and starting to yellow. I skipped the Dr Earth Life in the previous feeding because it looked like it had some burn, but now I think its suffering.
Amnesia - On Sunday, after watering on Saturday, the Amnesia seemed to take a pretty big hit. A lot of the leaves dried up and got crispy and I'm not quite sure why.
Check out the video for an overview of some of the issues and let me know if you have suggestions!

Likes
18
Share


@Onlygrow99
Follow
Bueno pues el sábado 4 y el domingo 5 de marzo realice las defoliaciones y el lunes 06/03/23 puse las luces a 12/12 para inducir la floración.
Las autos ya estaban en prefloración hace 1 semana. Son 12 plantas en macetas de 7L con 44 días desde que se empezaron a germinar las semillas.
Uso la gama completa de nutrientes, Boom nutrients
Están bajo la luz del panel LED 780W ResinX de GBLIGHTING
Pretendo poner una malla de scrog y en floración avanzada otra, para sujetar todo bien.

Likes
83
Share


@RunWithIt
Follow
What a fun experience! This was my first time trying a mixed grow style of synthetics and organic. I think I may have found my new go-to strategy. This definitely wasn't a perfect run by any means - as a matter of fact, I botched the feedings earlier in her life. However this grow definitely taught me a lot more about how to treat this strain properly. Now I'm running her clones in the 3x3x6. So the legacy will continue! Let's see how this strain does during the summer months!
Cheers everyone! This has been an awesome grow. What I'm lacking in yield, I yet again make up for in quality. And I don't think yield will be an issue with the clones, they're week 6 veg - and quite massive!
- RWI out!! 😁 😶🌫️🤑
Likes
37
Share

@PEAKYPLANTERS
Follow
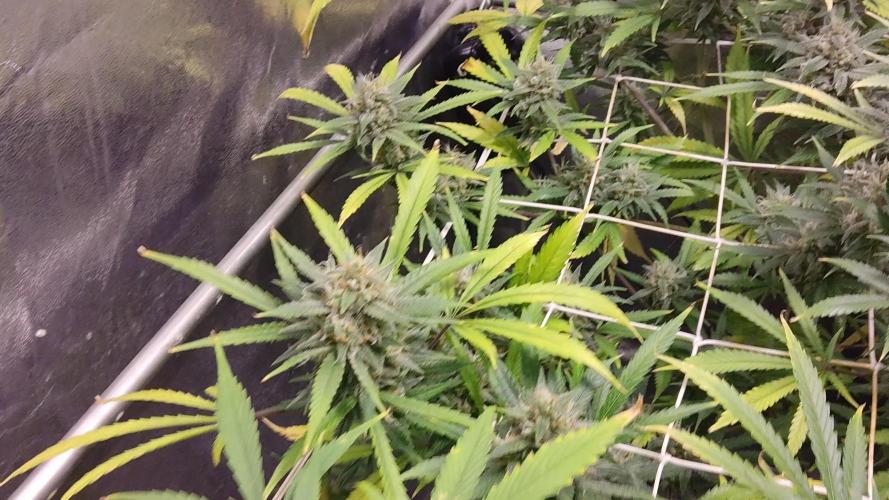
My baby does not pass well enough for an automatic, I would say that I could not ask for more
Likes
31
Share


@bybil
Follow
я давольно их ростом , они активно набирают тело, сняла несколько огромных листов с Ниагары растение отреагировала без стресса
рок машин сделали лст
ниагара оставили рости свободно, так как коллы пробиваются активно через листву самостоятельно

Likes
56
Share

@Growbody
Follow
Hallo und herzlich willkommen zum Ende meines Grows mit der Auto Jack, Jacky White 6th Gen. von Paradise Seeds. Die "Eltern" sind Jacky White x Ruderalis, die "Großeltern" sind Jack Herer und White Widow. Sie ist dadurch eine 75% Sativa mit zitronig-fruchtigen Aromen, genau mein Ding. Es freut mich sehr, das mir die Samen in einer sehr schönen Verpackung freundlicherweise von Paradise Seeds zur Verfügung gestellt wurden. Das war für mich der Ansporn, eine möglichst genaue Beschreibung des Growverlaufs aufzuzeichnen.
Die URL des Strains findet ihr hier:
https://www.paradise-seeds.com/de/product/auto-jack/
Für diesen Grow verwende ich den 15Liter WideVersion Stofftopf von ROOTiES, die Sonnenerde Bio Hanferde, den BioBizz Wurmhumus, Sonnenerdes Bio Faser, BIONOVA + zamnesias MonsterBud Mix Living Soil, zamnesias Smast Start und Plagrons Seedbooster Plus. Hat sich alles prima bewährt.
Tag 106: Mondhöchststand, Ende der Erntezeit, Anfang der Pflanzzeit am Blütetag, ein Optimaler Erntetag. Die Auto Jack, Jacky White 6th Gen. von Paradise Seeds wird geerntet. Letzte Woche habe ich eine kleine Schimmelstelle bei Ihr gefunden, zum Glück wurde es nicht mehr. 160 Gramm Nassgetrimmter Buds sind es geworden. Die liegen jetzt im Keller in DryFerm Bags zum Trocknen. Nächste Woche gibt's mehr Infos.
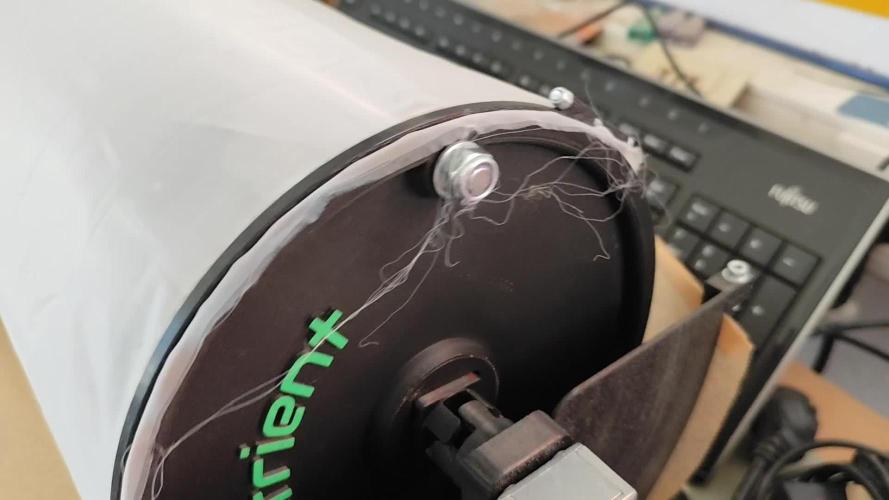
Tag 114: Das ist meine Trichomtrennmaschine. Da kommt aller Verschnitt rein mit ein paar Stängeln. Ich habe ein sehr feinmaschiges Netz gewählt, damit wirklich nur die Trichome durchpassen. Das dauert zwar viele Stunden, aber es ist ein sauberes Ergebnis. Die Maschine hab ich im www gefunden, Man kann den Bauplan für einen 3D-Drucker bekommen oder die fertig gedruckten Teile mit den wichtigsten Schrauben und Metallteilen, außer dem Motor mit Getriebe, dem USB-Spannungsregler und den Gewindestangen, die in jedem Baumarkt zu haben sind. Ja, und eben dem Netz. Da kann jeder seine bevorzugte Maschenweite dazukaufen. Die 3D-Teile haben vor ca. 1 Jahr ~80,- € gekostet, wenn ihr die Adresse braucht, schreibt das in die Kommentare bitte. Das Netz hatte ich glaub 150 Maschen(?) für 10,- €/m², der Schneckengetriebemotor (ohne Plastikteile!) mit dem USB-Spannungsregler haben ~45,- € gekostet. Die 2 Gewindestangen kosteten ~10,- €. Das Ergebnis nach einigen Stunden Sieben könnt Ihr auf den Bildern sehen.
Tag 216: Ich habe vergessen die Gläser zu fotografieren, sorry. Es waren mal 3 Gläser a 750ml, ihr seht, es schmeckt mir wirklich sehr gut.
Schön, dass du reingeschaut hast. Ich freue mich, dass du dabei warst 👋😎

Likes
16
Share


@Diips
Follow
In size they grow ;)
attempting to keep mainlining and light defoliation.
biggest plants starting to flower up. gonna feed her with bio pk, next watering
sensing that the other plant is a little week behind.
24-05 sweet cheese got her first dose of biopk

Likes
92
Share


@Krisis
Follow
04/09/24. Time to start week 7.
Not much to say other than about the girls themselves. I haven’t changed anything other than I think I’ve given them the last feed yesterday. I’m thinking they’ll be done within 2 weeks and I’ve read that it’s best to give water the last 2 weeks. Hope this is the right thing to do.
The buds are thickening up and the pistols are getting pretty dark and starting to recede.. well.. on two of the girls that seem the most similar to each other. The middle plants much frostier, smellier, and skinnier buds- with lighter pistols. All are becoming colorful.
It’s smelling very spicy with like rotting fruit or something currently. The smells very strong through the house.
I don’t think these will be the biggest buds, but they are definitely dense af and lovely and smelly.. oh and sooo sticky wew
Guess that’s it until the start of week 8 flower. We’re gettin close!
My video for the week won’t load up for some reason. Idk what the problem is.
Update: don’t be an idiot and run out of space on your phone. I made space and it uploaded LOL. Derrrrrrr
