
Likes
Comments
Share


@Optico45
Follow
All seems well so far. Had a nice sprout towards the end of week 2. All six plants now how adult leaves. Raised the CO2 levels this week. Plants seem to be enjoying it.

Likes
10
Share


@Turbo420
Follow
This week I did a single topping at the 5th node. Along with this I applied low stress training and tucking to expose the new growth.

Likes
91
Share


@DreamIT
Follow
🌵🐵 PEYOTE GORILLA BY SEEDSMAN 🐵🌵
🌵 19.2 all right, yeah
🌵 20.2 ...
🌵 21.2 ...
🌵 22.2 ...
🌵 23.2 ...
🌵 24.2 after a week of vacation, here we are again with the updates. everything is going well, at the weekend I provide for the transfer and between 2 to send them into bloom
🌵 25.2
____________________________________________________________________________________
📜 A look at the details of what I'm growing 📜
🌵🐵 Peyote Gorilla🐵🌵
⚧ Gender
▪️ Feminised
➰ Genes
▪️ 60% Indica / 40% Sativa
🎄 Genetics
▪️ Gorilla Glue #4 (Chem Sister x Chocolate Diesel) x Peyote Purple (Bubba Kush purple pheno)
🚜Harvest
▪️ 600 g/m²
🌷Flowering
▪️ 65 - 70 days
✨THC
▪️ 26.0%
✅CBD
▪️ 1.0%
🏡Room Type
▪️ Indoor
🌄Room Type
▪️ Outdoor
🕋Room Type
▪️ Greenhouse
🎂Release Year
▪️ 2019
__________________________________________________________________________
📷🥇 Follow the best photos on Instagram 🥇📷
https://www.instagram.com/dreamit420/
🔻🔻Leave a comment with your opinions if you pass by here🔻🔻
🤟🤗💚Thanks and Enjoy growth 💚🤗🤟

Likes
11
Share


@Kirsten
Follow
18.1.25:
Gorilla 🦍 Cookies 🍪 is firmly in week 2.
The plant is looking very good, sturdy.
I have been feeding with about 200 ml of dechlorinated water PH'd to 6.3 with the following nutrients;-
♡ 4ml Biobizz Bio-Grow
♡ 4ml Biobizz Fish Mix
♡ 2ml Cal-Mag and
♡ 1/4 g sprinkling of Ecothrive Biosys.
Trying to give the extra boost of Nitrogen to keep vigorous growth, and maintaining the nice lush green 💚 Cal-Mag was used from the beginning of this week.
Thanks for checking out my diary 🍃 ✌️
Likes
42
Share


@TerpTurtle
Follow
12 day dry @ 58-63RH & 60-66F in blacked out dry tent | Glass Jar Cure
LOUD N STANKY, opening a jar gives you the duck face funk face
Early taste test & this Bud KOs leaving you in major terp sweats! Hitting like a Sumo wrestler sitting on you tickling all over! Flower hits with overwhelming squeeze & flavor like drinking a smoothie!
Breaks down chunky, greasy & has a vivivd dark purple color.

Likes
7
Share


@Ryno1990
Follow
This amazing looking girl Purple Goat Cheese is so stinky it is overpowering all the other smells in the tent with the strongest sour smell iv smelt on a plant she is ending week 5 here an will prob go another week or so before she starts her flushing for harvest

Likes
15
Share


@NiBaMeCa420
Follow
another week has passed and we made some changes in the nutrients
pH Perfect Sensi Bloom Part A and part B are now doubled and we added b-52 again
this brand of nutrients is pretty awesome and they include a nice app to keep track of your nutrients schedule week by week
we use the expert line of these nutrients which include 11 bottles of awesomeness so the app is very useful if you are in the market for new nutrients to feed your lovely ladies we suggest to give this one a try
And to make this week even more awesome (NOT) we found out that we have Trips and we are using predator bugs to destroy these little fuckers
Which is totally organic and vegan😂
we will update you on this shit next week
Best wishes
Nibameca


Likes
100
Share


@AsNoriu
Follow
Day 85. Few days ago I trimmed most leafy Northern Lights and she loved it ! So tomorrow two most mature Alaskan Diesels go to chop room. All other plants will get defoliation too, will have space to reach all plants.
Third Alaskan Diesel is catching, but he is a week behind.
Green Cracks will fall in 2-3 weeks, Northern needs at least 4 ....
Will move my Bruce Banner's to main tent.
I still feed Northern , but all other plants are on pure water.
Day 86. Rearranged all girls, trimmed them heavy, gave new positions.
One Northern lights is still in dark part of tent, I think I need 7-10 days til last Alaskan Diesel will mature and it will be only 8 girls left.
Brought other diaries girls to main tent and added Mars Hydro SP150 as supplemental side lightning ... They miss height a lot compaired to older plants, so I hope it will help a bit . Never used lights that way before ...
Happy Growing !!!
Likes
36
Share


@MadeInGermany
Follow
Info:
Unfortunately, I had to find out that my account is used for fake pages in social media.
I am only active here on growdiaries.
I am not on facebook instagram twitter etc All accounts except this one are fake.
Have fun with the update.
Flowering day 8
since time change
to 12/12 h.
Hey everyone ☺️.
As the flowering begins you can already see a clear stretch of the lady :-).
Yesterday 2 g GHSC Bio Bloom per l coco were added.
In 2-3 weeks I will add another 1 g per liter 👍.
The tent was cleaned and everything was refilled.
Have fun with the update.
Stay healthy 🙏🏻
You can buy this Strain at
https://www.barneysfarm.com/blue-cheese-34
Type:
Blue Cheese
☝️🏼
Genetics:
Blueberry
X
Original Cheese
👍
Vega lamp:
2 x Todogrow Led
Quantum Board 100 W
💡
Bloom Lamp :
2 x Todogrow Led
Cxb 3590 COB 3500 K 205W
💡💡☝️🏼
Soil :
Bio Bizz Coco
☝️🏼
Fertilizer:
Green House Powder Feeding
☝️🏼🌱
Water:
Osmosis water mixed with normal water (24 hours stale that the chlorine evaporates) to 0.2 EC. Add Cal / Mag to 0.4 Ec Ph with Organic Ph - to 5.5 - 5.8
Likes
Comments
Share


@Rizzokicksbuds123
Follow
New home bigger pots finish of this training and flip them


Likes
8
Share


@Professor_Daank
Follow
SPREADSHEET: Jack's vs. Advanced:
https://docs.google.com/spreadsheets/d/1HtHnZOxMHtBK5DFQjpBun2lbhDxYVhI7lJaq4W6xbyk/edit?usp=sharing
-----------------
This week's recipe:
Jack's Hydro 5-12-26 @ 3.6g
Epsom Salt @ 1.2g
Calcium Nitrate 15.5-0-0 @ 2.4g
Fish Sh!t - 6ml
B-52 - 8ml
Rhino Skin - 8ml
Voodoo Juice - 8ml
Rapid Start - 1ml
-----------------
9/28:
Well, Jacks is amazing. EC solid. pH solid. Colors are great. Leaves are bouncy.
So far, Jack's is very impressive and I see no reason why it can't slay it like Advanced does. Much cheaper and the results, again, so far... are just wow.

Likes
32
Share
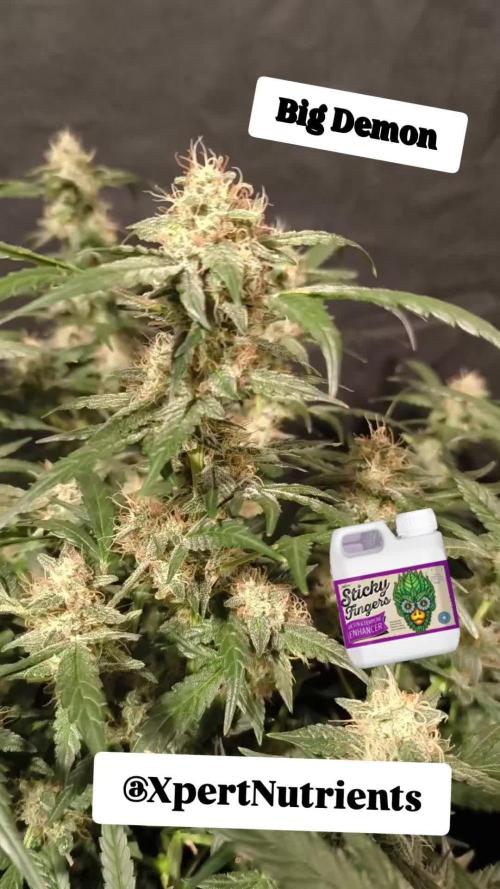

@DevelGrow
Follow
Hallo Freunde 👋 Big Demon von Divine Seeds ist 70 Tage Alt! Sie hat einen interessanten Duft am Start und ist weiter als gedacht!(Aussehen) Die Trichome sind an allen Buds, auch innerhalb und unterhalb, komplett milchig und Bernstein! Also wird jetzt nur noch Wasser gegeben und dann geerntet! Persönlich finde ich sie wunderbar gelungen,vom Aussehen, klar durch anderen Schnitt hätte man nur colas bauen können! Wird demnächst mal ausprobiert! 😉 Keep Green and grow High ✌️🍀💚🍀

Likes
9
Share


@shabazz411
Follow
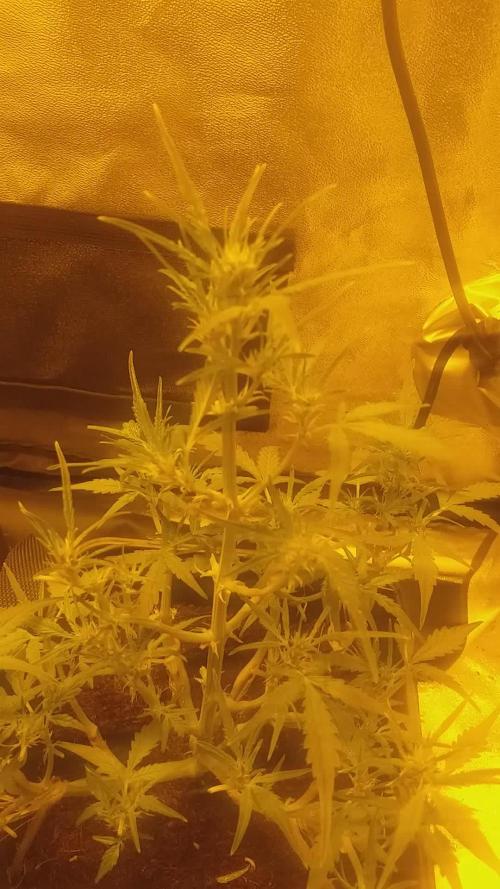
This was a mild start to the week one plant is bursting in growth and the other plants are on a medium to slow growth increased ppm on the other slow growers to catch up other then that were pest free and very healthy.

Likes
11
Share


@emeraldlabs
Follow
First week of flower went smoothly. Some stretch the first week but nothing crazy. She was thirsty this morning and watered a few hours before video/photos, hence the droopy bottom leaves.
First feeding occurred this week. Will increase feeding concentrations if major stretching occurs and switch out grow big for tiger bloom as flowering progresses.
Will lower light a few inches this week and see how she responds. Will slowly decrease humidity during flower to increase vpd. Lastly, will start to defoliate as we move through flower.
Video/photos taken 56 days after breaking soil, day 7 of flower.


Likes
22
Share


@BoboLacetti
Follow
I'll add pictures when it's timed and dried. It's just hanging in the dark


Likes
8
Share


@LittleBigTrees
Follow
Have her a big defoliating to allow light to the bud sites and to reduce humidity in the tent , she took it well and is growing really fast still.
The smell is very old school skunk type smell at this point


Likes
7
Share


@OwlGang_Uk
Follow
Gorilla Glue #1 - Harvest Comment - I Am Very Satisfied With What I Got, I got 3 ounce 7 grams - I Uses Advance Nutrients PH perfect In veg then I switch to the iguana juice organic juice for the flowering stage. I notice a much more slower growth when I switch to organic nutrients.00