
Likes
Comments
Share


@Superfly0303
Follow
Honestly recommend special queen, some have thos quite loud weed, almost garlicky taste to them. Because I run a lot of fruit strains, that's a pleasant detour.
If anyone can recommend any great fruit strains I'd really appreciate it.

Likes
6
Share


@Young_agronomist
Follow
Харвест был тяжелым и занял 3 часа , так как она была огромной .
Как итог 1350 г мокрых и протримленых шишек . Все цветы отлично созрели , даже те , которые находились ниже . Я дал ей достаточно времени созреть и она меня очень удивила
✊🏻🔥

Likes
361
Share


@Ju_Bps
Follow
Hello my friendly growmies 👩🌾👨🌾🌲🌲,
Nothing special this week, the cute ladies continue their maturation, and start to be completely purple 💜😍
I'll be so sad when I'll chop them 😞 , but probably happy when I'll try this beauty 🙂🙂🙂😋😋😋.
Smeel fruity and frosty 😋 ❄️ 🍌
💦 2 watering this week 2.75l/plant
Water + Cannazym + Sugar Royal
Water + RQS Bio Flowering Booster
@PH6
RQS Bio Flowering Booster - Week 7
THICKER 1. 2 ml/l
BIGGER FLOWERS 1 ml/l
SWEETER FLOWER 0.8 ml/l
Probably the last nutes watering.
The RQS liquid kit, look doing the job, not overfert or deficiency sign for the moment.
Trichromes look milky, end probably in one or 2 week,
Next watering will be flush.
Lamp @100% and start to be really close to the plant, but not burning sign for the moment.
Thanks community for follow, likes, comments, always a pleasure 👩🌾👨🌾❤️🌲
Merry Xmas to the community 💜👨🌾👩🌾🎅
Mars Hydro - TS1000 💡💡
https://www.mars-hydro.com/ts-1000-led-grow-light
Mars Hydro - FC3000 💡💡
https://www.mars-hydro.com/fc-3000-samsung-lm301b-led-grow-light
RQS - Fat Banana Auto 🍌🍌🌲🌲
https://www.royalqueenseeds.com/autoflowering-cannabis-seeds/487-fat-banana-automatic.html
Processing
Likes
29
Share


Likes
19
Share


@JeyGanesha
Follow
Siamo all'ultima settimana.il flush è iniziato da un paio di giorni💪👍🕉️10/15 giorni ancora e via......in questi ultimi giorni sta buttando fuori dei profumi intensi e vedo che sta tirando fuori dei colori favolosi. ... non vedo l'ora di assaggiarla Pre sentire se funziona bene come terapia😉💪💚💛👍
Likes
20
Share


@Bread_n_Buds
Follow
And here we are at week 4. Yes, she is our favorite Biscotti who brought me so much luck in the contest and beyond.
I really hope it becomes purple, purple like that one but I have news that the other phenotypes are also scary. After this week she is going into flowering, in the meantime, take a look, she has vegetated well, she has just been decanted into an air pot and is going into flowering.
You can find it on Zamnesia https://www.zamnesia.io/it/9484-zamnesia-seeds-biscotti.html
If you want some more info this is the description of Breeder Zamnesia Seeds
ZAMNESIA SEEDS - BISCOTTI: DELICIOUS BISCUITS TO EAT AND SMOKE
Spice up your grows and add the Biscotti strain to your cannabis seed collection. It offers the best qualities of marijuana: potency, productivity and intense flavors. Biscotti is made up of South Florida OG and Gelato genetics and contains 22–25% THC, enough to make your body vibrate from head to toe. The genetic profile of this strain is 80% indica and 20% sativa, with effects that will make you feel relaxed and creative at the same time. Plants of the Biscotti variety produce dark green leaves and numerous pistils, while the buds tend to be small and compact. Towards the end of the flowering phase, when nighttime temperatures drop a few degrees, you may also notice purple hues.
GROWING BISCOTT: FAST FLOWERING
Biscotti won't test your patience. You can break out your scissors and start harvesting her after about 8–9 weeks of flowering indoors. The plants are robust and vigorous and grow well both outdoors and indoors. Under the sun, you can expect heights of 130–170cm and yields of 800g/plant ready in October. Some experienced growers have reported achieving higher yields. So, the results will depend on your skills. Indoors, Biscotti typically reaches a respectable height of 130–150cm and offers yields of 550–650g/m².
FLAVOURS, FLAVORS AND EFFECTS OF BISCUITS: DELICIOUS AND COMPLEX
Once the drying and curing is finished, you will finally be able to taste the fruits of your labor. Biscotti is definitely one of our tastiest varieties, producing aromas of vanilla and honey biscuits contrasting with the classic diesel notes. A great addition to the kitchen where you can prepare delicious baked desserts. Being very potent and producing effects that can overwhelm the user, we advise you to consume it with caution to avoid becoming overwhelmed. This strain offers a relaxing high for the body, while the creative juices will start flowing in the mind.
You absolutely must try the new F1 suits from Zamnesia
https://www.zamnesia.io/it/35-semi-cannabis/634-semi-f1
Music of the week www.radionula.com
432hz frequencies 12h for my palnts too.
Feeding Plagron Alga Grow https://plagron.com/en
Bread_n_Buds - Official Zamnesia Grower - Exclusively.


Likes
23
Share


@SonomaSungrown
Follow
• French Macaron got planted into her 30 gallon fabric pot packed with HEAVILY-AMENDED Roots 707 soil.
– No more BS soil for me. Back to the good stuff!
• Took clones of the Chem Brûlée and Pineapple Meatball to determine sex
•Those girls are extremely root bound at this point... but don't want to accidentally transplant a male into the BIG pots since I am on a plant count restriction (6 mature plants in California)
Here's my Super Soil Recipe:
Sonoma Sungrown
2021 Photoperiod Soil Recipe
Makes ~8 cubic feet of Supersoil (enough for 3x30 gallon smart pots)
7 cubic feet Roots 707 Potting Soil
.5 cubic foot worm castings
1.25 lbs. bone meal
1.25 lbs. fish bone meal
2.5 lbs. high phosphorus bat guano
2.5 lbs. blood meal
1.5 cups oyster shell
1.5 cups kelp meal
1.5 cups alfalfa meal
1/3 cup Epsom salts
1/2 cup agricultural lime
1 cup Azomite
1 tbsp granular humic acid
1 tbsp mycorrhizae (mykos)


Likes
13
Share

@LST420
Follow
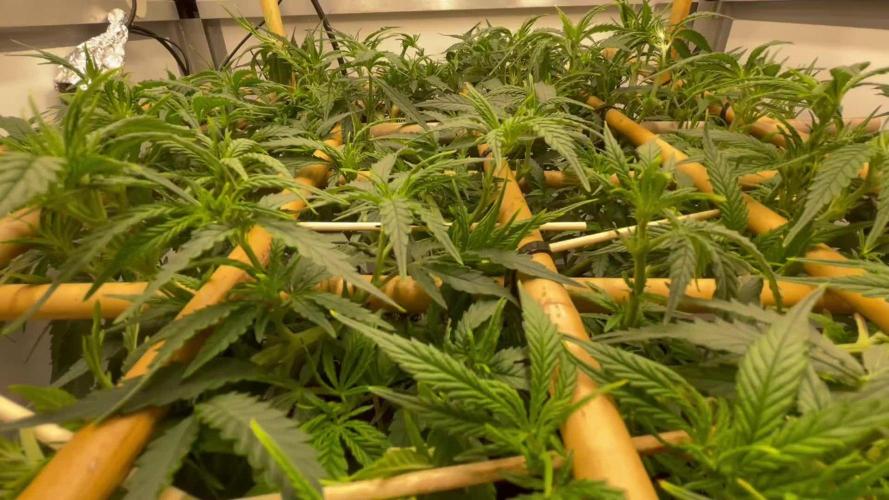
Week 10
The plant is looking nice and green but I wasn't expecting such a long grow period. I really wanted to fill the entire screen this time more than with the last grow (Mokum's Tulip previous diary). I might get temperature issues in the flowering period with the incoming spring and summer we'll see, no stress. 😎
And I discovered that if a shoot isn't long enough for the next square you can easily fixate it horizontally by inserting a kebab stick over it, it's upward pressure makes it stay in place.


Likes
2
Share


@Gembel94
Follow
Grow-Report – Blütewoche 1 (Tag 1–7)
Strain: Neon Runtz (Wizard Trees)
Medium: Coco, 15 L Stofftöpfe
Lichtsystem: Spider Farmer G4500 + UV/IR-Supplement Bars
Steuerung: Spider Farmer Controller + Meross WLAN-Steckdosenleiste
Lichtzyklus: 12/12 (18:00 – 06:00 Uhr)
Grow-Philosophie:
• Die ersten 2 Wochen der Blüte werden als Stretch-Phase betrachtet
• Trichomen-Beurteilung ab Woche 10
• Ab Woche 8 kein Dünger mehr bzw. nur noch in minimaler Dosierung
⸻
Düngung
Basisdünger:
• Emerald Harvest Grow/Bloom + Cal-Mag
• Dosierung: +0,25 ml/L über Schema
Zusätze:
• PowerZym (Hesi, enzymatisch): Unterstützt Wurzelhygiene & Substratabbau
Gießverhalten:
• Tägliches Gießen mit ca. 30 % Drain
• pH Gießwasser: 5,8 / Drain: 6,1
• EC Gießwasser: 2,0 / Drain EC: konstant bei 1,3 → sehr gute Aufnahme
⸻
Lichtsteuerung – Supplement Bars
IR-Licht (Spider Farmer Bar):
• Aktiv: täglich 06:00–06:30 Uhr (30 Min nach Hauptlicht-Aus)
• Funktion: End-of-Day-Treatment zur Unterstützung der Phytochrom-Umstellung → gezielter Stretch
• Beobachtung: Erste Anzeichen von Internodienstreckung ab Tag 4, keine Überdehnung
UVB-Licht:
• Aktuell deaktiviert
• Geplanter Einsatz ab Blütewoche 6 zur Steigerung der Trichomenproduktion
• Steuerung erfolgt getrennt über Steckplatz mit Zeitschaltung (z. B. 20:00–22:00 Uhr später)
⸻
Pflanzenzustand & Entwicklung
• Pflanzen zeigen aktives Wachstum, Aufrichtung nach Lichtstart
• Keine Mängel oder Blockaden erkennbar
• Drainwasser ist klar, Wurzeln vital (unterstützt durch PowerZym)
• Geruchsentwicklung gering, aber sichtbar beginnender hormoneller Umschwung
⸻
Ausblick auf Woche 2
• IR-Licht leicht reduziert (z. B. auf 15 Min gegen Ende der Woche)
• Vorblütenentwicklung und Struktur der Seitentriebe im Fokus
• Düngeschema bleibt stabil
• UVB bleibt weiter deaktiviert
• Beginnende Wuchsberuhigung wird beobachtet → Übergang zur generativen Phase


Likes
26
Share


@Mr_und_Ms_Lue_Roots
Follow
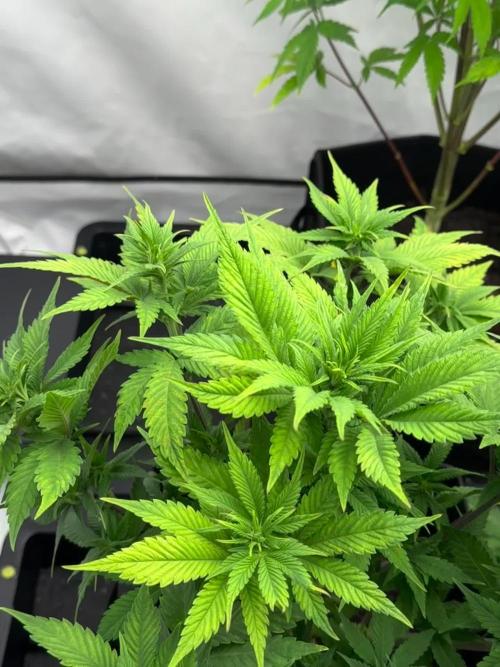
Herzlich willkommen in Woche 7
Im Moment sieht es sehr GESUND aus ^^ 😀
Der mS- Wert von 0,8 zu Anfang, war schon echt knirsch 😅 Gestern gemessen war der Bodenwert bei 0.7 mS
Daher haben wir die letzten 2 Tage erstmal mit PH- angepassten Destiliertem Wasser gegossen. Trinken tun sie wirklich gut. Düngen tun wir aktuell nicht.
Insgesamt freuen wir uns auf die kommende Woche und wünschen somit allen eine angenehme und erfolgreiche Woche!
VG ✌️
Likes
5
Share

@Bear_Grows_Green
Follow
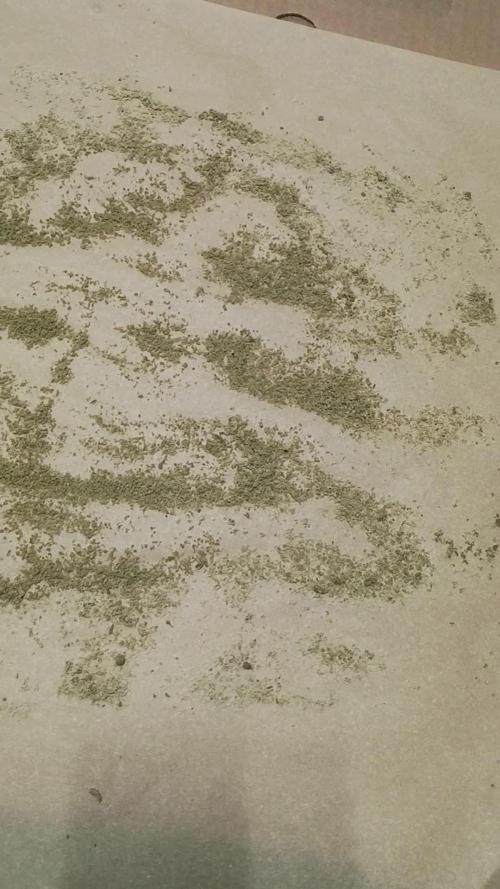
02/26 start of week 8 last week I harvested a branch off each got to taste em now #4 and #1 are omg good after the other 2 are ok but nothing special seeds on all of em mature seeds to harvesting fresh frozen 200 grams each plant on Saturday. Waiting one more week after that to chop and hang the rest
03/01 harvest around 200 grams each pheno fresh frozen and washed it. Huge learning experience didn't get what I was hoping at all but now I know I gotta have a better set up if I wanna make my own hash also got watered 10 gallons plain water
Processing
Likes
37
Share


@Hellhazard
Follow
Been feeding PH6.2 water with bud candy (sugars) for a few days and will continue until harvest. The buds packed in pretty well, as you can see one of them is around 14" tall and fat. Pictures dont do this plant justice in bud size because it is very leafy. The smell is mild, frosting is mild and I have another week to go at least..... todays feeding will get Final Finish additive to help wash nutrients out and hopefully get a fade happening.
Added a video today :)

Likes
13
Share


@MarryJuan
Follow
Been doing everything to slow them down so the others can catch up. Topped, FIN and defoliation constantly. Growing fast General Hydrophobics working great. Bruce Banner🍀💚

Likes
7
Share


@Bakeryguy420
Follow
really easy to grow mines came out
smelling like pine Barrens mixed with lemon balm , while my wives smelled like complete skittles chem gas like. Similar to mephisto white chem tbh. Yeild awesome some nice beautiful nuggets. If you notice on mines was super leafy so I ended up using the trimbag. I used it for not even 15 seconds and results show. Stuff like this investing into products like the trimbag and my herbsnow dryer has been saving my ass and time for many grows now. End product shows everytime. Will have and updated smoke report in matter of weeks. Can easily see me growing this one again but in a bigger pot ^_^. But for 1.5s gals ill take it really happy.
Likes
12
Share


@RookieGrowerTH
Follow
I transplant to 1 gl pot for veg
feed with clonex root solution
the rest is RO water with PH adjusted 6.3-6.5
The soil is from the previous grow but it's re amendment and set for a month before use
Likes
Comments
Share

@ibbzy
Follow
Tent has been heavily neglected....will pick up routine this week. Just been a busy week and hopefully settling in the next coming weeks.
Top dressed with 2-8-4 and worm castings
Have to up nutrients and sort out these deficiency's or PH you inbalance is what I think the culprit is