


Likes
Comments
Share


@BoboLacetti
Follow
I'm super happy and really looking forward to trying the Sherbelato. But I'll have to be patient for another 2 weeks



Likes
3
Share

@Organic_G
Follow
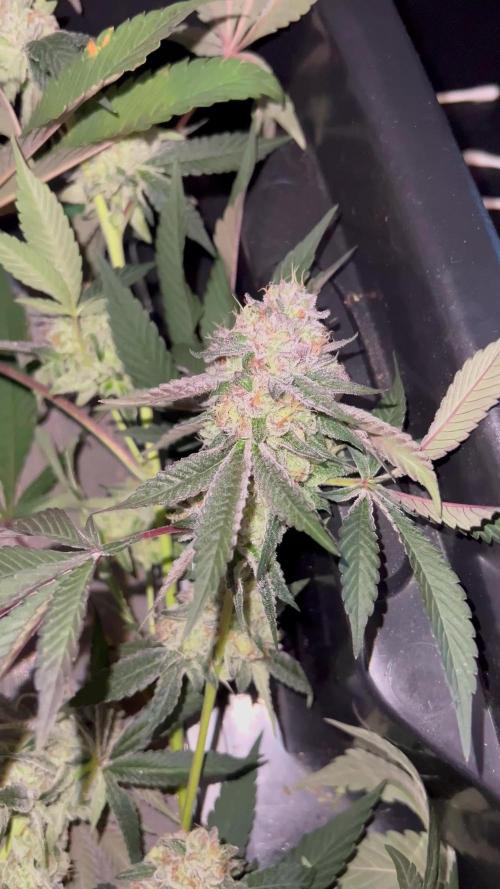
Das obere Drittel wird geerntet, sehen wunderschön aus.
Die Qualität wird von Grow zu Grow immer besser.
Super Juicy, richtig lecker und einfach wunderschön wie aus dem Lehrbuch.
Sind nun am Trocknen danach kommt der Rest ab.

Likes
18
Share


@ButterfliesLittleFarm
Follow
Hello Diary.
I am very happy that we are starting again. I’m going back to Automatics again. Many thanks to Royal Queen Seeds for sending me two of their new strains, Green Gelato Automatic and HulkBerry Automatic. So this is the first of two new diaries.
WHY GREEN GELATO AUTOMATIC?
Green Gelato Automatic is the autoflowering version of a legendary cannabis variety. The original strain is the lovechild of Thin Mint Cookies and Sunset Sherbet. It's one of the most aromatic strains available and produces monstrous levels of THC. Green Gelato Automatic contains both sativa and indica genetics. Her effects can be felt in the body and mind simultaneously. In fact, with a THC content of 24%, she's one of the most potent autoflowering strains you can find. She sends the mind into overdrive and makes a perfect smoke when writing, painting, or doing anything creative. The strain also boasts medicinal properties, taking the edge off pain, elevating mood, and raising appetite.
LET'S START FIRST WITH THE FARM SET-UP:
Box - Secret Jardin DS120W 120x60x178
Lights - MIGRO 200+
Ventilation - Blauberg Turbo - E 100
Fan - Oscillating Koala Fan
Humidifier - Beurer LB 45
Soil - BIOBIZZ Light - Mix
Pot - 11L Fabric Pot from RQS
Seed - Royal Queen Seed
Nutrition - BioBizz and RQS Organic nutrition
I apologize in advance for the detailed documentation, or the large number of photos, but I enjoy it, and I think it will help others around tracking their plants.
LET THE DIARY START OFFICIALLY:
10/06/2020. planting.
I have prepared everything I need for planting. The 11lit fabric pot I got from RQS, also Organic Boost Nutrition and Mycorrhizza from RQS, Soil is Light-Mix from BioBizz and of course the seed of the new strain Green Gelato Automatic. After adding 50g of pellets from Organic Nutrition and 5g of Mycorrhizze, I mixed everything well in the pot. After that I watered well and soaked the soil, I dug a hole with a wooden stick about 2-3 cm, I first put 1g of mycorrhize and then put the seeds inside. I lightly covered the hole with earth and put the pot in his new home. The temperature was about 25 degrees and the humidity about 65%.
14/06/2020. She sprouted.
After 4 days, Green Gelato came out. In the meantime, I sprayed the surface of the earth a little twice. The temperature is still around 26 degrees, thanks to the summer and the high temperature that enters the apartment anyway. I regulate the humidity with a humidifier, I maintain it around 60% -65%.
15/06/2020.
Her first photo shoot, I also watered her with about 2 liters of water, which I only regulated p.H. at 6.3 with Plagron, Lemon Kick.
19/06/2020. Day 1.
Green Gelato is officially one day old. On that occasion I took another photo shoot to celebrate this big day :).
24/06/2020. First Feeding
First feeding. She got a whole meal from BioBizz, Root-Juice, Bio-Heaven and Acti-Vera, p.H of water I regulated with Lemon Kick from Plagron.
25/06/2020. Day 7.
End of the first week. For now, everything is great. It is developing nicely, its conditions are almost perfect. Green Gelato will also have two roommates in the box, HulkBerry Automatic.
Green Gelato - Day 7. - 10 cm
I think that’s all for this week, I’m happy that it’s starting all over again, following its development and looking forward to what’s to come. See you next week.

Likes
4
Share


@FlowerPower559
Follow
This week was busy.. feeding, training, defoliation, trying to figure out how I was going to handle the branches now that they're outside of the bag. This is what happens when you wing it. Worked out well though!
Likes
10
Share


@GoldenWeedGrower
Follow
📅 D8 - 22/08
📜 Ready for pot, I will move her tomorrow
✍️ 0.3 EC
♒ 6 pH
🌊 0.2 L
📏 2 cm
📅 D9 - 23/08
📜 Pot Time
✍️ 0.5 EC
♒ 6.3 pH
🌊 4 L (moved in the pot)
📏 2 cm
📅 D10 - 24/08
📜 pH raise a lot. Keep attention
✍️ 0.5 EC
♒ 6.3 pH
🌊 4 L
📏 3 cm
📅 D11 - 25/08
📜 First true leaves
✍️ 0.5 EC
♒ 6.1 pH
🌊 4 L
📏 3.5 cm
📅 D12 - 26/08
📜 -
✍️ 0.7 EC
♒ 6.2 pH
🌊 6 L (added 2 L)
📏 3.5 cm
📅 D13 - 27/08
📜 -
✍️ 0.7 EC
♒ 6.2 pH
🌊 5.8 L
📏 3.5 cm
📅 D14 - 28/08
📜 So far so good. EC stable and pH raising. Medium watering.
✍️ 0.7 EC
♒ 6.2 pH
🌊 5.8 L
📏 4.5 cm
Likes
6
Share


@medicalhydro
Follow
Seed to harvest 10 weeks, fast grow and strong genetic.
Total light power 480
Rdwc and drip pots
Heavy and Sticky buds
Perfect smell

Processing
Likes
4
Share


@Grownewgenetics
Follow
We have these week try all ready 3 day's to upload all the diaries, information,videos and pictures, but we decided today to try without the app , also let's hope we get some pictures up these Time and all the Videos and pictures are on all our Media
Likes
19
Share


@FrostyTips92
Follow
I'd like to say. This is prolly the 2nd week into flower. For being what it is, I feel like there doing well. Will feed tomorrow there last feed was about 5 days ago but remember I'm going heavy with feed and letting them drink everything else thru the bottom. I also do have microbs in this soil. And add them after every feed.

Likes
7
Share


@HighQualityH2O
Follow
Week 3. Botanicare is working wonders. I went ahead and topped at the third node. And started giving plants full grow nutes. The Banana Biscotti looks so good I might clone it. The Ice Dream Cake hasn’t bounced all the way back yet.

Likes
14
Share


@GanjaReaper
Follow
Day 49:
Like is told you guys last week, I went on vacation for 3 weeks, so my friend took care of my plants.
Buds are starting to show up.
I do have one plant which is light greenish. Might be from overwatering or shortage of nutrients. I don't know the reasons since I have not been taking care of them.
The weather/climate still sucked. Alot of colds and rains.
Until next week.
Likes
12
Share


@timbarin
Follow
Week 4 of flowering just ended. She has some burned out leafs and requires bit of cleaning. I'll perform some maintenance next week when I'm back.
Likes
6
Share

@Redweasel
Follow
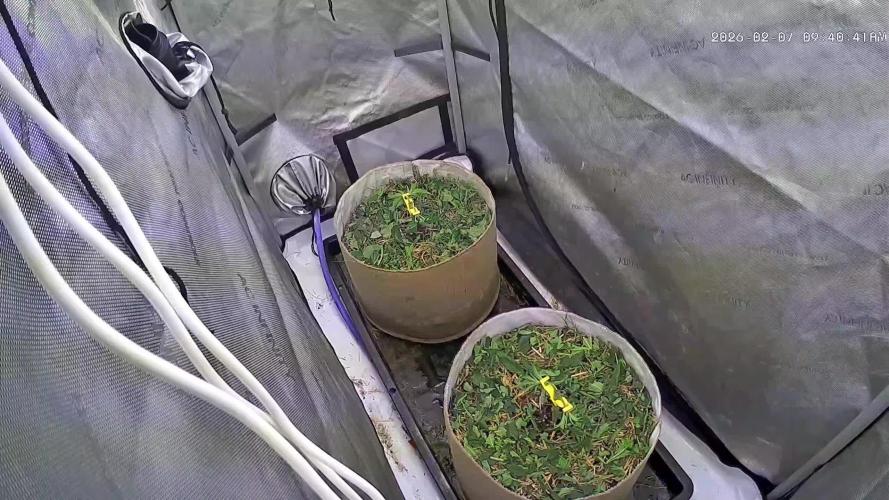
When attempting living soil in smaller containers, replenishing soil nutrients & refreshing biology often is an absolute necessity to keep root expansion & activity from stagnation. I top dress heavily every three weeks.
Total Tent Entry Time-40 min
Cover crop chop & dropped then integrated into existing straw mulch.
Top dress of 2 cups worm castings, 1 cup Build a Flower, 1/2 cup Craft Blend, 1/4 cup Kashi Gold, 2 tbsp Ocean Blend, 2 tbsp Kiss My Frass, blended together & mixed into mulch/cover crop layer.
6 cups of reclaimed & re-ammended soil, with fresh nematodes mixed in, used to cover mulch/cover crop/top dress layer of each pot.
Hand watered each container with 1/2 gallon plain 6.5 ph/11 ppm reservoir water, mixed with 1/2 tbsp each of Azos, coconut water powder, & quillaja saponaria extract powder.
Finally, added a 3/4 inch layer of fresh straw mulch that has been chopped to 1 inch lengths, & soaked in 3/4 gallons reservoir water mixed with 1/2 tsp each of coconut water powder, quillaja, & 1/4 tsp Recharge, giving me Azos at the root zone & recharge at the mulch level while keeping them apart.
DLI raised to 31
VPD raised to 0.90-0.95 kPa
Worm activity high in both containers & even saw some juveniles in the cap layer.
Expression #1
Height-5"
Width-14"×13"
-Week Prior-
Height-3 3/4"
Width-4"
Expression #2
Height-6.5"
Width-12"×11"
-Week Prior-
Height-6"
Width-4"
Week Total Entry Time-41 min
Likes
8
Share


@Ikalimkury
Follow
Craaazyyyy weeks
Craaazyyyy growth
Loving it AAALLLL
Ok, so, this is the 5th week.
Plants started flowering during 4th. They've had massive growth (from my perspective and experience 😅😅) and started to smellll
I think I was consistent on that LST. Always trying to give all the heads as much light as possible. It was a lot of work, but I still loved it. Having 2 plants makes it more fun because I need to have a diferent point of view for each one.
S has been toped, and with LST I was able to have lots of heads very well positioned
B is responding marvelously to bending, wich makes it hard to bend because THERE IS NO MORE ROOM TO RUN TO 😂 she is growing a lot, and there's just to much leaves to tuck...
As I was saying they're different, wich I am loving
I decided to defoliate them as my last stress move towards the plants.
Cutted the leaves that were on the bottom and covering the top heads, and the very small, tiny, thiny side branches.
I am lowering the LST to minimum.
Since the heads I chose, now have space and LIGHT to grow at will, I want to not disturb them as much as I can.
You can see that when I defoliated them, there was light on the soil. And just in 1 day difference, even at this point, you almost can feel them grow! I was amased, because of the stress I had caused them.
Yet, look with attention, you can spot the differece.
(I hope you can see it too through the screen, because it's real 😅)
Look at the S. She is doing just greaaaaat. Think it was a good decision to top her. Hope it keeps growing as it is!
Smell is increasing
Day 30 changed the light to 24h ON.
Day 31
- Heads bigger
- !QUESTION!
-I always water the plants simultaneously. B's vase is noticeble heavier. Cant understand why... I'm going to start checking if they need to be watered at different times. I can only imagine that the root system is different, due to its "differences outside". But really! They have suffered different stress at different times... different root system = different drainage?
Food for thought
Day 32
Defoliated them because I thought they were too bushy. Felt like it maybe was a mystake, later, due to some recommendations i read...
Day 34
Plants seem to have reacted ok to defoliation, lets see how the next days go by
Day 36
Starting to get frosty and smelly
Plants seem healthy ❄️
TEMPERATURE: 22-27°C
RH: 40-60%
WATER PH: 6.2-6.5
Likes
Comments
Share

@zzzzzzz064
Follow
Advanced nutrients base grow a and b ARE NOT REAL because they are in grams and i cant put it that way in here.
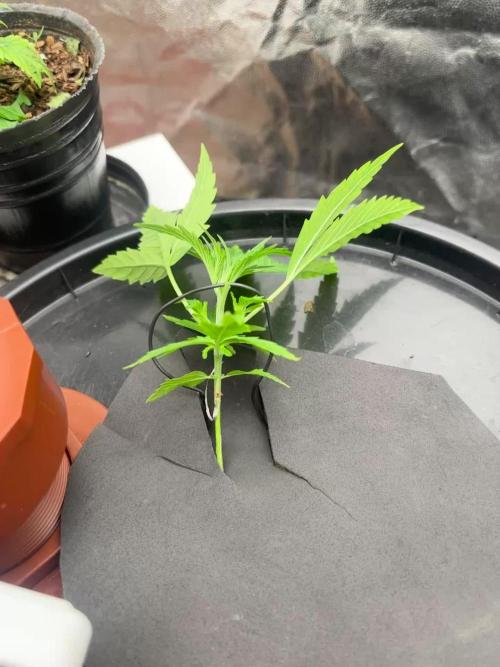
week 2 of veg was really when it was really touching the water with the roots, so the typical hydro explosive growth started. This week i runned out of silicio after using the last bit of the bottle.
Soon as the plant reached over 10cm or so, i started training her with the "420autoflower bent coat hanger" method. Since i cutted the rockwool like a pacman (without removing volume but rather cutting that way to separate it and put the seedling.) i was able to almost lay over the whole plant from the beggining. This was a huge advantage and it gave me exactly a bushy structure i was looking for later on later weeks of veg. Only thing to worry is the plant not touching the rockwool but after that i try and bend it as much as posible.
Likes
15
Share


@Rebola
Follow
Since i put my filter the temperature ir a bit high, i think the extractor in not powerfull enough 😔
All 3 Sensi Skunk are 50cm tall, and starting to flower, Big Bug is 35 cm and only a few pistils..
I realized that i started to count day 1 when it was already day 5 or so.. but no problem 😁
I dont have a ph or ec meter (will be my next investment), i just have those drops for test ph,
And today when i finished mixing the nutes, i tested with those drops and it was to low, (orange color) so i had to take off 1/4 off the solution, and
add tap water, which has high ph and i manage to bring the ph up,(yellow color).
Hope they like this mix of waters and nutes i gave them 😆
13/06/2021
Day 27 (from seed) - 1.7L water+nutes
Day30 - 2L water
Day32 - 2L water + nutes
Big Bud is not looking good 😔 bottom yellow leaves and the upper leaves very pale.. growing very slow compared to the others.
Same water and nutes for all of them, so i dont know whats the issue. ☹️

Processing
Likes
10
Share


@CreoWeed
Follow
Hey guys, this other week went very cool, I start reducing the nuts to the minimum and I can see really how fattening are the buds.
Now I can see some pretty milky trichomes, and just few cloudy, so I consider to chop in max 2 full weeks... (71 total days from seed) but anyway I'll adapt to how the plant is at that time.
The smell it's absolutely, insanely strong and ill need to buy ASAP a carbon filter to reduce it.
The only issue encountered in this grow was keeping low the humidity, and in fact I was not really able to do so as it stands at 55-65...but without noticing any mold issue on flowers.
Can wait to update this post next week!
Stay tuned, stay high!

Likes
98
Share


@Tropicannibis_Todd
Follow
💩Holy Crap We Are Back At It And Loving It💩
Growmies we are at DAY 56 and she's just killing💀it👌 The Smell has kicked in and is wonderful 😀
👉We are in full out flowering 💐 and its looking great 👈
So Shit , I gave them just a tad to much nutes on the first few feedings 👈 But I have since fixed it
So I'm helping out with some low stress training 🙃 and some defolation 😳
Lights being readjusted and chart updated .........👍rain water to be used entire growth👈
👉I used NutriNPK for nutrients for my grows and welcome anyone to give them a try .👈
👉 www.nutrinpk.com 👈
NutriNPK Cal MAG 14-0-14
NutriNPK Grow 28-14-14
NutriNPK Bloom 8-20-30
NutriNPK Bloom Booster 0-52-34
I GOT MULTIPLE DIARIES ON THE GO 😱 please check them out 😎
👉THANKS FOR TAKING THE TIME TO GO OVER MY DIARIES 👈
Likes
5
Share


@TheBulldozerSicily
Follow
Risultato finale inaspettato! Questa è la prima volta in outdoor, e pensare che le volevo regalare perché non me la sentivo di farle crescere a casa perché troppi vicini di casa, poi mi sono affezionato ed eccole qua, le più grandi piante mai riuscite!! Sono molto contento!!

Likes
6
Share


@Ninjabuds
Follow
Those two permanent marker plants are still kinda short, but they're finally starting to take off. It's cool to see them getting bushy. They're looking good so far.
Well, it's Christmas again. This year feels a little different, though. Maybe it's the snow blanketing everything, or the way the tree lights up the whole living room. Either way, it's cozy and warm, even when it's freezing outside. I'm really looking forward to seeing what Santa brings. I hope I get that new video game I've been wanting. But most of all, I can't wait to spend time with my family. We always have so much fun
This past week was a good one for the plants. They started the first week of their stretch, and they've already grown a decent amount. I can really see them filling out. It's cool to watch them grow so fast. I can't wait to see how big they get by the end
I always get a little worried at this stage, like they're not gonna get as big as I want them to. But then I remember how they always end up surprising me. By the end, they're always perfect.

Likes
2
Share

@MisterTree
Follow
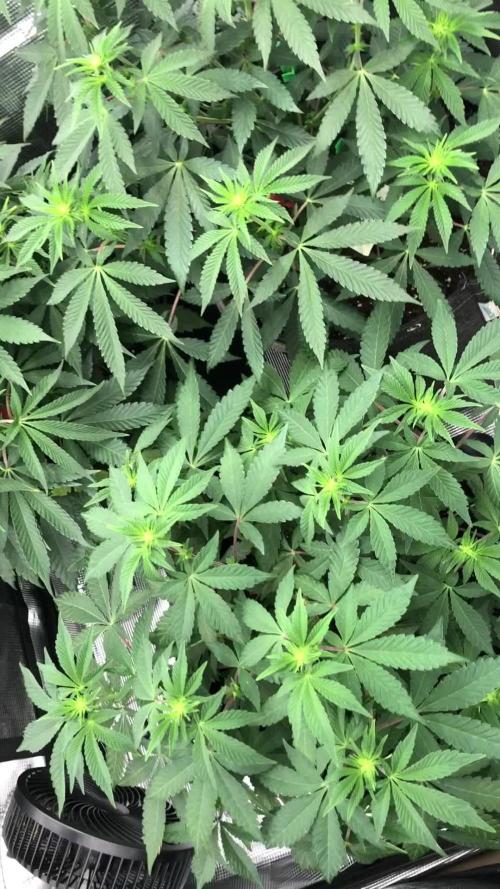
Stacy die gute hatte ebenfalls Probleme durch Überwässerung was natürlich meine Schuld war.
Wollte den Blütestart perfekt für die Ladys machen und habe es zu gut gemeint - Man lernt aus Fehler.
Die Dame ist auf den Weg der Besserung wie Ihre Schwestern und haben angefangen Buds zu bilden.
Das Licht wurde runtergefahren + die Wasserzufuhr, fange langsam an wieder mehr Wasser und Licht zu geben aber in kleinen Stepps.
Plan war heute nochmal bisschen zu gießen habe mich aber spontan entschieden morgen wieder Wasser zu geben.
Denke die Damen werden nicht mehr so hoch stretchen was mit zu gute kommt sie sind alle ziemlich auf einer Höhe und das ohne Netz.
Leute wünsch euch einen guten Start ins Weekend und lasst schön das Weed brennen 💚
Danke fürs vorbei schauen 🙏🏽

Likes
16
Share


@ChewiesGrow420
Follow
Plant 1 has 2 sets of cotyledon leaves. Which is a neat mutation. Anyone else grow stardawg and seen this? I really tried getting the temperature up a little more this week. Worked a little too well and things coulda went south quick. Thankfully everything’s good. I do not have access to my grow as much as I would like? As I do not have sufficient space in my apartment for my grow, Iam forced to do so in my parents basement. Big shout out to my mom! For watering these girls for me. She actually shot some of the videos, and it is her voice you are sometimes hearing. Till next time. ✌️