
Likes
Comments
Share


@sa2_gr
Follow
Hey ! I was away from home this week, so i only have pictures of the Day 20 of 12/12.
Have a deficience of N. Added some biogrow ans started the pk booster.
See ya next week ✌️

Processing
Likes
2
Share


@YJG420
Follow
Germination day! First time grower.
For my first time grow I decided to try my luck with autoflowers. The reason why was due to grow time, as I am growing for personal use I would like to switch up my strains every grow.
For this grow I have went for Auto Daiquiri Lime by Dutch Passion - US Genetics catalogue, & Auto Royal Cookies by Royal Queen Seeds.
After countless months of research, YouTube videos, grow guides, forms and speaking with friends who grow. I decided I would try a hydro grow in rockwool & coco.
Day 1 plan:
-1.5" rockwool cube x2 - ph'd to 5.5
- Rockwool cube placed inside of zip locked baggy (to help regulate humidity and keep rockwool damp)
- Bagged rockwool place inside propagator
- Hygrometer placed inside propagator to monitor temperature & humidity
- Propagator placed on seeed heat mat inside grow tent.
- Mars hydro 300W L.E.D placed 12" above propagator
I hooked up my 360 camera so that I could monitor the temperature with ease from my phone and not have to constantly climb into my roof space.
Next steps in 2-3 days time I will hopefully see signs of life and I will start to regulated my seedlings to the transition from propagator to grow tent environment.
By day 4-5 I will transplant into a 4" rockwool cube.
Stay tuned guys and watch me learn.


Likes
24
Share


@TerpTurtle
Follow
Topped, selective defoliation and leaf tucking, Minor LST
Before I go into flower planning of transplanting into 25 gallon pots with the most vigours 2 of the other strains, likely 33rd degree and unicorn poop x White wedding
Likes
17
Share


@FlavoursUk
Follow
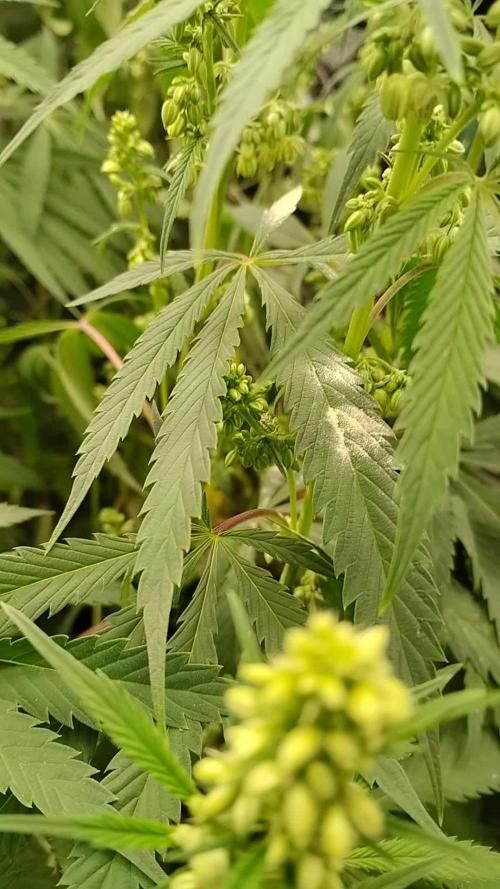
Blue Cheese, smelling pungent, nice sweet musky smell.. Can definitely tell it's cheese. Day 52 today, started her flush on day 50 and will take her to at least day 64/65 giving her a 14/15 day flush, maybe longer but i'll see. Slight nute burn that i'm aware of but nothing overly major, doing really well otherwise. Can't wait to try this one. Thanks for following along people. Stay tuned


Likes
45
Share


@Kirsten
Follow
We're starting to make some progress, leaves are looking good. Gaining some decent height, not too much.
I topped the plant at the beginning of the week, and it has taken very well. So let's see how it turns out 😁
I watered twice this week with 1ltr of dechlorinated water PH'd to 6-6.5, containing 1ml of Ecothrive Trace and 1/4 TSP Ecothrive Biosys.
Thank you for stopping by this week and hanging out! 😉💚✌️🍃😊

Likes
17
Share


@CanadianFillmore
Follow
Green Crack is wack!! Both ladies got the chop and are drying now. Both packed on considerable size during their last week, hopefully it translates to higher dry weight.
Will update in 7-10 days with dry weight and smoke report.


Likes
18
Share


@berlinbeginner
Follow
i flipped them to flower. Noticed a bit of stretch which will probably continue for another two weeks. SD2 still looks light but i flipped them all anyway. Will see what happens
Likes
2
Share


@Bones_1986
Follow
Day 64.
Ph water to the finish now. They ain’t the prettiest looking that’s for sure. Trichomes slowly to turn cloudy.
Orange haze will be first to chop, I’m thinking another 3-5 days
Berry cotton & cheese still white pistils, let them buds swell a little more. 7-10 days left I would imagine.
Finish line in sight
Day 66. Orange haze has now had its last feed of ph water.
Will chop once pot is dry around day 68/69.

Likes
110
Share


@420DeepGrow
Follow
ACTUALIZACIONES A DIARIO!!
Miles de gracias al equipo de Royal Queen Seeds y a @James por proponerme esta aventura tan trepidante y poder conocer de cerca las nuevas F1 y sobre todo a la gran Titan F1. Espero que lo disfruteis y os sirva como referencia.
¿Qué piensas cuando lees la palabra “Titán”? Hay quienes la asocian con los hijos de Urano de la mitología griega. Otros saben que Titán es la luna más grande de Saturno. ¿Y entre los cultivadores de hierba? Estas personas reconocen a la Titan F1 como una variedad de marihuana con una genética de vanguardia. Se trata de uno de los primeros híbridos F1 autoflorecientes, y es una variedad pionera que ofrece productividad, resistencia y algo completamente nuevo.
La Titan F1 deleitará tu olfato durante la fase de floración y más allá. Esta variedad autofloreciente ofrece un potente perfil de terpenos compuesto principalmente por mirceno, farneseno, ocimeno, pineno, bisabolol y limoneno.
Gracias a MarsHydro 😊🙏 por darme la mejor luz que hay en el mercado.
La marca numero uno en focos 💡, carpas de cultivo ⛺️, extractores 🌬️ y demás aparatos que necesitas para tu cultivo.
Para esta aventura arrancaremos con 💡Mars Hydro TS 1000 Full Spectrum LED Grow Light 150W Regulable y 1 semilla autofloreciente a un ciclo de 20/4.
Verdaderos 150w con este TS1000, la mejor luz de cultivo LED para principiantes.
Ofrece una luz adecuada para 2-4 plantas 🌱. Su precio razonable, la marcada mejora del rendimiento y el control variable de la producción la hacen amigable para los nuevos cultivadores. Todo un tesoro para cualquier cultivador que este comenzando.
Usaremos para esta aventura una carpa de 60x60x90, MarsHydro una carpa para los más exigentes.Con una solapa de cremallera mejorada, dobles cremalleras de metal con forro,reflectante diamante tipo Mylar, postes de metal para una estructura mas solida, no se puede pedir nada mas.
Garantizando una respuesta en solo 24 horas tanto si has usado antes la marca como si no.
🌻🚀 Consigue tus semillas aqui:
https://www.royalqueenseeds.es/semillas-de-marihuana-hibridas-f1/624-titan-f1.html
💡 MarsHydro TS1000:
https://www.amazon.com/gp/product/B07PLY1WKK
⛺️ 60 x 60 x 90 MarsHydro:
https://www.amazon.com/dp/B081PN2QDN/
Primera semana de floracion, las ramas laterales han comenzado a estirar y se muestran las primeras preflores, es una planta muy compacta y he tenido que quitar alguna hoja baja para evitar la aparicion de algun hongo.
Es la genetica que mejor ha respondido, por no decir la mejor. Felicidades Royal Queen Seeds y MarsHydro 😁
📅 Dia 21: Descanso
📅 Dia 22: Riego con nutrientes EC 400, esta Titan F1 crece por momentos, creo que voy a tener que sacar una del armario porque no van a entrar, me falta espacio 😡 para ver el desarrollo de esta genetica, la proxima vez van a ir en macetas de 17litros.
📅 Dia 23: Descanso, se pueden apreciar cambios notables cada 24 horas, va como un cohete 🚀
📅 Dia 24: Riego con nutrientes EC 350
📅 Dia 25: Descanso
📅 Dia 26: Riego con nutrientes EC 350
📅 Dia 27: Descanso, paso una al armario 12/12, no hay sitio para las dos en este armario. MARSHYDRO necesito algo mas big!!! 😁
Likes
2
Share


@Saintvicious
Follow
Keeps going. Etsy seeds coming through. I think soon in the grow a cal mag problem comes up. Chime in when you see it.
Likes
2
Share


@Green_Peace
Follow
Reaching peak flower now so added PK into the mix for extra Potassium and Phosphorous over the next 10 days or so. Never had plants soak up this much nutrients without any burn (touch wood) so I'm really impressed with the Vitalink range. Theis plant is at the front right of the tent, and to the left of the screen in the timelapse.
Defoliated for the last time at the beginning of this week.
Likes
6
Share


@Weedzoks
Follow
Bienvenue à tous sur ce nouveau journal de culture 😃
Nous partons sur une graine d’une OG BubbleGum en version automatique, croisement d’une BubbleGum x OG Kush avec une Ruderalis.
D’après le vendeur la graine met entre 50-60 jours de la graine à la récolte.
C’est parti !

Likes
5
Share

@AestheticGenetix
Follow
Pollen is everywhere!
One female has purple red under leaves
One female is quite frosty.
Likes
4
Share


@GROWINGCOLOMBIAN
Follow
Todo está bien sigo regando y amparando las ramas. Todo Luce bien

Likes
2
Share


@Madman2020
Follow
Vegetative steering
Aiming for:
leaf Temp -70f
CO2 300
VPD +.93
Planning for:
MJ and bras foilar
60%+1.5/-71f set to 68f+1.5
Leaf Temp is about 3f higher than ambient temp
At 68f outside, grow room still wont hit 68 with lights off
Day 24
No Co2
50-55klux
15inch from light
Leaf Temp 71-73f
60%/72F
Veg steering
Coconut water
Uneven canopy(11 at 29inch, 3ag 31 inch
————————
Day 26
56%68f(humidity dropped because i havnt watered in two days 🤡)
23inch-34inch tal. Arranged in order.
52-59klux
Sprayed
5Bras,(23inch)70 leaf temp
4Jas,(29inch) 70 leaf temp
4Bras&Jas(34inch)72f leaf temp
———————
Day 27
Watered once
————-
Day 28
Im pretty sure the sprays worked.
Noticed leaf burn with 3 plants sprayed with MJat 147ppm(.5ml)
No leaf burn with the .1Bras sprays
I wonder how long both are good for. Also, can i pour the unused spray in the medium? I just dont want to waste it.
Plants are noticeably more vigorous.
I am wondering if now is a good time for my defoliation. i was planning for Week 5. I feel like the buds are to developed for me to be pruning off lower buds and makes me feel like i should have pruned beginning of week4
__________

Likes
5
Share


@DarkRaven420
Follow
Welcome back to Colorado Gnome Grown. This week the gnome’s have been busy with the irrigation system. The water is stored in a 5g container and I mix the feed in it and it gets feed every time I water, which is twice a day for 1 minute, or until the plants drip. The plants are setting on a rack so that the water can drain away from the plant and into a tray. The plan is to buy Big Buds the first of the month to keep on hand to finish up in 4 weeks. Cookie Monster is 4in today and Noel is 2in, and both are starting to grow their bud site. Next week I will Top and defoliate for the first time. Well that’s all this time, tune next week for more information on; Colorado Gnome Grown!!!😎
Likes
3
Share


@GrowMallorca
Follow
Riego por planta 250 ml, en 2 litros de hagua pongo 1 ml de Boom Roots y 1ml de Boom Crecimiento.

Likes
91
Share


@MrCOCO
Follow
The girls gain mass and mature ... 🍃🍃🍃Everything is going well, I think that day 60 will be over🍃🍃🍃 ... Now only the water...🍃🍃🍃Enjoying the view... 🍃🍃🍃
