


Likes
Comments
Share


@Naujas
Follow
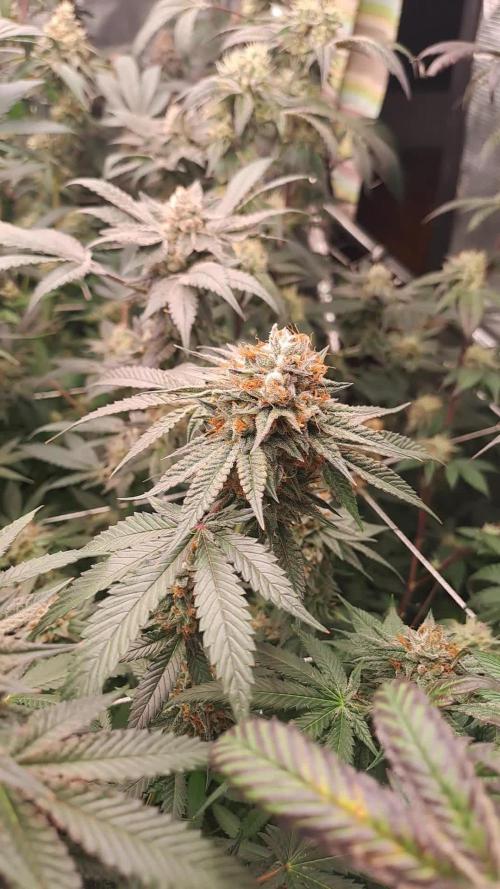
107 days!! Here is another great experience :) The girl has matured, 330 grams of wet, full of sticky, resinous shiny, pleasantly smelling flowers :) I think it will be about 90 dry :) although the girl is definitely not the biggest, but she looks great, the smell is also amazing :) I also got some sugar leaves from which I will make bubble hash, For me personally it is really beautiful and good growth, which I think will definitely be confirmed by the dried and cured flowers :) there will be a smoke review, as well as the total dry weight. good luck to everyone :).

Likes
13
Share


@SkunkyDog
Follow
Hallo zusammen 🤙.
Sie wächst sehr schön und macht keine Probleme.
Das war die letzte Woche mit Dünger.
Sie erhalten 25 Prozent Rabatt in unserem Shop
Mindestbestellwert beträgt 75 Euro
https://greenbuzzliquids.com/en/shop/
Code: GD42025
Sie bekommen 20 % Rabatt bei Zamnesia und der Code lautet GROWITGD.


Likes
4
Share


@DatGuyGrows
Follow
Soil level is a bit low after the transplant so getting ready to add some in. Took domes off and did first Nute feed on day 12. Using a FloraTrio mix with a touch of Cali-Magic and epsom salt

Likes
3
Share


@LAShugars
Follow
They are all coming along nicely. I’m concerned that they are fading a little early. I’ve used the nutrients may add a bloom booster

Likes
71
Share


@TimTheTerpMan
Follow
July 19th : Didn't get out before dark to get pics.
July 20th : Wowza! We got Flowering people!! 2 of the 3 are now Budding! This is when the fun begins!
July 21st - July 24th : Didn't get around to pics had a few things I've been dealing with.
July 25th : Just gave them some Happy frog Fruit and Flower last night. Lets see them blow up now!

Likes
6
Share


@Moss420
Follow
Potted up from 5L fabric pots to 10L air pots. I got these air pots because they are tall and narrow which helps disperse the water laterally (I also use Yucca and Silica additives), it's important because I use the auto watering halos.

Likes
169
Share


@SlowpokeFuegobud
Follow
🍪 😍🍪 😍🍪 😍🍪 😍🍪 😍🍪 😍
Great job, @anesia_seeds!! 💜
Growing the Foster was a beautiful experience, since reading the strain description i could not wait to try this tasty variety!! 😋
i wasn't disappointed!
Thanks for showing up and supporting me and the girls, bless you, growmies!! 😘
Shouts go out to my sponsors @GreenBuzzNutrients, thanks so much for your support!! 💚 💚 💚
If anyone would like to try their amazing organic products, you can find a generous discount code of 25% in my weekly comments! 😜 🙏
If you want a recommendation which product to get first.. BIGFRUITS!! 😍 I love the tasty terps with this one!!
https://greenbuzznutrients.com/
Thanks also of course @Anesia_Seeds, for the beautiful genetics!! 💜 💜 💜
________________________________________________________
Strain Information:
Foster
Foster is a balanced hybrid with a slight sativa dominance and it’s the result of crossing a particularly THC-rich Emperor Cookies Dough with our highly potent Sleepy Joe. The combination of these two exceptionally strong parents has resulted in a premium strain that delivers a fine balanced aroma and an insane high.
Foster’s high is deceptively slow at first and creeps up, but after a few minutes her outsized potency unfolds with dizzying energy and euphoria. The mind is suddenly full of motivation and a feeling of lightness spreads. At the same time, the body is flooded with tingling, warm effects and greatly relaxed. The strain clears your mind for new ideas and concepts, lets you dream and makes you feel really happy. Due to her high potency and measured THC levels of up to 35%, she will delight and challenge those with a high tolerance with ease, while certainly beaming away novices for several hours. Because of this, she is not recommended for beginners and you should not underestimate this fragrant beauty.
Growing Foster
Foster is a resilient and vigorous strain that produces excellent results indoors, outdoors and in the greenhouse. She tips the scales in yields of up to 550g/m² or 1000g per plant, grows quickly and forms many strong side branches with large heavy buds. Towards the end of the flowering period, the buds are covered in a thick layer of glistening resin and emit an intense sweet, fresh and floral scent.
She is perfect for growing in a SCROG or SOG and has a very favorable calyx-to-leaf ratio, making manicuring easy. Her terpene profile is complex, offering an aroma and flavor reminiscent of coffee, caramel, freshly baked cookies, and vanilla. It’s a seductive treat that shouldn’t fool you with her mind-blowing potency. She is among the strongest strains on the market and has enough THC to blow your head off.
Therapeutic effects
Due to its complex terpene and cannabinoid profile, it has a similar wide range of uses in the therapeutic field as in the recreational field. It helps to reduce stress, has a mood-enhancing effect and is extremely helpful for pain and inflammation.
https://anesiaseeds.com/product/foster/
________________________________________________________________________________
SETUP:
80x80x180 cm Zelsius
240W Full Spectrum LED IR UV dimmable
DW240H-A6-HS
Heatsink color red
LED Chips:
512pcs SAMSUNG LM301H
24pcs Osram 660nm
8pcs Osram IR 730nm
8pcs UV 385nm
Color mix: 2700K
4000K
2,8umol/J
Driver HLG-240H-C2100B
Coverage: veg 5x3ft / flower 4x2ft
Product size: 628x205x68mm
Green Buzz Nutrients
Shouts go out to my sponsors @GreenBuzzNutrients, thanks so much for your support! 💚 💚 💚
If anyone would like to try their amazing organic products, use code GD42025 for generous 25% discount (for orders of minimum 75€) ✨
https://greenbuzznutrients.com/
Biobizz Lightmix
custom exhaust fan 320/270cm³/h
Carbon Active Granulate 240cm³/h
tab water pH 8 - EC 0,25 with Calmag to 0,5
Advanced Hydroponics pH minus Grow
Bloom to pH 6.2
🍪 😍🍪 😍🍪 😍🍪 😍🍪 😍🍪 😍

Likes
39
Share


@Herbz_Unkraut
Follow
I'm not happy with the overall harvest...it produced some good tasty smoke due to fine nutes and a wonderfull strain but i fu**ed it up by using a very bad soil...growth was very slow and also lost like 25g due to budrot/mold...again my fault as i set up ventilation the wrong way (RH was good but some buds didn't get enough airflow)
Again i learned alot of things and got 275g of good, great smelling smoke...so not that bad...but could be much better 🙂

Likes
4
Share


@Masshysteria
Follow
Quick Summary: moved and transplanted around day 18 into 5 gal. airpots with fresh ocean forrest, flowering began around day 24, thought I maybe had some nutrient burn, more likely cause is phosphorous and/or cal/mag deficiencies, three plants in the home stretch, O has a bit longer
Day 50 Update: Watered and took some pictures last night. Not much new. Pretty sure they have massive deficiencies instead of any burn. I may chronically underwater/underfeed my plants. I'm still learning. This is my fourth grow ever so there's still lots to learn.
Day 51 Update: Meant to water today but didn't.
Day 52 Update: I spent a while with each plant and took some pictures/video when plant O was out of the tent. You can see some pretty clear brown spots on a fair bit of the shorter two plants. S is all kinds of ugly, but who knows, maybe still put out a decent weight. I fed twice in a row now and added some CaliMagic (forget the company name) this time. I read about how when there are stronger lights or MORE lights, the plants can burn through phosphorous rapidly, so maybe that's the issue I had. Either way, about day 40 seems like when the nutrients can be more steadily increased. The shorter two, V and P, have about 2ish weeks so that will likely be their last feeding. S too probably. O, on the other hand, has several weeks left but is looking otherwise really solid. Hopefully I got enough nutrients in early enough in that plant's flowering that it won't show any deficiencies. It's a monster too! 38 inches to the top of the spire. The other three are 25, 21, and 19 inches still so likely their final heights. I kept the tallest as the plant height for the diary because the top end is good to know for other indoor growers.
Day 53 Update: No news.
Day 54 Update: No news.
Day 55 Update: S, V, and P are the three shorter plants. They are all starting to take water a bit slower. They didn’t *need* water tonight, so I’ll give them another day. O, on the other hand, is a monster! Probably needed water yesterday. Filtered tap, about 2 gal for O tonight. Food next time for O also. Others are in the wind-down so we’ll see. Pics added from tonight.
Day 56 Update: Nothing to report.

Processing
Likes
27
Share


@LockDownGrow
Follow
Ok so I'm going too only feed pH water from here on out too force the plants too use up all that's in the soil , I am hoping I can carry them on now for the next 2 weeks like this before they are ripe ,
Likes
10
Share


@cuervo420
Follow
Ultima semana de vegetativo. Fueron 7 semanas y unos días de la Muse en 18/6. Agregamos MadGrow Algas foliar. Pasamos dos plantas afuera a florar así le damos un poco mas de espacio en el indoor. Quedaron 5 plantas total, la Muse central, 3 esquejes de Portela y una Hulkberry. Pusimos la red de SCROG, acomodamos las puntas y buscamos que ocupe todo el espacio. Luego de unos días que se acomodaron las pasamos a flora 12/12. Arranca el segundo capitulo 🌸




Likes
48
Share


@Northern_Ent
Follow
May 13: 10-15 C hotter than normal and low humidity means we’re having a very bad fire year. Misting plants to compensate for low humidity. Early to put seedling out but it’s warm enough even overnight for the little Gorilla Cookies Fast Flowering. Nice bags from Fast Buds are a bit too small at 4 gallons for this girl so I’ve put hot peppers in them instead.
May 19: outside full time now. Bad fire season and getting smoky and gross.



Processing
Likes
3
Share


@Andylatynhack
Follow
I started the 12/12 cycle the plants begin to get used to, I left the first 2 or 3 days of flowering the mh instead of 7 or 10 due to lack of time, but I see that they grow well the same with hps 600 already immediately


Likes
25
Share


@BudHaks
Follow
I am now flushing her with plain Brita filtered water PH'd with lime juice to lower her PH.
I initially first flushed her with 42L of water and now I am flushing her once a day for 8 days and then I will put her in for darkness for 3 days and then I will harvest her and dry her for 9 days and then cure her for 28-48 days.

Likes
4
Share


@Barcelona_Farmers710
Follow
Simplemente una de las mejores Super Silver Haze o muy parecido que probado! Una pasada de sabores cítricos y terroso a la vez...hay que decir que sabor a Lemon predomina! Una gozada Farmers.
Likes
21
Share


@DeepRootsGrowTrees
Follow
SATIVA DREAM by KANNABIA
Week #22 overall
Week #6 Flower
This week has been a good week no major issues this week she's looking good and has that sativa smell about her!! Stay Growing!!
Kannabia.com
SATIVA DREAM