


Likes
Comments
Share


@PolezGardn
Follow
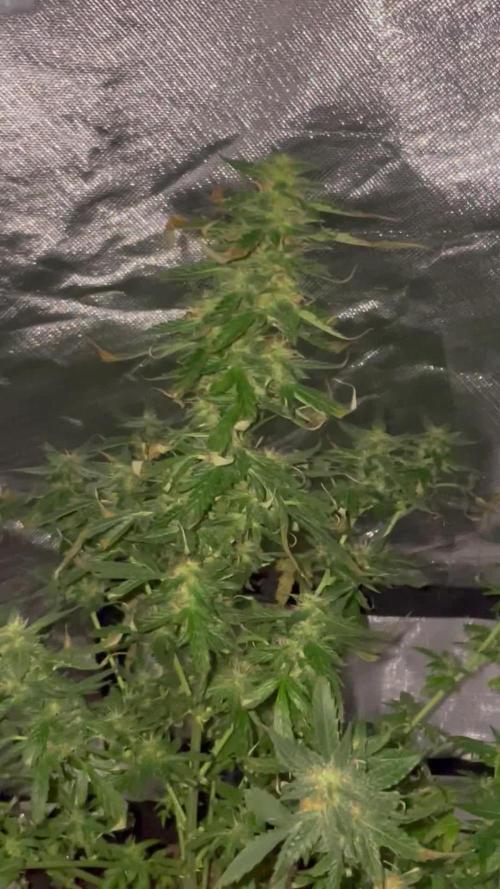
week four flower everything looks fine so far :D
I water them with 1.5l every 48h
the light I use was set to 100% and it hangs 80cm away from the tops

Likes
3
Share


@420cfm
Follow
Haven’t been able to post for a bit. We’re through 16 days of 12/12; a week of transition and now done week 1 onto week 2.
The stretch on these is heavy. I knew this but my clones were taken a month early I figure. So they’re very tall in the tent and lights are as high as they’ll go. We should be close to the end of stretch this week so here’s hoping we can make it work.
Super happy with this grow. Nice and clean and tidy is the game. Bottoms are clean. Lots of nice lush green growth and flowers are really coming on now. Will do a heavy defoliation at day 21. Did a heavy defoliation at the flip.
Let me know your thoughts!!


Likes
31
Share


@Dunk_Junk
Follow
Wow she over doubled her height and grew 53cm this week
!!!!!!!!!!!!!!!!!!!!!!!!!!!!!
I'm kinda liking these genetics.......

Likes
27
Share


@w33dhawk
Follow
Leider bin ich unzufrieden aber nicht mit Anesia oder der Sorte sondern mit mir selber habe erst zu spät bemerkt das ich Trauer mücken im Zelt hatte 😢 diese scheiß fliege hatte das erste mal mit den Biestern zu tun ich sag euch der name passt zu den fliegen wenn sie erstmal da sind Dann Fängst du an um deine Ladys zu trauern 😂 naja wieder ne erfahrung reicher nur gelb sticker haben nicht geholfen werde die Sorte sicher noch einmal growen da ich gerne den Durchgang mit gesunden Pflanzen als Bericht erstellen möchte


Likes
49
Share


@Roberts
Follow
I had a horrible germination rate then the seedling I finally got was very weak. So I made the best of it, and finished the grow. Frosty buds nice color. Great smell. The Gen 1:11 nutrition works good. Was just the first time using it in DWC. Good looking nugs. Just not one of my best grows. Thank you Mars Hydro, Gen1:11, and Humboldt seed company. 🤜🏻🤛🏻🌱🌱🌱
Thank you grow diaries community for the 👇likes👇, follows, comments, and subscriptions on my YouTube channel👇. ❄️🌱🍻
Happy Growing 🌱🌱🌱
https://youtube.com/channel/UCAhN7yRzWLpcaRHhMIQ7X4g

Likes
3
Share


@GanjaFarmer101
Follow
Smooth trim, last of the first wave of autos this summer - yields are very low but the bud looks great :)

Likes
3
Share


@medique
Follow
PK boost was added for this week as lower fans were starting to show serious PK deficiency. Defoliated about 25% of each plant, basically the lower fans/growth that was not getting light. Added some CFLs in a tent dark spot

Likes
13
Share


@Happydays58
Follow
04/27 - Day 30
~510PAR across the canopy. More training and a little trimming to get some air flow under the girls.
04/30 - Day 33
~540PAR across the canopy. Switched over to the VIPARSPECTRA KS5000. Coverage is a WHOLE lot better and will allow me to start the next batch soon.
All the girls are starting to drink more, adding 1 gallon back to the reservoir daily for the last couple days. Noticing some yellow tips on leaves, but getting super bushy.

Likes
41
Share


@Skinnytalls420
Follow
Well I have to say even though I had a few temperature issues in the night that I think may have stressed them. They took a lot longer than expected but after drying I don’t know how but I ended up with some fantastic tasty buds a few of the plants even came out purple!! I have to say the purple buds are my favourite 🤩 fastbuds never disappoints!!!!!

Likes
13
Share


@TheSource
Follow
I I’m filling a 100l water butt with 250ml each of dutchpro A and B and 150ml of explode in the same brand also used 30ml of rootexcelarator by house an garden and 15ml of x-force by bio green also 5ml of canna version of calmag!


Likes
25
Share


@BudHaks
Follow
She is now putting on weight - and still going tall! She looks like she has a while to go before harvest but she is doing magnificently. Little to no deficiencies!
Likes
15
Share


@SolitudeCorners
Follow
Can't wait to blazeeee
Feeding💪
10/17 Water30L+Cleanse80ml+calmag@190ppm
Ph6.3
Ebb 10.42/11.32/12.26/13
Clone 11.35/12.21/13.05/14
Average runoff ec1.5
Keeper 300ml per pot
10/18 Water26L+Flawless90ml+calmag@300ppm
Ph6.3
Ebb 11.38/12.24/13.17
Average runoff ec1.2 ph6.5
Clone 12.38/13.56/15.20/16.10
Average runoff ec1.5 ppm750
10/19 Water26L+Cleanse80ml+calmag@200ppm
Ph6.3
Ebb 11.12/11.48/12.24
Average runoff ec1.4
Clone 11.50/12.12/12.37/13.37/14.40
Average runoff ec1.3 ph6.6
10/20 Water30L+Cleanse30ml+Calmag@190ppm
Ph6.4
Ebb11.42/12.22/13.20/14
Clone 12.40/13.20/14.20/14.45/15.15
Average runoff 1.2ec ph6.4-6.7
10/22 last light day
10/23 2 Pm Cut and hang
Plan 21day at 23temp 55rh

Likes
11
Share


@m0use
Follow
Memes for the fastbuds meme contest
Memes for the fastbuds meme contest
Memes for the fastbuds meme contest
Memes for the fastbuds meme contest
Likes
12
Share

@PolezGardn
Follow
week two flower everything looks healthy :D
today i defoliated them
i watered them with 1.5l every 48h
the light i use was set to 80% and it hangs 80cm away from the tops

Likes
8
Share


@STAYINGONMYMAINCBATORUNTWO
Follow
Was a bit worried in the first weeks of flower as the buds formed early but... i was left with the most densest of buds literally hard like arnie in his terminator days lol! I didn’t quite get the amount I expected but defiantly enough! Will defo grow again!
After time went on she developed so much frost literally like diamonds 💎
Resistance was very strong on this one too and drank so much more than the rest had to be smart with watering! I’m the end the result was as intended can’t wait for the next couple of weeks for the flavour to really come out but as of now really reminds me of skittles as you can taste the sweetness but also that cake 🍰 comes right through too and this is before a full cure. Happy growing buddies I say this one is a top one to grow!
Added a few photos since cure! These buds are dense and colorful and fruity! Tastes like it smells until you get a lovely bit of cake come through! Heaven!
High is full body literally one point I felt it in my feet rose to my chest!
Likes
9
Share

@Allybearx3
Follow
So I chopped one girl on Monday and will be chopping the other girl today, will be back when they are both dried with weight and my recap on my first grow ?
Likes
4
Share


@HighOhioAn
Follow
Rainbow melon what can I say? Fast buds has outdone themselves with these fem photos I’ve grown a few other genetics, but fast buds checks all the boxes plants almost grow them themselves🔥💪
Likes
39
Share


@Mrs_Larimar
Follow
May, 18th.2021
The Lambsbreath does it like her Sisters, performing well, looking
healthy and happy, and budding some Flowers
Doing just like she should
