
Likes
Comments
Share


Likes
23
Share


@Kynareth
Follow
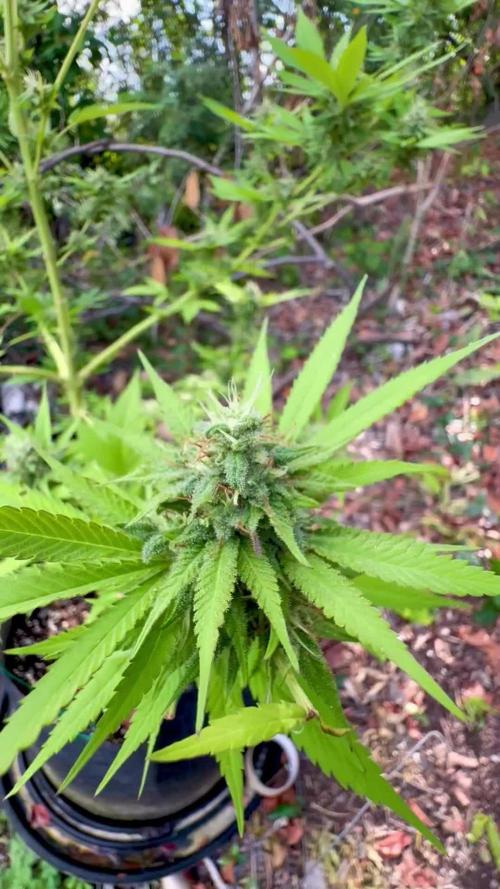
Not many to comment this week. The plant is develoving good and dense buds and the smell is increasing. I like how the flowers look. According to the breeder it should be ready in 9 weeks before germination, i think it will be more

Likes
5
Share


@GarciasGarden
Follow
Took a while for these plants to get to size .. I had like 20 plants in a 4x4 closet so I had to keep all these in a shot glass for literally 3 weeks they were dying for a bigger pot!

Likes
28
Share


@JiggleBudz
Follow
Day 64 - The start of Week 9! Flowers are getting nice and frosty now. Watering consistently with 2.1L with a 10% run off.
Day 65 - Defoliated some of the larger fan leaves that was growing towards the inside of the plant to promote ventilation and light distribution.
I saw a moth fly into my tent this morning but didn't see it come back out... After my coffee I sat down and inspected my plant. I found the moth stuck in one of the satellite branch flowers... Stuck in the sticky-icky-yicky of the a flower. I cut off that flower and disposed of the moth. Good to see she's getting sticky!
Day 66 - Humidity is sitting in the low 50's around my area, this helps lower the tent humidity nicely. I gave more water today with a 20% run off.
The flower stretch seems to have finished of the main cola. Some of the side branches are now nicely stretching to reach the main cola height.
Day 67 - She's looking beautiful.
Day 68 - Humidity in my area is up again putting the tent at 55% today. Everything seems to be going well.
Day 69 - Wah wah wih wah! 69! She's looking good the colas are filling up nicely. You can barely see any stem in the main cola's top.
Day 70 - The end of the week! Found 2 moths stuck to the yellow stickeys this morning. Plant looks good, watered with 2.1L with 11% run off.
Likes
6
Share


@Growstopher
Follow
6.12.25.
6th week of flower started on 6.9. Buds look good but damn this plant got stunted! Still trying my best to get the best end result but feels like quicksand this grow. Can’t wait for next grow!
Thanks for checking out grow

Likes
14
Share


@GoldenWeedGrower
Follow
D78/F34 - 17/06/23 - I changed light schedule hoping she's going better. (6 only red ligh and 7 red-white)
D79/F35 - 18/06/23 - New lights schedule is running
D80/F36 - 19/06/23 - Added water and integrators EC 1.0 and pH 6.4
D81/F37 - 20/06/23 - Nothing to report
D82/F38 - 21/06/23 - Added water and nutes EC 1.0 and pH 5.7
D83/F39 - 22/06/23 - Temp is too high for both water and environment. I see signals of suffering on the flowers (foxtailing)
D84/F40 - 23/06/23 - I'm trying to keep the Tremp under control but isn't easy. To lowering water temp (that now is about 26 °C) I'm adding some ice to the water
Likes
21
Share


@growops123
Follow
Lots of growth this week had to switch nutrients since I ran out of sensi grow anb

Likes
10
Share

@Organic473
Follow
The smell from this strain is really pungent. Not a nice smell though it’s like garlic I believe…anyone who grew this strain possible can confirm…the buds are sticking up nicely though.


Likes
8
Share


@SmashDabz
Follow
The thrips are gone. It is taking more nutrients it’s more hungry these days still cutting off lots of defoliation lots of buds growing in so I’m having to keep her close eye and make sure I take out anything that’s not worth spending energy on buds are getting huge but it’s not growing any taller it’s going to be a short stocky plan
Processing
Likes
5
Share


@EUPHORIC
Follow
Plants are really taking off now and i decided to switch 12/12 yesterday. They have been super-cropped in the final veg week. Knuckles are forming on the stems as the lower nodes spurt upwards, cannabis is known for stretching most shortly after the switch. Most strains will remain growing a few weeks more before actual P-K uptake.


Likes
6
Share


@GrowingSA
Follow
This week was great took some more cuttings .....testing wich method is more successful .... airoponics vs coco perlite mix
Same light same hours ...no nutrients ....lost 1in the coco perlite dome

Likes
18
Share


@OrganicAutomatic
Follow
Hi guys 😄 add 0.5/lt of bio grow
1ml/lt of activera ond14
Day 18 spread some cinnamon on the ground seem to work great against flies
They really hate the smell.
Also spread some coffe to lower the ph level in the ground that still remain on 7+
After to weeks of watering ph 6,
And also providing some nitrogen for the grow.

Likes
8
Share


@Aldo90
Follow
I was going to upload the process, but the wiser side of me said no. So I've edited it out and some of the evaporation process can be seen. Bho/wax/honey whatever we care to call it

Likes
9
Share


@Cestlaweed
Follow
Satisfecho con los resultados y el control sobre la temperatura con nuestro Cooltube reduciendo eficientemente cerca de 5-6 grados al armario.
El itinerario para nuestro cultivo es mantener en las condiciones actuales a nuestras 5 bebes y durante la tercera semana germinar La sexta. Recordar que este diario está enfocado solo en 4 babys, macetas de 11Litros 3xGlueberry OG Auto de DutchPassion y 1xLSD-25 de FastBuds, muy buenas genéticas de muy buenos bancos que esperamos potenciar en cosecha con tecnicas de Bajo estrés incluyendo el mallado SCROG, y ya en etapa avanzada de crecimiento una tecnica de Alto estrés conocida como popping (poda de bajos) además de un casi completo programa de fertilización, contando con los nutrientes básicos de vegetacion y floracion (top veg y top bloom) y para las primeras semanas ya en uso un enraizante (Top underground) y otros productos para terminar la floración de la mejor manera posible.
Sígueme en IG @cestlaweed para mayor información, y cualquier comentario o consejo es sumamente bien recibido ✨🌱
Likes
40
Share


@KingSalomonsWeed
Follow
Hallo, willkommen im Wahnsinn.
Red Bull! Dosen grow für Tiny Pot Challenge.
Am 22.09. Direkt in die Erde gesetzt.
Northern Lights. Eine Legende. No 5 ist die stärkste und zeitgleich Geruchsärmste.
Ach ja und die! "lowrider". D

Likes
3
Share


@CannaGods
Follow
I am just going to add some pictures of the reveg. If you're interested in me expanding the diary make some comments and if I have time I will.
Likes
19
Share


@DrGr33nThumb
Follow
So heen away a while not too sure what day I'm on but the weeks are correct lol... photo and vid dump I'm getting super excited at how well it's doing.
Dropped in abit of calmag to the feed this week as its was showing signs of deficiency.


