Likes
Comments
Share
@Oldwied
Follow
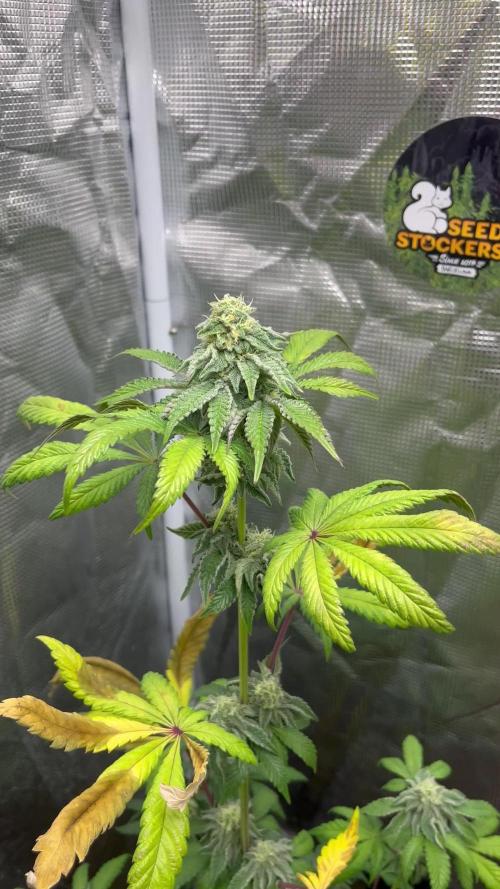
Day 58 The colours of autum are so beautiful. 1 week left to haverst.
Likes
12
Share
@Siriuz
Follow
Week 12 Day 79 Started flushing this week She's almost ready for harvest We plan on to next week Stay tuned for more Day 80 She's starting to smell more and more after we added so much water to drain all nutes Day 81 Looking good and can't wait to smoke some soon! Day 82 Good Day 83 She's good Day 84 check out the video sorry for the late updates I've been busy being a dad of a newborn baby boy :) Day 85 End of week 12 Everything looking neat
Likes
Comments
Share
@Sativ_420
Follow
Vienen creciendo muy bien. Se nota la diferencia de tamaño entre las que están en 30L y las que están en 50(tienen la tierra por la mitad en maceta de 100. Espero en unos días poder transplantarlas también
Likes
2
Share
@Jxkptx
Follow
An Tag 23 habe ich das LST neu angepasst um die kleine niedrig und buschig zu halten. An Tag 24 habe ich fast alle großen Fächerblätter entfernt und das LST erneut angepasst. An Tag 25 erneut LST angepasst. An Tag 27 wurden zu viele der unteren Triebe mit Schatten bedeckt, so dass ich einiger der Blätter wegnehmen musste.
Likes
9
Share
@Iop420
Follow
Hi 👋. This week I stopped the nutrients and I started flush. In first week of flushing I use 2ml /l of Canna Flush and then only pure water until harvest. 15 liters every flush. Buds are hard like stone 😁 and the smell is amazing. Now i know why they call it Zkittles 🍍🍓🍬🍊. Thanks for watching.peace✌️
Likes
7
Share
The girls recovered the same day as the topping last week. They have more than doubled in height and gain nodes quickly. Accidentally was giving wrong dose of nutes last week and corrected it this week. These strains are very hardy so far
Likes
4
Share
Likes
12
Share
Buenas noches familia, pues empezamos con el final. Nuestras power plant xL se han comportado fenómeno , recordamos que metimos 9 plantas de 3 variedades distintas y esta es la única variedad que perdimos espacio del indoor. Aun así sin palabras en cuanto al resultado. Planta con floración muy rápida, bastante vigorosa, lo malo es que al final tendrás que tutorar si o si, pero es por el peso de la flor. 56/59 días para cortar en floración, (y es Sativa).Se supone que tira 20%thc y su genética es South African sativa.
Likes
3
Share
Giving bio bloom nutes every water now till day 50 she's really coming along and would of been happy if plant looked like this in the end but we still have a couple weeks but she's frosty and a bit stinky and so nice to look at I won't count my eggs yet but I've impressed myself nów just this final phase and hopefully some nice nugs thanks Mark for the kind words and will def take onboard your advice 🍀🍀💯
Likes
1
Share
Plants are doing good but humidity could be higher sometimes. I am spraying the Clones with water to keep them hydrated as long as they dont have strong roots. Clones experienced slight sunburn but nothing bad.
Likes
3
Share
Bueno después de una semana solucionamos los problemas que tenía una de las últimas plantas aplicamos qué es lo que aplicamos microorganismos en grandes cantidades como para ayudar a la planta a asimilar el nuevo sustrato que pueda adaptarse de una mejor manera y pueda observar mejor los nutrientes y de ahí se solucionaron los problemas nutricionales que estaba presentando hicimos defoliación y poda de bajos y pasamos a flora este mismo día que estoy subiendo el video la planta se recuperó fenomenalmente estiró sacó nuevos brotes lo mismo hicieron las demás plantas comenzamos a regar de manera más frecuente la cantela y una vez por semana la maceta sin fondo y eso dio muchos mejores resultados los paneles subimos la intensidad de un 40% a un 65% y lo sucesión vamos a ir aumentando su intensidad hasta llegar al 100%.
Likes
28
Share
We have a new girl with suggestive references: Lavender is in fact a fantastic plant, widely used in human history for various purposes, with a purple color that no one can escape. Creating a lavender-flavored plant is a great idea and we want to enjoy it soon. The plant grows well, the leaves are regular and very turned towards the light, it is very proportionate even I don't see stretching, bending and things that don't convince me. Soon we start with the grow. The girls have already been trashed in 11 lt jars because the biodegradable jars have started to decompose prematurely, no problem let's go to the ground, Power Roots for root fertilizing. Music of the week provided by Radio Nula from Slovenia. https://radionula.com/ Thanks to friends of Seeds Mafia try this and their other creations seeds > https://seedsmafia.com/en/autoflowering-cannabis-seeds/auto-lavender-feminized.html Light and tent > https://marshydro.eu/products/marshydro-sp3000-led/?lang=it
Likes
5
Share
@Ensign420
Follow
Greetings fellow growers 🖖 and welcome to my first grow ever. This adventure actually started several months ago when I decided to stop buying flower from dispensaries and just grow my own bud. How hard can it be!? This is actually my second seed of this strain. The first bean sadly died due to over watering (sorry girl, RIP). I was literally watering the cube to the point where water was dripping from the bottom, then heavily sprayed the humidity dome and tray with the vents completely closed. Everyday. Multiple times. I never let the dome or try dry out. So after about 8 days of not sprouting, there was a funky smell of rot. So that was that. Later I learned that rockwool retains a lot of water and can easily drown seeds. So a wet/dry cycle is best for rockwool germination. So even after hours of researching and digging through forums and tutorial videos, I was still under prepared for this journey. Did not consider how delicate the germination phase is. Oh well. Lesson learned. Reset and try again! I hope everyone is safe and stoned during this corona crisis. Just like everyone else in the world, I want this pandemic to be over with. But in the meantime, let's grow some weed! 🖖 [START OF WEEK 01] Day 01 - Monday - 08/03/20 - Total Days: 001 ----------------------------------- - [0830]: Light Schedule: 24Hrs/0 --- Soaked cube in 5.5 PH water for 10 min. Did not shake water out. --- NO NUTES! Only PH'd down to control the PH levels. --- Did not use the default hole (way too deep). --- Flipped cube upside down and made a shallow hole for the seed (less than 0.25" deep). --- Placed seed in and pinched hole close. No additional water added. --- Sprayed the tray and dome with straight water (5.5 PH). --- Vents are cracked opened a for ventilation (about 1/4 opened each). --- Distance between the light and tray was 53" --- AC was set to 80 °F --- Exhaust fan was set to 86 °F --- Room average temp was at 85 °F --- Dome humidity was at 85-99% when sprayed. --- Allowing to completely dry before respraying. - [2200]: Dome and tray were completely dry! Sprayed only tray and dome with more water. Day 02 - Tuesday - 08/04/20 - Total Days: 002 ----------------------------------- - [0845]: Sprayed dome and tray in the morning. Everything was dry. --- Hoping for the best! - [2130]: Everything was dry again, so sprayed dome and tray at night along with a light spray on the cube. Day 03 - Wednesday - 08/05/20 - Total Days: 003 ----------------------------------- - [0830]: Everything was dry again. Resprayed dome and tray. Slightly sprayed cube. - [2125]: Hooo damn!! She popped! Am little stub is visible! Resprayed dome and tray again. --- Still going 24/0 for lights. - [+0033]: Just checked up on her and I swear she grew a bit taller! Getting excited! Day 04 - Thursday - 08/06/20 - Total Days: 004 ----------------------------------- - [0845]: Wow! Went from a little stub to fully sprouted overnight! Everything was pretty dry again so resprayed dome and tray. - [2200]: Tap root is visible! Over 1" long too! Just resprayed dome and tray again. -- Going to prep for hydroton transplant tomorrow! Day 05 - Friday - 08/07/20 - Total Days: 005 ----------------------------------- - [0930]: She keeps growing! -- Added a bit of CalMag to the spray bottle (8 drops to 650ml of distilled water). Resprayed dome and tray. Water was at a 5.4 PH with 141 PPM. - [1045]: Prepped the bubble bucket with 4.5gal of water. Water is high enough to reach about 0.25" above the bottom of the net pot. --- Added 3 drops of Superthrive --- Added 3.5ml of CaliMagic --- Added 2ml Hydroguard --- Then PH'd down to 5.6 --- Solution Strengh: 120 PPM --- Water chiller is set to 20 °C - [1100]: Transplant time! --- Filled the net basket 1/3 with hydroton. When placed in the bucket, air bubbles are not visible, but are slightly below the surface (slight digging will reveal the water/bubbles below). --- Removed plastic on rockwool cube and placed in basket, then filled around and covered with hydroton. Making sure to block any light from passing through the net pot and into the nutrient solution. --- Covered with a half-bottle dome sprayed with the CalMag water from earlier. --- Hoping for the best! - [1300]: Raised Bucket 5" higher. Now light distance is 48" to top of bucket. - [1820]: Lowered tent exhaust temp to 76 °F --- Lowered AC to 75 °F --- Raised bucket even higher so light distance is 30" to top of bucket. - [2300]: Looking good! --- Sprayed dome and surrounding hydroton with more CalMag water. --- Attached timer to light! So new 18 Hrs On/6 Hrs Off light schedule. --- Lights On: [1600] (4pm) --- Lights Off: [+1000] (10am the next day) --- Decided to go with lights on during the evening/night and off during the later mornings/afternoon (the hottest part of the day) to see if temps can be controlled better. --- Please survive girl! Day 06 - Saturday - 08/08/20 - Total Days: 006 ----------------------------------- - [0800]: Everything was dry. Resprayed hydroton and dome. - [2000]: Here first night cycle seemed to go well! Get'n taller! --- Dry again. Removed the dome. --- PH went up to 6.5 so PH'd down to 5.7 --- Ran the top feed drip ring for a bout a minute to wet the hydroton and rockwool with the nutient solution. ---Too scared to leave the top feed on 24hrs (I don't want over water her and cause dampening-off). Will let dry before re-watering. - [2100]: After closer inspection, I think she's looking a bit yellow. --- Decided to add a bit of grow nutes to the bubbler solution. --- Added 2ml of Sensi Grow A --- Added 2ml of Sensi Grow B --- Solution strength after adding more nutes: 176 PPM --- PH went up to 6 --- I hope that the extra chelating properties of the 'PH Perfect' solution is enough of a buffer for proper nutrient uptake. Day 07 - Sunday - 08/09/20 - Total Days: 007 ----------------------------------- - [0800]: Water dropped a bit (mostly due to evaporation) so solution strength was at 190. --- Checked PH again. Was still at 6, so PH'd down to 5.4 --- Ran the top feed for a minute to wet the hydroton a bit. - [0915]: Since she's looking perky but still a bit yellow. So decided to up the nutrient concentration even more before lights out. --- Added 2ml more of Sensi Grow A --- Added 2ml more of Sensi Grow B --- Solution strength after adding more nutes: 199 PPM --- PH went up to 5.8 - [1700]: Checked nutrients. --- PH: 5.9 --- Solution strength: 202 PPM --- Added 4ml of Voodoo Juice --- Added 4ml of B-52 --- PH after adding more nutes: 5.9 --- Solution strength after adding more nutes: 238 PPM - [2130]: Decided to make a new foliar spray to address the continued yellowing. --- Started with 500ml of distilled water. --- Added 3 drops of CaliMagic --- Added 3 drops of Sensi Grow A --- Added 3 drops of Sensi Grow B --- Added 3 drops of B-52 --- Added 1 drop of Superthrive --- Solution strength: 164 PPM --- PH was at 5.9 and did not adjust. --- Gave her one spray. --- Also sprayed the surrounding hydroton. [END OF WEEK 01]
Likes
11
Share
*01/24 - Week 3 Veg - Snapped a cola when adding bend clips, All clips have been removed - Uptake in nutrient feeds - Lite LST training - Lights running 18/6 - She shot up quickly in a week and 2 days - grew 6.5 inches ( 10 Inches total ) *01/27 - Mid Week 3 Veg - Uptake in nutrient feeds - Normal LST training - Lights running 18/6 - Retied up her main cola - increase in CAL-Mag feed.
Likes
40
Share
week 3 kicked off and the flowers are really atarting to take shape! 27” tall now! the stretch is unbelievable
Likes
1
Share
For a small plant with small buds there seems to be quite a lot. I will update when dry
Likes
47
Share
Day 21: From day 10 to 21 I couldn't take care of the plants because of private reasons, I asked my friend to take care of the plants and he didn't do a good job! He should had asked me or alerted me when he saw mayor problems, not just saying a little bit of light green or yellow. As you can see, we have alot of yellowing beneeth the plants, different sizes and even got some burnt leafs indicate that he didn't water on time. Did some run-off checks and saw many various values😓 Ph between 6.8-7.5 and EC between 1 to 2. The PH should had been 5.8-6 and EC at this stage 1.8+ since they need alot of nutrients because cocos soil doesn't have any. Because of this shit, they have been underfed, burnt, stress and more. Not ideal for autoflowers. Even the reservoir from humidifier was empty, indicating that it hasn't been filled for days!! Also he didn't sorted the plants out, there are always spots that get dryer faster or stay more wet. Get more light or less. Therefore it is wise to change spots of your plants all the time, I call it dancing. Your plants will grow more equally. If you look at the bigger plants, this should had been the size of all the plants sadly. They now look like they are in end of week 2 instead of week 3 and the bad plants end of week 1 😕 I did some defolation on some plants on the lower area. Roots start to show underneeth the pots, which is really good. I putted the bad plants in left under corner, Lets hope I can still nurse them. I still have 1-2 weeks to fix this before it goes into flowering, lets hope they will still grow double in size, otherwise this will be a lower rewarding grow.
Likes
15
Share
I had such a good response applying raw aloe very gel to the silver haze, just look at this weeks pics compared to last weeks. You can clearly see the difference. Aloe is high in beneficial enzymes and growth factors and more importantly an excellent source of silica. Cannabis flower, specifically the trichomes are made up of between 78% and up to 86% silica depending on the cultivar, so far only a small number of cultivars have been tested. However its clear that cannabis flowers NEED silica. Silica will also help with drought tolerance, it will armour your plant against pests, it will help the plant with transpiration, it will make water transport much easier for the plant, freeing up energy for other things like flower production. Also, If used as a foliar spray once a week in veg, it will help tighten up node spacing. So if you want those frosty buds make sure you have silica readily available for your plants.