Likes
3
Share


@KronicAquaponic
Follow
This week was good, stopped feeding nutes, ro water only, the buds are so solid, nice and thick. Didn’t think this was going to be so big, the 16”x16” fits the growbed perfect, it the plant is a little cramped, a 24”x24” would be perfect, as the branches would be able to droop more and allow more light to some lower growth. However after this I’m using these tents to do smaller scrog plants, which are photos. And I’ll do the auto-flowers in a more open environment.

Likes
26
Share


@Bakeryguy420
Follow
Coming to the end of week 2 more photos to up loaded!!
New lighting system ended up getting 2 3500k and 2 6500k cobs . Can tell my plants are already loving them fastest growth rate I've seen since my first grow !!
Gg4 and 3 are looking fucking amazing
7 outta 8 in solo cups looking good
Caramella never cracked kinda pissed but it's whatever ! I have one forgotten cookie by metophstic limited edition soaking so let's see :) .
Temps between 77 n 85v
Humidity 70 80%
24 hours on
Water every 5 to 7 days using a one gal
Solo cups get small amounts
So far so good :)!
Further along updated at the start of week 3.

Glueberry Auto · Expert Seeds
Gorrila Glue #4 Auto (Expert Gorilla Auto) · Expert Seeds

Tangie Auto · Fast Buds
Sweet Cream Auto · Expert Seeds

Amnesia Haze Auto · Vision Seeds

Amnesia Gold · Pyramid Seeds
OGesus Auto · Expert Seeds

Royal Haze Automatic · Royal Queen Seeds

Caramella Auto · Custom Breeder & Strain
Rhino Ryder Auto · Fast Buds

Fugue State · Mephisto Genetics



Likes
18
Share


@TheCannaProphet
Follow
~ FASTBUDS TESTER #2206 ~
Well friends, here we go on another 'canna-venture' together!
The grow room has had a complete remodel and some upgrades done to it including brand spanking new 4x8 and 4x4 tents and a Trolmaster Hydro X controller along with a new Control Panel.
This tester strain is one of six tester strains that FastBuds has graciously provided me with and I'm looking forward to seeing what this girl has to offer when she's grown to her full potential!
One drawback of 'testers' is I have little to no information on it other than its number and that it's an autoflower... 🤪 But, it's ALWAYS a blast growing them for me because not knowing a lot allows me to just concentrate on the essentials: Light, Environment, Water, Nutrients and possibly a bit of LST... not complicated, just basics like keeping a constant temperature and RH in the tent at a level that gives a good VPD, watering when almost dry and maintaining proper light levels according to their stage of growth.
____________________________________________________________________________________________________________________________________________________________________________________________________________________________________________________________________________________________________________________________________________________________________________________________________________________________________________________
~THE SETUP~
~Initially seeds were lightly scuffed, then soaked for 3 hours in 78℉ distilled water after which they were transferred to moist paper towels laid out in a Jiffy Pellet plastic starter tray with lid. Underneath the tray was placed a Vivosun Heat Mat with Controller that was set to 78℉ where they stayed until their tap roots emerged.
~Planted into Jiffy Peat Pellets that were hydrated with distilled water warmed to 78℉ with a 7.0 ph.
~Once roots emerge from the Jiffy Pellet they're transferred to their fabric pots.
~Grown 100% organic in a 4g Gronest fabric pot and a 3g fabric pot by Wraxly filled with Mother Earth 70/30 Coco/Perlite medium and initially amended with Dr. Earth 4-4-4 / Earthworm Castings / Dr. Earth Flower Girl 3-9-4 and Coast of Maine Stonington Blend Organic Plant Food 5-2-4.
~19/5 light cycle for the entire run with supplemental UVA added during flower. Lights are controlled by a Trolmaster Hydro X controller set for a 15min Sunrise/Sunset simulation.
~Top dressing every 3-4 weeks with slow release dry amendments and Earthworm castings.
~Straight water ph'd @ 6.2-6.8 when needed and bi-weekly Compost Tea's.
____________________________________________________________________________________________________________________________________________________________________________________________________________________________________________________________________________________________________________________________________________________________________________________________________________________________________________________
Weekly Updates:
12/1- I soaked both seeds for 3 hours in 78℉ distilled water after which they were transferred to moist paper towels laid out in a Jiffy Pellet plastic starter tray with lid. Underneath the tray was placed a Vivosun Heat Mat with Controller that was set to 78℉ where they stayed until their tap roots emerged roughly 24 hours later.
12/3- Today their tap roots were about 1/2 to 3/4" so at 11 am I transferred them into Jiffy Peat Pellets that were hydrated with distilled water warmed to 78℉ with a 7.0 ph using a tine off of a plastic fork as a 'mini trowel' to make a hole in the pellet and to gently cover the tap root, leaving only the seed head slightly exposed. This method accomplishes most of the initial work the seed has to do by eliminating having to orientate itself, push it's root down and head up. By 10pm the #1 seed had her cotyledon leaves opened and the #2 isn't far behind!
12/5- Well this is Day ONE for the #2 FBT #2206 and the second day for her sister! I'll keep them in the covered/heated Jiffy tray until I see their roots beginning to emerge from the peat pellet, then I'll transfer them gently into their respective fabric pots. The #1 will be going into the 4g Gronest pot from FastBuds and the #2 will reside in a 3g pot by Wraxly, which I'm trying out for the first time.
12/7- Yesterday I checked the #1 tester and she had roots starting to emerge from her pellet so I transferred her into her 4g Gronest pot. After making a hole in the medium for the peat pellet, I coated the entire surface with Xtreme Gardening Mycos then placed the pellet in the hole and planted her in. Lastly, I watered her in with about 4oz of de-chlorinated water with 3ml/g of FishShit added which was then ph'd to 6.4 @ 75℉ after which I placed a humidome over her for 24hrs to ensure that the humidity stays constant.
The #2 tester is doing great and I'm confident that she should be ready to transfer into her fabric pot in the next couple of days!
😎💚 Thank you for checking out my passion in life! Please visit as often as you wish and I hope you enjoy this journey as much as I know I will! Grow Strong! 💪😎🤙
Processing
Likes
15
Share


@Siriuz
Follow
Alright guys, I'm back
First I thought she wasn't going to make it but then she started developing even better so we've got her already blooming guys!
We started adding floranova bloom but we keep adding floranova grow for the veggie stage, we will increase bloom nutes soon
We continue applying LST plus some watering every so often to keep her moist and wet but never super wet just chill
Depending on your lights wattage you could need more or less water you will have to figure it out yourself but for me is 600ml per 24 hrs morning and night time usually I keep the very well hydrated and they have been showing off for good!!!

Likes
21
Share


@Stash074
Follow
This week was ok. For the most part, the plants seem to be more healthier this week than the last 2. I decided to do a light flush yesterday on all plants. I ran 5 gallons of light strength nutrients through each plant. I can say that it did benefit the plants judging by the run off..i was able to get my runoff ph up to 5.7. At 1st I was getting 5.3. All of this happened because I didn't calibrate my ph pen from the last grow. Lesson learned. My initial goal was to flip into flowering next week which would complete an 8 week veg, but now i won't flip until I know the ladies are fully healthy. We shall see how they respond this next week..ill keep yall updated in my next upload
Likes
12
Share


@Hawkbo
Follow
Soaked 7.27 for 36ishhrs, into paper towel for 12 hrs then into a solo cup with greentree garden supply pro ultra (coco/perlite). First feed was a diluted leftover feed from my other auto youngins. Basically about 1 ml/g of grow, 7ml/g humid acid, 1ml/g more roots, 1ml/g orca, cannazyme, hydroguard and a sprinkle of living organics in the nutes and on the top of the coco. Usually the ppm will be higher than I want it so I just dilute with r/o water until I'm down to 200-250. It makes it so I cant be accurate on ratios so that's why I'm tellin ya, but it's how I always do it no matter what nutes I use. This is from the same seed pack I grew out 3 years ago so let's see if these have some longevity.
Likes
3
Share

@Bizno
Follow
September 22, 2026
Unfortunately, not everything goes as planned. That wasn't my intention at all, since the only reason I'm here is to show the plant's true potential. Since I wasn't very careful, the plant is experiencing unnecessary stress, but it's nothing that can't be fixed—in fact, even for more serious mistakes, there's a solution. Just don't forget that Mother Nature is in charge.
🗓️ Day 22-25 - Vegetative phase:
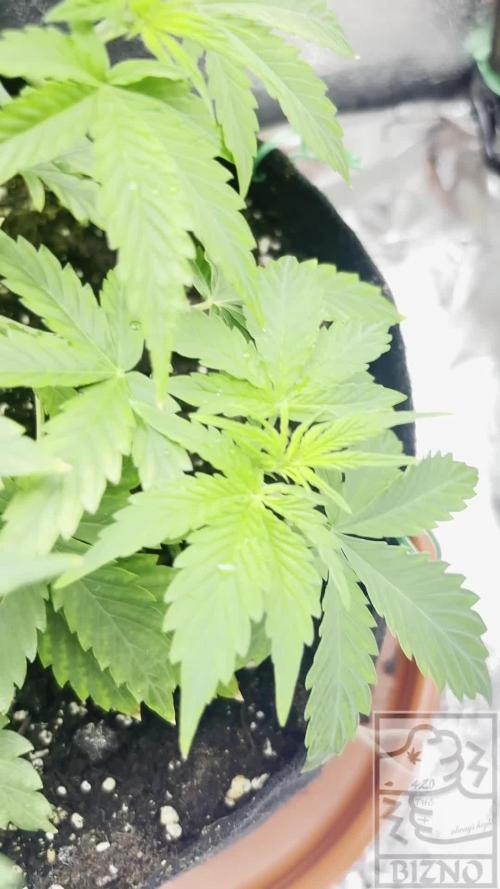
As you can see in the first image, unfortunately, while removing the fan leaves, the scissors nicked the main stem. At first, it didn’t seem like a big deal, but since there were clips holding the stem at a 90-degree angle for the LST, the cut opened up even more. I had to abandon the LST and focused solely on securing the main stem and carefully wrapping tape around the cut. The plant has never lost its rigidity, but it's always a good idea to seal the wound right away to prevent fungus or to keep the plant from losing its ability to transport nutrients to the top.
🗓️ Day 26-27 - Vegetative phase:
Obviously, this week will simply be “wasted”; the plant will focus all its energy on healing, and as expected, there will be very little vegetative growth. I limited the nutrients because the plant experienced a big stress due to buildup in the soil; Will only use water until I see the first signs that it’s transitioning to the flowering phase. Today, I switched the LED settings to BLOOM (red lights).
🗓️ Day 28-29 - Vegetative phase:
Luckily for me, the Wedding Cake strain is very resilient, and so is my determination to show the final result even after all this stress—I don't like discarding plants just for the sake of it...
As you can see, it’s actually healing well. After 5 days, I replaced the tape to put on a new one and refresh the cut area. The plant never lost its rigidity or strength. Today I just made the final LST adjustment, but not on the main stem—since I can’t do anything with it for now—but I spread the side branches further apart to make room for light to get through the middle. The fan leaf cutting and LST were stopped as soon as the cut was made, so now it’s best to forget about it, as it will cause unnecessary stress.
__________________________________________________________________________________________________________
📌Nutrition:
- [Water 6.2 ph]: 350ml - When 2 cm of the soil is dry
📌Watering:
Day 23- 350 ml - (Pure water)
Day 25 - 350 ml - (Pure water)
Day 27- 350ml - (Pure water)
📌Hardware Setup:
- [LED Display]: 50W - 55cm distance
- [Light Schedule]: 20/4h
Likes
46
Share


@Dreadnug
Follow
Two phenotypes - one purple and one white/green. The purple was very difficult to train and resulted in a couple inadvertent breaks - luckily it was repairable. The other trained very well, very flexible and worked very good for SCROG. Both produced heavily and are beautiful. The purple tends to be much more fluffy, with very long pistil hairs - the longest of any grow I have done. The white was super dense, very crystally and sticky. It will be very interesting to see how they smoke. Also, the purple tended to do very well with some nute mistakes I made as well as fluctuating pH in my water feeding. The white did not do as well in this regard but was able to get to harvest fine.
Wet bud weight is prior to trimming. The buds off of these plants were HUGE!!!!
Plant #1: (Purple): Wet weight - 76.58oz prior to trim; 15 colas; Terps: White - 60%, Clear - 20%, Amber - 20%
Plant #2: (White): Wet weight - 71.65oz prior to trim; 16 colas; Terps: White - 70%, Clear - 30%,
After 3 days of drying, took them down to trim for my jars.
After a few hours filled mostly quart jars 3/4 full but also tried an Infinity jar and a gallon mason jar to minimize the number of smaller jars.
Dry weights into jars:
Plant #1: 14.79 oz
Plant #2: 11.76oz
I did pull them after a day to dry rack them for 12 hours due to a little bit higher moisture content then I would have liked ( 70%rH). Re-jarred on 6/1/23 and now holding steady at around 60% rH.
Cure Check In (Week 2): 6/10 - 6/12/23: rH ~ 63 - 66%. Daily air exposure & fanning. Very smelly. Looking good - another couple weeks and will be ready.

Likes
15
Share


@Bread_n_Buds
Follow
Our Tangerine Dream by Zamnesia is one of the photoperiod plants that is holding up best to main lining, the branches are stretching and growing very very well.
** Remember that we are growing a plant worked with the techniques indicated and another left to grow without pruning to preserve its speed; in the previous/next diary you will find the other plant of the same variety.
We are in a 100% organic configuration, the soil is recycled Promix + 1/3 fresh soil + 10% Perlite + RQS Mycorrhizae Mix (4 g in the mix, 1 g under the small fiber pot).
We switched to the advanced flowering program a couple of days ago but last week we still did not give any green sensation. We fertilize with: // 1 ml/l Sugar Royal - 3 ml/l Alga Bloom - 1 ml/l Power Buds - 1ml/l Green Sensation
All nutrients are available from Zamnesia: https://www.zamnesia.io/it/531-growshop/476-fertilizers
We always have the excellent mycorrhiza from RQS running through the soil. https://www.zamnesia.io/5778-mix-micorrhiza-easy-roots.html
Taste this strain a little bit, it's a cross of legendary strains ---- // https://www.zamnesia.io/en/10966-zamnesia-seeds-tangerine-dream.html
Short Description Zamnesia // When legendary genetics are crossed, something exceptional can only be born. Tangerine Dream is the result of crossing classic strains. With citrus and sweet aromas and flavors, vigorous growth and euphoric and stimulating effects, Tangerine Dream by Zamnesia Seeds has it all. But don't take our word for it: order your seeds now and discover it for yourself.
You can find the whole world of growing at Zamnesia and much more take a tour of the site and you will find "all the best that nature has to offer" in various shapes and colors.
The whole world of growing and more is at Zamnesia: just take a look at the site and you will find "all the best that nature has to offer" in various shapes and colors.
The new strains are fantastic and the old ones are no exception...
-- // www.zamnesia.com

Likes
13
Share


@IQuSX
Follow
Hi, topman!
In the week number 4-5 and we added in the substrates nutrient's more Sensizym by Advanced Nutrients:
Turn root zone waste into plant nutrition. Sensizym features a proprietary blend of Xylanase, multiple forms of Cellulase, and Beta-Glucanase, three powerful enzymes that convert debris into the bioavailable nutrients your garden needs to thrive. This popular product also feeds the beneficial microbes in your root zone and clears away the dead material. The result is an optimized growing medium and root zone that work together to support high-performing cannabis.
1. Transforms root zone waste into available nutrition;
2. Feeds natural microbes, which in turn support overall cannabis growth. (C)
We are optioning 8l pots , because we want make all-in system FloraFlex (R) !
Next week we will be cutting and topping!
And, We are recommending for you shall watch and check this report…
..see you.

Likes
119
Share


@JamMAKEcan
Follow
Not enough room.. I cant baby them the way i like to.. Lesson learned.. Sticky already ..leafs are perfect color.. No burns at all

Likes
10
Share


Likes
16
Share


@Bncgrower
Follow
Harvested today, truly strong smell, cultivation was absolutely perfect from start to finish. Very happy with the result, anxious for the drying and curing process! Thank you for following along.. 🤜🤛🌱🌿🌲
Likes
132
Share


@rhodes68
Follow
11/29 Start week 3
Transplant day both into 5 gal pots both look fine.
Feed at 800ppm till water filter installed.
Training sometime later in week
12/1 Going to try a ponytail on them, doing Ripley now, Tara later
12/5 Contining ponytail - Feeding to once per day at lights on 1 qt (liter) 800ppm, runoff = 1 cup (25%) each


Likes
19
Share


@GoldenWeedGrower
Follow
📅 D119/D03 - 13/03/24
🚀 Drying
🎬 Added 22 pics and the timelapse of the harvest
________________________________
📅 D120/D04 - 14/03/24
🚀 Drying
________________________________
📅 D121/D05 - 15/03/24
🚀 Drying
________________________________
📅 D122/D06 - 16/03/24
🚀 Drying. First trim : 3 g and a tiny flower placed in the jar for curing
________________________________
📅 D123/D07 - 17/03/24
🚀 Drying
________________________________
📅 D124/D08 - 18/03/24
🚀 Drying. I've made the very first try and she's very promising 😍😍😍 @Pure_Instinto_Seed_Bank
________________________________
📅 D125/D09 - 19/03/24
🚀 Drying. Trimmed 7 grams and start curing of about 10 g for now. She's very sticky and very fragrant with an intense smell. Lot of rosin stucked to the scissor, good sign ! 😊
________________________________
📅 D126/D10 - 20/03/24
🚀 Drying. She's quite ready for trimming, I'll start tomorrow
________________________________
📅 D127/D11 - 21/03/24
🚀 Drying. Trimmed 14 g from one of the main bud.... Less than expected but very dense, high quality buds
________________________________
📅 D128/D12 - 22/03/24
🚀 Drying. Trimmed 11g
________________________________
📅 D129/D13 - 23/03/24
🚀 Drying. Trimmed 22g
________________________________
📅 D130/D14 - 24/03/24
🚀 Drying. Trimmed 11 g
________________________________
📅 D131/D15 - 25/03/24
🚀 Drying. Trimmed 12 g
________________________________
📅 D132/D16 - 26/03/24
🚀 Drying. Trimmed 16 g + 20 g + 16 g = 52 g. So far 132 g in total and 2 buds missing
________________________________
📅 D133/C01 - 27/03/24
🚀 Trimmed last 15 g - Total outcome is 147 g. First day of curing



Likes
14
Share


@Stonie_Mahoni
Follow
Die Ladys zeigen sich nochmal von ihrer schönen Seite , alles glitzert und steht kurz bevor geerntet zu werden .. Heute ist der 3. Tag ohne Nährstoff was man an den Farben der Blätter gut erkennen kann .. das ist bei Hydroponic Research echt richtig schön , die Ladys gehen in den Herbst Modus und entfalten ihr ganzes Potenzial bis ganz zum Ende .. Habe auch das Top Light runter auf 65% und das Undercanopy läuft auf 40 um ihnen eben noch mehr den Herbst Eindruck zu verleihen.. die 3 Seriotica haben sich super entwickelt aber von der Permanent Marker bin ich nicht so ganz überzeugt, ich hab ehrlich gesagt mit etwas mehr Ertrag gerechnet aber es wird sich am Ende zeigen ob sich das Gefühl bestätigt ..