


Likes
Comments
Share


@TheObserver
Follow
Recovering from 5 days of holidays, defoliated a bit. All good. A bit of struggle raising the temperature.
Jan 9th: I finally watered again, It took 10 days the dirt to dry out
PS: 12/12 scheduled but still recovering, not flowering yet,


Likes
4
Share


@Growzzbud
Follow
Estuve de viaje y dejé que fuese lo que el destino quisiera, al final sobrevivieron pero lamentablemente la gomu gomu mango se quedó rezagada debido a falta de riego, la black muffin ni idea de cómo es que ha avanzado tanto xdxd ambas recibieron los mismos cuidados, entiendo pues que la black muffin resiste mejor a sequías ajajjaja
Pongo el estado actual y de la semana pasada todo en uno y lo seguiré actualizando. La black muffin o la corto mañana o pasado.

Likes
5
Share


@GarciasGarden
Follow
Well mother fu**** woke up one morning and saw that one of the NANAZ got something that looks like nute burn (keep in mind I feed them all the same exact thing!) what happened to that plant should of happened to the others but what a pain in the ass.. it is completely brown now and I think I’m chopping it no room for uglies in the tent!

Likes
17
Share


@CanadaGrows
Follow
Very easy strain even though I had issues at first, was a dream to grow and yield wasn’t bad at all!


Likes
25
Share

@DogDoctorOfficial
Follow
Ghost Train Haze — Harvest / Trim / Cure
Part 2 — Trimming, Resin & First Cure
First of all, once again, sorry for dividing this harvest into three different parts. But honestly… there was just no way to fit this entire experience into one single update without rushing it.
This run became something special for us.
So instead of throwing everything into one giant report, we wanted to slow things down and give each phase the attention it deserves.
Part 1 was about harvest day itself — especially the frozen plant and the preparation for the future ice water hash runs.
Now in Part 2, we focus on the monster of the room.
The big Ghost Train Haze girl.
The giant.
And damn… she was beautiful.
⸻
The Giant Finally Ready
After drying slowly and patiently, she finally reached that moment every grower waits for:
the stem click.
Not bending anymore.
Not soft anymore.
That perfect dry snap telling us she was finally ready for trimming.
And honestly, seeing this massive plant hanging there fully dried was already rewarding by itself.
Huge flowers. Dense structure. Long spears everywhere. Frost absolutely covering the plant from top to bottom.
At this point, we brought out the Trim Bin, got comfortable, and of course…
Mr. Baggy joined the session too.
Because trimming alone is trimming.
But trimming with the homies becomes part of the memory.
⸻
Trimming This Beast
Once we started separating the branches and working through the flowers properly, one thing became immediately obvious:
This plant was ridiculously frosty.
And I mean ridiculously.
Possibly the frostiest plant in the entire room.
Every touch released resin.
Every nug felt sticky.
Scissors getting glued together constantly.
Gloves turning darker and shinier minute after minute.
The flowers themselves came out incredibly dense and compact too. Heavy in the hand. Proper weight to them. Not airy at all despite the sativa influence from Ghost Train Haze.
And visually?
Beautiful.
Silver-covered calyxes.
Orange hairs fading perfectly into the resin layer.
Chunky flowers with that classic “don’t squeeze too hard or you’ll ruin the trichomes” feeling.
This girl truly felt like a reward after the full cycle.
⸻
The Trim Bin Surprise
One thing we absolutely loved during this trimming session was watching how much resin naturally collected inside the Trim Bin.
By the end of the session, the amount of loose trichome heads sitting underneath the screen was honestly crazy.
No dry sift machine.
No mechanical shaker.
Just trimming.
And still…
A beautiful golden layer of resin waiting for us underneath.
Of course, finger hash also started building up naturally while trimming. Sticky gloves. Sticky fingers. Sticky scissors. The classic signs of a happy trimming session.
Then came one of our favorite moments of the day.
⸻
Playing The Drums — Moroccan Style
At the end, we decided to have some fun with the trim itself.
Using the dry material almost like traditional Moroccan drum-sifting techniques, we gently worked the trim leaves and remaining material to knock off even more trichomes.
Simple. Relaxed. Traditional-inspired.
And honestly?
It worked beautifully.
What we collected afterward turned into a gorgeous little hash bar that looked and smelled incredible.
We didn’t even bother weighing it.
Sometimes not everything needs numbers.
Some things are simply for the experience.
For the ritual.
For the future session.
For curiosity.
For enjoyment.
And this one definitely earned its place for later tasting sessions.
⸻
Final Dry Weight
After everything was trimmed, cleaned, and separated, the final dry flower weight from this single plant came to:
294.9 grams dry
Honestly?
We’re extremely happy with that.
Almost 300 grams from a single plant in this run is something we can absolutely appreciate.
Especially considering this entire project was:
* 12/12 from seed
* Minimal training
* Minimal intervention
* Natural structure
* Mostly observation and guidance
Just letting the plant express herself while giving her the right environment.
And she rewarded us massively.
⸻
Storage & Cure — Different Approaches
Once trimming was done, we started organizing the curing process using different storage methods.
This time we decided to split the flower between:
* Glass jars
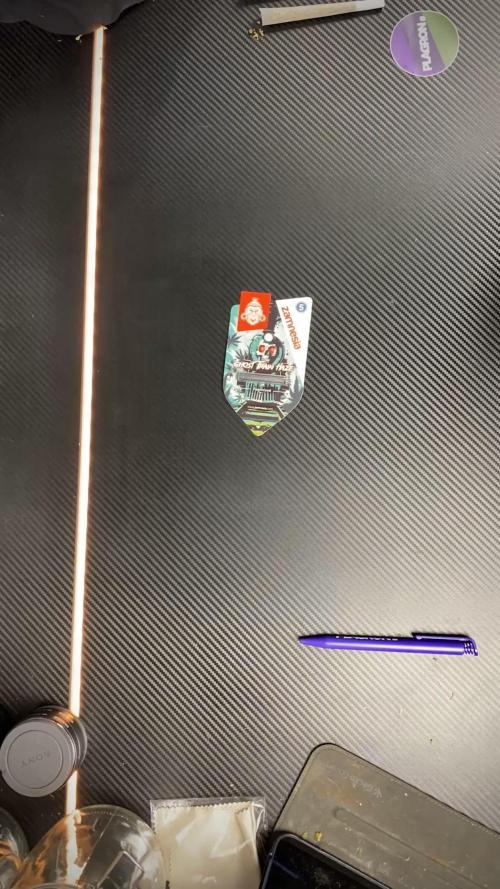
* Metal Zamnesia containers
* Grove Bags
Each one has its own purpose and philosophy.
Glass Jars
The classic.
Simple, reliable, proven for decades.
Perfect for manual burping and personally controlling the curing environment yourself. They also allow us to visually inspect the flowers easily during cure.
⸻
Metal Containers
The Zamnesia metal containers feel more protective physically and also help reduce light exposure completely.
They feel solid. Clean. Almost laboratory-like.
A very nice option for preserving flower while keeping things discreet and protected.
⸻
Grove Bags
These are probably the most modern approach we tested in this run.
The idea behind Grove Bags is that their “TerpLoc” technology supposedly regulates humidity internally while allowing gas exchange in a controlled way.
The theory is that they naturally maintain flower within the ideal curing range around:
58–62% RH
without constant burping.
So now we’re extremely curious to compare all three methods later during the smoke review phase:
* Does one preserve terpenes better?
* Does one keep the flower softer?
* Does aroma evolve differently?
* Does cure quality actually change?
We’ll definitely revisit this in Part 3.
⸻
The Frozen Plant — Flower Comparison
After finishing the main giant plant, we also trimmed and cured the material that came from the frozen/hash-focused plant from Part 1.
This was important for us because we wanted to compare:
* Flower from the “normal dried” plant
vs
* Flower from the plant intended mainly for extraction
And surprisingly?
The terpene profiles feel extremely similar.
Same family. Same identity. Same Ghost Train Haze soul.
Maybe slight differences in intensity or texture, but overall the profile remained very recognizable between both plants.
Which honestly gives us a very good feeling about the future hash quality too.
The frozen plant itself ended up giving:
58.5 grams dry
Plus whatever was already separated and reserved through the frozen material process itself.
So overall, absolutely worth it.
⸻
Macro Photography & Focus Stacking
During all this, we also continued working on our macro photography experiments.
Some of the photos shared in this update were actually focus-stacked images made from:
* 112 photos
* 96 photos
* 33 photos
For people unfamiliar with focus stacking:
Macro photography has extremely shallow depth of field. When you photograph trichomes closely, only tiny portions stay in focus at once.
So instead, we take dozens — sometimes over a hundred — separate images with different focus points and merge them together afterward in software.
The result is a final image where the entire flower or trichome field becomes sharp at the same time.
It takes time.
It takes patience.
But honestly, we love the process.
Because cannabis truly deserves to be appreciated up close.
⸻
Trimming Timelapses
We also recorded trimming timelapses so people can better see the workflow behind everything.
Not just the glamorous final nug shots.
But the actual process:
* separating branches
* cleaning flowers
* resin building up
* trim collecting
* the mess
* the rhythm
* the work itself
Because behind every beautiful cured flower, there are hours of patience nobody usually sees.
⸻
What Comes Next — Part 3
The next and final report will focus on:
* Full smoke review
* Cure evolution
* Drying process explained deeper
* Flavor profile
* Terpene expression
* Effects
* Overall experience with Ghost Train Haze
* Personal reflections after living with this cultivar
That final report will close the entire Ghost Train Haze journey properly.
⸻
Thank You
And as always…
Huge thanks to everybody who stopped by this journey.
To the breeders behind these genetics.
To the companies making nutrients, LEDs, gear, and tools possible.
To the platforms that allow growers to share their passion openly.
To the community members constantly supporting each other.
To the OG followers.
To the new followers.
To the silent viewers.
To the growers.
To the curious people.
To the skeptics.
To the lovers.
To the haters too.
If this grow made somebody stop scrolling for even a few seconds and appreciate the plant differently…
that already means something to us.
From grower to growers.
See you all in Part 3.
📡 DELETED @ 1K Please stay tuned.we never quit https://www.youtube.com/@TheDogDoctorOfficial NEW 🙏 Thank you for your patience and continued support.
FOR DISCOUNT CODES AND MORE JUST FOLLOW THE LINK https://website.beacons.ai/dogdoctorofficial
📲 Don’t forget to Subscribe and follow me on Instagram and YouTube @DogDoctorOfficial for exclusive content, real-time updates, and behind-the-scenes magic. We’ve got so much more coming, including transplanting and all the amazing techniques that go along with it. You won’t want to miss it.
GrowDiaries Journal: https://growdiaries.com/grower/dogdoctorofficial
Instagram: https://www.instagram.com/dogdoctorofficial/
YouTube: https://www.youtube.com/@dogdoctorofficial Deleted by Youtube - https://www.youtube.com/@TheDogDoctorOfficial NEW
Vimeo : https://vimeo.com/dogdoctorofficial Under construction stay tuned ⸻
Explore the Gear that Powers My Grow
If you’re curious about the tech I’m using, check out these links:
🔆 Lighting & Environmental Control
• Future of Grow — Advanced LED lighting technology
https://www.futureofgrow.com/
DISCOUNT CODE: DOG20
• Lumiflora — Under-canopy LED lighting
https://lumiflorade.com/
• TrollMaster — Environmental controllers and automation gear (past collaboration)
⸻
Genetics
• Zamnesia Seeds — Genetics used in this project
https://www.zamnesia.com/
⸻
🌱 Soil, Substrates, Boosters & Root Support
• Plagron — Substrates, bio mixes, and supportive products
https://plagron.com/en/
⸻
🎒 Storage, Curing & Preservation
• Grove Bags — Curing and storage solutions
https://grovebags.com/
⸻
📸 Photography Equipment & Tools
(Not sponsors, but part of my creative toolkit)
• Sony A6700
• Sony full-frame macro lens + few more
• Stacking photography workflow - learning
• iPhone (for behind-the-scenes shots)
We’ve got much more coming as we move through the grow cycles. Trust me, you won’t want to miss the next steps, let’s push the boundaries of indoor horticulture together!
As always, this is shared for educational purposes, aiming to spread understanding and appreciation for this plant. Let’s celebrate it responsibly and continue to learn and grow together.
With true love comes happiness. Always believe in yourself, and always do things expecting nothing and with an open heart. Be a giver, and the universe will give back in ways you could never imagine.
💚 Growers love to all 💚
📸 P.S. – The Eye Behind the Lens
All photos in this diary (for now — except for the ones showing the camera, which I took with an iPhone) are taken with a Sony A6700 paired with a Sony full-frame macro lens and a few more.
Photography is part of the story — it’s how we share the fine textures, the glow, and the quiet details that words can’t always capture.
I’ve also started experimenting with photo stacking — a technique where multiple images, each taken at a slightly different focus point, are layered together to create one perfectly sharp image from front to back.
It’s not digital enhancement or AI; it’s pure photography — a way to reveal the plant’s beauty in microscopic depth, from trichome to petal.
You’ll even see a few shots of "ghost me" capturing the shots — camera, lens, setup — because every grow deserves not just to be cultivated, but documented like art.
FOR DISCOUNT CODES AND MORE JUST FOLLOW THE LINK https://website.beacons.ai/dogdoctorofficial
NEW DISCORD - Official Server Invite Link : https://discord.gg/ksjAkA5T74

Likes
41
Share


@negrowsoil
Follow
my first grow. It was fun . Drying for couple weeks than curing . I’ll post dry weight than . Thanks

Likes
79
Share


@JUNGLE_B4RNS
Follow
Week 15, week 5 of flowering.
SpliffSeeds is definitely a recommendable seed bank. I’m very happy with all the plants, they are all making dense and nice buds. See the pictures and the video, they talk by themselves.
Last week at max feeding. Next week I will start to reduce the nootz solution slowly and might give the last feeding just before starting week 7 of flowering, it will depends on the flowers development and the tips of the leaves, we’ll see.
Buds are getting heavier, needed to add bamboo sticks and to tie some tops. Particularly the Lemon Cream Kush. Do not defoliate a canopy at this stage, plants are laying and holding on the leaves of each other !
From now, as I mentioned, I keep an eye on the flowers development and the leaves, particularly the tips of the leaves. And will readjust nootz and watering from these indicators.
That’s all for the week folks 😊
(I’m looking for a job in the Cannabis industry as Master Grower, Mineralogist, Quality Control)

Likes
8
Share


@Random80
Follow
Again I did not connect her on autopot but soaked the soil with loads of water and left wet towels all around the bottom of the tent to keep humidity since capacity of my humidifier is just one day. My idea was that she will use all the water in the pot and nicely dry out the root until I am back next time and in the meantime wet towels on the bottom of the tent will keep air humidity for first few days and than I can switch ON my humidifier remotely for last day, if needed (I am using alfred camera app and my old phone inside of the tent to be able to keep an eye on conditions while I am absent however I can only remotely control humidifier). Turns out (AGAIN) that it was too much water and she did not manage to use all of it during this 5 days. I found the top of the soil to be completely dried out while at the bottom of the pot and by the weight I would guess that there was still plenty of water available. I am using guanokalong soil that normally spreads water and humidity very nicely so I was bit surprised about such a difference from top to bottom of the pot.
Overwatering signs are visible on young leaves; they became soft and start curling down got darker color. Despite that I have added 0,5 lit water (with orgatrex) just to balance the humidity in the pot. I am here only for day and a half and after that I will be gone for 10 days. Will not be able to dry out the soil before connecting autopot so more problems related with overwatering can be expected next time I am back. Will try to calculate quantity of water needed for 10 day and fill the tank of autopot with just a bit less than that so she can recover from all that water at one point.
Likes
44
Share


@Chedderbob112
Follow
Not much to say it’s early veg stage av got them on a 24 hour light cycle n a thot a longer veg period would maybe be benificial in the yield department tge skittles is well ahead so topped her av got a blueberry cheese autoflower in heat aswell a will scrog this one n will perform training on some of the girls n leave a couple to grow wild n free obviously tidy them up defoliation wen becissary but wild n free this is one of these well it’s kinda a danger grow am a prisoner in ma own home cany answer the door tae land lord Fukin stress man but can’t stop won’t stop @chedderbob112


Likes
6
Share


@Krautbauern
Follow
dosidos auto is the plant with the most leaves, but it still has the biggest headbud. We are curious to see how firm her buds will be and are looking forward to a prompt harvest.
Likes
11
Share


@blasterw32
Follow
Hello gardeners!
I'm starting my third grow after two good attempts where I learned a lot. In my first trial I was able to pull 40 + 20 + 20 = 80 g under not optimal conditions (limited time mostly), and in my second I improved to roughly 40 + 40 + 60 = 140 g with one additional week in veg and an additional led panel during flower.
Now, my goal is to harvest 3 x 60 = 180 g with pretty much the same set up.
The differences from my previous grow will be:
1) 1 more week in veg (total 6 weeks): I felt that my girls were not mature enough when I flipped them to 12/12 in the last grows. I wanna see them stronger and more robust this time
2) Use a larger pot size during flower (5 gal): for the same reason as above, I want to give them the opportunity to be strong and robust plants
3) Reduced number of colas (16 per plant): last time I was a bit conservative doing lollipop and removing the little side branches, and ended up with ~23 colas/ plant, which did not allow proper spacing between colas. Although ventilation was never a problem, there was a lot of shade that could not be avoided.
4) Improved feeding regime: (see images) one of my goals with my growing is to establish a good feeding regime that works reasonably well for average strains with my growing medium (PRO MIX herbs and vegetables). Since the medium is a hybrid between soil and soiless, the plants don't need extra nuts in the first weeks, but as the plants grown, the organic compost present in the medium becomes not sufficient. My feeding strategy is basically the GH Flora Series - Drain to Waste chart with reduced amounts in the first 4 weeks and slightly less nitrogen during flowering.
5) Height Control: since the girls will have an extra week to grow, I'll need to be extra cautious and control their height from the very beginning. I'll be doing 1 top in the CBD and GG, and probably 2 on the Moby Dick. I also may try something similar to manifolding on the Moby Dick if she starts to grow really faster than the others. In addition, I'll be scroging everything as low as I can.
6) LED panel distance: last time plants finished flowering about 16 in away from the lamp. I feel that I can lower it to 13~14 without problems, so I'll try this too
SET UP --------------------------------------------------------------------------------------------------------------------------------------------------------------------------------------
Grow tent 2 x 3 x 6" hidden on a closet (0.54 sq meters)
Light: 2x LED Panel VIPARSPECTRA 450w (200w real)
Air filtration VivoSun 4" exhausting outside the closet
Air circulation: 2x 120mm 5v desk fan
Container: Red Solo cups / 1 GAL / 3 GAL / 5 GAL
Medium: 75% PRO MIX Herbs and Vegetables (sphagnum peat moss, Peat humus, compost, perlite, gypsum, limestone, organic fertilizer, Mycorrhizae - NPK: 0.30 - 0.05 - 0.10) + 25% Perlite
Nuts: GH Flora Series
Ph: 6.0


Likes
28
Share


@basementgrown
Follow
Had a lot of fun growing these girls. They went through a lot off the bat due to my inexperience. Learned a lot during this run and it was extremely rewarding to nurse them back to health. I am very pleased with this grow for it being my first run. I had no expectations as I am just starting to learn and want nothing more than to acquire knowledge. The quality and yields will come once I get more dialed in. Once these girls got healthy they had no problems for the whole grow. I am already planning improvements for future systems and am extremely excited to continue on my grow journey. Thanks to all who helped me out.


Likes
37
Share


@boneyjones77
Follow
Hey guys it’s BONEY !
Fed each plant 1 litre of Banana tea
At the beginning of the week and just finished some heavy defoliation.
Stay cool and if you can’t be good , be good at it ! 😆


Likes
25
Share


@DeepRootsGrowTrees
Follow
FAT BANANA 🍌 AUTO / RQS
WEEK #10 OVERALL
WEEK #5 FLOWER
This week she's doing good no issues to report she's looking good buds are getting structure to them and they have nice trichome coverage! Stay Growing!!
Thank you for stopping by and taking a look much appreciated!!
Thank you ROYAL QUEEN SEEDS!!
RQS / FAT BANANA 🍌 AUTO
Likes
21
Share


@w33dhawk
Follow
Moin an alle 3. Woche is durch läuft alles ganz OK bis auf die lady hinten rechts das Ph Problem besteht immer noch zwar schwankt es hart aber es nervt gibt sonnst nicht viel zu berichten stretch sollte so gut wie durch sein deshalb habe ich heute am 01.07.22 also freitag nochmal Zusätzlich ringe eingezogen um die Pflanzen ein wenig auseinander zu spreizen um mehr Licht an die einzelnen Blütenstände zu bekommen sollte man aber auf dem Video ganz gut sehen können. Was ich interessant finde das ich die Woche über eine Geruchs explosion der Ladys hatte Montag roch sie typisch nach Gras, Dienstag roch sie wie saure kotze, Mittwoch wie ne süße Frucht, Donnerstag roch sie garnicht, und seid heute also Freitag ne Mischung aus sauer fruchtig und typischem Gras Geruch der aber sehr tief in die Nase eindringt und dort länger verweilt. irgendwie interessant mal sehen was die nächsten Wochen noch so mit sich bringen vll mischt sich ja noch ein anderer Geruchs ton mit ein...

Likes
14
Share


@CHILLING_RACOONS
Follow
Dear Friends, 👨🌾 👩🌾
we are here to show you our journey with the BLUE SUNSET SHERBERT™️ by Barney’s Farm.
Germination started on the 10/11/2022, the root sprout on the 12/11/2022.
27/11/2022 Transplanted into 15L Smartpot
✅ VEGETATIVE week #5
📅this week goes from 12/12 to 18/12.📅
💡💡💡Viparspectra XS2000 is working at 50% power.
💉🔍Fertilization schedule:🔍💉
14/12 eposom salts 2g/l foliar and 1g/l irrigation
This new strain is hybrid produced from a cross between Sunset Sherbet x Purple Punch.
It is a mostly indica strain, so, short flowering and big and dense buds! At the end of its flowering stage it will take a lots of colors, it is also beautiful to see!!
I can’t wait to grow this strain! I’m excited like a child!! 🤓 🤓
We are glad to have the opportunity to try this strain from this experienced seed bank, we will do our best to grow this baby as well as possible. THANK YOU Barney’s Farm ❤️❤️❤️
***WE ARE BACK!!!
We are back after a little pause.
We take a break because we were too busy to post high quality diaries. In the last diaries we tried to post as good as possible and we have to publish about 6 or 8 diaries (in addition to these that we will publish shortly). We opened also an educational Instagram page, we growed a lot in a short amount of time BUT, Instagram suspended our account and we lost all our posts, I was so sad and disappointed... a lot of work lost in a night....***
🤓+DATA SHEET+🤓
BLUE SUNSET SHERBERT™️ Cannabis Seeds Strain Specifications
Type: Feminised Photoperiodic
Genetics: Sunset Sherbet x Purple Punch
Effect: creative euphoric sativa high + full body Indica tranquilising calming experience
Indoor Yield (g):up to 650-700 gr/m²
Flowering Time (days): 59 - 63
Taste: Sweet Candy, Citrus
Aroma: Sweet Candy, Citrus Zest, And Sweet Berry
💸💸💸💸💸 Buy BLUE SUNSET SHERBERT™️: https://www.barneysfarm.com/blue-sunset-sherbert-551
_______________________________________________________________________
🔧💡OUR SET UP💡🔧
✔️ 💲💲💲VIPARSPECTRA 🚀🚀🚀🌕🌕
ViparSpectra®️ XS2000 240W Infrared Full Spectrum LED Grow Light:
Excellent ratio between wattage and ppfd, excellent light penetraton, perfect light spectrum (it also has IR 🤩) and it has the best build quality on the market. Until now, built quality is really awesome. You can touch that quality. Materials are really strong, excellent driver and the best leds on the market. Heat dissipation is perfect, the lamp is never too hot and it has a passive dissipator so you will have zero noise. It also has IP65 certification. I like that this lamp is bigger than others, so the 240w of power are well distribuited on the space. Viparspectra has an awesome customer service, and shipping was creazy fast!
This awesome brand also offers 3 years warranty.
This lamp has no rivals.
A special thanks to Emily of Viparspectra ❤️❤️❤️❤️
HERE YOU CAN BUY THIS PROFESSIONAL LIGHT: https://www.viparspectra.com/products/xs-series-xs2000 or https://amzn.to/3dyUoJl
and here you can buy other awesome stuff: https://www.viparspectra.com
✔️ 💲💲💲MARSHYDRO 🚀🚀🚀🌕🌕
📦120X120 GROW TENT: an awesome box, easy and fast to assembly. Made by strong materials, solid zips and it is totally lightproof. The position of holes is optimal and the two lateral windows will make easier the work inside the box. There is also a double end, so you are 100% sure that dirt or liquids will not spill out. You can find it here: https://www.mars-hydro.com/grow-tent/buy-mars-hydro-grow-tent-48x48x80-1680d-4-x-4-size-keeps-all-light-in-top-quality-1680d-canvas-is-tear-proof-and-double-stitched-light-blocking-fast-installation-for-sale
💡TS 600 FULL SPECTRUM 100W LED GROW LIGHT : with this light you will achieve excellent buds, you will not need anything more. This lamp replace a 150w HPS lamp, but, with this Led Light you will smoke bigger, harder and tastier buds because Led have a complete spectrum and a powerful light penetration, so your plants will work as much as possible to make you happy. Psssssss it it extremely cheap and it is only 100w, your bills will never be too high, YOU HAVE NO EXCUSES!! Here if you want this little beast: https://www.mars-hydro.com/led-grow-light/mars-ts-series-led-grow-light/mars-tsw-600-led-full-spectrum-hydroponic-led-grow-light
Thank you Eleen of Marshydro❤️❤️❤️❤️
💣Quantum board - 480w - 4x120w Boards by Zhoangshan Koray Opto-Electronic Ltd.
Samsung LM301B 288 led/board 3000K 0dB noise
+24led/board led Osram 660nm
Efficiency 2.6 umol/J 220 lm/w
Driver: Meanwell HLG-480H-36B
💣Quantum board - 240w - 2x120w Boards by Shenzen Yuanhui Led Ltd.
Samsung LM301H 504 led 3500K 0dB noise
+24led/board led Osram 660nm
Efficiency 2.7 umol/J 220 lm/w
Driver: Meanwell HLG-240H-48B
-ESTRACTION FAN:
Blauberg 125 Turbo Pro Series
Maximum air flow: 430-560 m³ / h 50W 32-44 dBA
💊💉💊FEEDINGS:
We are growing in BioBizz Light Mix, it is perfect also for the first weeks.
TOP CROP:
-DEEPER UNDERGROUND: to stimulate roots system
-TOP VEG: for a excellent growth in the vegetative phase
-GREEN EXPLOSION: to promote creation of bud sites and to allow a faster growth
-MICRO VITA: bacterias for equilibrate the soil and to make the plant healty
-BIG ONE: to stimulate bud sites and to stimulate resin production
-TOP BLOOM: to achieve excellent big and hard buds
-TOP CANDY: to feed the buds with molasses for a tastier smoke and to gain weight
-TOP BUD: to enlarge buds and to gain weight
PLAGRON: PK 13-14 to have big and hard buds and to feed plants with lower effort
ADVANCED NUTRIENTS: Sensi Cal-Mag Extra-> for cal mag deficiency
GROTEK: CAL MAG for cal mag deficiency
HESI: PowerZyme to clean and balance the soil. It feeds the plant cleaning the soil.
GHE: - Final Part (ex Ripen) accelerate the final flowering phase, dissolves minerals in excess
- Flash Clean to flush the plant and to be sure that all excesses are out from plant and pot
These two products improve A LOT the smoke of our babies
-PURPINATOR to stimulate flavonoids and to have a better taste and smell.
____________________________________________________________________________________________
🙏❤️ THANK YOU FOR BEING HERE ❤️🙏
Please leave a comment with your opinions, it is very important to us to have a comparison.
If you like our job, tap the weed button and follow us. It will be really appreciated.🙏
We want to thank again everyone that help us in our project. You support us to support our dream. ❤️
SPREAD THE LOVE OF THIS PLANT ALL AROUND THE WORLD
🌿Thank you again🌿
❤️Sweet hugs❤️
👨🌾CHILLING_RACOONS👩🌾