The Grow Awards 2026 🏆 


Likes
Comments
Share
@Gardens_of_Of
Follow
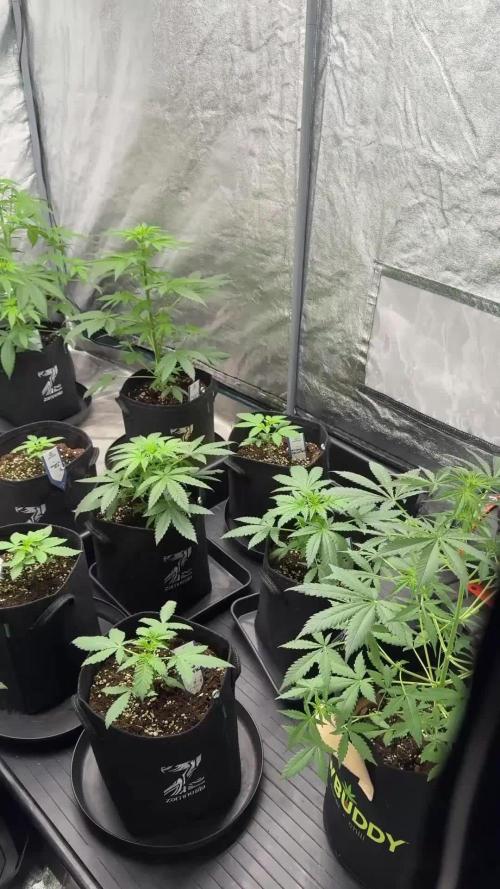
Green House Feeded one is moved to the middle and she enjoys her new spot. Advanced Nutrients feeded one is overfed. I will be adjusting the Ph and reduce feeding. Light intensisty is at 90% in 50 cm distance.

Likes
6
Share
@Cannabis_ConnectionUK
Follow
Week 3
Big Leaf strip and lollipop
Few more stakes added
Lights 100%

Likes
7
Share
@LittleBigTrees
Follow
Feeding still as they look like they need another week or two to finish.
The trichomes are all still clear.

Likes
1
Share
@FacelessGardens
Follow
Ladies looking really good 😎👌🏻💚🙏🏻 they are in two different tents but all from the same beans rdy to chop of at any time ! dense flowers strong smell !
Likes
19
Share
@MadeInGermany
Follow
Hi everyone 🤗.
The buds continue to grow 😀👍.
It starts to smell really good 😍.
The bud structure also looks very nice, and is already covered with resin 😎.
This week they continue to get 4-5 ml / l water from the Canna Bio Flores.
I hope you enjoy the update, stay healthy 🙏🏻 and let it grow 🌱😃
You can buy this Strain at :
https://greenhouseseeds.nl/
Type:
Wonder Pie
☝️🏼
Genetics:
Wedding Cake x OG Kush
👍😍
Vega lamp: 2 x Todogrow Led
Quantum Board 100 W
💡
Flower Lamp : 2 x Todogrow Led
Cxb 3590 COB 3500 K 205 W
💡💡☝️🏼
Earth: Canna Bio
☝️🏼
Fertilizer: Canna Bio
☝️🏼🌱
Water: Osmosis water mixed with normal water (24 hours stale that the chlorine evaporates) to 0.2 EC. Add Cal / Mag to 0.4 Ec Ph with Organic Ph - to 6.0


Likes
34
Share
@MrJoint
Follow
✌️🎃 Thank you for checking my cultivation.
✂️ Defoliation Time’s
🌷 Started flower stage
🤕 #3 doesn't look good yet


Likes
16
Share
@pHilosophy420
Follow
Day 70 - she is growing well and getting frosty. The buds getting bigger every week. The smell is great and the plant is bright colour when in late flowering I will do colder nights to get out the dark colours

Likes
7
Share
@Cogollo_eu
Follow
**Encontrarás la traducción a español al final de la descripción**
From/Desde: 08/03/19 || To/Hasta: 14/03/19
From day/Desde día: 15 || To day/Hasta día: 21
You can find the Gorillas Diary here:
** Podéis encontrar el diario de las Gorilla aquí:**
https://growdiaries.com/diaries/25675-makingmoney-with-gorilla-mm-vs-gorilla
-----IMAGES & VIDEOS-----
Video 1:
7 days TimeLapse, +/- 1 image each 180 secs @ 30 fps, you can see how beauty is the dance of this babies and how are they growing. This is a fast timelapse adjusted to 1 minute for instagram, if you want to see the 3:21 min complete video (1fx60s 30fps) it's uploaded on the gorillas diary named abobe.
Video 6:
An overview video of the babies, moments before i performed the first topping/man-linning/prunning/LST on the biggest gorilla. The other one is recovering at time from those ugly color marks she has on them leaves. As the leaves seems not healthy i decided to not perform the man-lining on this one until it has a pair of healthy main leaves on which i can trust to guide.
-----WEEK SUMMARY-----
I traveled to Venice this week and i have very few photos, also i returned with a terrible flu, so i'm not going to take too much photos for the next week too, i'm so sorry.
The Money Makers are growing healthy and equitative, with very short nodal distances as you can see in photos 4 & 5, i'm not going to perform the same main-lining technique i'm doing with the gorilla, i'm going to test some things. With the Money Makers i'm going to perform something similar to the man lining but with 3 or 4 floors, i'll be twisting the main branch to create a circular horizontal proppagation with 6 or 8 branches. First i will fix the heights of the floors and then i will push them horizontally. Let's see where they go ;).
-----WATERING CALENDAR-----
12/03/19 - 700 ml with all week nutrients @ 0.95 E.C. PH5.9
12/03/19 - FOLIAR - Used about 25 ml of (200 ml water with 1ml Pro Active, 2 ml Plant Vitality + and 0.1 ml Foliar Spray)
*****ESPAÑOL*****
-----IMÁGENES & VÍDEOS-----
Vídeo 1:
TimeLapse de 7 días, +/- 1 imagen cada 180 segundos @ 30fps, observad la maravillosa danza de las nenas y cómo crecen. Esta es una versión rápida de 1 minuto que cree para instagram, si queréis ver el vídeo completo de 3:21 min (1fx60s 30fps), está subido en el diario de las gorilas que nombro en la cabecera de la descripción.
Video 7:
Un vídeo general del armario, está grabado momentos antes de realizar las técnicas de cultivo sobre la mejor de las gorilas. La otra se sigue reponiendo de esas manchas feas que le salieron en las hojas. Ya que las hojas parecen enfermas, he decidido no hacer el man-lining hasta que no tenga un par de hojas saludables en las que poder confiar para hacer el guiado y alimentar los brotes.
-----SUMARIO SEMANAL-----
Las Money Makers están creciendo sanas y equitativas entre si, con distancias internodales cortas como podéis ver en las imágenes 4 y 5, no voy a realizar el mismo man-lining que estoy realizando sobre una de las gorilas, pues voy a probar cosas. Con las Money Makers voy a realizar algo similar al man-lining pero respetando 3 o 4 pisos de las plantas, giraré el tallo principal para crear una propagación horizontal circular de las plantas con 6 u 8 ramas. Primero ajustaré las alturas de los pisos y luego las expandiré horizontalmente. Veamos hacia donde van ;).
-----WATERING CALENDAR-----
12/03/19 - 700 ml con todos los nutrientes semanales @ 0,95 E.C. PH5,9
12/03/19 - FOLIAR - He usado unos 25 ml de (200 ml de agua con 1ml Pro Active, 2 ml Plant Vitality + y 0,1 ml Foliar Spray)

Likes
33
Share
@PrairieFrostGrow
Follow
***** Week 6 December 23 to 29, 2020 - Days 36 to 42 from germination *****
Week 5 was certainly a stretch week and she grew tall baby👊👍 She has been doing well with her crack on the main stem from early on and when I pulled her out you could hardly tell where it was. Perfect......because she has been growing hard she is getting a little uneven in her canopy but I have been watching how hard I pull on her main stem. Correcting the situation as best I can now but with only in 3 gal pots its tough to get out further on her long branches and tie them down. Could get creative with Bamboo and creating ties but those suckers are eye pokers and I don't use them too often. Will just deal with the potential difference in height and keep pulling her harder now that I can.
Silica increasing this week as well now that we close to the end of being able to shape her lower branches. She needs the strength now to defend any potential pests and to growth thick stocks so she can support the bud weight.
Since she has been going hard it was time to pull her out and start trimming some lower branches now. Yes she is an auto and many say to never remove leaves, never mind branches, but I do and want to allow her to focus on top buds. I will accept a potential decrease in yield but since I am already performing LST and working with more than one top.....a gain in one area can be offset in another without too much pain😜👍 Stripped quite a few leaves from this girl. She is thick at the bottom and in the last week her node spacing has gone crazy on the 8 main branches😲 I will trim the bottom as it just doesn't get the light intensity down below......even with opening the canopy up lots those sites are still 12" to 18" lower than the tops at this point. Her side branching is really thick and looking awesome. She is showing signs of wanting to grow some big buds😀 She will be able to support the weight at least.........really nice selection Fast Buds!!!!!!!
Little more detail........
Dec 23/20, Day 36
- Feeding day today. Continuing with first weeks flower feed of 2ml/L.
- 2L feed with Micro, Bloom, Magnifical, AstroFlower, VeloKelp, Natures Candy @ 2ml = 800ppm and 5.8pH.
- add microbes again on the next feeding!!!!
Dec 24/20, Day 37
- She was given 1L of feed left from yesterday (both her and Orange Sherbet.......J47 is on a two day dry.)
- Her color is good but still quite yellow in the new growth points.
- pull out tomorrow and clean up lower growth and check runoff numbers.
Dec 25/20, Day 38
- 2L full feed again with the same 2ml/L feed as earlier in the week for all the autos. Added AN Rhinoskin as well for silica.
- 1150ppm and 5.9pH going in.........pots were really dry and perfect pretty well.
- Runoff was 925ppm and 6.1pH.........I can live with that at week 2 flower😁😁
Dec 26/20, Day 39
- 2L full feed again. Had mixed up 12L yesterday.
- Added 2ml/L of Microbial Mass and Piranha = 1200ppm and 5.9pH.
- The girls needed their microbe allotment as we get closer to the end.
- Bacteria added to help keep some of the nutrients in the media as she finishes.
- next watering is more of plain water and add Terpinator.
Dec 27/20, Day 40
- pots are light again in the afternoon.
- 2L watering with Magnifical, Rezin, and Microbes @ 2ml. Terpinator @ 3ml = 400ppm and 5.8pH
- She taking the nutrients but backing off the ppm on this watering a bit.
- noticing some clawing in the girl.....start of some excess nitrogen or environmental??? Keeping an eye on it👌
Dec 28/20, Day 41
- the girl is hungry so feeding again today with full nutrients.
- 2.5L watering today, stepping up from 2L volume.
- Full line of Remo, all 6 parts plus silica again @ 2ml = 1150ppm and 5.9pH
Dec 29/20, Day 42
- another feeding in the morning today. Pot was really light.
- 2L in the morning giving with same feed of 1150ppm and 5.9pH.
- her colour change in the leaves is really popping out now. Bud is all purple but the leaves are turning purple as well.
- noticing leaf colour is getting even to the other girls for green. No need to compensate any deficiency anymore......in fact watch over feeding now😀
- in the evening, 12 hours later, pots were pretty light so gave another 1.25L of feed that was left over for 16L mixture yesterday.
- she had a total of 3.5L feed today......water tomorrow and not feed.
She is doing very well at the start of the week. Canopy height is good but her node spacing has me concerned a bit. Looks like we are going to get some beautiful colours from this girl as her buds are purple already. Leaf colour already has a yellow huge to her........Purple Lemonade baby......on point!!!!.......nice work Fast Buds.......this strain is making a lot of growers go, DAMN she's freaking awesome😁😁😁

Processing
Likes
10
Share
@Loudcloud514
Follow
I changed my mind so instead of 10 weeks it will be finished in 9 weeks so I changed the feeding to Week 6 I just feed remos nature's candy and the girls got fatter. Starting week 7 to week 9 I will just feed ph'd water for a 3 week flush

Likes
4
Share
@LittleBigTrees
Follow
I've been pulling the top fan leaves to stop the main stem growing any taller and repotted them into 4L pots, once they show roots I'll flip them over to flower.
They've all outgrown their mutations but the apple fritter has a slight varigation.

Likes
12
Share
@SSKNFbyHAZE
Follow
Throughout the week, I give compost tea, and fermented plant juice once each ^^
Hope you guys have a wonderful day today ^^v
*** Please Like, comment & share ***
Highly appreciated -----/-----<@

Likes
82
Share
@BigBadLion
Follow
Another fast update! 😃
Hey guys! I hope everything is going well for everyone. This is the 2nd week of flower and I'm here again to share what happened last week!
My babies now get thirsty really easy, nothing like how it used to be (and you can actually see them stressing over it in my photos) but gladly nothing that some water can't fix. The main colas are also starting to grow more and they are full of small developing flowers (they look super pretty! 😍)
Some side stems are also outgrowing the main branches... and I'm kinda unsure what I want to do (or if I should do anything). Maybe LST or supercrop them? (I might screw things up by doing it in flower and I have never done it before 😭) I don't know. I also want to trim some leaves away since the foliage is very dense but I fear I might end stressing them! I will probably make a grow question to know what others think.
I'm back on a normal nutrient schedule. I'm no longer "overfeeding" them and I water them 4 times a week (but with little water). Next week I'll try doing 3 but with more water and see if they like it more that way.
So far I love how the plants are developing! The small flowers look great and they look bigger everyday! 😃
Thanks everyone! See you all next week! 👋

Likes
2
Share
@Chi_K24
Follow
Hey folks. Into week 6. Not much happening. Just letting the girls settle back in after the windstorm have em a good whipping.
Just standard watering when needed and some lst here and there.
Likes
45
Share
@MadeInGermany
Follow
Info:
Unfortunately, I had to find out that my account is used for fake pages in social media.
I am only active here on growdiaries.
I am not on facebook instagram twitter etc All accounts except this one are fake.
Flowering day 31
since time change
to 12/12 h.
Hi everyone .
The lady is developing beautifully :-).
The buds start to get thicker and it smells better and better :-).
I added another 1 g GHSC Bio Bloom per l coco.
That should be enough for the remaining weeks.
Otherwise everything was checked and cleaned as usual.
Have fun with the update and stay healthy 🙏🏻
You can buy this Strain and Nutrients at :
https://greenhouseseeds.nl/
☝️🏼☝️🏼☝️🏼☝️🏼☝️🏼☝️🏼☝️🏼☝️🏼☝️🏼☝️🏼☝️🏼☝️🏼
Green House Seeds Company Cup Clone 🏆
Type:
Wonder Pie
☝️🏼
Genetics:
Wedding Cake x OG Kush
👍😍
Vega lamp: 2 x Todogrow Led
Quantum Board 100 W
💡
Flower Lamp : 2 x Todogrow Led
Cxb 3590 COB 3500 K 205 W
💡💡☝️🏼
Earth: Canna Coco
☝️🏼
Fertilizer: Bio Grow Feeding ( GHSC ) , Enhancer ( GHSC ) , Bio Bloom ( GHSC)
☝️🏼🌱
Water: Osmosis water mixed with normal water (24 hours stale that the chlorine evaporates) to 0.2 EC. Add Cal / Mag to 0.4 Ec Ph with Organic Ph - to 5.8
Likes
7
Share
@DogDoctorOfficial
Follow
🌿 Week 4 Veg – Beauty, Branching & Bio-Tech Symphony
Grower’s Journal – BlueBerry by Zamnesia Seeds | Entry 005
Welcome to Week 4 of Veg, and let’s just say it clearly:
These BlueBerry girls are growing like there’s no tomorrow.
Branching like crazy, stretching into their potential, and looking like true queens under the lights.
⸻
📸 Visuals to Match the Growth
This week, we pulled them out of the tent for a special photoshoot, just to honor how gorgeous they’ve become. Their structure is perfect, the leaves are flawless, and the pace of development is exactly where we want it.
These are the kinds of plants that make growers pause, smile, and say, “Yes, this is working.”
⸻
🌱 Nutrition – A Balanced, Thoughtful Feed
We’re continuing our Aptus nutrient regimen, supporting explosive vegetative growth while maintaining biological harmony in the root zone:
Current Feed (per liter):
• Regulator – 0.15 ml: Cell wall integrity, anti-stress armor, and enhanced nutrient uptake
• CalMag Boost – 0.25 ml: Supporting structural development and leaf strength
• All-in-One Liquid – 1 ml: The nutritional foundation, covering macro and micronutrients
• 🌿 Start Booster – 0.25 ml: Still supporting root density, node stacking, and early branching
🌿 Why we’re using this:
Because we’re in rapid growth mode, and we want to fuel expansion without pushing too hard. This combo delivers strength, balance, and root vitality, exactly what we want before any training or pre-flower stretch.
⸻
🌞 Lighting – Now a Two-Zone Setup
We’ve expanded the operation—stretching across an 8x8 space, creating two active light zones:
⚡️ Zone 1 – Black Series 600 by Future of Grow
• Full-spectrum LED designed for early veg and structured growth
• Gentle but powerful PPFD—keeps internodes tight and leaf color rich
⚡️ Zone 2 – THINKGROW Model One LEDs
• Ultra-efficient LEDs with controllable spectrum
• Ideal for pushing vigorous vegetative growth across a larger canopy
• Controlled via the TrolMaster system for precise lighting schedules and dimming
💡 Both systems are delivering clean, cool light, helping shape the canopy while managing energy use smartly.
⸻
🌬️ Airflow & Environmental Control – Total Tech Harmony
We’re not just growing plants—we’re growing a controlled microclimate, with every element tuned:
Airflow Setup:
• Exhaust: Two 6” inline fans
• 1x Spider Farmer 6” Exhaust w/ Carbon Filter – Controlled via Spider Farmer GGS Controller
• 1x TrolMaster AeroFan 6” Exhaust w/ Carbon Filter – Controlled via TrolMaster Tent-X Controller
• Intake: One 6” fresh-air intake pulling air into the tent
🌀 This system keeps:
• CO₂ fresh (~632 ppm)
• Temperatures steady (~27°C)
• Humidity ideal (~57.4%)
• And filters in place keep the air pure, clean, and odor-controlled, even at this early stage
🧠 Sensors & Controllers:
• TrolMaster Tent-X Ecosystem – the brains of the setup
• Managing lights, exhaust, intake, CO₂, temperature, and humidity
• Connected to:
• CO₂ sensors
• Temperature & Humidity probes
• PPFD sensor (light intensity measurements for accuracy)
Every zone, every variable is dialed in with care.
⸻
🌿 Why All This Matters – Creating Plant-Centered Intelligence
We’re not just creating a grow tent.
We’re creating a living, breathing system that adapts, protects, and encourages growth. Each element, from airflow to light to nutrition, is designed to support the natural intelligence of the plant.
And the BlueBerries are responding.
They’re thriving, stacking, stretching, and showing gratitude through leaf expression, branch angles, and rhythm.
⸻
🔮 What to Expect Next Week
• More branching, tighter nodes
• Early signs of pre-flower development
• Possibly early LST if needed
• Continued sensor data collection as we dial in the automation
⸻
🙅♂️ What Not to Expect
• No topping yet—structure is still unfolding
• No transplant (they’re in final 11L fabric pots)
• No overfeeding—we’re keeping it steady and strategic
⸻
🎥 Video Update – Inside the Setup
A video has been added to this week’s update, just a quiet visual journey through the setup:
💡 No narration, just the gear, structure, and rhythm of a garden built with intention. The systems speak for themselves.
⸻
💬 Final Thoughts – BlueBerry as a Statement
This isn’t just another grow.
It’s a special BlueBerry run.
A classic cultivar grown with modern methods, storytelling, and reverence.
We’re blending nature with tech, instinct with data, and roots with rhythm.
Thank you for being here. The best is yet to grow. 🌿
With light and love,
Your faithful garden companion 🌱💚
DD💚
As always, this is part of our ongoing Grow Series, an open diary of everything we do and why. Whether you’re a new grower or just here for the vibes, you’re invited to come along.
📲 Don’t forget to Subscribe and follow me on Instagram and YouTube @DogDoctorOfficial for exclusive content, real-time updates, and behind-the-scenes magic. We’ve got so much more coming, including transplanting and all the amazing techniques that go along with it. You won’t want to miss it.
• GrowDiaries Journal: https://growdiaries.com/grower/dogdoctorofficial
• Instagram: https://www.instagram.com/dogdoctorofficial/
• YouTube: https://www.youtube.com/@dogdoctorofficial
⸻
Explore the Gear that Powers My Grow
If you’re curious about the tech I’m using, check out these links:
• Genetics, gear, nutrients, and more – Zamnesia: https://www.zamnesia.com/
• Environmental control & automation – TrolMaster: https://www.trolmaster.eu/
• Advanced LED lighting – Future of Grow: https://www.futureofgrow.com/
• Root and growth nutrition – Aptus Holland: https://aptus-holland.com/
• Nutrient systems & boosters – Plagron: https://plagron.com/en/
• Soil & substrate excellence – PRO-MIX BX: https://www.pthorticulture.com/en-us/products/pro-mix-bx-mycorrhizae
• Curing and storage – Grove Bags: https://grovebags.com/
⸻
We’ve got much more coming as we move through the grow cycles. Trust me, you won’t want to miss the next steps, let’s push the boundaries of indoor horticulture together!
As always, this is shared for educational purposes, aiming to spread understanding and appreciation for this plant. Let’s celebrate it responsibly and continue to learn and grow together.
With true love comes happiness. Always believe in yourself, and always do things expecting nothing and with an open heart. Be a giver, and the universe will give back in ways you could never imagine.
💚 Growers love to all 💚
Likes
3
Share
@Cmccart
Follow
Couple be happier I started this grow now some old guy hit me the other day and totaled my car. I have zero intention on selling any just so happy to know I’m gonna be saving a lot on it soon


Likes
228
Share
@StarLorr
Follow
Welcome to my Pablø Ęscøbar diary.
In this diary:
Seeds: sponsored by Ðivine Șeeds
Media: Promix HP
Nutrients: Advanced Nutrients, Diablo Nutrients.
Light and Weather: Şun☀️and Mother Earth.🌎
___________________________
Feeding:
Wed 17Jul: 6L nutrients pH'd 6.5
Thu 18Jul: 8L water not pH'd
Fri 19Jul: 8L water not pH'd
Sat 20Jul: 4L nutrients pH'd 6.5 and 4L water not pH'd
Sun 21Jul: 7L water not pH'd
Mon 22Jul: 8L water not pH'd
*please note that most water only feedings are 2L at the time throughout the day in bottom saucer*
___________________________
What a beautiful summer that we're having, my Ðivine Ladies are just about to start flowering and i am having a hard time to keep up with their feedings and i might need to sprinkle some Gaia Green Bloom on them to keep up with the water only feedings🤔
______________________________
Pablo Escobar is such a beautiful plant to grow outdoor, sturdy and so much greenery in it😍
______________________________
Thanks for stopping by, likes and comments are appreciated!👊🏻😎
Keep on growin!
Keep on tokin!!!
😙💨💨💨💨💨