
Likes
Comments
Share


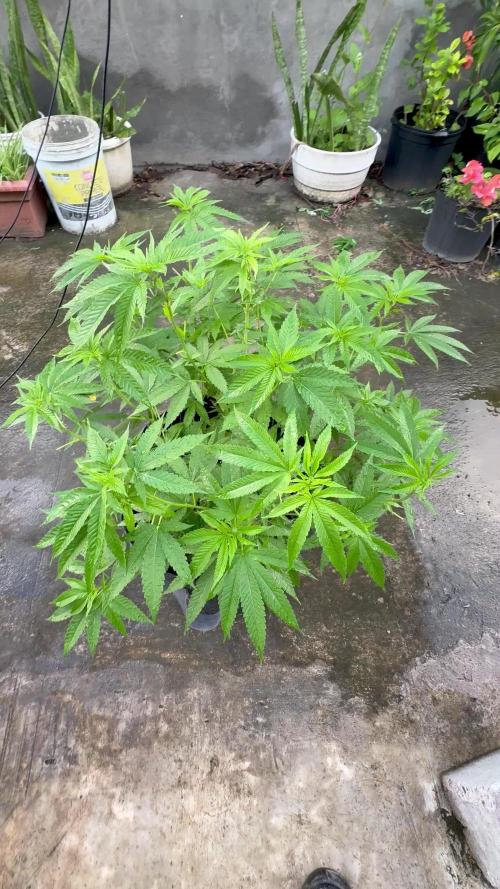
@Bread_n_Buds
Follow
Our Zamnesia Jet Fuel has reached 16 buds. I'm growing them a little more to make sure they don't go into flowering with small brunches but now we're there, a few days and they go into flowering.
The Topping worked well the plant went a bit into over fertilization because during repeated topping the plant has much less need of nitrogen and it's magic to get there by fading the fertilizers especially with many plants.
The ideal when doing topping is probably to start with a slow-release fertilized soil or just start preparing the soil for a period that is at least enough for the vegetative phase at most by adding a bit of alga grow which alone I must admit gives me some problems at least in this case if the plant grows straight much less indeed nothing.
We are always using soil, feeding and all the recommended additives from Plagron 100% organic we have only lowered the amount of grow in this topping phase for the reasons given above.
---- Decide on the right soil and calculate your fertilizer card based on the soil on the official website.
-- www.plagron.com
Try a seed of this strain that drives us crazy...
---- https://www.zamnesia.io/it/11258-zamnesia-seeds-jet-fuel.html
Zamnesia Description // Jet Fuel (also known as G6, Jet Fuel OG, and G6 Kush) is a modern hybrid rich in THC and terpenes with a diesel aroma. Originally created in Colorado by crossing Diesel with Aspen OG, this 60% sativa-dominant hybrid is a must-have for any smoker who enjoys an uplifting and energizing high. Now, thanks to the hard work of our breeders, the original Jet Fuel is even easier to grow at home. Order your seeds, plant them in soil, and enjoy their rapid growth. After just 9–10 weeks of flowering, you can expect a generous harvest of premium sativa buds!
All the best that mother nature can offer is on —— www.zamnesia.com

Likes
49
Share


@LockDownGrow
Follow
Flush time for this tester , all went well and nutrients worked well ,
She is now 100% cloudy and about 5% amber on the sugar leaves ,
So should be ready this coming weekend or the next

Likes
5
Share


@Mr_nugs_lover_David
Follow
I just cleaned the roots and I'm waiting until it's dry to chop her down, I love the smell and the compact nuggets that she has,it's just a very nice genetic to grow.


Likes
18
Share


@Green_Blood
Follow
Excited I got to run and test this genetic.
Was very pleased with the result and would run it again.
Very frosty, Dense nugs, and great fruity/gassy aromas.
Great flavor, nice hybrid.

Likes
39
Share


@Randyb4
Follow
Day 98, 40 days of flower, Plants are progressing well from all the abuse I've put them threw. Not sure when to chop plant B. Keeping an eye on the tricomes.
Day 99, 41 days of flower, Watered with 3 liters per plant of plain distilled water.
Day 100, picked some dead leaves off like I do everyday now, just keeping an eye on plant B's trichomes since it's hairs are showing the most age. Plant A's hairs are all orange now, while plant C and D are still white. Looks like we will have a staggered harvest. Not sure when to harvest though.
Day 101, 43 days of flower(start of week 7 of flower) - Picked more dead leaves off, Plant A- has the biggest bugs, all orange hairs, but the smallest stalk.
Plant B- has a few new white hairs but is still aging.
Plant C- has small frost buds, and alot of white hairs.
Plant D- has medium sized buds with plents of frost, has lots of white hairs.
Day 102, 44 days of flower- Watered with 3 liters of plain distilled water. Picked more dead leaves off of course to maintain a clean canopy and reduce options for bugs.
Day 104, day 46 of flower- Plant B has some amber trichomes, so I might chop it today or tomorrow. Took alot of photos of plant B since it's my first harvest.

Likes
39
Share


@Festerus
Follow
Really the usuals, clean her up and tie her down :) I did add a WiFi controlled watering system for when I go out of town tho, so that was nice!
She is quite the shrub 15” tall and 40” wide >.< the trunk is approaching 1.75” diameter :)
Processing
Likes
3
Share


Likes
11
Share


@HowtoBubatz
Follow
So, the big day finally came!💚
I harvested the plant and got her cut and hung up to dry. But before that, she spent a solid 72 hours in complete darkness to finish off. (A little boost before the chop)🌿
Everything went as planned and is looking pretty good so far.
Nothing out of the ordinary, just smooth sailing through the final stage. Now it’s all about patience while it dries properly. Can’t wait to check out the final results in a couple of weeks! 🌱
Likes
5
Share


@GaizkaDinafem
Follow
This week I´va started to smell some sweet and fruity aromas... 😊😊😊 The buds are taking weight and the trichomes start shining 🙌
Likes
7
Share


@Reaper
Follow
pistils start to turn brown maybe 2 more weeks before harvest.
some topleaves show calmag issues because i gave too luch bloom booster 2 weeks ago looks wors then it is
Likes
13
Share


@smokeycropping
Follow
Se agregó la malla scrog se paso a floración, no pude obtener la malla con más tiempo asique ya no tenia mas tiempo para rellenar. Pero con el lst se busco el mismo objetivo y pasamos a 12/12 primera semana de floracion

Processing
Likes
23
Share


@Organic_LarF
Follow
High GD community,
Week 2,
This is surely not the s1 version 😅😅
Allready 1 leaf is missing, so not sure ill keep it, not taking risk of pollination. Ill give it an extra week and evaluate after that.
Thats it for this week
Grow safe buds and feel free to check out my other ladies doing fine 🌿👍
🙏🌿🌿🌿🙏
Feel free to use this link when you are intrested in any product🐍viparspectr🌈 has to offer➡️➡️➡️➡️➡️➡️
https://www.viparspectra.com/?aff=nbemz68cxril&utm_source=affiliate
VIPARSPECTRA XS1500 LED grow light
VIPARSPECTRA XS2000 LED grow light.
VIPARSPECTRA XS4000 LED grow light
Likes
209
Share


@BioBuds
Follow
Another week has passed and this lady seems to have recovered from last week's sudden problems. I just kept feeding with clear water, I suspect low PH and my solution fixed it.
I also raised the light a little more, this SP 3000 is a true beast of a light, and especially the Kush in the middle couldn't handle it that well. Thank you @MarsHydroLED
I did some final defoliating, only bundled up leaves and leaves covering major bud sites.
This Orange Hill Special is something else though, Im happy to grow this, she is pretty and sophisticated in all, almost majestic. The buds are speckled with orange hairs, the shape of each like a round ball of ice cream.
She was pretty from seedling on and looking back, I would have loved some offspring of this pheno. She is a thrill and no signs of male parts on this one, although it can happen with this strain.
So glad I have some more seeds and cant wait to put a tentful of this. Don't let its low score dissuade you, yes there is a chance she hermies but when she doesn't my my my... Check em out here @DutchPassion_Official
She smells of orange and tangerine with a very strong hazy undertone. This combination promises a great smoke and frankly, I cant wait.
Thanks for reading up on me and thank you for the comments and likes again!
Hug Bud


Likes
3
Share

@Organic473
Follow
She is looking good haven’t watered in a while as the continuous rain helped. I’m doping she can gain more height in the next 2 weeks as I intend to flower her into the dry season.

Likes
7
Share


@Dargaville_Dukes
Follow
Poor babies! They've definitely had a rough start. I'm fairly certain now the issue has been too much moisture in the soil. I believe there are a few factors that have had an impact:
1) Obviously, giving them too much water. In the first week I gave 90ml into their 1 litre pots over two waterings. I thought this was okay because the top soil was completely dry between waterings. Someone suggested that seedlings don't need additional water for the first 10 days so I'll try that next time
2) Feedback I've had is that my soil mix is quite heavy @ 63% soil, 25% Coco, 6 % perlite + 6% vermiculite. In future I'll increase the perlite portion to about 40%
3) Also, I just noticed that the plastic pots I'm using have very small drainage holes. I think this has caused moisture to accumulate at the bottom of the pot. Yesterday I pushed my finger all the way to the bottom of the pot and it is much wetter at the bottom than at the top.
So yeah, tough start. But they're still growing, albeit very slowly. I trust they'll survive.


Likes
Comments
Share


Likes
15
Share


@ThePotFactory
Follow
Just flushing the girls this week, waiting for most trichomes to go cloudy instead of clear. Ive now switched the lights off for 36/48 hours and will harvest in the next couple of days :))


