


Likes
4
Share
@discopriest379
Follow
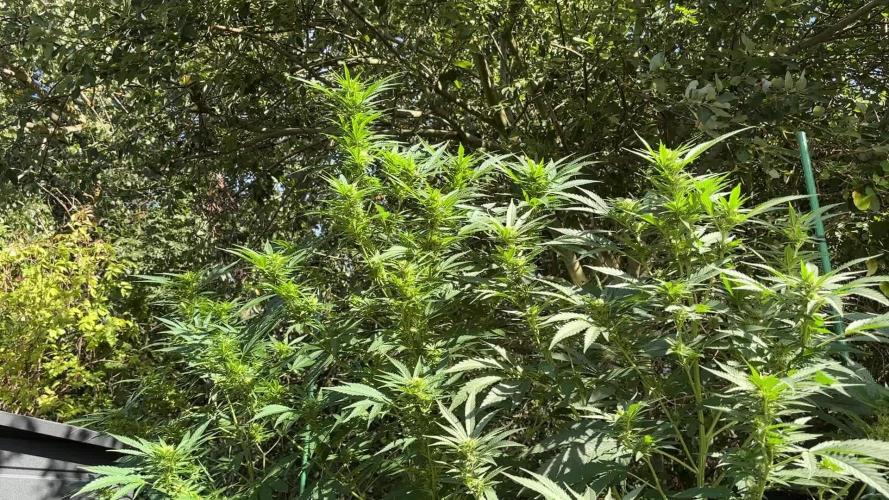
Everything still looks good this week. The leaves are healthy, and the buds continue to develop nicely 🌸✨
I watered twice this week — on September 16th and September 19th. Each time I used 10 L of water with 3 ml of Alga Bloom and new added 1 ml of Green Sensation 💧🌿.
The plants currently get direct sunlight from around 12:30 until about 15:00, depending on the weather ☀️. After that, the house starts shading them.
This week I also did quite a lot of defoliation again, mainly to prevent the leaves from shading the buds and to improve airflow through the plants 🌿✂️💨
So far, the weather has actually been quite favorable. The mornings aren’t as humid anymore, and there’s still a nice amount of airflow around the plants. Even though it rained during the night, the plants were already completely dry by 8 AM. It was also quite windy on Saturday — you can see it in the video 😄💨🌿
Hopefully this weather will last. I need at least another three weeks of reasonably dry conditions to get them safely to the finish line 😄🌸☀️
Fingers crossed! 🤞🌿

Likes
6
Share


@pzwags420
Follow
Week 8 has gone well and she is chugging along. She is still putting out new pistils with some turning orange. Calyx's are growing longer and buds are still soft. I'm thinking a min of 10 weeks flowering for her. I removed some leaves on inner canopy to bring some air and light deeper. She is so bushy its hard to even defoliate maybe next time i will remove some more lateral branches... afterremoving the leaves I must have come incontact with a pollen sack as where I defoliated all seemed to be polinated over night and are making seeds :( I will cut my losses and harvest while seeds are still small.

Likes
26
Share

@Northern_Ent
Follow
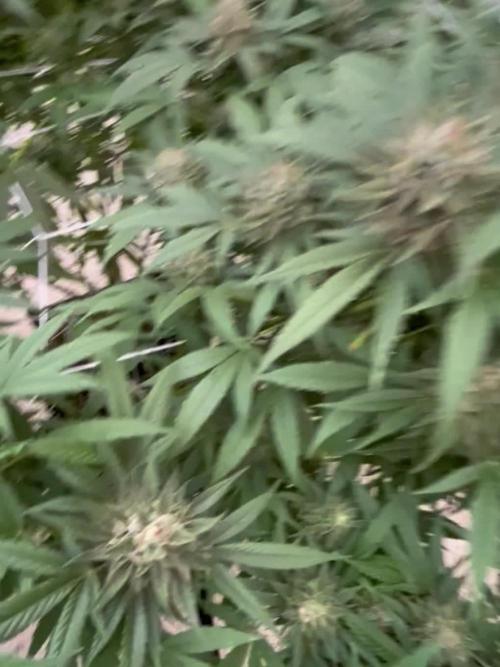
Sep 6: the top buds are mostly ready. Final Flush was applied two days ago and are supposed to wait 7-10 days. Will wait a bit longer but harvest will be starting soon.
Sep 7: harvested 740 g wet buds into freezer. When dried this will be about 180 g. Lower buds will be another week or two.
Sep 12: most likely will be harvested tomorrow. These are really nice hard buds.
Don’t take flash pics of your plants unless you follow up with a far red light. Otherwise…hermies are more likely.

Likes
18
Share


@RealTrees_uk
Follow
easy strain to grow for rookies like me an you will still end up with a nice end product didn’t think my first grow would turn out like this am so happy it went so well ! 4oz not bad 🍁👌🏻💚

Likes
35
Share


@DudeGrowsWeed
Follow
Happy New Year!!!
Over the past week I did some HST bending. The branches are starting to recover and straighten out after the HST now. I still have some issues with pale leaves and a few spots here and there. I’m going to try adding some Dolomite Lime with the next watering and think that should help with the paleness. I’m also going to up the amount of CalMag and Mammoth P to see if that helps with the spotting. I’m not sure if I should see the spotted leaves recover or if the spots will remain. I suspect the spots will remain on the existing leaves regardless of what I do at this point, but hopefully no new spotting will develop.
The lights went off before I was done taking pics, so some pics will look a little different. The pics with the lights on I had to color correct, they still look a little more on the yellow side than in reality, but much closer to reality than the pre-color corrected versions. Once the lights went off I turned the flash on for my camera, those pics did not need any color correction. You can see the differences in the pics of all plants, the first 2 are color corrected with the lights on, the last 2 are taken with a flash and no color correction.
I read several books on cannabis over the past few days, some good, some not so much. One that I liked was “Marijuana Cultivation Reconsidered: The Science and Techniques For Huge Indoor Yields” by Read Spear. This book is available on Amzon’s Kindle Unlimited service, which costs $9.99/month, but they offer a free 30 day trial (which is what I’m using at the moment). Reed’s book is broken down into 3 sections, the first and third go fairly deep into the science behind growing, he does a pretty good job at breaking it down in easy to understand terms, but I had to read several sections 2 or 3 times to really get it (or just move on with as much understanding as I could digest). The second section is the nuts and bolts of growing. Most was a review but there were several topics he touched on I hadn’t thought of in a while. And again its well written. He also offers the section only in a separate book called “Small Spaces, Big Yields”. If you are not interested in going deeper into the science behind growing, “Small Spaces, Big Yields” is what I would recommend (if interested in reading books on cannabis).
I took some notes while reading and I’m going to add some of these notes in my dairy updates over the next few weeks. This week I’m going to include a note on electrical, this should be a fairly basic concept, but it is super important IMO…
“Electrical Items In a sealed grow room or in a tent, you will have water pooling on the floor from time to time. There is no avoiding this. Mop it up when you see it, and never put your electrical gear directly on the floor. Never. Not even for a moment. In fact, let me stress this point in bold capital letters. ALL ELECTRICAL GEAR MUST BE MOUNTED SECURELY ON A WALL OR TENT POLE.”
-Read Spear
I’ll add more did bits like this in my diaries over the upcoming weeks.
If anyone has any good book recommendations please let me know in the comments. I’m looking for books that might not be as popular as the ones by Jorge Cervantes or Ed Rosenthal (I’ve read those). I did just order “True Living Organics” by The Rev which I’m looking forward to reading. But I’m looking for more. I really want to step it up and learn as much as possible. Your comments, feedback and recommendations are very much appreciated!
Until next time, Happy Growing! Stay Positive! And have an amazing 2019!!!


Likes
40
Share


@CampaCavallo
Follow
7ª settimana di fioritura per la bella BISCOTTI 🍪💙🗿
interrompiamo la somministrazione di BIG BUD di ADVANCED NUTRIENTS... Mi sembra che abbia funzionato propio bene questo giro! I fiori sembrano scoppiare🎉😍🔝💐


Likes
27
Share


@Pennello
Follow
Hi guys,
At the end of the story, I am very happy with the whole cycle and finally the outcome, I almost killed everything in there 😂
The Acid Dough is a great sativa strain, with a short flowering period. I did have problems throughout the cycle overfertilizing the plant.
I toppped them, and then use LST training to help her growing wider, Probably if I wouldnt have messed up with the ferilizer I would have a much better final product, not even talking about quantity, but quality.
The whole plants were dried for 18 days after which they were finished in jars for another 6 weeks, if I dont fell...
I would like to thank Grow Diaries for this amazingly-organized community they have created, where we all can learn a lot, and share something we really love.
Thanks to everyone who stopped by and looked at the diary, squeezed the like button or comment the diary.
13/12 I'VE MADE MY FIRST RUN OF BUBBLE HASH!
Very very happy with the end result, did not weight anything yet because is still wet big time, I lightly squeezed it a bit, before let it drying on parchment on a cardboard. The smell it's just absolutely crazy. I can smell strong citrus notes in the 120µm but the 90µm and 73µm explodes with crazy-sweet note. While the 25µm (did not use the 43µm) where I did collect most of the hash, smell like good and sweet hash, nothing crazy like the previous ones but a very buttery like consistency that makes me want to eat it like this...dont ask me why...even though I know you all probably felt this way too...
Anyway, the paper sheet says it all about timing, washes and µm used for the extractions, but just in case I'll explain it down here.
I have done 3 wash with different timing.
1º wash: 5 min only to get the most brittle trichome heads
2º wash: 10 min stardard
3º wash: 30 min to stock up a bit 😅
I could have done an extra wash for sure and get more out, but I was running out of time so...I will update with the dry weight, it was not the only wash I've done, that were just too many grades to weight up..so I chose to do it once all dry!
See you really soon with on the nex run pals!


Likes
9
Share


@Organic_G
Follow
Tag 48, Woche 3 der Blüte kommt morgen zum Ende… 🌷🌺
Soweit haben sie sich extrem gut gestreckt und Bio Masse aufgebaut.
Stamm kommt photoperiodischen am Ende der Blüte nah, deutet darauf hin, dass es der Pflanze super geht, sieegr als genügend Nährstoffe zur Verfügung hat und anstatt Stämme bauen zwei der Ladys einfach Rohrsysteme auf 😆 die angezeigten Äste sind teilweise so dick wie bei anderen die ganze Pflanze 🌱
Terps sind super Candy, eine Streckt sich komischerweise immer noch, war ein Spätzündung, dafür meiste Bio Masse von allen.
3 blühen bereits gut, eine davon lässt tatsächlich mit der Trichomproduktion auf sich warten, wieso keine Ahnung aber interessant zu beobachten 😄
Likes
15
Share


@MG2009
Follow
👍
10/15/2020
It's been 3 weeks since last update so 33 weeks got 2 weeks I think ? Feed some
4-9-3 happy frog 3 tbls and 3 tbls of (DE). 3 weeks left at most.
10/16/2020
There is some nasty weather on the way so I am going to bring her in for the finish going to get out a scope tonight and have a good look at her. But I think two weeks left, also will be under a 11-14 cycle till done.
Her mother plant thrived under this light and microclimate.
Ps.
She's expected to be (FLOWERING!)
10-12 week strain
So calyx swelling soon🙏 I almost forgot, she smells like Juicy Fruit gum. Smoked something similar in the 1980's and been searching ever since! Hope she tastes as good as she smells
10/26/2020
Its been 9 weeks and 4 days since start of flower buds are getting harder everyday maybe a week to go.
10/29/2020
10 weeks on the nose. Just water,water and water this week took some branches 2 weeks ago very good for no cure just dried, but With a good trim, and cure should improve over the next couple weeks.
Harvest may come this week but we will see🙏
Likes
32
Share


@GrowingTime
Follow
here we are Guys, 11th week, 6th into flower, the girl is recovering nicely.
she started to put some size buds and pistils are started back to grow white.
the Led is working perfectly and the buds are really frosty as fuck.
I hope she will still give me some nice weight even with the past big mistake.
UPDATE: she's definitely recovering fast. at day 82 the buds are swelling, I apologise for all the colors shades but i changed lights in order to get the best shots.
Likes
3
Share

@DogDoctorOfficial
Follow
Folder 13 — Blue Waffle — Pheno A
Week 2 Vegetation — A New Home Beneath the Surface
Welcome back, growers!
This week marks one of the biggest milestones since germination.
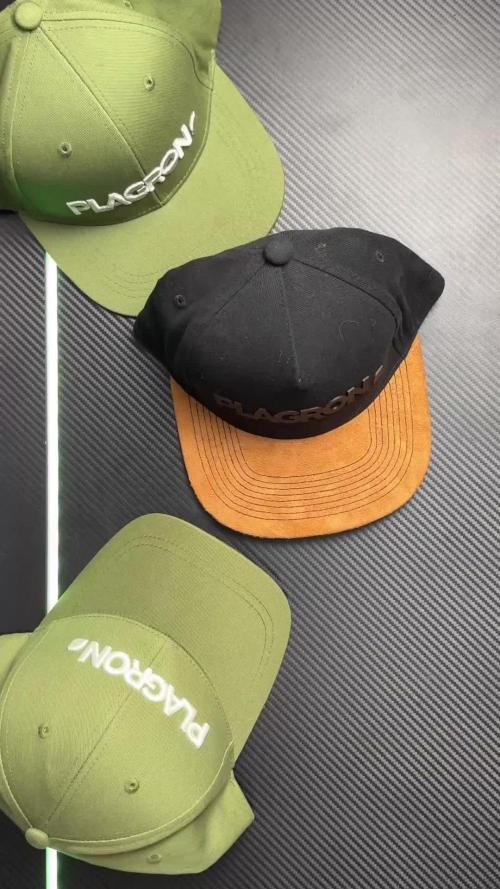
After spending the first week establishing a healthy foundation inside the starter container, Blue Waffle Pheno A has officially moved into her permanent home—a Plagron 8L Premium Coco Grow Bag, where the next stage of her journey truly begins.
Transplant day is always exciting. While the leaves tell us how a plant is feeling above the surface, it’s the roots that reveal the real story. And this week, that story was a very encouraging one.
⸻
The Environment
The Zamnesia ecosystem continues providing a stable and comfortable environment for these young ladies.
Current room conditions:
• Temperature: 29°C
• Relative Humidity: 68%
Airflow remains unchanged from last week:
• Extraction Fan: Level 5
• Circulation Fan: Level 4
Lighting also remains steady, with the LED running at 27% intensity, drawing approximately 86 watts from the wall.
At this stage, consistency is far more valuable than chasing rapid growth. Stable environmental conditions allow the plants to focus their energy where it matters most—building roots.
⸻
Feeding Program
Now that the plants have entered their coco home, the hydroponic feeding strategy officially begins.
The nutrient solution remains intentionally simple:
• Plagron Hydro A
• Plagron Hydro B
• Plagron Hydro Roots
Reservoir parameters:
• EC: 1.26 mS/cm
• pH: 5.83
• Solution Temperature: 23.1°C
Hydro Roots continues playing an important role during this stage, encouraging the rapid development of fresh roots as the plants begin colonizing their new substrate.
The objective isn’t explosive top growth just yet.
Everything starts beneath the surface.
⸻
Transplant Day
Last week the Plagron Premium Coco Grow Bags were slowly hydrated using distilled water, allowing the coco to expand evenly while creating a perfectly moist environment before receiving the plants.
Rather than forcing the transplant into a dry substrate or flooding the bags at the last moment, the coco had an entire week to stabilize.
When transplant day arrived, the process couldn’t have gone smoother.
Using the original nursery pot as a guide, I carefully created a perfectly sized cavity inside each coco bag. This simple step allows the entire root ball to slide into place naturally without compressing or disturbing the surrounding coco.
Sometimes the smallest details make the biggest difference.
A gentle transplant means less stress.
Less stress means faster recovery.
⸻
A Look Beneath the Surface
Before placing Blue Waffle Pheno A into her new home, I couldn’t resist taking a closer look at her root system.
And I’m glad I did.
While the roots haven’t completely filled the container yet, they are beautifully distributed around the entire root ball. Bright white feeder roots are visible across every side, with countless fine root hairs actively exploring the growing medium.
This is exactly what I was hoping to see.
There was no need for a heavily root-bound plant before transplanting. In fact, moving them at this stage allows the roots to continue expanding naturally instead of beginning to circle around the nursery pot.
Healthy roots don’t need to be massive.
They simply need to be active.
Blue Waffle Pheno A is giving every indication that she’s ready to explode into her new environment.
⸻
Blue Waffle Pheno A
Above the substrate, Pheno A continues to impress.
The compact structure remains intact, with tight internodal spacing and excellent symmetry across the canopy.
The leaves display a healthy green colour, while the petioles have started developing subtle purple pigmentation—a characteristic that can often appear naturally in younger plants depending on genetics and environmental conditions.
Most importantly, the plant showed virtually no signs of transplant shock.
Only a short time after moving into the coco bag, the leaves remained upright and turgid, while fresh new growth continued emerging from the center.
That’s always one of the best signs a grower can hope for after transplanting.
It means the plant is already getting comfortable in her new home.
⸻
Looking Ahead
With the transplant now behind us, the next objective is allowing the roots to colonize the entire Plagron Premium Coco Grow Bag.
As the root system expands, so too will the canopy.
The coming weeks should bring noticeably faster vegetative growth as Blue Waffle Pheno A begins taking full advantage of the increased root volume and hydroponic feeding schedule.
For now…
Healthy roots.
Healthy leaves.
Healthy future.
Exactly what every grower hopes to see.
⸻
Thank You
A huge thank you to everyone following along on this journey.
Special thanks to:
• Zamnesia for the incredible genetics, equipment, and complete ecosystem that make this project possible.
• Plagron for supplying the Premium Coco Grow Bags and the Hydro nutrient line that now powers this grow.
• GrowDiaries for providing an amazing platform where growers from around the world can learn from one another.
• And finally, thank you to every member of this incredible growing community. Whether you’re just starting your first grow or you’ve been cultivating for decades, your support, advice, and passion make this hobby something truly special.
The roots have found their new home.
Now it’s time to watch Blue Waffle Pheno A reach for the sky.
Growers Love and Keep Growing. 🌱💙🍁
Likes
140
Share


@MrJones
Follow
mrjones - Slurricane #7 S1
🌱Slurricane #7 S1
@inhousegenetics_official
👨🌾🏽GD Grower: MrJones
🔹🔹🔹🔹🔹🔹GOALS🔹🔹🔹🔹🔹🔹
🌞Environment - 75/80℉ and 55% Humidity
💧 Feeding - Advanced Nutrients Organic
⚗️Soil - 50% Ocean Forest / 20% Tupur Royal Gold / 10% Earth Worm castings / 10% lobster Compost / 10% Additional Perlite
🍃Training / HST, Will be topping, Cloning, and creating larger plants, and placing to flower under a trellis
🕷️ IPM - Will be using Green Cleaner" 1 OZ per Gallon, and CannControl from Mammoth alternating between product each month for Integrated Pest Management.
💡Mars Hydro LED / Veg Geeklight Monster Board 480W V4 / Flower 480W FC 4800
🔹🔹🔹🔹🔹🔹🔹🔹🔹🔹🔹🔹🔹🔹🔹
📜 Rambling - Week 9 underway the plants are responding very well to the decreased nutrients - the clones are coming along, but trying to ween them off the biodomes is a bit tricky.
🔹🔹🔹🔹🔹🔹🔹🔹🔹🔹🔹🔹🔹🔹🔹
▶️ Sunday - 04.04.21 / Fed 30 Ounces today
▶️ Monday - 04.05.21 / Fed 30 Ounces today
▶️ Tuesday - 04.06.21 / Fed 30 Ounces today
▶️ Wednesday - 04.07.21 /These Mother plants are on cruise control, Fed 30 Ounces today
▶️ Thursday - 04.08.21 / Fed 30 Ounces today
▶️ Friday - 04.09.21 / Fed 30 Ounces today
▶️ Saturday - 04.11.21 / Fed 30 Ounces today
🔹🔹🔹🔹🔹🔹🔹🔹🔹🔹🔹🔹🔹🔹🔹
📜 Cultivar Information - In House Genetics - Slurricane #7 S1
🔹🔹🔹🔹🔹🔹🔹🔹🔹🔹🔹🔹🔹🔹🔹

Likes
25
Share


@Creme_De_La_Creme
Follow
week 9 and LOOK AT THAT !! 😄
Im in love with her perfume, the smell is amazing and she is growing by the biggest autos i have ever seen, unfortunatly as you guys can see im running out of space in the 5x5, but thats what it is, super confident i will have a huge yeild from this tent.
see you later, give a like and comment, tks 😎
Processing
Likes
8
Share


@hi_bengal
Follow
This little girl is loving life! 16 days old today! 6.4 ph water 18/6 light schedule watering when soil looks and feels dry.

Likes
12
Share


@Jays_Not_Here_Man
Follow
Another week has flown by! The girls are doing great, cruise control this week as I have just been monitoring RH and temps. Trying to keep them as low as possible, I’ve been getting as low as 74 during the day and 68 at night.
I finally took a look a look at the trichomes with my jewellers loop, lots of cloudy, and a few amber around the leaves and top colas, but still lot’s of clear trichomes. I’ve ordered myself a wireless/usb digital microscope to assist with the process, and looks like it will be here just in time to determine harvest day. 😎🎄
I started by eliminating the nutrients at the beginning of the week. I typically allow for 3-4 pure water feeds before I harvest, and at the rate they have been drinking, this should be enough to get through the 7-12 days they have before harvest. I don’t flush, but rather “rinse” with normal water amounts, allowing the plant to use up the remaining nutrients in the soil. This also allows me to recover most of the soil from my grows and reuse ♻️ with other soil mix.
There has been great debate and a great deal of bro science out there for many years, but the recent studies suggest there is no difference in end result when it comes to flushing or using nutrients right until the end, if a proper dry and cure is performed. What do you think? What do you prefer to do? Thanks for reading this far, leave me a comment with your preferred method 👊🇨🇦❤️

Likes
19
Share


@Wenz004
Follow
EC schrittweise auf 1.3 - 1.4
Die ersten 4 Tage im Video kaum Wachstum (war unterwegs)...Blumat war verstopft...Blätter sind unheimlich dünn geworden und die untersten großen verwelkt...ab Mitte der Woche 4 konnte ich eingreifen...danach bissl manuell LST (mit der Hand gebogen) betrieben und entlaubt...bissl später scrog Netz spannen und Pflanze schön in die Breite ziehen. Im Großen und Ganzen hat sich die Pflanze wieder schnell erholt und gedeiht weiter.
Heute auf 12h umgestellt (bin schon ganz aufgeregt...SF1000 raus und SF2000 rein(füllt die gesamte Breite des Zeltes aus😬)...zunächst ca. 45 cm Abstand und 80% trotzdem Photonen schon ca. 40% mehr...in paar Tagen gehe ich auf 100%...habe auch Seitenlampen (Niello T8) bereits installiert aber noch nicht eingeschaltet...evtl. wird das zuviel aber ich experimentiere halt gern...3 Optionen...die Pflanze geht dann richtig ab...Sie geht ein...oder es beeinflusst nichts ausser Stromrechnung.
Likes
16
Share


@Marijuanaisland
Follow
Alguns ataques de bottritis e corte no top Bud mais consegui controlar com desumidificador alimentando com( ripen ) GHE desde o dia 50 caminhando para a colheita
Likes
12
Share

@farah4weed
Follow
Hello guys,
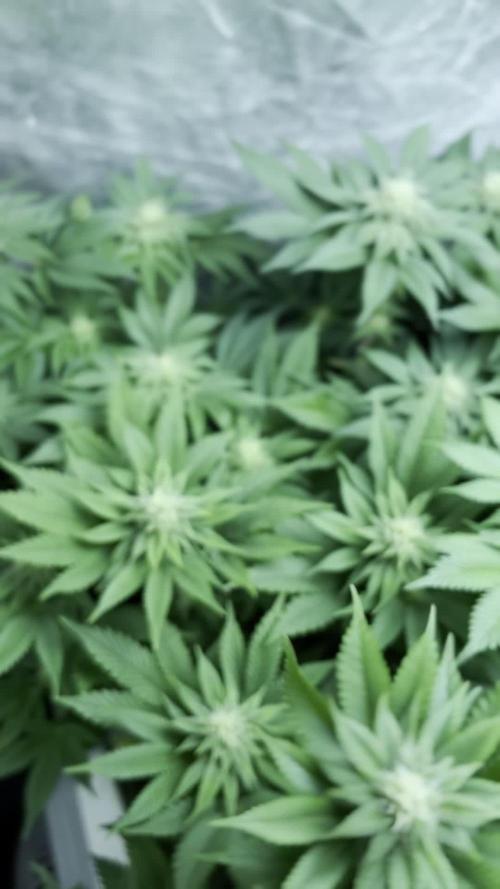
The og cream project has reached the fourth week of flowering😍
From the appearance of the plants and flowers, I can see beautiful, dense, fragrant buds.
You can see the characteristics of the mother plant in the appearance of the flowers.
But the smell is a little more pungent and intense 😋
The plants are all growing healthily.
I posted a photo of the difference in temperature between night and day😍
Thank you for your comment🙏
"farah4weed"