The Grow Awards 2026 🏆 


Likes
Comments
Share
@Brujha77
Follow
Beginn Woche 3.
Wasserwechsel und neue Nährlösung für den AutoPot angesetzt.
Deutlicher Unterschied der beiden zu sehen (deutlich mehr Strech im AutoPot).
Aber auch die 2. Im Airpot steht gut da.
AutoPot 30l Tank
(Gedüngt wird nach dem Plan von Terra Aquatica für Coco).
Airpot wurde mit Greenhouse Feeding biolinie gedüngt je 4g/l
Ende Woche 3 und was soll ich sagen...
Bisher schaun beide gut aus, aber der Unterschied zwischen Airpot/AutoPot is schon Enorm (Vergleich hinkt etwas da ja auch Unterschiedlich gedüngt).
Der EC ist recht hoch, hoffentlich geht's gut. Leitungswasser kommt mit 0,8 aus dem Hahn.....

Likes
3
Share
@Happygrowing
Follow
Mi aspettavo qualche grammo in più e un gusto differente ma comunque mi ha insegnato molto sulla crescita e sugli errori da non commettere di nuovo in futuro.
Come qualità di cima sono belle come non troppo compatte con un forte aroma.
Seccate per 14 giorni a 60%di umidità e 21 gradi Celsius.
Conciata per 14 giorni e consumata.

Likes
100
Share
@MadeInGermany
Follow
Hi people :-)
This week the Victory Kush F1 (Phenotype 1-3) and the Zkittlez (Phenotype 1) were harvested.
The Orange Sherbert (Phenotype 1-2) and the Zkittlez (Phenotype 2) were flushed.
The rest fertilized as usual.
Next week it continues :-)
I wish you all a nice and healthy weekend.


Likes
12
Share
@HerbalBlazer
Follow
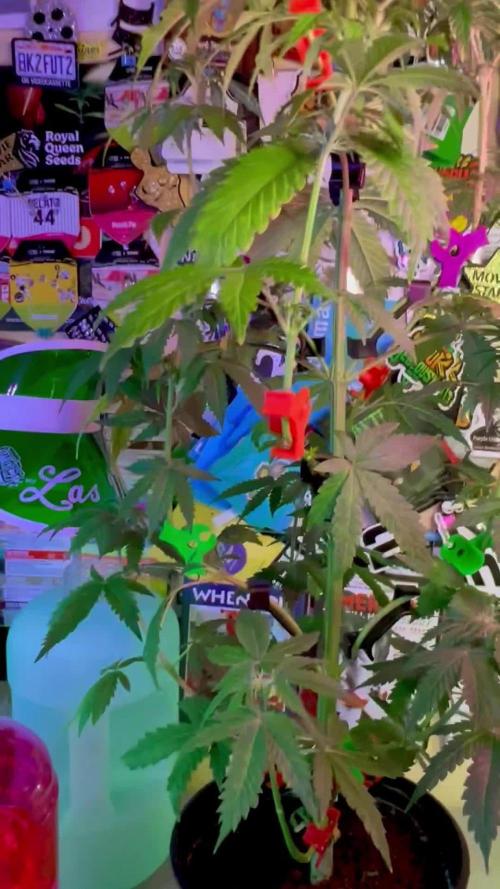
Now nearly court up so this is around 3_4 weeks flower just finishing stretch here


Likes
20
Share


Processing
Likes
3
Share
@macrocefalo
Follow
The last 100 meters shallow hahaha. The vegetative growth and bud formation are good I believe we will have at most 15 more days for plants # B1 # B2 # B4 # B5. Plant # B3 has small white pistils and, due to its structure, there is no way for it to be a photoperiod so it will have more days than its sisters.
**UPDATE: B3 finally starting flowering with 66 Days
***UPDATE: 68Days flush Plants OK
Likes
4
Share
@QixxGrows
Follow
Day29: New sets of leaves. I'll repot and switch to proper Veg Lights on the weekend.
Day30: I'll repot tomorrow.
Day31: Repotting done. She had a crazy amount of roots in the seedling pot. MUCH more than I expected. I switched to Veg lights at 90% power.
Day32: Settling in new pot
Day33 & 34: I had to perform some maintenance on the tent. Lost some hours due to that.
Day35: Growth really looking healthy. Although she's not really stretching high, she does look rather happy. I do like them thicc ;)
General: I need to put the camera somewhere else so that the growth can be better seen. Right at the end I'll edit out the white flashes. They're caused by the humidifier running and will be really easy to cut out without losing the gist of the grow :)

Processing
Likes
6
Share
@ladyjane
Follow
8/10 - In prep for flower I've got some Compost Tea brewing with a little Terp Tea Bloom by Roots Organics. .Also did a little selective defoliation
8/11 - Flipped the ladies to flower today! And all is good in the 8x4.
8/12 - Watered all the ladies with the Compost/Terp Tea. Also did some more defoliation and added some mosquito bits for added pest prevention.

Likes
38
Share
@GardenSchool
Follow
February 23, 2021 (Week 7, Day 50, Flower 1): It's the first day of flower! The plants slept for 12 hours last night and will keep that up until harvest. Still seeing pretty crazy growth even for the 12 hours of darkness they went through. Grew about another .5". Excited to see how much these things stretch. Soil was very dry this morning so I watered with 4l of water per plant with 3ml/l pH Perfect Bloom + 2ml/l pH Perfect Grow + 2ml/l Sweet Raw + 1ml/l Big Bud + 1ml Cal-Mag Plus + 1/4 tsp/gal Humboldt Nutrients Big Up Flower Powder with a pH of 5.8. Runoff pH of 6.3. I will start watering with a 6.0 solution going forward. I also top dressed with about an inch of fresh Roots Organics Lush soil. Plants are looking great. Not seeing any problems currently. I'll keep a close eye on them as they transition. Turned down humidity another 5% today. Averaging 50% rH and 73℉.
February 24, 2021 (Week 7, Day 51, Flower 2): Plants look great. Soil still moist from watering. Tilled half inch of topsoil. Averaging 50% rH and 73℉. Nothing else for today.
February 25, 2021 (Week 7, Day 52, Flower 3): No complaints at all. These plants are as healthy as they can be from what I can tell. The growth sites are starting to do some funky stuff and everything is kind of starting to "clump" together. Really interesting to watch this process happen, as I've always wondered exactly how the buds begin to form. I was greeted with a very sweet smell when I opened my tent this morning, nothing strong yet. To encourage further vertical growth I've removed all LST ties except for two from Gelato 1 and Unknown 2. I adjusted the ties on Unknown 1 because it's already starting to stretch and I need it to slow down just a bit while the others catch up. Soil is semi-moist this morning but the pots are still pretty heavy, so I'll water in a day or two. Averaging 50% rH and 72℉.
February 26, 2021 (Week 7, Day 53, Flower 4): Pots were light today so watered with 4l per plant with 3ml/l pH Perfect Bloom + 2ml/l pH Perfect Grow + 2ml/l Sweet Raw + 1ml/l Big Bud + 1ml Cal-Mag Plus at 6.0 pH. Runoff sitting at 6.4 pH. Defoliated one more node on each growth stem - the lollipop look is coming around. It will probably be my last defoliation like this. From now on I'll only pluck fan leaves that get in the way of bud sites. Unknown 1 grew over 2" in the last 24 hours. The stretch is getting real. I removed all remaining LST ties from Gelato 1 and Unknown 2. I redid the LST ties on Unknown 1 in an attempt to control its growth, but at this point I feel like it's just going to be a lanky plant and there's nothing I can do about it. I'll do my best to keep them as level as I can. Also, I took off Unknown 2's stem cast today and it healed really, really well. I have never seen a plant do this, but it filled itself in with tissue that is soft to the touch, and there's only a slight split at the top. It's looking really great. My wife noticed the smell of the plants this morning for the first time - so that's a good sign! Plants are starting to put off a lot of their own humidity, so I haven't refilled my humidifier in days. Averaging 50% rH and 72℉. Happy Friday everyone! 👻
February 27, 2021 (Week 7, Day 54, Flower 5): Soil is still moist - tilled half inch of topsoil. Overnight it appears Gelato 1 and Unknown 2 are doing their damnedest to catch up with Unknown 1 - they both grew about 2". Plants are looking great and are definitely starting to stretch! Averaging 50% rH and 70℉.
February 28, 2021 (Week 7, Day 55, Flower 6): Top soil is pretty dry, but the pots are still heavy. I'll hold off watering for a day or two. The last 24-hour period I think I saw the biggest difference in the plants so far. Each growth stem stretched a ton on each plant, but at varying degrees. The canopy is suddenly uneven, but I think trying to keep everything even at this point will be futile. I will let them go and install the SCROG net soon if the colas start growing too differently from one another. The stipules on every plant tripled in length overnight so I think the plants are definitely getting with the new 12-hour schedule. All the plants are starting to shoot off tons of pre-flowers and pistils now. They're in the swing of things now. Averaging 50% rH and 70℉.
March 1, 2021 (Week 7, Day 56, Flower 7): Soil is dry but pots still have some weight. Will probably water tomorrow. Plants are looking fantastic. Canopy is stretching all over the place. Averaging 50% rH and 70℉.
Looking forward to next week! Hopefully we'll start to see some flowers poking through soon!


Processing
Likes
18
Share
@UKauto
Follow
Topped the other 2 branches and kept her pinned down, getting somebody nice growth going now, steady away nothing flash but it's all good.
Not far off flipping her, probably a couple weeks.

Likes
40
Share
@Targona
Follow
24/05/2023 - 78 days since my little girl sprouted from a seed🌱
Tenth week of my Jack Herer 🌿🌾🌲
Nutrients:
Advanced Nutrients Flawless Finish - 2ml - I rinse the plants two weeks before harvesting so that they have a clean taste and smell 😋👃🌴
-------------------------------------------------- -----------------------------------
Lights: I use a Mars Hydro TS1000 - 150w full spectrum, great light for vegetation and flowering use 💡💡
Training:
No training is needed this week
In general:
As I already wrote, Jack did not go well for me this round. I still don't know what caused the burnt leaves. Whether it was a small watering and high heat, or a bad reaction to nutrients. The pH of the soil was fine. Its buds are very weathered and have many leaves in them 😒
In a week I will gradually harvest the girls 🌿🌾
Thanks for the likes and you can follow me on Twitter 🐦: @ Targona666
See you soon 😍

Likes
2
Share
@MT_Farmer
Follow
As the plants have been developing some brown dots on some leaves I suspected they might need some added calmag. I added a ml/l for a few waterings


Likes
3
Share
@CalGonJim
Follow
2/2 3:45 AM. Everyone is looking great. I separated the plants. I only have three going in the temp because there was airflow issues. I upped the EC to 1600 last time use 2 mL of calcium and 2 mL of purple on top of maxi bloom powder about 4 1/2 g into a gallon. I have been a little light so they’re a little stared in some ways but not too bad. the flowers look great. I’m seeing plenty of resin on OG triploid by Humboldt seeds. They look great.
2/4 1:48AM Goin gto flip the PHOTOPERIODS to flower. I started too many photos..... will only do Autoflowers from now on...too much work, to many extra steps fro photos. Im not feeling good enough to do all that any more. I cut back the Trailer Park Boys plants for a show grow, Tyson plants are in a new tent....photos and micro grows are difficult to maintain.
2/6 1:59 PM I worked on the Tyson plants goat auto is doing good. Corkscrew is very bushy. I put training clips in all of them. I should look good.
2/7 4:32AM BPP RF3 by Fast Buds is everything they say it is....TWICE as big as all the others at the same age. HUGE main cola and only in a 2 gallon container. Running at about 80W and it's more than enough. I over fed and she didnt mind.... RF3's are my new favorite from Fast Buds, totally worth it!!!!!!!!!!!!!!
Likes
11
Share
@Lazuli
Follow
Preflowers 😁 shes going to have a good size im lucky
From here i dont touch her just the LST
Processing
Likes
9
Share
@Luv2Grow
Follow
Day 57 - Starting week 9 and man she is looking good with the dark purples. Just took her out for some pictures and see if she needed a drink. Will probably give her a feeding on Sunday. Got the new AGLEX COB LED hooked up so we’ll see over the next few days how she likes it.
Day 58 - Nothing new happening with this girl today. So far so good with the new light. Soil is still sorta damp so plan in giving her some water tomorrow.
Day 59 - Still chugging along and still not ready for any water and I don’t want to over do it so will hold off another day before giving her some.
Day 60 - Still not ready for water, looks like tomorrow she should be ready and will give her a feeding of the foxfarm trio. Other than that, she’s chugging along and looking gorgeous.
Day 62 - Looking great still and gave her a feeding of the foxfarm trio today. I went ahead and defoliated quite a bit today so hopefully she can focus on some more bud development. I’m gonna start really checking the trichs here in the next couple days. She might be getting close to the end but not sure yet.
Day 63 - Ending week 9 today and almost all trichs are cloudy. Wanting to get about 30-40% amber before chopping plus she’s still got quite a few white pistils so I’ll wait until I stop see those popping up.
Processing
Likes
1
Share
@Teddy01500
Follow
Hello everyone here are my babies after five week-end Of Growth, why five weeks to make up for the week lost during potting. I spent them in flowering two day ago, now remains more than to wait until they grow in a week to see the évolution of my babies. Thank you all, I made you a nice vidéo or have seen other of my babies, who are not mentioned in the newspaper. Bye-bye
Likes
10
Share
@Chitown_grower
Follow
Starting to see some pretty nasty mag deficiency on the top of the canopy so I fed them some Mag Amped today! Will be watching the tops this week.
Otherwise, they are exploding with weight!
Likes
31
Share
@DudeGrowsWeed
Follow
This Green Crack was my 3rd round of started seeds in my perpetual garden of auto's. I decided to get a little experimental and try topping and bending this girl at the beginning of the flowering stretch (about a week ago). So far she has not missed a beat, she just keeps stretching and growing. Starting to see the bud sites develop. One branch did take a little damage from the bending, but I put some blue painters tape on it and expect a full recovery.
Growing in organic composted 'super soil'. Have not added any additional nutrients yet. Looks great to me so far.
Setup:
24x48x72 grow tent
1 Viparspectra V300 300w LED fixture
1 Viparspectra R300 300w LED fixture
1 CFL 100w (26w actual)
4” exhaust fan w/carbon filter 190cfm
6” clip on fan
Electric oil filled radiator behind air intake