


Likes
Comments
Share


@Dsant
Follow
D33 - 19/02
Haven’t changed the reservoir this week yet.
A few burnt tips on Northern Lights #2, will probably go a little lighter on nutes next feed - she’s definitely more sensitive to them than the other ones.
Overall great looking girls and nice growth.
The #2’s are higher than the #1’s, nodes developing nicely and the scrog is definitely helping with lateral growth as well.
—
D35
Mixed a new reservoir with roughly 19L, at around 70% strength.
pH 6.0 and EC 1.1
Humidity has risen a bit, so I installed the dehumidifier again.
Apparently the tip burning has stopped, or at least slowed, which is good.
#1’s are at around 25cm height, while #2’s are around 40cm height.
—
D36
Did another defoliation session as the girls really needed it. Cleaned a lot of the big fan leaves, airflow and light penetration is way better now.
A few hours after and they’re super happy again.

Processing
Likes
4
Share


@inxxx
Follow
Beginning of week 6. Northern is getting very thick and burly. The gorilla clones are all iced in trichomes, very sticky. I love it, but very fluffy for some reason. I mean they look awesome and smoke is incredible too since these are clones and I remember they looked exactly the same at 7 weeks under 400w hps lumatek setup. 3 weeks left so hoping for better results this time :) CBD danceworld is doing ok, like I said in comments somewhere I don’t expect much from cbd strains in terms of yield. In few months I will be running medical mass just to see if I can get a decent yield as RQS advertises this strain as heavy yielder. Will see about that :) other than that no probs whatsoever.
Likes
27
Share

@RockoCalenberg
Follow
Hallo Growlegen,
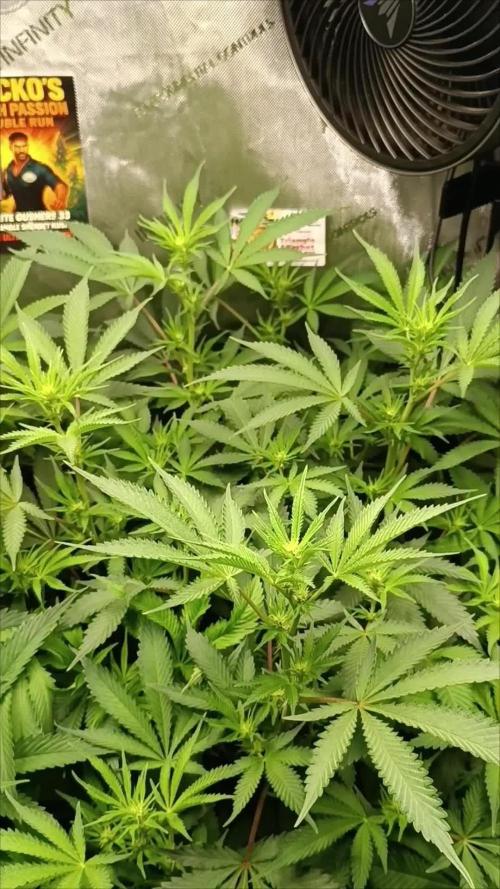
wir zählen Blüte Tag 10 und den Blümchen geht's soweit sehr gut 😁
Sie messen jetzt ca 85 cm 📏
Beide wachsen ähnlich, die Gushers hat etwas längere Internodien und Frau Kush ist etwas kompakter und buschiger.
Beide haben leichte gelbe Spitzen, aber mein VPD ist auch nicht ideal. 😞
Der PPFD liegt erst bei ca.650 und Lampe bei 60 %- da müsste eigentlich noch was gehen, oder was meint ihr ? ☀️🌤️⛅🌥️
Ein einziges Blatt der Gushers zeigt etwas Calmag Mangel - aber sonst nix zu sehen außer die typische Blüteaufhellung.
Der Stretch der letzten Tage war schon ordentlich, aber noch passt die Höhe ✅
Wir freuen uns alle schon auf den Friseur Termin in nächster Zeit (noch 11 Tage Geduld), da muss dringend gestutzt werden im Unterholz ✂️
Grüne Grüße Rocko 💚

Likes
8
Share


@R1pp3r
Follow
Tan solo esperando la flora ajajsjsjs no puedo estar más conforme con la estructura que alcanzó, sin duda hasta ahora es una de las mejores cepas que eh probado

Likes
179
Share


@Tropicannibis_Todd
Follow
💩Holy Crap We Are Back At It And Loving It💩
Growmies we are at DAY 28 and she's just killing💀it👌
👉We are in the Preflower stretch 👈
So Shit , I gave them just a tad to much nutes on the last feeding 👈 But I have since fixed it
So I'm starting to pull her over and do some low stress training 🙃 and some defolation 😳
Lights being readjusted and chart updated .........👍rain water to be used entire growth👈
👉I used NutriNPK for nutrients for my grows and welcome anyone to give them a try .👈
👉 www.nutrinpk.com 👈
NutriNPK Cal MAG 14-0-14
NutriNPK Grow 28-14-14
NutriNPK Bloom 8-20-30
NutriNPK Bloom Booster 0-52-34
I GOT MULTIPLE DIARIES ON THE GO 😱 please check them out 😎
👉THANKS FOR TAKING THE TIME TO GO OVER MY DIARIES 👈

Likes
35
Share


@Pietcandwcbucket
Follow
Only 2x struggling.. Ill give them this week to recover-then ill be using that space for the new critical orange punch auto & 3 watermelon zkittlez auto barney's farm.. Anyways all buckets water was replace with fresh h2o & nutes before 9AM.
Took off some branches & leaves.... Not to much!!
5/5 the 2 critical orange punch autos that are doing so well are both receiving liqui cannabiz local south african brand.. With a touch of... Not telling
Likes
46
Share


@LittleBigTrees
Follow
Pulling the top fan leaves to allow the side branches to catch up.

Processing
Likes
12
Share


@Guerilla_Jack
Follow
Last week of veg. plants. Switch to 12/12
Add bloom switch on my platinum led p300
I do a lot of cleaning below net.

Likes
15
Share


@Wicked_Stix
Follow
Day 35 Gave her a flush and fresh nutrients. Added a little maxibloom. Switched lights to 12/12.
Nutrients per gallon
.5 tsp maxigro
.25 tsp maxibloom
.25 tsp armor si
.5 tsp calimagic
.1 tsp 90/10 humic/fulvic acid

Processing
Likes
19
Share


@creichs
Follow
both lights are about 8 inches away and holy punch is now 11 inches tall.
did a lot lollipoping on day 54 hop it wasn't to much for the smaller power flower it seems to be coming back fine though
Likes
3
Share


@KushManAdam420
Follow
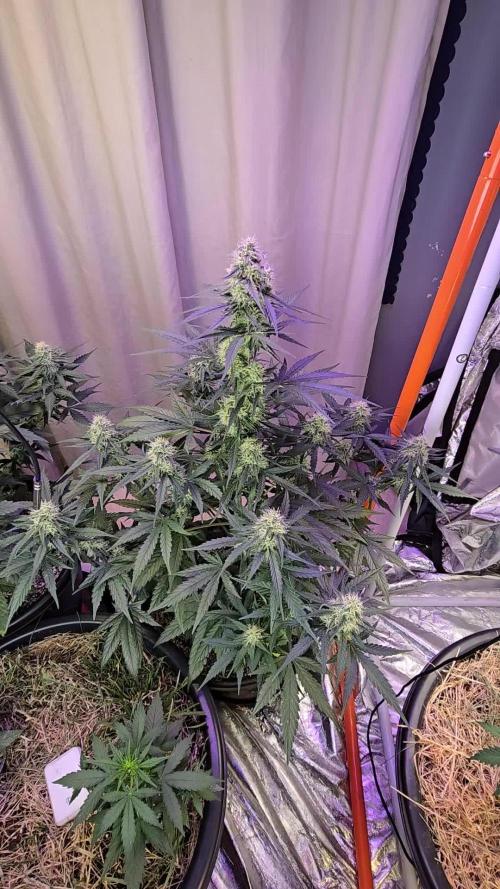
bit of light stress in the last weeks photos, everything has cleared up
still watering with silica when pot is dry. might just do a plain watering
we have started flowering at day 18 on one of the crinkles , the rest of the room has now followed


Likes
5
Share

@ChronicNerve
Follow
As I posted last week, both plants started to strip the bottom fan leaves for nitrogen and nutrients. This makes perfect sense, as the perlite makes up 50% of the mix, after giving it some more thought. To remedy the situation, I ordered the Biobizz line, and both plants are now taking in 1 litre a day of the full Biobizz line recommended for All-Mix.
This immediately stabilised both plants, which then enabled me to take the advice from Atomik_water in the comments and raise the temperature in the room to 29°C, while the plants remained around 26–27°C.
Both plants are now receiving a DLI of about 55 and show no signs of problems under the current watering and nutrient regime. I therefore intend to keep things the same until they finish.
Likes
3
Share


@hinterhofgrower
Follow
.
📹 : Full Video on YouTube @hinterhofgrower
🌱 : soft topping on day 17+20
💧 : 2l day 19
💡 : Dli: 20 mol/m²/d
🤔 : Finally, a plant is growing with wider internodal spacing, even though it's supposed to be Indica dominant.
There was the usual overwatering discussion on YouTube.
The soil I'm using consists mainly of peat with added perlite. It's also not compacted. In my last grow with this soil, it settled by about 5 cm in the 20L pot. The measured soil moisture reaches about 60% when saturated, but with my current watering pattern, it only reaches a maximum of just under 30%. I think there's always enough oxygen in the soil. I did, however, wait longer before watering this time.
The removal of the bottom pair of nodes was also hotly debated. In my opinion, it was exactly the right thing to do. I would have had to remove the large pair of leaves above them to give the two branches full light. I would have had to trim the next pair of branches down significantly to bring them to the same level. In my previous grows, this resulted in small, bushy plants. This meant the buds were very close together and therefore susceptible to mold. Furthermore, the lower parts weren't fully developed. This was something I wanted to prevent in this grow.
No more energy needed to be invested in the small branches, allowing the plant to focus on photosynthesis with its large leaves. The result is a uniform canopy.
Likes
15
Share


@Messypies
Follow
Auto cinderella jack - Amazing week of growth. There are new nodes exploding from everywhere and its not showing signs of slowing down. They are currently loving the organic nutes and have started showing signs of flowering.
Auto critical cheese - this plant has shot up recently. It was planted a week later that the ACJ but is growing some seriously fat fan leaves. Should be a nice yeilder.
Peanut butter cookies - this girl is looking pretty sorry for herself. I am intentionally trying to keep her as small as possible so that I can get the autos out before flipping into flower but she is gonna be a beast. Will transplant into a final pot in the next day or so.


Likes
10
Share


@DeepRootsGrowTrees
Follow
MIMOSA ZKITTLEZ FF/
GANJA FARMER
WEEK #9 OVERALL
WEEK #8 FLOWER
This week she continues to grow and just get bigger she's really a big plant strong genetics she's handled topping without any issues as well LST and she really responded with new growth. Stay Growing!!
Thank you for stopping by and taking a look it's much appreciated!!
Thank you GANJA FARMER!!
MIMOSA ZKITTLEZ FF/ GANJA FARMER

Processing
Likes
40
Share


@GreenZealand
Follow
Starting week 3 today, with a challenge ahead with this little bad girl!
It's looking good!
I'm feeding the plant once each two days, with Seaweed Tonic, 150ml with the suggested dilution from the bottle.
Now I have also a bottle of Canna Terra Vega, with NPKS 3-0-3-0.
Is it a good idea to start feeding the plant, with also this nutrient?
The soil is a mixture of 80% organic soil + 20% of coco coir.
What is the best agenda to follow with nutrients?
Cheers!!
(:

Likes
14
Share


@Chubbs
Follow
What up what up, weekly update on these FrostBangers, they've definitely transitioned beautifully into flower and now almost everyday you can see the flower sites swelling getting bigger. I raised my lights this week as they where getting about 12in from the top of the canopy and I usually like it to be a little further that that. All in all Happy Growing.
Likes
62
Share


@masterofsmeagol
Follow
8/23 Fed 2 gallons of nutes to the garden. I'm planning to increase feeding to three gallons as plants look hungry. Ice cream cake isn't as vibrant as it once was. Still losing leaves but I find that is consistent with others in my area according to the local growers page. The hurricane missed us but the rain and humidity are still a problem. It's not raining (plants were soaked so it rained last night) and rh is still 100%. It's outdoor so what can I do? What I NEED to do is spray BT and something to combat PM. Plants are flowering nicely. It's good to actually have some flowers to look at. The smell is great too.
8/24 Didn't water as it rained last night. Defoliated what was dead. Fog was so thick you could cut it with a knife. Everything is in flower. The little ice cream cake flowers don't look like they like this rain. I don't blame them. I don't remember the last time it didn't rain at night. I noticed more damage on plants or maybe old damage. Either way bud shoots are gone on a few lower limbs. I can't pull up my bags as the are firmly rooted. I checked under the five gallon buckets (which were also somehow firmly rooted) and found a shit ton of earwigs underneath. I killed what I could. I tried spraying a bug with dawn but it didn't kill it or at least didn't kill it right off. I stomped on them and tore open the earth. Logic dictates they are probably under the grow bags as well. I'm going to try Spinosid tonight. I'll look up some other methods as well. If anybody has advice please hit me up.
UPDATE: Went back down at 6. Super sunny and humid today. Temp was 92 with humidity about 90%. I couldn't spray. I'll have to wait until tomorrow. Found four more moth leaves on the sick isolated plant. They must like the injured ones better.
8/25 Watered and defoliated what needed it. Buds are growing rapidly. Took pictures but have been unable to upload due to slow internet connection. Hopefully the weather will allow me to spray tonight.
8/26 Watered heavy as it's been in the 90s. Couldn't spray as it was to hot last night. Buds are tightening up. Ran out of LCPT so I need to find an alternative. Now that plants are flowering it's easier to see the damage from the earwigs. No buds where they should have been on some low branches. Not many and hopefully the few that got lollipoped will focus growth on the top. I hope I'm able to make it down late tonight to work. I was worried about my plants flowering late but that might be a blessing in disguise. I've seen lots of people losing plants to bud rot. Thanks for stopping by and please leave any thoughts or advice in the comments.
8/27 UPPED MY FEEDING REGIMEN TO THREE GALLONS AND USED TWO TBSP TIGER BLOOM IN PLACE OF KOOL BLOOM AND USED A WHOLE TBSP KELP FOR THE HEAT. This heat is killing me. Yesterday was over 95f with rh in the 90s. My medication makes the heat harder to bare. Defoliated what needed it. I'm in town looking for a fungicide. Planned to use apple cider vinegar this morning but of course I couldn't find it. Buds still rapidly forming. I'll update later. I picked up potassium bicarbonate and citric acid and have the recipe and ingredients for both diy green cleaner and green cure. Once the sun starts going down I'm going to use the potassium bicarbonate recipe. Bought a bunch of potassium bicarbonate and citric acid. I am now able to make diy versions of both green and green cleaner. I mixed 1tbsp potassium bicarbonate with 1/4 teaspoon dawn and sprayed two gallons on the plants last night. Leaves were yellowing more and traveling upward on the blueberry. Bleeding like nitrogen deficiency. I'll monitor. If plants don't improve I'll need to do a flush and an application of Spinosid. Wanted to take pics but the phone died.
8/28 Thoroughly watered today. I also had to defoliate a ton of yellow leaves on my blueberry's. I'm hoping it's not nutrient lockout. I still have three issues that could be my problem 1) the WPM 2) PISSIBLY ph fluctuation or worse w lockout and 3) earwig or inch 🐛/ moth larvae causing damage. I'm coming out of my funk so hopefully I can fix these issues. Smell is amazing and the buds are really starting to develop. They looked bigger in the evening than they did in the morning. It was over 90° f yesterday and I woke up to 50 this morning. I'm sure these big temp swings don't help much.
8/30 Rained last night but I watered slightly as there wasn't much rain. ADDED TWO MORE I.R. CAMERA'S last night. I feel more secure as the area is also protected with motion sensors and a whole bunch of other stuff I'm not going to mention. Anything bigger than a porcupine and things get bright and loud and signals get sent, roads blocked ECT. Not my first rodeo deep in the Maine woods. The grow will not be left alone and hadn't been for a few weeks. Anyway I lifted a 5 gallon bucket and found more earwigs. It jives with some of the damage I've been seeing. I'm thinking of spraying spinosid instead of BT tonight. At least the buds are starting to fill in. They don't seem to bother those as much. They did bite off a bunch of grow shoots though. Either way I have a few issues to deal with. As long as the weather stays alright until October I should be fine. My ice cream cake is barely flowering and it's HUGE. I have another seed that's in a similar state. Others are further along. We shall see how things go. The little ones could be transported inside at night if necessary.


Likes
4
Share

@DeepRootsGrowTrees
Follow
SPEEDY BOOM 💥 AUTO/ KANNABIA
Week #9 Ovetall
Week #4 Flower
This week she's doing good no issues to report she's really a easy plant to grow if your interested in her I would say outstanding genetics as far as not having to do anything other than water and she's a resilient plant the elements don't effect her. Stay Growing!!
Kannabia.com SPEEDY BOOM AUTO
