


Likes
7
Share


@UtterLoudPack
Follow
This week is pretty routine plants look good was going to flower for 10 weeks but most of the fan leaves are turning yellow indicating that it's almost time to harvest. There aren't too many new white hairs growing most are turning orange.


Likes
24
Share


@DevokeOG
Follow
Week 7 the start of flowing and my ph and TDS meters have arrived which should make things a little easier for me to understand what is going on, I had changed the light schedule last week to 12-12 because I wasn’t really sure that it was an Autoflower or not due to it being bagseed but it looks as tho the pistols are getting bigger now that I have 🍁✌️🏻.
Likes
13
Share


@hachiko
Follow
Roots look very healthy
I tried different method for starting the seedling that seem to work. Plant seems very healthy at 10 days of growth. Will try to do the shortest veg time possible.
Having issue with water temp. I added some H2O2 and will make new solution tomorrow, will try to change it twice per week
Likes
22
Share


@BlumenBot
Follow
2/20 - finally got all of the top spread out across the edge of the pot. Also defoliated all of the older fan leaves. I'm not sure if I need to take off the lower shoots that are starting around each top...
2/21 - flush feeding, tops are starting to point up except for one weakling which I took the binds off of to let her get her strength back
2/23 - things are looking great so far, the one top that was weak regained strength and is back to bindings. This is the cleanest training I've done so far I think!
2/25 - week 9 nute feeding, same as week 8 minus the Kelp and the normal amount of Terpinator. I will be taking off some shoots starting on each top.

Likes
65
Share


@Dendegrow
Follow
Welcome to week six! 🌱 Week five was a complete success – all parameters are perfectly aligned. I’ve increased the water conductivity to a solid 3000 and bumped the CO2 level up to 1200 🌿. Light intensity is now set at 1400 µmol in the center and 1000 at the edges, which will keep the plants strong in their generative state 🌞. I’ll maintain these levels until the end of the third week and then start slowly removing the large fan leaves to ensure the buds get plenty of light 💡✨.
I’m also trying something new to activate the “Emerson effect” 🌄: I’m running the deep red lights for 5 minutes before sunset and for another 5 minutes after the day ends. This should give the plants a final boost in photosynthesis, helping to maximize their growth potential! Everything’s looking fantastic so far! The Black Cherry has rooted well across different experimental setups, and at the end of the grow, I’ll provide a full report on the best care techniques for both strains 🌺👌.
Willkommen in Woche sechs! 🌱 Die fünfte Woche lief perfekt – alle Parameter stimmen. Ich habe die Leitfähigkeit des Wassers auf satte 3000 erhöht und den CO2-Gehalt auf 1200 angehoben 🌿. Die Lichtstärke beträgt jetzt 1400 µmol in der Mitte und 1000 am Rand, was dafür sorgen wird, dass die Pflanzen stark im generativen Zustand bleiben 🌞. Ich werde diese Werte bis Ende der dritten Woche beibehalten und dann langsam damit beginnen, die großen Sonnensegel zu entfernen, damit die Blüten ordentlich Licht abkriegen 💡✨.
Zusätzlich probiere ich etwas Neues aus, um den „Emerson-Effekt“ zu aktivieren 🌄: Ich lasse das tiefrote Licht 5 Minuten vor Sonnenuntergang und 5 Minuten nach dem Ende des Tages weiterlaufen. Das sollte der Photosynthese einen letzten Schub geben und das Wachstum der Pflanzen maximal fördern! Bis jetzt sieht alles fantastisch aus! Die Black Cherry ist in verschiedenen Versuchsreihen gut angewachsen, und am Ende des Grows werde ich einen ausführlichen Bericht darüber abgeben, wie sich die beiden Sorten am besten pflegen lassen 🌺👌.

Likes
5
Share


@Ninjabuds
Follow
My strawberry gorilla is really starting to be a pleasure to grow. At 1st I had it in a small tent with my gorilla cookies and the other plant was taking all the light and the tent was so small I kept having to cut back at both the plants so they would fit in the tent but now they are in the bigger flower tent by themselfs and man all the lollipoping did wanders for this plant it’s got some nice big colas. You could definitely get this plant to make huge colas if done right. Only my 3 auto so I’m figuring it out.


Likes
15
Share

@LST420
Follow
Week 12
The time has finally come I've flipped her to flower! Because of some very slight yellowing of the leaves I've added yet another Biotab at day 77. My experience is that if you're doing a normal grow without too much training follow their guidelines. But if you plan to make your plant big with lots of bending and defoliation you might want to add an extra tablet as soon as you notice any yellowing of the leaves. Within a few days you should see your plant recover.


Likes
33
Share


@SkunkyDog
Follow
Hallo zusammen 🤙.
Sie wächst sehr schön und macht keine Probleme.
Sie bekommen 20 % Rabatt bei Zamnesia und der Code lautet ZAMMIGD2023.


Likes
30
Share


@valiotoro
Follow
Week 4 has passed✔️
They double in size every week😳
We are now in the preflowering stage they seems to be happy with the LST & Topping✂️
Next week i will cut the nitrogen & start with the bloom nutrient🔥
Take care 💚
Likes
13
Share


@CURATI_DA_SOLO
Follow
Questa settimana come è andata? Hehehehe è andata a meraviglia!!! LEI E SEMPLICEMENTE PERFETTA!!! cresce sempre di più le cime si ammassano e diventano sempre più dure! I colori sono stupendi e il profumo di limone mi ha invaso la villa!!! La struttura della pianta e veramente robusta ovviamente dopo un lst molto scrupoloso! Veramente una grande bella signora! Rimango sempre meravigliato con i semi di fast buds, veramente secondo me e la più valida di tutti! Ho visto i tricomi con il mio lumagny 100x e sono ancora bianco/trasparenti e si ammassano sempre di più! Deduco altre 2-3 settimane penso di fare un ultima settimana di nutrimenti e poi via con il flush! Laverò le radici per almeno 10 giorni, voglio un fumo morbido e deciso! Ringrazio voi per essere qui a vedere i miei lavori e ringrazio i ragazzi di FAST BUDS per avermi dato l'opportunità di coltivare le loro genetiche!!! Un bacio a tutti voi! 💪🏼🌈🌱
Likes
14
Share


@Reyden
Follow
Penso che questo seme non abbia ereditato il tratto autofiorente perché adesso ho appena spostato a 12/12 e dopo 25 e passa giorni la ragazza non è entrata nella fase di fioritura e non si è nemmeno allungata, invece LSD-25 è già con pistilli visibili e ha la forma sta salendo per allungarsi e formare i siti di fiori, vediamo se starà al passo delle Fast Flowering ma a questo punto non penso 😄💚🌱👋
Likes
30
Share


@WeWantItToGrow
Follow
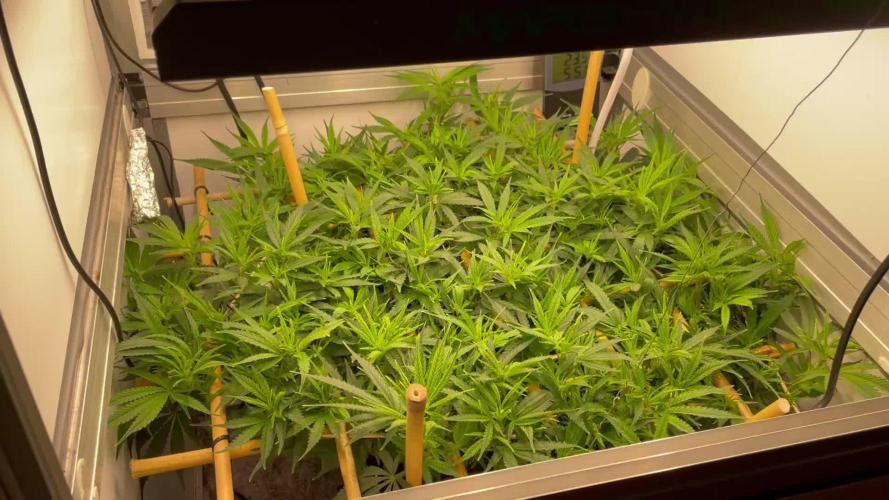
This week has been one of great gains in both size and vegetation we have seen a vertical leap in two plants that is astronomical almost 4 inches in a week! Had to do some pruning to expose new bud and a little bit of low stress training on to plants to see if we can expose light to the underside and perhaps get a little more love out of our lower buds The stalk size on almost all of these plants is almost as big as your thumb but on one it is actually relatively skinny that is the one we’re doing the low stress training on we just started the low stress training and it is taking very well to it One of these plants is extremely dark in color on the vegetation and has typically about 11 fingers per leaf! Not sure what that means yet

Processing
Likes
32
Share


@Platinouuu
Follow
Ultima Semana amigos!Ya para el dia de hoy llervamos 24 horas de escuridad para darles 24 horas mas para pasar a picar las plantas. Hoy haciendo esta publicacion le quedan 24 horas mas de oscuridad, osea mañana miercoles es el 2do dia de oscuridad para picar. Noto muchos terpenos, en cuanto a produccion, ésta sepa no produce muchos cogollos,eso lo lei luego de ya sembradas, se ven muy bien, les estare contando hacerca de sus efectos, pero su olor es fuerte, me tioene toda la casa olorosa a frutas. Muy contento y deseoso de probar esta sepa. Luego de cuidarlas mucho, se ven alegres, para pasar al proceso de secado, esperen a las cosecha amigos, y gracias por tooodo su apoyo. UN ABRAZO GRANDE A TODOS, buenos humos!


