
Likes
Comments
Share


@Roberts
Follow
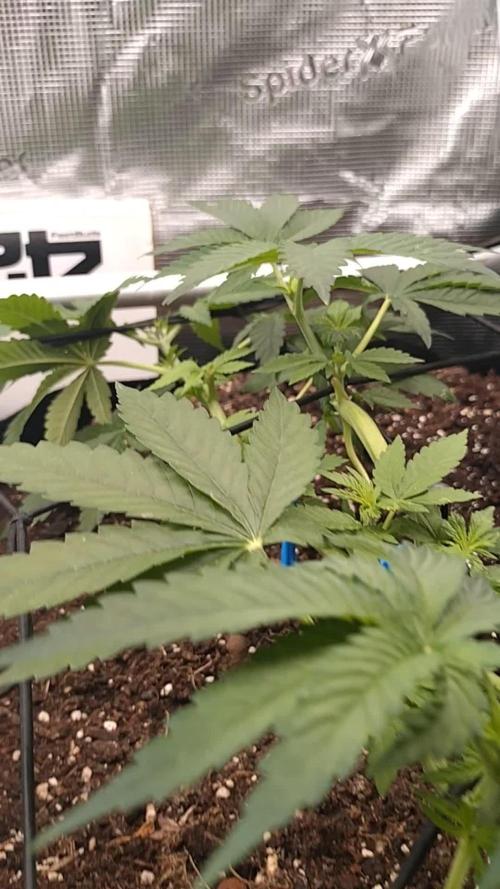
Deepforest Super auto is growing great. I defoliated her some today. She should be going into flowering very soon. Everything is looking great. Thank you Spider Farmer, Athena, and Doctor's Choice. 🤜🏻🤛🏻🌱🌱🌱
Thank you grow diaries community for the 👇likes👇, follows, comments, and subscriptions on my YouTube channel👇.
❄️🌱🍻 Happy Growing 🌱🌱🌱
https://youtube.com/channel/UCAhN7yRzWLpcaRHhMIQ7X4g.


Likes
15
Share


@Lordviper28
Follow
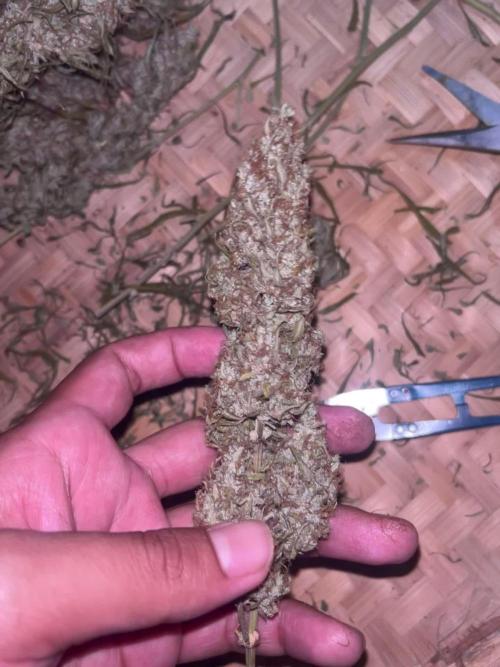
This strain has been wonderful from jump 👏 all seed made it and all came out looking gorgeous with a very tropical berry smell to them the taste I get from them is tropical although most turned purple in the end after hanging them up I could see a red tint to some of the buds 😁 but the purple kinda took over its fun growing with diaries and can't to get my next strain 8n the grow and share with grow diaries

Processing
Likes
52
Share


@CBD_Sweden
Follow
2017-09-11. Kl 12.00. Week 3 starts. I have cleaned the whole room for the new week and gave the girls water and nutes. Added videos and pics. Girl is 10 cm high.
--------------------------------------------------------------------------------------------------------------------
2017-09-12. Kl 10.00. New pic and video.
---------------------------------------------------------------------------
2017-09-13. Kl 22.00. Added new video.
---------------------------------------------------------------------------------------
2017-09-15. KL 10.00. New pics and video. The girl is 14 cm high.
---------------------------------------------------------------------------
2017-09-16. Kl 10.00. The girl is starting to grow little better now and i hope she is picking up the pace. Added new videos.

Likes
42
Share


@Canna96
Follow
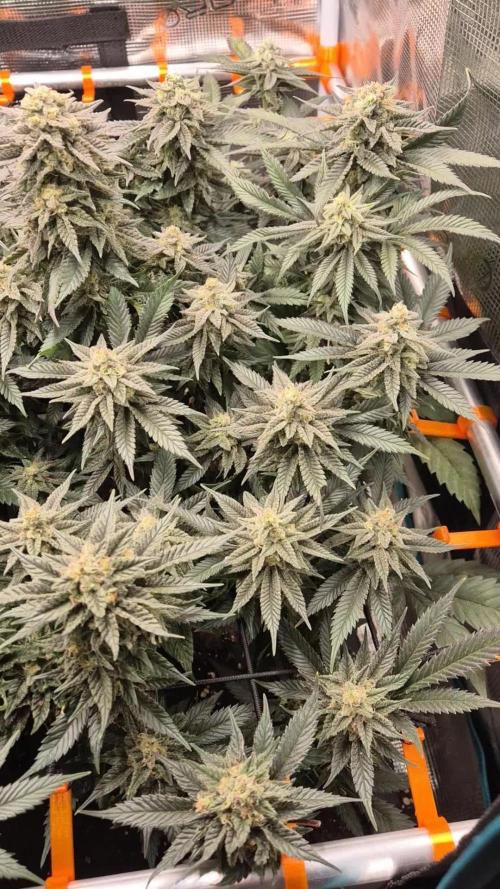
Second run with these genetics, I ran her last time in a 5.4 gallon container, I got the grape pheno, higher yield with the first run, but much tighter nugs with this run. This one smells much more earthy/gassey and less grapey. I ended up with just under 26 zips of nugs, 2 zips of Larf which I will turn into canna sugar, and my buddy made a 35 gram brick of bubble from the trim. It should be dry in the next few days and I'll post a video of the squeeze, hoping to get around a zip of rosin which I will split with him since he turned the bubble...Super excited to squeeze some nugs once the cure is done, Ill post vids of them as wel. Next run I'm planning to try and cram 2 plants inside a 5X5, build mainlines, and flip by week 6 or 7....Switching to two 315 W CMH bulbs up top, and LED's on 2 of the sidewalls for supplemental lighting. Looking forward to it, stay safe, blaze on!


Likes
29
Share


@CANNASIM
Follow
---GENERAL COMMENT---
Girls are at day 4 technically, but i like to update Sunday always, so keep that in mind, is 1/2 a week now.
From germination to soil emerging took 3-4 days, no issues at all. 100% germination rate from multiple breeders till now.
I will try my best to do a stress free grow again, so will grow mainly naturally.
---RQS QUICK ONE---
She is tiny, tiny, tiny. The smallest seedling i ever have worked with. Hope she takes off soon!
---DAY 10 UPDATE---
over some days she got volume, just started to use RECHARGE, and wow, that thing works, 48H you could tell something is different, since watering with it the stem is thicker and is growing more vigorous, lets see how it will impact overall!
---DAY 14 UPDATE---
This is the last day of this week and this girl is showing some kind of wired markings since the beginning in the first sets of leaves, will do her anyways... She grew a lot, showing already the intension of shooting up more stems like her cousin. She will be on plain water and recharge till i stabilise and figure what is going on with her, at least for a week.
This strains tend to be easy and do well with low nutes, light and etc, really basic, i like to pay to see so i never give up from a pheno, but is not fun to have issues... No worries though there is always a crop after the other 😎👍. Lets see what happens next.

Likes
1
Share


@Smokwiri
Follow
Welcome to my watermelon Zkittles diary.
Grows good, first round of abandoning oldest leaves had initiated.
Development is satisfactory...
Use code RUFFSELEKTAH at Mars Hydro store checkout...


Likes
Comments
Share

@blaze_fpv
Follow
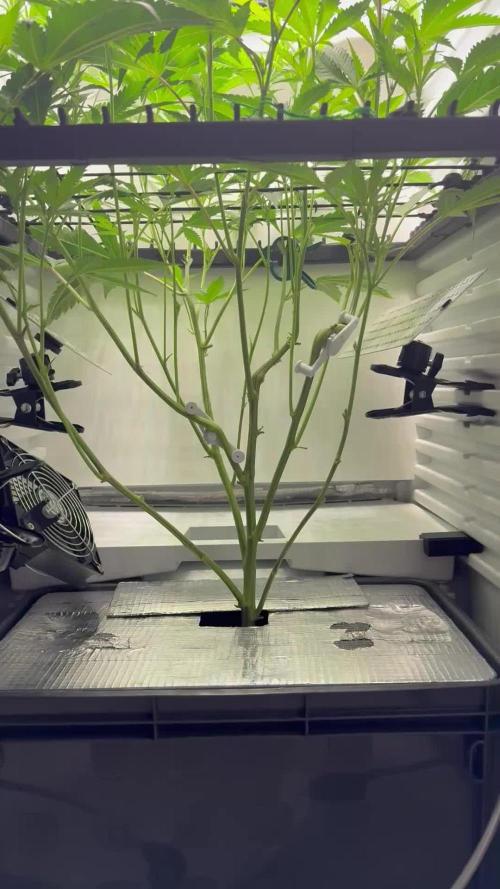
Week 2 flower | it started to fill out the space pretty well | did some scrog work | gonna keep adjusting the net


Likes
126
Share


@DogDoctorOfficial
Follow
this is a very easy one to grow with an enormous bag appeal true her all cycle, a must in any garden, her trichomes production is out of these world, as are them grams on them fruits, a true must for us all to grow

Likes
2
Share

@Growingdaddyo
Follow
Start der 9. Blütewoche.
Optisch top, olfaktorisch topitop, haptisch ein Träumchen.
Erinnert mich an Bildern von überfüllten Badeanstalten in Asien🤣 toller Vergleich..
Bin zufrieden. Mal schauen wie lange ich denen noch gebe. So langsam kommt auch Farbe ins Spiel.
Mutti purple haze wollte lieber grün bleiben. Vielleicht schaffen es ja ihre Klone ihrem strain auch gerecht zu werden..
14.02. Ende der 9. Blütewoche. Es geht dem Ende entgegen. Werd mir die Trichome heute Abend mal näher ansehen.

Likes
6
Share


@Comfrey
Follow
Just water and sunshine.
Green Poison XL needs some more time. I want amber Trichomes.
Likes
5
Share

@DaedalusGrow
Follow
Hallo, heute ist der 18.2 Hab sie soweit gut durch den Stress bekommen. Sie ist schön in die Breite gewesen die Genetik ist sehr robust. Hat sich schnell gut erholt. Ich lasse sie jetzt noch oben wachsen 👌🍃💚
Likes
2
Share


@FlowerBloom09
Follow
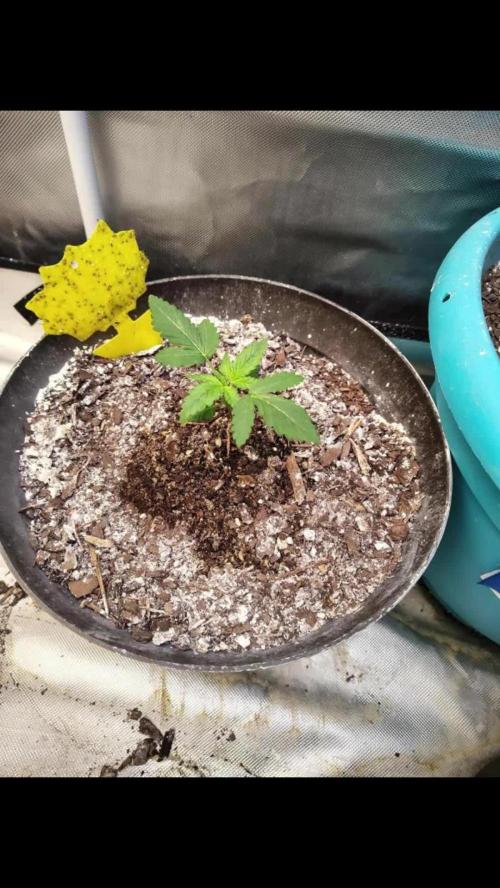
Plant is doing amazing! This is my first grow & I am so excited , I’m in the process of practicing LST , I am not the best but you learn as you go! Let me know what you all think! Please give me feed back and advice!

Likes
8
Share


@Inceptionist
Follow
Mystery Made 2 already stopped showing male traits. I only plugged 3 or 4 there in total. Melonade Runtz on the other hand still is developing but I have the feeling that it is slowly getting better.
All in all they look amazing and are growing very nicely. The trichomes are also developing great!


Likes
46
Share


@LittleBigTrees
Follow
Had issues with my dripper system timer 🙄it reset its self twice now !
Unfortunately the EC in the coir got up to 3.6 after drying out to much before I realised.
I've got it back down to 2.0 now so hopefully it won't stunt them too much .

