
Likes
Comments
Share


@MrDoubleHaze
Follow
Bekommt seit Montag nur noch reines Wasser ,ist nochmal Hardcore entlaubt und bekommt die letzten 4 Tage vor der Ernte Flash Clean


Likes
Comments
Share


@DogDoctorOfficial
Follow
🌱 8×8 Adventure – Cash Express (Plant B) | Week 4
Taking Her Time to Build Something Special
Welcome back to another update from my 8×8 Adventure, where twelve unique genetics are growing together under identical conditions while every phenotype receives its own individual diary. This project is all about discovering how different plants express themselves, even when sharing the same environment, feeding schedule, and care.
This week belongs to Cash Express – Plant B, and although she’s following the same path as her sister, she’s choosing to walk it at her own pace. While Plant A has already started flirting with pre-flowering, this beautiful lady is still fully focused on building her vegetative structure before making the transition.
And honestly… I love seeing those differences.
⸻
🌿 Life Inside the 8×8 Jungle
Everything inside the tent continues running smoothly as the entire garden moves closer to flowering.
The ecosystem remains stable, allowing every phenotype to express its own personality without environmental stress influencing the outcome. Healthy airflow, consistent temperatures, and balanced humidity continue creating the perfect conditions for vigorous growth.
One of the things I enjoy most about this project is watching twelve different cultivars evolve together while still behaving completely differently.
Cash Express B is proving that genetics always have the final word.
⸻
💧 Feeding Program
This week she continued receiving the same balanced nutrition as the rest of the garden.
Feeding Schedule
• Plagron Terra Grow
• Plagron Power Roots
• Plagron Pure Zym
• Plagron Vita Race (foliar)
The plants continue responding with lush green foliage, healthy stems, and steady growth, confirming that the feeding strategy remains right where it needs to be.
⸻
🌱 Growth & Development
Although slightly behind her sister in maturity, Plant B has developed into a beautifully balanced plant.
Her structure is compact but steadily stretching upward, and she’s beginning to establish herself as one of the taller ladies in the room. Every day she adds a little more height while continuing to strengthen the lower branching that will support future flower sites.
Unlike Plant A, I’m not officially calling pre-flower on this phenotype just yet.
The growth tips are becoming increasingly active, but she’s still investing most of her energy into vegetative expansion rather than reproductive growth.
Sometimes patience produces the biggest surprises later in flower.
Her leaf color remains vibrant, stems are becoming thicker by the day, and new growth appears healthy and vigorous across the entire plant.
⸻
✂️ Low Stress Training
Training this week remained gentle and intentional.
Leaf tucking and light Low Stress Training continue opening the canopy while allowing more light to reach the developing side branches.
She’s responding exactly how I hoped.
Each adjustment encourages additional branching without slowing her natural momentum, and the canopy is beginning to widen nicely while maintaining excellent symmetry.
Rather than forcing her into shape, I’m simply guiding her and letting her genetics do the rest.
⸻
🔍 Looking Ahead
Over the coming week I’ll continue allowing Plant B to dictate the pace.
There’s no rush.
I’ll keep encouraging lateral growth through gentle LST, continue opening the canopy with occasional leaf tucking, and wait patiently for her to announce the beginning of flowering in her own time.
With the way she’s developing now, I expect she’ll reward that patience with a strong, well-balanced canopy ready to support plenty of flowering sites.
Every day she’s becoming a little stronger, a little wider, and a little closer to showing exactly what this phenotype has hidden inside.
⸻
💚 Final Thoughts
This is exactly why I love running phenotype hunts.
Two sisters.
The same genetics.
The same environment.
The same feeding schedule.
Yet completely different personalities.
Cash Express Plant B reminds us that every plant has her own rhythm. She’s calm, methodical, and focused on building a solid foundation before taking the next step.
Sometimes those are the plants that surprise us the most when harvest day finally arrives.
I’m excited to watch her story unfold over the coming weeks.
Thank you all for following this 8×8 Adventure and for joining me on another chapter of this incredible journey.
A huge thank you to Plagron for providing the nutrition that keeps this garden thriving, Zamnesia for supplying the genetics and equipment that make this project possible, and of course to the amazing GrowDiaries community for all the support, inspiration, and shared knowledge.
Growers Love and see you all in the next update, where this beautiful lady may finally decide it’s time to join her sister and begin the next stage of her adventure. 🌱💚


Likes
25
Share


@Jimmy89
Follow
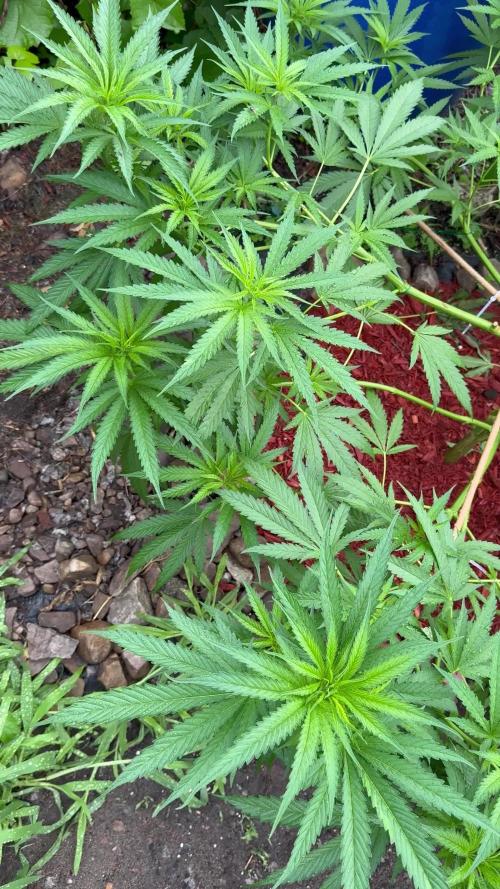
These all seem happy enough to say i let them dry out and wilt yesterday.. my fan controller has been acting up too so they were sat at 99% humidity for a day then at 45%.. think I’ve got the humidity settled at 65% now. All photos taken on the last day of veg, tonight will the the first 12hours of darkness for these ladies

Likes
14
Share


@OutdoorUK
Follow
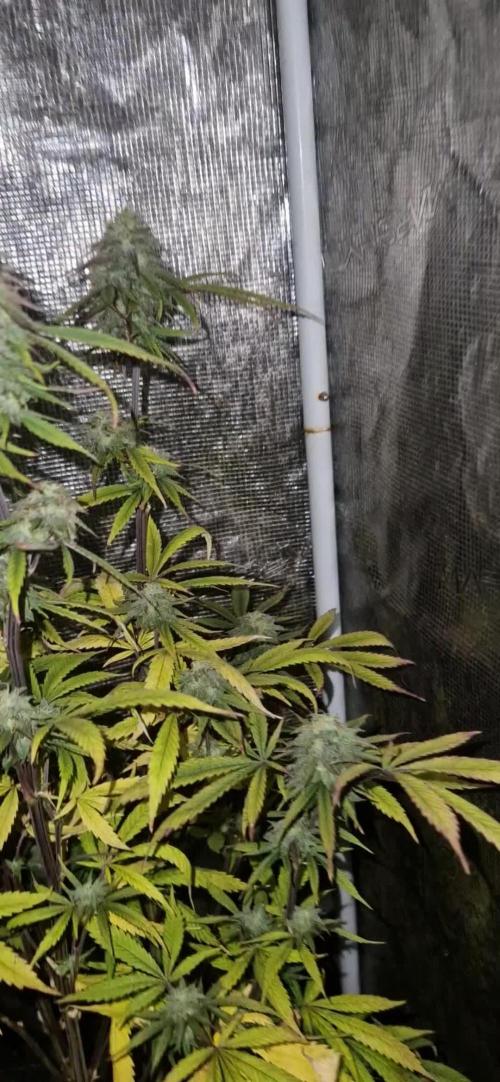
Been busy so didn’t get any photos of just before it went in flower but here’s where we are up to

Likes
54
Share


@Njanne
Follow
This is an easy plant to grow. She was quick from seed to harvest. The vibe creeps up on you so watch out! She's dried now and set to cure in brown paper bags for a few weeks. This one is a winner.


Likes
18
Share


@valiotoro
Follow
Hello everyone week 3 of flower has passed for this Strawberry Gorilla auto 🍓
Spider Farmer SE7000 80%
have a great day and wish you all happy growing 😎👨🌾🏻

Likes
34
Share


@SalocinSpecial
Follow
D68 (28/01/2021): First official day of week 6 in bloom and first official day (second in reality) of pre harvest flush. The smell is strong when I open the tent! It does not take long for the whole room to smell dank and even outside the room.
- temp: 24-25C light ON ; 20-22C light OFF
- no water
- RH: 49-52% light ON ; 49-50% light OFF
D69 (29/01/2021): I did a first proper flush today by running approximately 2.5 gallons of water trough the medium. There is still a lot of nutrients in the medium. I might do the exact same flush tomorrow. The PH of the run off is high (around PH7-7.1). This is an other reason to flush again tomorrow. I also reduced the light ON schedule by two hours. So now 18h hours ON and 6 hours OFF. I will continue reducing the ON period until they are ready for a complete dark period. I also try to reduce the air temperature.
- temp: 24-25C light ON ; 19-20C light OFF
- water: PH6.4, 135PPM, 2.5 gallons each
- run off: PH7 and 680PPM for Glue Gelato ; PH7.1 and 560PPM for Banana Kush
- RH: 47% light ON ; 48-53% light OFF
D70 (30/01/2021): I did a second flush since I was not satisfied with run off PPM of yesterday. Today, the run off PPM is under 300 which is what I wanted. The run off PH is still high with 7.1. Banana Kush is ripening with the pistils slowly turning brown. Glue Gelato look sooooo yummy and I can't wait to harvest it. There is a small color change in some leaves but I'm expecting more in the next days.
- temp: 23-24C light ON ; 19C light OFF
- water: PH6.4, 125PPM, 2.5 gallons each
- run off: PH7.1 and 260PPM for Glue Gelato ; PH7.1 and 250PPM for Banana Kush
- RH: 46% light ON ; 46-48% light OFF
D71 (31/01/2021): Glue Gelato is changing color. I'm checking trichomes everyday on both girls and no amber yet.
- temp: 23-24C light ON ; 19C light OFF
- no water
- RH: 45% light ON ; 49-50% light OFF
D72 (01/02/2021): Well well well...the clock is ticking for those girls. Glue Gelato is now having a couple of amber trichomes. Banana Kush don't have any. Overall Banana Kush has less trichomes and fluffier buds. This girls is not ready yet but I will need to chop her down at the same time has the Glue Gelato because my drying space is the tent I'm growing in. I will try to push the Banana Kush to ripen faster by lifting up the lamp at 16 inches from top bud and by reducing of 2 hours the day period for a 16 hours light ON and 8 hours light OFF. But at least all Banana Kush trichomes looks milky.
- temp: 23-24C light ON ; 18-19C light OFF
- water: PH6.2, 123PPM, less then a gallon each
- run off: PH7.4 and 200PPM for Glue Gelato ; PH7.4 and 287PPM for Banana Kush
- RH: 45% light ON ; 40-45% light OFF
D73 (02/02/2021): I gave water probably for the last time today. Trichomes on Glue Gelato are starting to amber on top buds. Not a lot of amber but you can see that all the trichomes are starting to degrade by curling down slowly. Trichomes on Banana Kush are not amber at all but they all look milky. Glue Gelato is ready to harvest but Banana Kush need more time. It's tough to make a decision to chop or not since they are not at the same stage of growth. I want to place them in a complete 48 hours of darkness before harvest. 1h less light today for a 15h light ON and 9h light OFF. The lamps are now at 20 inches.
- temp: 23-24C light ON ; 18-19C light OFF
- water: less then a gallon each
- RH: 45% light ON ; 40-45% light OFF
D74 (03/02/2021): Glue Gelato is ready for 48h of darkness. I will take her out of the tent and place her in an other room without light. I will try to maintain a proper environment in this room and if it smells to strong or if the condition are not good I will replace her in the tent and both will start the 48h darkness. The idea is to give Banana Kush 2 more days to ripe and swoll more. After 48h, I will chop Glue Gelato and place her in the tent to start drying. Banana Kush will then start her 48h darkness. I don't know if this strategy is good but I will monitor everything closely and react if something is wrong.
- temp: 22-23C light ON ; 19C light OFF
- no water
- RH: 47% light ON ; 43-45% light OFF


Likes
26
Share


@Gunnen
Follow
Working towards germinating 4 autos. Hopefully all seeds will successfully take. Seeds will soak for a day or so and then into directly amended soil in fabric pots.


Likes
6
Share


@GrowFOUR
Follow
This plant drank a ton of water from early veg to end of flower. Only 3 big pH swings. Should have fed less because ppm rose about 200 a day
Likes
1
Share

@Olduffybastard88
Follow
Getting the next diary up and running already as I welcome the better weather and conditions theese plants preformed amazing under colder conditions and responded well the any cold snaps during veg so I can only imagined this summer run is going to be amazing also each seed is the size of a pea there massive the biggest seeds I've ever seen and they sure show that with a massive stock

Likes
85
Share


@Tropicannibis_Todd
Follow
Start of day 49 ...... Nov 27 Start of week 7 ........ 23 DAYS INTO FLOWERING
Check out the full grow video on latest weekly update
Super Exceptional Growth Daily
Still adjusting LST when needed and leaf tucking.......
Water Only when needed but its drinking more every otherday and adjusting lights when needed......
Rain Water Only .......
( DAY 54 AND IT SHOWS ZERO DEFICIENCIES ) IM ALSO DOING VERY LITTLE, SLIGHT DEFOLIATION
( DAY 49 AND RESIN PRODUCTION HAS STARTED )
( DAY 54 AND ALL IS GOOD , THERE FATTING UP )
I hope you enjoy my growlog...

Likes
14
Share


@Aircoholic
Follow
When I got into the room one day before I scheduled the harvest, her branch collapsed under the weight of the buds. Not surprising, the buds were massive and dense! This is one of the best problems to appear during a grow, could never be mad at a plant for lack of strength to support the massive buds. I decided to view it as a sign from the plant, that it's done, it had enough, so the harvest happened a day early.
Her buds were too tall for my DIY Cooler and since the buds were so dense, it wasn't easy to get to the stem to cut it and since the buds were covered in trichomes, the gloves were super sticky.
The genetics were pretty amazing to grow, super happy plant with amazing growth - thank you, @Exotic_Seed for the seeds! 🙏


Likes
16
Share


@DreamIT
Follow
Sponsored by:
🎭ZAMNESIA SEEDS🎭-💡VIPARSPECTRA💡-💐GREEN BUZZ NUTRIENTS💐-🛠️WEDRYER🛠️
28/7 I took a clone and leave it a week of greenery before moving it to bloom, yeah
2/8 it has recovered very well from the cut and grows luxuriantly. soon she comes into bloom too
__________________________________________
Personal advertising (contains affiliate links)
__________________________________________
🦄Zamnesia boasts the most complete and accurate site where you can find everything related to cannabis and the "psychedelic" world. Autoflowering, feminized seeds, mushrooms, salvia divinorum, afrodisiacim of everything, and more! ( no affiliate link)
✅https://bit.ly/Zamnesiaseeds
__________________________________________
Did you know that Green Buzz Nutrients fertilizers are 100% vegan? A complete line of products ready to give the best to each of your plants! Visit the site and see my journals to see how they work 🦄
🤯 And with the code "dreami t" you will immediately receive a 15% discount on your purchases
✅https: //bit.ly/GreenBuzzLiquidsPro
__________________________________________
👀 Are you looking for a good lamp to start with? 👀
🌞Viparspectra has something more than the others, take a look at their site.
⏩ Use "GDVIP" for an extra discount or "DREAMIT3" for an extra 5 %% discount
👀 Search for it on Amazon
✅Amazon USA: https://amzn.to/30xSTVq
✅Amazon Canada: https://amzn.to/38udUVe
✅Viparspectra UE: bit.ly/ViparspectraUE
✅Viparspectra USA: bit.ly/ViparspectraUS
______________________________________________
🌈 Tired of blowing on your weed hoping it dries quickly? Check out the Wedryer website! You will find a well-made accessory that will help your weed dry in just 8-10 days without the annoying risk of finding mold or other annoyances! (no affiliate links)
✅https: //bit.ly/Wedryer_
______________________________________________
📷🥇Follow the best photos on Instagram 🥇📷
https://www.instagram.com/dreamit420/
Backup
https://www.instagram.com/dreamit4200/
🔻🔻Leave a comment with your opinion if you pass by here🔻🔻
🤟🦄💚 Thank you and good growth 💚🦄🤟
Likes
33
Share


@BudXs
Follow
Thank you Heather, you rock as always. Stoked to get these soaked:)
Im impressed with FastBuds stability, terpene profiles and mass. These are great plants, happy and thankful to grow em out
Likes
152
Share


@SlowpokeFuegobud
Follow
🍪 🍒 🍰🍩 🎀🍪 🍒 🍰🍩 🎀🍪 🍒 🍰🍩 🎀🍪 🍒 🍰🍩 🎀🍪 🍒 🍰🍩 🎀
Welcome to week 12, dear growmies!! 😘
I'm back and everyone survived haha! 😎
From now on only boosters. 💧
Thanks for showing up and supporting me and the girls, bless you, growmies!! 😘 ❤️
Shouts go out to my sponsors @GreenBuzzNutrients, thanks so much for your support!! 💚 💚 💚
If anyone would like to try their amazing organic products, you can find a generous discount code of 25% in my weekly comments! 😜 🙏
If you want a recommendation which product to get first.. BIGFRUITS!! 😍 I love the tasty terps with this one!!
https://greenbuzznutrients.com/
Thanks also of course @Kannabia, for the beautiful genetics!! 🧡🧡🧡
Pouring all my love into this grow, thank you for joining in, growmies!! 💚 💚 💚 😘 ❤️ ❤️ ❤️
Wishing you all the best for your beautiful gardens!🌱 🙏 Grower love!! 💚
_________________________________________________________
Strain Info:
https://www.kannabia.com/en/feminized-cannabis-seeds/break-up-cake
We need to talk
You’ve got to celebrate everything in this life, and that includes love and heartbreak. Since you’re all familiar with Wedding Cake feminised marijuana seeds, we’ve put a Break-up Cake in the oven at the Kannabia Seed Company – because things don’t always go well, and we sometimes need a friendly seed to lean on.
Break-Up Cake has a base of Girl Scout Cookies, one of North America’s best-known strains, which is earthy with a very potent indica effect. And we top it off with a delicious Cherry Pie which, in addition to giving it an elegant dark attire, adds a silky, deeply sweet flavour of cherries and berries. Look no further – it’s the perfect cake.
This seed will be celebrated for its ease of cultivation and abundant production. It’s one of the best investments you’ll make this year. But if it’s going to be memorable for one thing, it’s for its sweet complex flavour that’s full of contrasts. If we have to break up, let’s do it sweetly and amicably, right?
How to: Break-Up Cake
Break-Up Cake is an “all-terrain” marijuana seed, which will adapt to the place you allocate to it. An ode to independence, it’s a plant with only the most basic needs that knows how to grow by itself.
It’s a pale branching plant with tremendous dark green leaves, purple tips, and an icing sugar coating of trichomes. Its immense buds are some of the stickiest ones we’ve found in our seed bank recently.
Indoors, it needs 60 days of flowering to give no less than 600 grams per square metre. Use a Screen of Green method without hesitation, or plant it using hydroponics if you want to obtain the full benefit of its potency.
Outdoors, it reaches two metres in height with a harvest of 800 grams per plant, which is reason enough to give it a go. Like a good break-up cake, this plant doesn’t need to live with a partner, and knows how to live well in a Guerrilla plot. Between 25th and 10th October is its moment.
Taste and effect of Break-up Cake
Very relaxing but not causing lethargy, it’s a good indica-dominant plant. Its effect is mellow (we’re too old for childish games). It calms the consumer but it also gives rise to creative moments. Head on up to the top floor, later to make your way, little by little, down to the kitchen later (where you might want to give in to temptation if you need to stimulate your hunger).
The flavour is full of nuances. It will remind you of a vanilla sponge or cheese cake: you’ll notice a cherry topping, something sweet that you can’t quite distinguish, and an earthy undertone on a biscuit base… You’ve got to sample it to know it.
_____________________________________________________________________
SETUP:
80x80x180 cm Zelsius
240W Full Spectrum LED IR UV dimmable
DW240H-A6-HS
Heatsink color red
LED Chips:
512pcs SAMSUNG LM301H + 24pcs Osram 660nm + 8pcs Osram IR 730nm + 8pcs UV 385nm
Color mix: 2700K + 4000K
2,8umol/J
Driver HLG-240H-C2100B
Coverage: veg 5x3ft / flower 4x2ft
Product size: 628x205x68mm
Green Buzz Nutrients
Shouts go out to my sponsors @GreenBuzzNutrients, thanks so much for your support! 💚 💚 💚
If anyone would like to try their amazing organic products, use code GD42025 for generous 25% discount (for orders of minimum 75€) ✨
https://greenbuzznutrients.com/
Biobizz Lightmix
custom exhaust fan 320/270cm³/h
Carbon Active Granulate 240cm³/h
tab water pH 8 - EC 0,25 with Calmag to 0,5
Advanced Hydroponics pH minus Grow + Bloom to pH 6.2
🍪 🍒 🍰🍩 🎀🍪 🍒 🍰🍩 🎀🍪 🍒 🍰🍩 🎀🍪 🍒 🍰🍩 🎀🍪 🍒 🍰🍩 🎀

Processing
Likes
31
Share


@MadeInGermany
Follow
Hi everyone 🤗.
Welcome to a new diary.
Cuttings were cut and rooted last week 🙂.
Today they were placed in 11 pots in Canna Coco Proffesional +.
Green Buzz Liquids is used for the fertilizer 😀👍.
Made in Germany 🤗.
I looked at the compositions of the individual elements and I am very impressed and excited about him 😎.
Greetings go out to Green Buzz Liqudis, and a big thank you for the support 🙏🏻👍.
Which training methods I will use will be decided spontaneously each day 😃.
I wish you a lot of fun with the diary, stay healthy l and let it grow 🌱.
You can buy this Strain at
https://www.barneysfarm.com/blue-cheese-34
You can buy the fertilizer at
https://www.greenbuzzliquids.com/
Type:
Blue Cheese
☝️🏼
Genetics:
Blueberry
X
Original Cheese
👍
Vega lamp:
2 x Todogrow Led
Quantum Board 100 W
💡
Bloom Lamp :
2 x Todogrow Led
Cxb 3590 COB 3500 K 205W
💡💡☝️🏼
Soil :
Canna Coco Professional +
☝️🏼
Fertilizer:
Green Buzz Liquids :
Organic Grow Liquid
Organic Bloom Liquid
Organic more PK
More Roots
Fast Buds
Humic Acid Plus
Growzyme Big Fruits
Clean Fruits
Cal / Mag
Organic Ph - Pulver
☝️🏼🌱
Water:
Osmosis water mixed with normal water (24 hours stale that the chlorine evaporates) to 0.2 - 0.4 EC. Add Cal / Mag 2 ml per l water every 2 waterings . Ph with Organic Ph - Pulver to 5.8 .
Likes
2
Share


@LittleBigTrees
Follow
Picking the odd leaf off but it's pretty much just doing its own thing other than having to feed her . She smells really nice with lots of bud sites and has some visable trichome production now .