Likes
Comments
Share
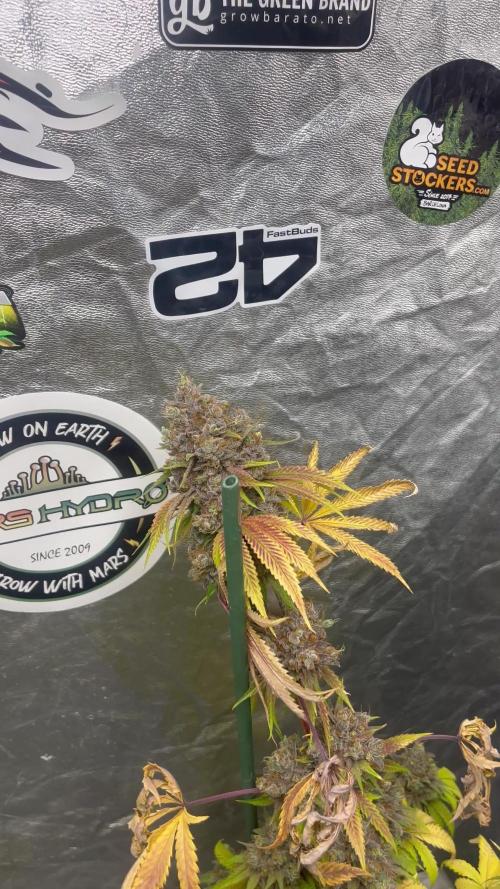
The last two weeks! I know I should wait one or two more weeks for harvesting, but unfortunately I will travel in 3 weeks and I have no option other than finishing everything up before I go. This week events: -Feeding on Day 73 , following the Flora Series Drain to Waste Chart (Ph 5.8) -Started to lower the temperature to ~17 C during the night
Processing
Likes
6
Share
@Mannabis
Follow
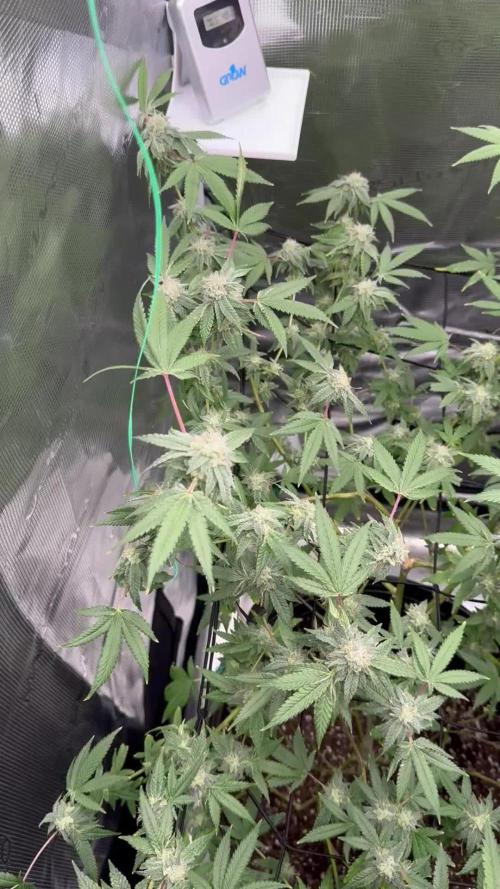
Time for the stretch! Lots of flowering growth happening now. I can see where the bud spots will be so I’m going to have to stop moving the branching around in the Scrog, also the branches are getting thick and less pliable.
Likes
32
Share
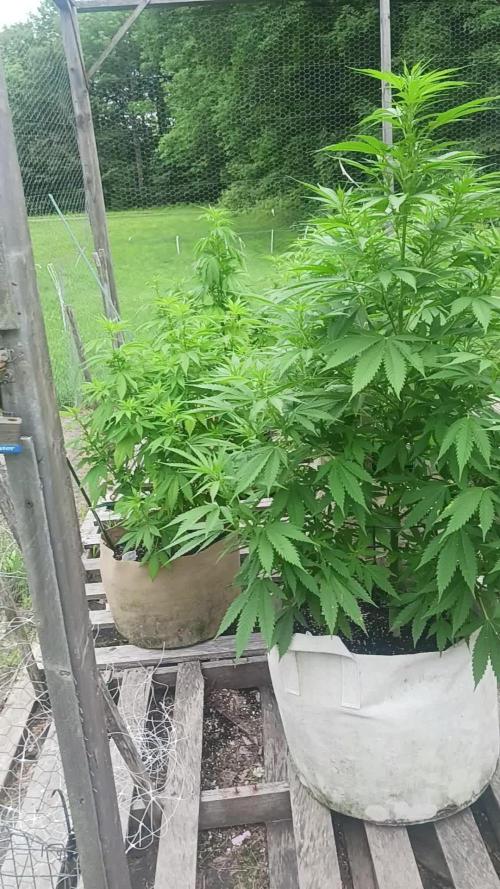
Tuning in kinda late as you can see they all trained down and spreaded around the pot. Feeding regular water coz i put biotabs in the soil, going organic this time to try to seek that difference in the taste and aroma.
Likes
2
Share
@Fleetwood
Follow
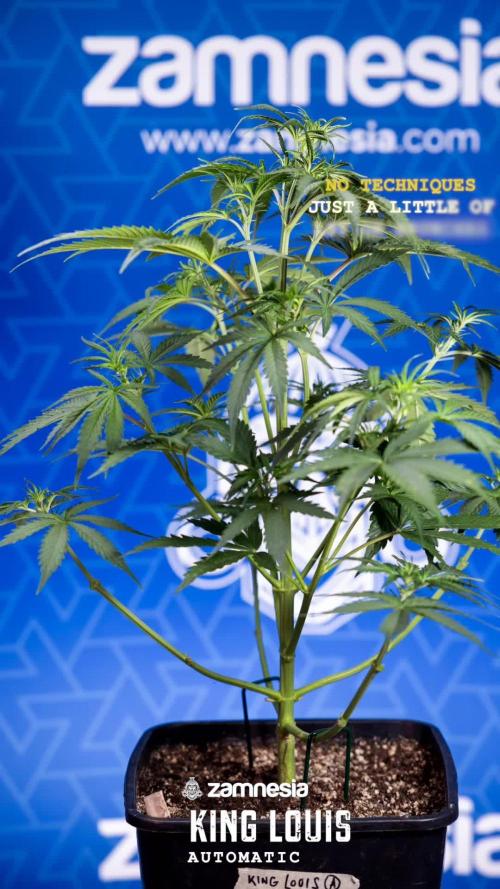
Still just want to keep the defoliation to a minimum. I wanted to have a grow with the plants 'O Natural' with no topping or other techniques. I thinned out almost all but the top 2 sets of fan leaves
Likes
17
Share
I think I'm about a week away from harvesting #1. There are a few amber trichomes on the buds (there are more on the sugar leaves) but the smell I'm looking for isn't there and many of the pistils are still white. I have just been giving it plain tap water with no nutrients for the last few weeks.
Likes
11
Share
These ladies did'nt stretched much so far in week 2 but that could be due to the light intensity and distance I had it at in week 1 of the stretch period. This strain is really starting to show signs of that Gassy, Sweet, Creamy smelly that I was looking for and so far these ladies have been a breeze to grow.
Likes
149
Share
Hi all the happy people here in GrowDiaries. This is my second cultivation ever and it will be fun to try a bigger space than my closet grow. First, I'm just going to say I'm done with the construction of my new growroom. I put some pictures on the construction here in week one. The room is 2.14 meters by 1.7 meters and has a ceiling height of 2 meters. It provides a floor area of ​​3.6 square meters. I use a 54 Watt Lightwawe T5 for germination and 2 Pcs 400 Watt HPS lamps. I have a channel fan that replaces the room air about 40 times an hour to get a comfortable theme in the room, the air enters a fresh air intake from the outside. The air is purified through a carbon filter to then leave the room to the rest of the basement. Then I use that heat to heat the rest of the basement. I will use 8 pcs 15 liter Autopots to grow with and a 100 liter water tank that supplies the pots of water and nutrition. I will grow completely organically in soil and will watercure my buds to get the best possible medicine for me. But there are no cultivation rooms to be displayed here, so I continue with what is most important. Today I have put my seeds in my moisture dome and hope the seeds have germinated within a few days. I am very excited to see how the new growroom will work and how this Blue cheese Auto from Royal queen seeds will turn out. Blue Cheese automatic cannabis seeds are a cross of Blueberry Automatic and Cheese Automatic that has been perfected over five years of breeding and careful selection. The result is a feminized, autoflowering strain with superior yield, flavor, and effects to either of its distinguished parent strains. THC: 16% CBD: Low Yield Indoor : 325 - 375 gr/m2 Yield Outdoor: 60 - 110 gr/plant Height Indoor: 40 - 70 cm Height Outdoor: 60 - 110 cm Flowering: 7 - 8 weeks Harvest month: 9-10 weeks after planting Genetic Background: Blueberry x Cheese x Ruderalis Type: Sa 35% In 40% Ru 25% Effect: Cerebral and uplifting Climate: Mild .............................................................................................................................................................................................................................................................................................................................................. Update 2017-08-15. All 4 seeds have germinated and planted in small pots inside the humidity dome. I'm so glad it worked so well and now it's just hoping they'll start growing and become 4 big healthy girls :) ............................................................................................................................................................................................................................................................................................................................................... Update 2017-08-16. I have mixed my own soil today. Its 40% sieved peat harrow H2-H4 0-30 mm, 45% sieved peat harrow H4-H6 0-30 mm. 5% sand and 10% of compost soil. And i use 15% of perilite and mix it all together. ................................................................................................................................................................................................................................................................................................................................................ Update 2017-08.20. Nr1 and 2 grow and thrive. Number 3 just got rid of the seedpod and is folding out the sheets. Number 4 is a bit shy and can only be seen if you look carefully into the soil. ......................................................................................................................................................................................................................................................................................................................................... Update 2017-08-21. Nr 1 and 2 is doing well. Nr3 is trying to catch up and Nr4 is still shy. -------------------------------------------------------------------------------------------------------------------------------------------------------------------------------------------------------- 2017-08-23. Transplanted 2 girls from humidity dome and the small germinating pots to 15 liter autopots. The other 2 girls have to wait a little more before transplant to the autopots. ................................................................................................................................................................................................................................................................................................................................................................................ 2017-08-27. The girls have settled in to there new home of the 15 liters autopot after a little transplant chock. Now the real week 1 starts for me and the girls. -------------------------------------------------------------------------------------------------------------------------------------------------------------------------------------------------------- 2017-08-28. New pic and movies. --------------------------------------------------------------------------------------------------------------------------------------------------------------------------------------- 2017-08-28. Nr3 is transplanted in 15 liter autopot. ------------------------------------------------------------------------------------------------------------------------------------------------------------------------------- 2017-08-29. New movie of the girls. Its no water for 3 days now for Nr1 and 2 so the roots develop more and match the plant above the soil. The temp controlled fan is awesome, its easy to set what temp you like to have in the room. Right now its 28 celcius. And humidity is 56%. ------------------------------------------------------------------------------------------------------------------------------------------------------------------------------------------ 2017-08-29. Hello to you who read my diary, I just want to say that I am pleased that you have chosen to check in with me and in my diary. I just want to say that I do this for myself and for a steady flow of my medicine. Everything you read and see in my diary is 100% honest and I will never distort or beautify anything here. I document my crops so that I can learn from my mistakes and also to look back at those different crops. I try to update with pictures every day and with text if something special has happened in the garden. This is my strainhunt for the best medicine and the beginning of my journey with cannabis and the cultivation of it. ----------------------------------------------------------------------------------------------------------------------------------------------------------------------- 2017-08-30. Cleaned the room this morning, just vacuuming and cleaning with chlorine solution. Im testing the fan to control temp and humidity, it works great. Added some pics with measurements and movie. Everything is looking great right now. --------------------------------------------------------------------------------------------------------------------------------------------------------------------------- 2017-08-31. New pics and videos. --------------------------------------------------------------------------------------------------------------------------------------------------------------------------------- 2017-09-01. New pics and videos. Gave each of the girls with 2 ml Alg-A-Mic, 4ml Bio-Grow, 4ml Bio-Heaven and 10 ml Formulex mixed in 2 liters of water. I hope they like it :) ------------------------------------------------------------------------------------------------------------------------------------------------------------------------------------------------------------------------------------------- 2017-09-02. New pics and the girls liked the water and nutrients yesterday. ------------------------------------------------------------------------------------------------------------- 2017-09-03. New videos of the girls this morning. Nr1 and 3 looks great and nr 2 is looking a little funny, maby a little stressed. Kl. 16.00. Did some defoliation on the girls. Added video. Kl.. 23.00. New videos, defoliation and leaftucking. -----------------------------------------------------------------------------------------------------------------
Processing
Likes
12
Share
Not really much to report as I'm now just waiting to give her a good trim once the stretch is done... Moved around to get the ones under the 300 under the 6 and vice versa to level out the growth as the ones under the 600 are more rapid Shooting out pistills everywhere looki g absolutely fabulous lol... smell is to die for you just wanna smoke it right now!! Went up a bit on the feed as still not showing any signs of visable nute burn so were tryna push her without going over the edge looking really healthy and just about to give then a feed before these pics.. Really cant wait till shes done because what a treat she is keep an eye out for next weeks update when we do our flower period defoliation to get as much light to her budsites coz that's all we want! Peace ladies and gents thanks for the love on here and the instagram page it's much appreciated!
Processing
Likes
15
Share
@Venabr96
Follow
Floraçao correndo otimamente bem. Algumas folhas manchadas ou queimadas mais apenas algumas. Produz bastante polem. Ansioso para chegar ao fim dessa aventura
Likes
109
Share
Hey fellow growers week 9 update of my critical purple and pineapple auto grow. Well today all 4 plants are 63 total days old. Critical purple #2 is now in week 6 of 🌸 the other 3 are in forth week of 🌸. This will most likely be critical purple #2's last update as she will be harvested this week hopefully! No big changes this week from last besides Pineapple auto #2 is still not happy and critical purple #1 is thickening up nicely! Well here's what I did to the ladies this week... 10/30/21 Watered all plants Ph 6.2 178 Ppm 1ml ph down Solution temp 73.2°F 11/3/21 Critical purple#1 & Pineapple auto #1 2ml micro 3ml bloom Ph 6.31 420 Ppm Solution temp 70.0°f Critical purple #2 still flushing! 5ml flora kleen Ph 6.24 185 Ppm Solution temp 74.6 Pineapple auto #2 2ml micro 3ml bloom Ph 6.5 430 Ppm Solution temp 74°f Here's my link for discounts on merchandise from viparspectra: https://www.viparspectra.com/?aff=Wackytabacky420&utm_source=affiliate Coupon code: Wackytabacky420 Well guys it's been a crazy week so I'm gonna wrap this up till next week. Best of luck and Happy Growing!😎🌱💚💪💪
Likes
21
Share
Before starting this harvest chapter, I want to apologize once again for not uploading everything directly into the official harvest and smoke review tabs. GrowDiaries has been struggling a little with very large uploads lately, and with the amount of photos, videos and information involved in this Ghost Train Haze harvest, I decided to split everything into multiple parts to make sure nothing gets lost or broken during upload. And honestly… this plant deserves the full story. So welcome to Part 1 of the Ghost Train Haze harvest. 🌱✨ Before talking about harvest itself, let’s do a quick recap of how we even arrived here. This was another 12/12-from-seed run. No traditional vegging. Very little manipulation. Minimal training. Mostly just letting the plants naturally express themselves while guiding environment, airflow, watering and light intensity carefully around them. Instead of forcing the plants into a shape, the goal here was to let them grow naturally into the PPFD and into the environment themselves. And wow… Ghost Train Haze really showed personality during this run. Most of the attention naturally went toward the massive main plant everybody keeps seeing in the photos — the giant colorful spear covered in fading reds, dark purples and swollen flowers — but there were multiple plants in this room, and in this harvest report we’ll finally start talking about all of them and the different directions they took after harvest. By Week 14, the room looked absolutely incredible. The fading on these plants became something special. Deep reds. Dark purples. Almost black tones in some areas. Golden fading leaves. Heavy trichome coverage. Color spreading through the sugar leaves and surrounding flower tissue. One of those harvests where the plants almost stop looking real. And underneath all those colors: extremely heavy flowers. Dense. Massive. Sharp aromas. Long spears everywhere. The branches became so heavy during late flower that support was absolutely necessary. Yo-yos were holding branches constantly, helping prevent collapse under the weight of the flowers. And the moment the supports came out during harvest… everything opened and leaned downward immediately under its own weight. That alone says a lot about the size and density of these flowers. There are photos in this report where I’m holding entire plants, and honestly, seeing them outside the tent really puts scale into perspective. It’s one of those plants that instantly makes you imagine how unbelievably huge she could become outdoors in native soil with unrestricted root space. Harvest day finally arrived, and from there the project split into two different paths. Some plants were harvested whole and hung for traditional drying. Others were fully broken down, every single flower removed from the branches, vacuum sealed into bags and immediately frozen for ice-water extraction work. And this is where things start becoming really interesting. Because this report is not only about harvesting flower. It’s also about exploring different post-harvest directions and understanding why growers process material differently depending on their goals. The flowers selected for traditional drying will continue their journey in Part 2, where we’ll focus much more deeply on drying conditions, moisture management, branch snapping, trimming and curing. But for now… let’s talk about the frozen material and ice-water extraction. ❄️ After harvesting, the flowers destined for washing were separated carefully and placed into vacuum bags before going into the freezer. Freezing fresh material helps preserve volatile compounds, terpene expression and trichome integrity while preparing the flowers for ice-water extraction. And no — this is not simply “throwing weed into ice.” There’s actual science and technique behind this process. Before washing, the frozen material is combined with ice and extremely cold water, ideally close to 0°C. The goal is to make the trichome heads brittle enough to detach cleanly while keeping unwanted plant contamination as low as possible. At the same time, the flowers need time to fully soak and rehydrate slightly before agitation starts. This helps reduce excessive breakage of plant material during washing. And then comes the wash itself. The bubble washer machine agitates the mixture gently, allowing trichome heads to separate naturally from the plant material and suspend inside the cold water. From there, the water passes through a series of filtration bags with different micron sizes. 25 micron. 45 micron. 73 micron. 90 micron. 120 micron. 160 micron. 220 micron. Each size captures different grades and sizes of resin heads and contaminants. We are not using every single bag configuration during this run, and we’ll go much deeper into grading, collection quality, drying and final results later in the series. But since this report already includes videos and photos of the process itself, I thought this was the perfect moment to explain what ice-water extraction actually is — and what it is not. This process is not about adding anything. It’s about separating what the plant already naturally created. Water. Ice. Agitation. Filtration. Patience. That’s it. And honestly… watching these resin-covered flowers moving inside ice water almost feels hypnotic. The harvest itself may be finished… but the real post-harvest journey is only beginning now. This report will continue in the next update very soon because there is simply too much material, too many photos and too much information to fit properly into a single upload without risking GrowDiaries crashing or losing content again. Part 2 will continue deeper into: the drying process, environmental control, trimming, flower handling, and the continuation of both post-harvest paths. And eventually, Part 3 will close the circle with curing, smoke review, flavors, extraction reflections, effects and final thoughts. As always, thank you to everybody following this journey. To Zamnesia for the genetics. To Plagron for the nutrition. To all the gear keeping this room alive day after day. To GrowDiaries itself. To the community. To the longtime followers and OGs. To the new people arriving every day. To the curious ones. To the silent supporters. To the lovers. To the skeptics. To the haters. To everyone who stopped by, even for a moment. Thank you for being here. 🌱 Part 2 coming very soon. ✨ 📡 DELETED @ 1K Please stay tuned.we never quit https://www.youtube.com/@TheDogDoctorOfficial NEW 🙏 Thank you for your patience and continued support. FOR DISCOUNT CODES AND MORE JUST FOLLOW THE LINK https://website.beacons.ai/dogdoctorofficial 📲 Don’t forget to Subscribe and follow me on Instagram and YouTube @DogDoctorOfficial for exclusive content, real-time updates, and behind-the-scenes magic. We’ve got so much more coming, including transplanting and all the amazing techniques that go along with it. You won’t want to miss it. GrowDiaries Journal: https://growdiaries.com/grower/dogdoctorofficial Instagram: https://www.instagram.com/dogdoctorofficial/ YouTube: https://www.youtube.com/@dogdoctorofficial Deleted by Youtube - https://www.youtube.com/@TheDogDoctorOfficial NEW Vimeo : https://vimeo.com/dogdoctorofficial Under construction stay tuned ⸻ Explore the Gear that Powers My Grow If you’re curious about the tech I’m using, check out these links: 🔆 Lighting & Environmental Control • Future of Grow — Advanced LED lighting technology https://www.futureofgrow.com/ DISCOUNT CODE: DOG20 • Lumiflora — Under-canopy LED lighting https://lumiflorade.com/ • TrollMaster — Environmental controllers and automation gear (past collaboration) ⸻ Genetics • Zamnesia Seeds — Genetics used in this project https://www.zamnesia.com/ ⸻ 🌱 Soil, Substrates, Boosters & Root Support • Plagron — Substrates, bio mixes, and supportive products https://plagron.com/en/ ⸻ 🎒 Storage, Curing & Preservation • Grove Bags — Curing and storage solutions https://grovebags.com/ ⸻ 📸 Photography Equipment & Tools (Not sponsors, but part of my creative toolkit) • Sony A6700 • Sony full-frame macro lens + few more • Stacking photography workflow - learning • iPhone (for behind-the-scenes shots) We’ve got much more coming as we move through the grow cycles. Trust me, you won’t want to miss the next steps, let’s push the boundaries of indoor horticulture together! As always, this is shared for educational purposes, aiming to spread understanding and appreciation for this plant. Let’s celebrate it responsibly and continue to learn and grow together. With true love comes happiness. Always believe in yourself, and always do things expecting nothing and with an open heart. Be a giver, and the universe will give back in ways you could never imagine. 💚 Growers love to all 💚 📸 P.S. – The Eye Behind the Lens All photos in this diary (for now — except for the ones showing the camera, which I took with an iPhone) are taken with a Sony A6700 paired with a Sony full-frame macro lens and a few more. Photography is part of the story — it’s how we share the fine textures, the glow, and the quiet details that words can’t always capture. I’ve also started experimenting with photo stacking — a technique where multiple images, each taken at a slightly different focus point, are layered together to create one perfectly sharp image from front to back. It’s not digital enhancement or AI; it’s pure photography — a way to reveal the plant’s beauty in microscopic depth, from trichome to petal. You’ll even see a few shots of "ghost me" capturing the shots — camera, lens, setup — because every grow deserves not just to be cultivated, but documented like art. FOR DISCOUNT CODES AND MORE JUST FOLLOW THE LINK https://website.beacons.ai/dogdoctorofficial NEW DISCORD - Official Server Invite Link : https://discord.gg/ksjAkA5T74
Likes
13
Share
@Lfuego22
Follow
Good week. Day 41-48 from clone about day 21-28 in veg 3 weeks in clone
Processing
Likes
27
Share
@Snowy
Follow
All ladies have grown a lot this week again, with the Blue Dream CBD growing at the rate of about 10 inches a week. That's almost a foot and I will admit to being a bit unprepared for this kind of growth rate, especially given that flowering season will not start until about late July... All said everyone seems healthy and happy. UPDATE - Interesting and unexpected development: the ladies (both Trainwrecks) seem to have flipped into flowering. I have no idea how this happened at this time of year. The seeds were not planted under lights, the plants have been sunlight only since they sprouted. Perhaps this explains the crazy growth all plants have been exhibiting. I'm keeping a close eye out on the two others to see if the same happens. Any thoughts?
Likes
46
Share
@Smokwiri
Follow
Welcome to week 5 of my Bubblegum XL diary Genetics by: Royal Queen seeds Looks great, nice and dark leaf, i like the new smaller leaves, the bubblegum leaves edges remind me of the weel on an automated saw. Kinda cute. I think i will let it grow for another week to get a bit wider plant
Likes
13
Share
Likes
2
Share
Everything is not as accurate as I would like to say, but I wanted you guys to see what I can do
Likes
1
Share
@Ninjabuds
Follow
It's amazing to think that this tiny sprout will one day be a beautiful, vibrant weed plant. I've nicknamed it Soap Tiny, and it's such a joy to watch it grow! Right now, it's just a few delicate leaves poking out of the soil, but I can't wait to see it reach its full potential. I have a feeling this little plant is going to bring me so much happiness.
Likes
5
Share
Zdar Bando . Začínám 5 týden a přidal sem 1 ml pk od hesi, teď vše po 2 ml/l. Jinak proběhla defoliace, příští kolo možná vezmu ještě víc listí. Zálivka co 2 dny 3l na kytku. Začínají být už cítit tak budu muset dát pacháč 😁. Zaučuji mladýho,už je na čase, za chvilku to po mě převezme 😂. Zatím snad vše ok. Tak další hlášení za týden .