The Grow Awards 2026 🏆 


Likes
Comments
Share
@tsf_homegrow
Follow
Der Haupttrieb wurde am 16.3. geerntet den Rest der Pflanze am 18.3.💛


Likes
6
Share
@AlpenZilla
Follow
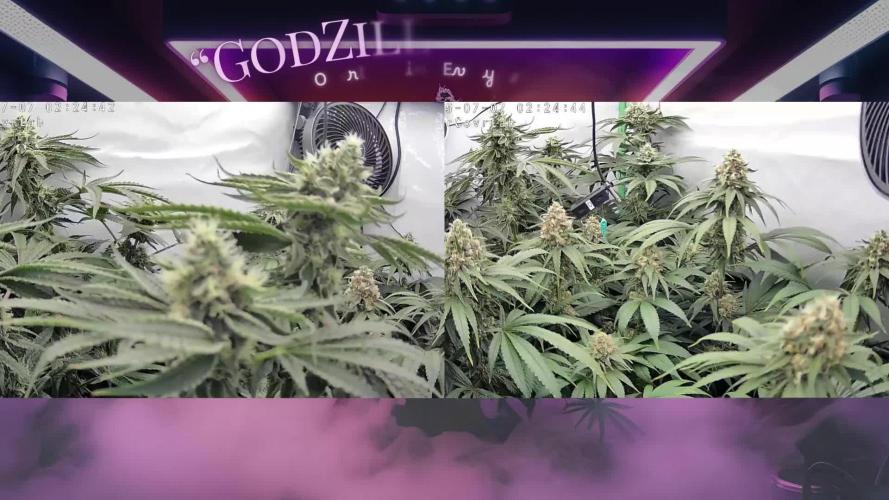
Week 11 – Day 79 (Flower Day 51)
🔄 General Update
Unfortunately, I ran into a nutrient lockout earlier this week – some of you may have seen it in the comments.
📉 The drain pH just won’t go up anymore, even after multiple flushes with light nutrient solution.
I’m now down to 50% of the feeding schedule and reduced light intensity to around 600 PPFD to keep stress levels low.
❄️ White Widow – Day 51 of Flower
She’s clearly showing signs of the lockout now ⚠️
Still, the buds continue to swell visibly, which is honestly a nice surprise!
It seems like she’ll make it to harvest without major damage.
Flushing only from now on – harvest is planned for next week.
⚠️ Drain pH is stuck at 5.6 – completely off, but can’t be fixed anymore at this point.

Likes
4
Share
@Ieiogrow94
Follow
Eccoci qui...
Tutto va per il meglio, questa settimana ho eseguito Lollipopping e Defoliation per far si che le cime principali sprigionino al meglio il loro vigore.
Siamo verso la fine del progetto ora bisogna solo aspettare la fine...
Grazie a tutti per il supporto🔥🌲❤️
Likes
150
Share
@visco
Follow
So here we are, day 72 september 8th. RIP first grow, I shoulda had a dehumidifier guys.... The 3 other plants are transpiring wayyyy too much and I didn't realize how much of a humidity problem it would cause. Low and behold, it ruined my girl. I believe only the main cola is affected. Can I chop her top off and continue on till the rest of her buds ripen? What can I do ?? Please help I fucked up, this really sucks ass....
EDIT EDIT: ITS NOT ROT YAY! IT'S SPIDER MITES I BELIEVE! I saw a little red bug and i was like OH SHIT. Turns out they can leave little webs in your buds. Any recommendations on how to treat this ?
EDIT 9/10: Okay, after not wanting to believe it was mold.... it was mold. lol. I removed the top part of the main cola that was in the early stages of bud rot (botrytis) I have never seen the inside of a developing bud like this. I wasn't really sure exactly what I was looking at lol. So I probably removed more than I had to and some parts probably could have been salvaged but fuck that I just got rid of all of it. Cleaned the tent with lysol disinfecting wipes and got a cheap dehumidifier. I am almost 100 percent sure I am gonna have to buy a 150-200$ dehu in the near future..... i hope not tho. ALSO, changed light schedule back to 20/4. 10 AM off, 2 PM on. Hopefully this will help with some cooler temps during the day. :) and @Philindicus recommended I switch it, I am gonna take his advice this time after he warned me of mold issues xDDD
Sept 11th Day 75 - Got a 50 pint GE dehu setup today, big boy moves. Plants are thriving now, 55% RH controlled and ooooo its so nice! Feels good to regain control over the grow again xD. Will post some nice pics tomorrow :)
Sept 12th day 76 - sorry no pics again today, just been super busy :p Plants are still thriving, currently 50% rh in the tent and 74.5f degrees :) TEXTBOOK! Catch y'all tomorrow ;)

Likes
21
Share
@Esmoki_La_Cabrona
Follow
September 2, Day 43. I removed the trellis because it was annoying and I realized the spaces were too large and that's why it felt clumsy... Kabob sticks are doing the trick so far.
As I was clipping some leaves to prepare for flowering, I noticed roots growing through the bottom of the pot. I hate transplanting plants so I sat the current pot in another pot that was filled 30% with additional coco coir that had been prebuffered with seedlings strength nutrients to avoid shock. I am confident the roots will continue their journey through the first pot and into the additional space below. Now to observe for a few days, aiming to switch to flowering next week.
I have removed at least 30 leaves throughout the last week and she is still looking so bushy and healthy... Thanks Recharge. I ordered Big Bud by Advanced Nutrients and I look forward to using it during flowering.
SUPER MEGA HAPPY UPDATE
Day 44, September 3. I clipped a branch and planted it in a prebuffered with seedling strength nutrients rockwool pellet... I baptized her Kaboom Baby.... And. She. Survived!!! Ahhhhh!!! So freaking happy! I am going to start a second grow under this diary called Kaboom Baby, La Reinita Africana.
Update, Day 46, September 5, 11am. Fed and watered with all nutrients except Recharge. Kaboom Mama is growing wild and free. I had so many training plans but I like her this way.
As always, thank you for stopping by. If you have any thoughts about this grow, please leave them below. Happy growing and massive yields to all 💯🙏💚


Likes
1
Share
@walterwhiteee
Follow
Aug 13th transplant day
Using Gai Greens Organics 4-4-4 with worm castings and mykos for root structure
Aug 15th Start of LST


Likes
15
Share
@Bluemels
Follow
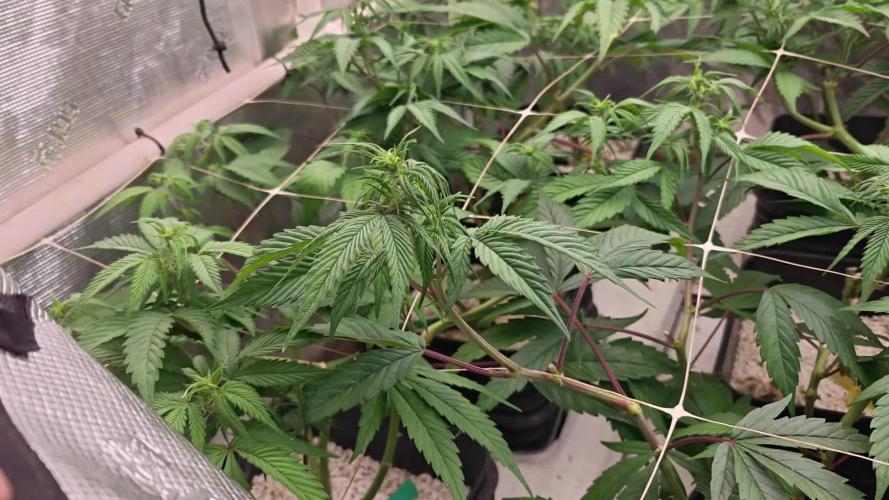
Tag 21 war es zeit die Triple G umzutopfen und sie in ihr eigenes Grow Zelt umgezogen 😁
Schon an Tag 22 konnte ich die Pflanze bei Nodien toppen 😃
Likes
1
Share
@Drtomb
Follow
Just flip these plants about 3 or 4 days ago. Had some bud trainers on the branches to get them down a little bit lower is this plant tends to stretch. We should see some nice Frosty buds in a few weeks . Stay tuned and tune in

Likes
3
Share
@mquintero7
Follow
No purple yet, maybe never. But still beautiful and smelling very good. Very good harvest coming. Buds getting fat.
Given that the soil is organic with a wide variety of amendments I decided not to keep fertilizing with liquid fertilizer.


Processing
Likes
16
Share
@GreenCropsPT
Follow
Second week of vegetation they are going very well and lets see how it goes


Likes
12
Share
@russrahl
Follow
Plants are looking good so far, added about 2ml/gal to the reservoir this week and plants responded well. They are all keeping short and stocky so far and should be able to start LST training in a few days I think. I also turned up the light to 750w and the air temps are now hovering between 24c-25c. Water temps are creeping up though in the 21c range, gonna wrap the buckets tonight in foil insulation and build a water cooler for this setup soon as well. Had some Ph issues during week 4 because my pen decided to go wonky. I tried to calibrate it again and had a hard time. So I busted out an older one and decided to calibrate it and see if it worked still... calibrated in a few min and sure enough res ph was well bellow 5. So water was changed as it was time anyway and ph’d proper just before lights out so we will see what happens tomorrow.

Likes
Comments
Share


Likes
38
Share
@Homegrown93
Follow
I tried a new germination method this time. I wasn’t happy with the peat pellets I was using. They couldn’t handle the moisture and would mess with my balls. So this time I used small coco pots with coco substrate and dynomyco mixed in. Covered and labeled each one with a ziplock baggy and boom, 3 days later all of them were up and moving. Solid 4/4. Don’t mind the AvT finishing up in the middle.

Likes
23
Share
@NSCanna
Follow
Buds are fattening up pretty well and I've had to use more rubber garden wire and clips to keep the branches from bending over. Smell is increasing on the Northern Light but still a mild skunk on the Black Devil. Also gave the very last feeding on the plants this week so they will get nothing but water until the chop.
I'm very happy with the microbe populations so I stopped feeding the sugars (molasses/agave) as the plants themselves don't get much out of them; that stuff is just for feeding the soil beasties. I had added some predatory mites several weeks ago to deal with some springtails, and the mites annihilated the population. I did find a developing larva though so there are still some around. Posted lots of microscope videos today.


Likes
9
Share
@SSKNFbyHAZE
Follow
** COST **
TO RUN
- Used previous ⛺️ setup : $0.00
- Monthly electricity : $36.73 <-- other ladies sharing ⛺️
- 3 Gallon Fabric pot : $0.15
- Bonsai wire : Apx. $0.03
- Reused soil from last run : $0.00
FOR NUTRIENTS
- Jadam Microbial Solution : $0.00
- Fermented Plant Juice : $0.00
APPLYING
- JMS : 30ml / 1 Litter
- FPJ : 30ml / 1 litter
TOTAL COST : $36.91
Throughout the week, I give compost tea, and fermented plant juice once each ^^
Hope you guys have a wonderful day today ^^v
*** Please Like, comment & share ***
Highly appreciated -----/-----<@
Likes
4
Share
@BADINFLUENCER
Follow
Cambio liquidos a floración por ver ya sus flores, muy contento con los resultados, la poda justo a tiempo. He tenido un problema con la mesa A, una de las luces se ha fundido, la sustituyo por una de 4200k mismo voltage, hasta que la marca me lo reemplaze por defectuosa.