
Likes
Comments
Share


@TechDCo
Follow
23/04/2025
Lights On! Sprayed walls 6%HP/L sprayed Domes 0.05% HP/L
Pulled backwards MS with tape to try and shape her.
23/04/2025
Lights Off!
25/03/2025
Lights On!
Placed seedlings in the 5L starting cans.
Lights Off!
Check the VT me like the old me!
26/03/2025
Midday!
27/03/2025
Lights On!
28/03/2025
Lights Off!
30/03/2025
Lights On! Defolled!
Switch to flower in 4days. I need to setup the sativa tent in loft!
Midday! Increased light: 460watts they perked up and are praying!
- "If the truth perished, it'll still stand true that the truth perished"
Likes
81
Share


@UnorthadoxDude
Follow
Hey! Welcome to week 8! Karen is mid way through her flowering stretch. Please check back to last week as I update daily so the week is now complete. I count about 20 colas now.
Day 51: Have reconfigured the tent, see video. Karen is now 36cm and still stretching. Karen has more light now. Smell is still there hits you when you open the tent. Fertigated 2l.
Day 52: Height: 39cm. Karen's scent is heavenly. I have reconfigured again and installed some upgrades. Better reflector. Much bigger carbon filter. Increased airflow. Better config. More efficient pot layout. Karen is lovely.
I am grateful to her and for her, so I wrote her a little poem, I hope she liked it.
"Karen! Oh Karen! The phoenix of flowers,
Three lowly weeks she struggled in vain,
Shadowed and starved for five hundred hours,
He slowly wept to witness her pain.
Karen! Oh Karen! I P-H'd your showers,
and in the fourth week you started to gain,
Hallowed and hard you survived as you cowered,
I thought you meek, I was wrong once again.
Karen! Oh Karen! Forgave me my howlers.
She set a pace, a pace she maintained,
Now shes a girl at the peak of her powers,
And so I'm a geek, with buds on the brain."
Day 53: Approx 48h into a simulated dry spell.
Alright I think it is time for Karen to get her first MAJOR defoliation. I will update shortly with photos and info. I will also be doing some gentle LST to separate the colas a bit.
Day 53.5: Defoliation and LST. Finally got chance to photograph that bunda. Enjoy!
Day 53.75: Bit of a fail. Messed up the timer and the lights ended up being off for about 3 or 4 hours. Because I was cooling the room (open window) to keep temperature in the tent down, without any light the temperatures absolutely plummeted as it is sub-zero outside. By the time I realised and turned the lights on, the temp in the main tent had dropped to 14 degrees celsius. Whoops! How is that for mistreating your girl? Defoliated about 80% of her leaves, 4 nodes, significant LST, then stuck her in the cold and dark for 1/6 of a day. Not to mention she is now almost 3 days into a "dry spell". There do not seem to be ill effects, and Karen has already begun to respond to the LST; all the colas that had been changed in angle are now upright again.
The dry spell I keep mentioning, there is a method behind my madness, I have spotted one or two small flies and I think they may be fungus gnats. I am starting to suspect that the 2nd seedling in the Purple OG Punch Auto grow was actually beheaded by fungus gnat larvae. So I am drying out the mediums as much as I dare. I am closely monitoring the plants, so far the only one I have had to break the drought for is Enigma; all the girls in big pots haven't even noticed it's dry yet. How far am I going to push it? Well I will judge it on a plant by plant basis, but quite honestly I am hoping to see physical signs of thirst before I breakdrought. Of all the plants the two I think will respond most strongly to this will be Karen and Bertha, because of where they are. Karen here is actually probably 4 weeks into flowering rather than two, so about now is a good time to give her a little hydration stress. I do not think I will push it past 5 days, as RH is 34%. By now all the plants will be compensating for the lack of moisture and the high temperatures and low humidity. They will be taking more and more moisture out of the coco, and as the coco dries further and further down, those plants that have space will start desperately growing roots to find moisture. Mark my words, 24 hours after I end this drought, every plant in the tent will throw out crazy growth.
Day 54: Ended drought and fertigated 6l, no run off, I will re-fertigate tomorrow. Karen is still stretching her height post LST is now 37cm. The two tallest colas seem to have stopped but the other colas are still stretching.
Day 55: Alright so it has been 5 hours since lights on, and Karen is looking in good shape, all her drooping leaves have perked back up and she has added quite a bit of foliar growth. The colas are all still rising, except perhaps the two tallest. This girl is absolutely loaded with pistils, I'm starting to see trichomes on the sugar leaves, but trich production hasn't started in earnest yet. She has a least 20 colas, and 6 of them are thicker/taller than the primary cola at her tip. Every one of her nodes has reinforced itself with a bulbous growth and these cola branches are swelling rapidly. I am increasingly of the opinion that, all being well, this girl is going to surprise us all with her yield. My first grow, which was just mucking about really, I got 60-70g of the two main plants, and they were just bare sticks with 2 colas. Although her height is less than theirs was, 2/3 of their height was bare stick... whereas every mm of her is befoliaged and living. So in terms of the height of the actual cola I think they were about comparable in usable space on a per cola basis. The main difference being that Karen has 20+ colas whereas they had 2 primary and 2 lower. I know that it is probably unrealistic to expect more than 70g from a single auto grown indoors. Nevertheless my gut tells me this baby could achieve at least 100g, perhaps as much as 150g. The next few weeks will determine that, but given where we were in week 3 I will be grateful for any yield of quality bud. I have dropped the lights down to 18/6 from 'tonight' onwards.
I really have no idea how long we have left for Karen. According the the "brochure" she flowers for 7-8 weeks, with a total crop time of 9 weeks. The problem is I don't know what a total crop time is? Does that mean from seed to finish? If so Karen is clearly not going to be anywhere near that timescale.I am going to go ahead an assume that, for my plant anyway, the first 4 weeks were veg weeks. I think it is fair to count week 5 and 6 as flowering because pistils were popping out very early in week 5 if not before. So that makes this week four of flowering. I am going to assume 8 weeks rather than 7, so I think we have another 4 full weeks give or take a week. On that basis I am expect harvest week to be around week 12 or so. I am not fixed on this though, I am determined not to harvest this girl early.
Day 55: Photos taken 00:00 9/3/23 Strong 24h of veg growth as predicted.
Day 56: Existing leaves continue to swell. Stretch appears to be slowing. I've taken so many media this week that I cannot scroll down far enough to select a recent thumbnail. Probably Karen's biggest week in terms of changes. She is looking like she is going to impress. Height 39cm.


Likes
41
Share


@TheBulldozerSicily
Follow
Sabato 6 luglio Aggiungo 50 lt acqua per livello basso
Venerdì 20 luglio Aggiungo 50 lt acqua e il doppio dei nutrienti, vediamo che succede. Ho dato anche una bella defogliazione e pulizia rami inferiori
Martedì 23 luglio
Inizio controllo ec 3999 ph7
Cambio soluzione parto da 75 lt acqua osmosi inversa + 5lt acqua rubinetto ottenendo ec 473 ph 8.4
Aggiungo tutti I nutrienti ottenendo ec 1489 ph 6.5

Likes
3
Share


@ALittleDabWillDo420
Follow
Girls been doing great , sadly i have missed a few weeks so this is a update from week 3 to week 5 few pictures I have took threw the weeks ... girls are doing great and stacking really nice aswell as frosting up
Likes
5
Share


@VividLeaf
Follow
This week the flowers really started to bulk up.
I was worried about having very loose buds as the development starts off very slow but eventually they really bulk up nicely!!
The topped plant is about 2 weeks behind in flower but has way more main collas! Check the last video for both plants


Likes
7
Share


@OwlGang_Uk
Follow
Week 4 - Sometimes You Got To Lose To Gain Phase 2 - I took off the fan leaves so that the plant would redirect its energy into the stem and branches rather than the leaves. I also cut of the top heads so that the energy would go into the development of the 2 heads below.
Likes
13
Share


@STAYINGONMYMAINCBATORUNTWO
Follow
Flush is going amazingly I’ve now switched to the lights off for 24hours and will chop tomorrow so next update is hopefully on time and will be a harvest one! Been loving growing all these strains can’t wait to add the final report!

Likes
10
Share

@BalconyBoy
Follow
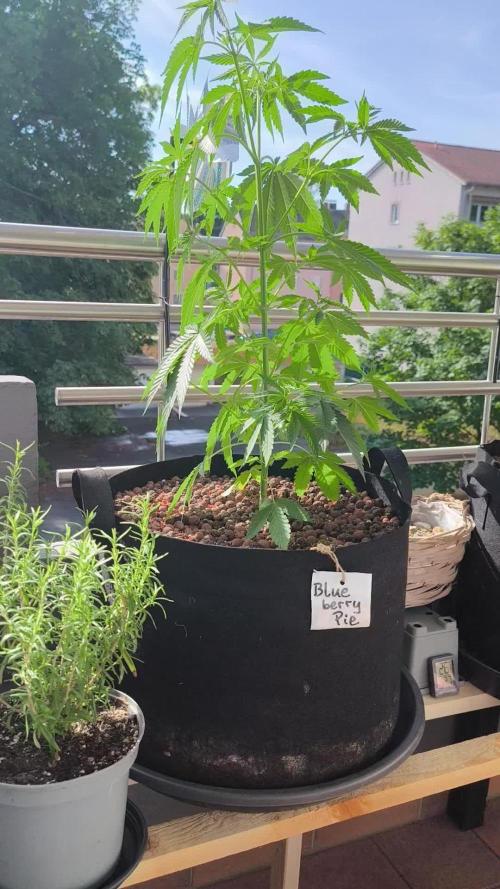
08.06.26 die Pflanzen entwickeln sich weiterhin gut und hatten die vergangene Woche mehr Wind abbekommen, jedoch ohne Schaden. So darf es gerne weiterlaufen!


Likes
51
Share


@Corwinism
Follow
WEEK 5 (03/28/2021 - 04/03/2021)
Day 38: 03/28/2021
Plants had their first feeding today. It’s been about 3 or 4 weeks giving them tap water only. With my ppm dropping in the soil, I thought now would be a good time. Leaving out the Cal-Mag this feeding.
Nutrient mix: 651ppm, 6.0 pH, 71℉
FF Big Bloom: 5ml/gallon (⅓ strength) = 15ml/3 gallons
FF Grow Big: 5ml/gallon (⅓ strength) = 15ml/3 gallons
ppm/ppm = runoff/soil
JB#1 - 960ppm/309ppm, pH 6.9 JB#2 - 1290ppm/639ppm, pH 6.8
AP#1 - 1400ppm/749ppm, pH 6.8 AP#2 - 1190ppm/539ppm, pH 6.8
GC#1 - 1190ppm/539ppm, pH 7.0 GC#2 - 1350ppm/699ppm, pH 6.8
-------------------------------------------------------------------------------------------------------------------------------------------
Day 41: 03/31/2021
Plants watered around 5:30-6:00 p.m.
ppm/ppm = runoff/soil
JB#1 - 955ppm/653ppm, pH 6.8 JB#2 - 1070ppm/768ppm, pH 7.0
AP#1 - 1470ppm/1168ppm, pH 6.8 AP#2 - 1390ppm/1088ppm, pH 6.8
GC#1 - 1110ppm/808ppm, pH 7.0 GC#2 - 1160ppm/858ppm, pH 6.9
-------------------------------------------------------------------------------------------------------------------------------------------
Day 44: 04/03/2021
Plants watered between 5:30-6:30 p.m. Botanicare Hydroguard was used at half-strength to supplement the roots and as a preventative against rot.
Tap water: 247ppm, pH 9.4, 70℉
Botanicare Hydroguard: 1ml/gallon = 3ml/3 gallons
pH Down: 11.5ml
Mixture: pH 5.6, 285ppm (+43ppm from pH solution)
ppm/ppm = runoff/soil
JB#1 - 858ppm/573ppm, pH 6.8 JB#2 - 857ppm/572ppm, pH 6.8
AP#1 - 984ppm/699ppm, pH 6.8 AP#2 - 1030ppm/745ppm, pH 6.9
GC#1 - 880ppm/595ppm, pH 7.0 GC#2 - 932ppm/647ppm, pH 6.9
-------------------------------------------------------------------------------------------------------------------------------------------
This week has been much more pleasant than the weeks prior. I believe my plants are finally getting acclimated to the medium and recovering from transplant shock. New growth is looking much healthier. Just as a preventative measure, I picked up some Botanicare Hydroguard to use in an attempt to supplement the roots and bring the pH of the soil down to where I want it. Personally, the pH remains just a tad too high for my liking this week. I would like it more in the range of 5.7-6.5 but I'll give it a week or so to see the reaction to the Hydroguard.
I've continued with more LST on all but the Glookies #2. On this plant I simply did a topping. It was a risk, considering the plants isn't vibrantly healthy, but I need to maintain it's height. I also did a second topping to the American Pie #1.
As can be observed from the photos, not all of the plants were shaped the same way. I got creative with the fabric pots and I decided to LST a few plants a little bit differently just to see which technique/style I liked the most. So far, I am digging the way the Jelly Bananen #1/#2 and American Pie #2 are shaping up. They are going to have a beautiful, wide canopy when they head into flower.
I'm considering transplanting into 5 gallon fabric pots within the next week or two so I can flip them to flower two weeks later. My intuition is telling me this has been a pretty lengthy vegetative stage, thus far.
I'm expecting all of my plants to double in size during the flowering stage, which should be anywhere between 65-70 days long. I made sure to select strains with similar flowering times (60-70 days).
Thanks for stopping by this week. Please feel free to leave a comment or any tips/advice! Until next week! 🙏


Likes
24
Share


@Basementganja
Follow
Harvested the Clones!
I'm stoked how #4 grew out, I think she's the winner!
With limited space in my grow, I'm only going to be able to bloom out the rest of the phenos clones to week 3-4.. The show must go on..
It's the price I must pay for using non-ideal cloning methods... Next round of phenohunting will have 100% cloning success, using my new aeroponics cloning machine.
Likes
10
Share


@asstonmartian
Follow
Fifth week of flower and it was time to defoliate the indoor units as they were starting to get bushy and block exposure to the lower bud sites. Quick work with the bonsai shears and they were ready to soak in the sun. I left the rooftop plants alone as I believe having additional leaf mass enables them to withstand temp and environmental fluctuations better. Whether or not this is the case, it was an experiment.
Likes
40
Share


@Ganjagrandaddy
Follow
Day 63 : These girls are continuing their quest for glory and still popping pistils.
#1 In her organic soil looks the most potent up close and her main stem is so fat now. I tried to reposition it a little and lost the battle as it could arm wrestle a Gorilla !!. I amended her pot today with some charge(200ml/10L) in her water along with the other LOS girls and a top dress with "life cycle" (30ml) . I think another week at least for her so she could use the boosts.
#2 Is also looking potent and smells amazing like her sister up close. she is a very thirsty girl and uses all her nutes within a day to a lighter pot slightly every feed. She has been fed with just the shogun sumo boost (20ml) , dragon force (40ml) to 10L water to compare with her MC fed sister. her height is held down with lst but if I grew this strain again , I would not train it flat but manage it as natural as possible. #3 is the reason I say this. As she had looked a little different in size and colour , I allowed her to grow untrained. She is still completely different to the others but from talking to a member here , there are about 9 different ones. wow. She smells identical but her buds look so different to her sisters from different Misters. She is being fed with Mc (10g) , sumo boost (10ml), pk warrior (6ml) , calmag(10ml) and silica (10ml) to 10L water. She is loving life and packing her weight on now. i think she may finish a bit after her step-sisters but I expect a few more weeks possibly.
Keep it green Growmies


Likes
10
Share


@Jozef_Balcerek
Follow
Podlewane woda PH 7.0 żeby podnieść PH ziemi, rośliny są przyblokowane ale jestem dobrej myśli, gdyż pomału wraca do prawidłowych wartości Zaczęło się kwitnienie. Warunki są stabilne 25-26C wilgotność 60-65%. Pozdrawiam odwiedzających. Jesli macie jakies uwagi albo propozycje piszcie w komentarzach . Dziekuje :-)

Likes
34
Share


@Roberts
Follow
I am starting a auto moon rock. I will be growing her in 3 gallons of perlite. My 1 gal one was nice, and I am curious to it on a bigger scale. Figured this may be neat upon finishing. 🤞🏻 for a great grow. Thank you Medic Grow, and Divine Seeds. 🤜🏻🤛🏻🌱🌱🌱
Thank you grow diaries community for the 👇likes👇, follows, comments, and subscriptions on my YouTube channel👇. ❄️🌱🍻
Happy Growing 🌱🌱🌱
https://youtube.com/channel/UCAhN7yRzWLpcaRHhMIQ7X4g

Likes
21
Share


@Master_weeda
Follow
Bonjour
Décidément je n'aurais pas étais bon avec cette plante du à un mauvais engraissage j'ai brûlé ses racines et par la même occasion ses feuilles
J'ai donc décidé de ne plus mettre d'engrais
Cela prouve une fois de plus la robustesse de cette variété qui possède une bonne génétique pour vaincre les erreurs de débutant je vous invite toutefois à consulter mon diarie différent test
https://growdiaries.com/diaries/37722-differents-tests
Ou j'ai cultivé 2 souches identiques issus toutes les 3 de la même banque pevseeds bank pour ne pas la siter et elles sont magnifiques
Si le problème persiste après le rinçage forcé je procéderait à la récolte même si les trichomes ne seront pas ambrés comme ils le devraient...
Car je n'aurais pas le temps de pratiquer une intervention quelle que ce soit
And in english
Hello
Decidedly I would not have been good with this plant due to a bad fattening I burned his roots and at the same time his leaves
So I decided not to put fertilizer
This proves once again the robustness of this variety which has a good genetics to overcome the mistakes of beginners I invite you however to consult my diarie different test
https://growdiaries.com/diaries/37722-differents-tests
Or I have grown 2 identical strains from all 3 of the same bank pevseeds bank not to sit and they are beautiful
If the problem persists after the forced rinsing I will harvest even if the trichomes will not be amber as they should ...
Because I would not have the time to practice any intervention whatsoever
