
Likes
Comments
Share


@Dsant
Follow
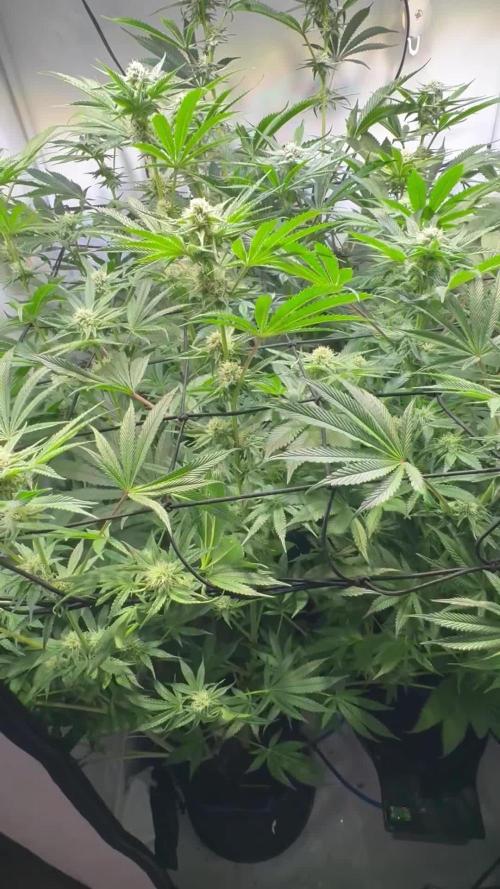
D73 - 31/03
We’re almost at the finish line with these girls!
Haven’t done anything lately, just watching them grow and making sure everything is dialled for them.
This week I’ll be mostly away, so I’ll set up my reservoir with only plain water. Hopefully everything goes smoothly.
I’m very very happy with this grow so far, looking forward to the harvest and curing!


Likes
8
Share


@SkunkyDog420
Follow
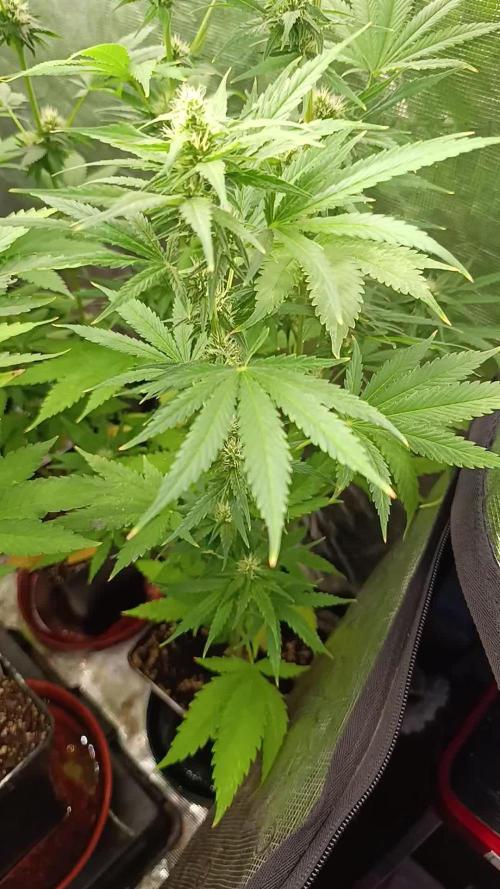
Hallo zusammen 🤙. Habe heute das letzte mal gedüngt ab Tag 78 nur noch Wasser 2 Wochen lang.

Likes
8
Share


@sweetkaya
Follow
Day 23 - Had some problems with Calcium because I had not buffered the coco... Made a nutrient flush with a solution of 2ml/gal of CalMag Xtra and 1ml/L of Sensi Coco Bloom A/B diluted at 550 PPM. Now the run-off PPM is higher and the ladies seem recovered. Wish I learned from mistakes. Keep running 🙏🏼
Day 25 - Everything ok. The plant's growing strong and healty. The growth in coco is soo faster than soil!
Likes
4
Share

@Kokothegrower
Follow
BT 31 seit Umstellung auf 12/12.
Die Mädels entwickeln sich prächtig, sehr starker Geruch und gute Harzproduktion.
Weiterhin nur Osmosewasser mit Calmag.


Likes
4
Share


@GeminiCQC
Follow
Hbss is 27in tall
ABxRKO is 38.5in tall
I'm starting to run out of height because of the ABxRKO as it finally flowers. Still slight nute issues with the HBSS, but nothing too tough to handle for now. The smells the HBSS give off are absolutely crazy.
Just letting them grow, and watering every day seems to work. Will upgrade to earth boxes for this tent since a little autonomy is nice

Likes
17
Share


@Elpicor
Follow
Sakura season has begun, I hope everything goes fine.
Strawberry Pie is going to have a tough time this week, let's hope it survives, meanwhile there are signs of heat shock and sunlight, it's developing 3 point leaves and strange ramifications but maybe I'm wrong.
D38
Defoliation, I hope I haven't overdone the pruning
D41
First week of flowering, I think it couldn't have gone better, it's growing visibly, let's hope it's like this until the end, maybe shortening the timing, we'll see. on the contrary strawberry pie has stopped growing, I have to thank that she survived, who knows what will come out of her, I wish her a sweeter climate...
D42
Defoliation is limited for what I did last night, I literally deforested, I did it because the humidity was sky high and the vegetation was too thick covering so many peaks,,, the fascinating thing is that they recovered within the night, if I may say that 6 hours of darkness relax the plants just as if they were on vacation.


Likes
4
Share

@420DeepGrow
Follow
📆 Semana 5
El stretch ha finalizado en la mayor parte del cultivo y la energía se concentra en el engorde de los cogollos. La genética de floración más rápida muestra ya flores más compactas y resinosas, mientras que la de dominancia sativa mantiene un desarrollo algo más progresivo, aunque continúa ganando volumen y formando nuevos sitios florales.
El consumo de agua y nutrientes alcanza uno de los puntos más altos del cultivo, por lo que mantener una nutrición estable y un clima controlado será clave para sostener el desarrollo de ambas plantas.
⚡ EC: 1.9
💧 pH: 6.2 - 6.5
🌡️ Agua: 21°C
🌫️ Humedad: 40–45%
💡 Intensidad: 1050–1100 PPFD
🔥 Nota de cultivo: Comienza la fase de engorde. Aunque cada genética avanza a su propio ritmo, mantener la estabilidad en el riego, la nutrición y el ambiente permitirá que ambas expresen todo su potencial.
Seguimos creciendo fuerte 💪!

Likes
15
Share


@38PLAN
Follow
Siamo arrivati alla 10 settimana,una pianta ha incominciato il flush,quella al centro di destra.i fiori delle piante più avanzate sono grassissimi e ricchi di resina,questa pianta é davvero ECCEZIONALE,daremo qualche altra settimana di acqua e raccoglieremo la prima!ricordiamolo sono tutte autofiorenti.GORILLA COOKIES AUTO
Processing
Likes
3
Share


@Ogbangbang2981
Follow
week 9 was a good week I watch my pollen sacks grow into beautiful pods cant wait to use it plant doing pretty good health and strong

Likes
12
Share


Four plants.... same medium.... same pot size.... same nutes.... same everything.... lots of Bud sites from the bottom to the top......Thick main colas..... the other two spindly..... all of the buds at the top........... added a second 300 watt LED

Likes
22
Share


@Weedbadk
Follow
Día 1 y todas germinaron súper rápido 3 días
Día 5 desde puesta en sustrato
Ya todas están arriba
Estoy solo pulverizando el sustrato
Temperatura 23c humedad 75%
Processing
Likes
29
Share


@Reaper
Follow
ph meter is broken. i use ghe liquid to read ph lol
ph goes down every night. 650ppm is still too high for this strain, drinks a liter everyday
i need a bluelab ph/ec meter
2 Februari:
the buds start to appear on the hydro plant with thc everywhere lol
Likes
9
Share


@GrowPassionItalyChris
Follow
È stata una settimana bellissima! Il caldo estivo italiano finalmente è arrivato con temperature alte di giorno e fresco di notte. Queste varietà sono perfette! Ogni banca dei semi di queste varietà merita il mio applauso di cuore! Alcune sono più alte di me cioè superano il metro ed ottanta centimetri di altezza! Molto diramate tutte si stanno riempiendo di infiorescenze dure, appiccicose e molto resinose con odori intensi e fruttati! Ogni varietà sta sviluppando il suo aroma in maniera impeccabile! Gli insetti e parassiti ormai non sono più un problema, la resina appiccicosa non è gradita dagli insetti! Sono cresciute molto ed in circa tre mesi verranno raccolte, adesso si riempiono fino a che possono, le infiorescenze si stanno gonfiando ed iniziano a prendere forma. Abbiamo iniziato con un po' di Atami bloombastic assieme al top max e biobloom e se continuano così tra circa 4 settimane raccoglierò alberi XXL di altissima qualità biologica con aromi speciali! Odore nauseante in giardino! Un abbraccio a tutti e complimenti ai creatori di queste varietà!


Processing
Likes
21
Share


@Onlypotent420
Follow
Hi all,
Grow area updates:
Nothing major far as area is concerned added Some yoyo’s to the net so it can be raised and lowered easily now. I also noticed I had been following ghp feeding schedule for a recirculating system when mine is drain to waste. Didn’t have in adverse effects on the plants at all actually think they loved it tbh. But I’ll notice the ppm difference on these future updates. I was using way more nutrients then what was needed. Now I get to save money lol.
Blue dream auto:
Def has the faint smell of flowering cannabis now. The branching power from the mixing blue dream and already branchy plant with the ruderalis is def perfect for a scrog set up when you trying to maximize the your yield off one plant. I had to visit the tent 3 times this week to re tuck her down. Did the last tuck Thursday so what you are seeing from the pics today is three days of growth. Crazy!!!! She sitting at about 900 ppm And that’s with cutting the the grow solution some.
Master kush photo:
She popped through the net mid this week and hit her first tuck under today. With how well she reacted to the femm job. I went ahead and topped on the new growth on each branch. Her branch structure is way more sturdy then autos for sure. Leaves are bigger as well. One is the size of my palm lol I have big hands so that’s awesome. She sitting at about 800 ppm and getting less bloom solution.
I’d also like to add I appreciate everyone’s advice far as set up and temp control. It was above 100°F the last couple days. And tent never got over 85 and as soon as the hotter part of the day was over we where back in the 70’s. Ima smoke one for y’all! 🤘🏾 Until next time #StayKited

Likes
17
Share


@Bushbanker4
Follow
A can see the buds fattening up every day just a little.
More and more pistels turning orange with more tricombs building up.
Feeding day today. 2ml grow 3 ml bloom, 4 ml top max and 0.8 ml bloombastic.
Happy growing 😁

Likes
3
Share


@weedelicious
Follow
Today I switched the light to the flowering phase. The light is now on for 12 hours.
All plants were fertilized with Hesi Bio Bloom. The Tropical Marker and the Plurple Kush each received 2 liters of water, and the Pink Gelato received 1 liter. I trimmed off some large leaves. I hope they have a smooth transition into flowering.
Day 42:
The girls are growing well. The Purple Kush and Pink Gelato received 2 liters of water with Hesi Bio Bloom and some Biobizz Calmag today.
I dimmed the light to 60%. The Pink Gelato is catching up a bit, but is very small in comparison.
Day 43:
They're all still growing well. The tropical marker has been given 2 liters of water with hesi bio bloom and biobizz call mag. I've raised the lamp a bit higher. Here you can see how the stems of the plants have developed; the pink gelato has grown like crazy. The humidifier from Spider Farmer does a great job!
Day 47:
The girls look good; the first signs of flowering are visible on the Tropical Marker and the Purple Kush. I also defoliated them; it was definitely too much, and they thanked me a day later with preaching leaves. Unfortunately, the Pink Gelato didn't tolerate the topping well and only developed one shoot. I then removed this shoot. Afterward, I watered the Tropical and the Purple with 2 liters of water mixed with fertilizer and Calmag at a pH of 6.3. I set the ventilation to 50%.
day 50:
They look very healthy. I fertilized all three plants with 2 liters of water each containing Hesi Bio Bloom and also mixed in some Cal Mag from Bio Bizz. The first signs of flowering are visible. I set the exhaust air to 50%.
day 51:
The ladies look good, but the humidity has risen due to the weather, so I had to connect the new Spider Farmer dehumidifier today. It's easy to use and does a great job. 55% humidity was quickly reached on the low setting. The air goes directly into the tent through the hose. The CO2 level is also rising slightly.
day 52:
Today I started weaving the Tropical Marker into the net. I also cut off two of its shoots. I watered the Tropical Marker and the Purple Kush with 2 liters of water containing fertilizer and a pH of 6.4. The light is slowly being increased—today to 70%.
day 54:
The ladies are doing well. I watered the Tropical Marker and the Purple Kush with 2 liters of water with fertilizer and a pH of 6.3. The flowers of the Tropical Marker are slowly getting larger. All plants are now flowering. The Tropical Marker had the fastest transition to flowering and is about a week ahead of the others.
day 55:
Today I watered the pink gealto with 2 liters of water mixed with fertilizer and cal mag. I defoliated the tropical marker a bit.
day 56:
Hey guys, nothing exciting happened today. The girls are doing well; they look very healthy. Humidity is 55%, temperature is 24 degrees Celsius, and the Vpd is 1.4.

Likes
17
Share


@Eastbis
Follow
I decide to switch my light on 12/12 after exactly 5weeks.
On this week I'm gonna start to adj more mills nutrients for the flowering.
