
Likes
Comments
Share


@Stankmeister
Follow
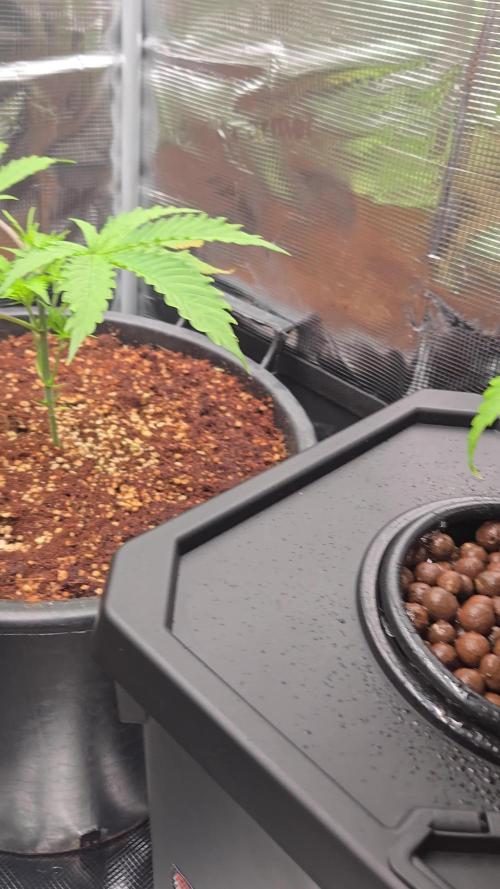
2 weeks later and Girl crush is throwing out 12's... I will have to top her soon. I took her 1st two liters to prop clones but they failed repeatedly. She isnt a big stretcher and I'm not limited by vertical space at all so I'm not worried [even though my auto's are at the very least 30 and 45 days away from full maturity respectivly.]
The ogreberry is somehow even easier to train than the whiskey zulu at this stage. The canopy is much more even and we'll just have to see if that remains true.
This ogreberry smells fucking wild. The other two plants smell good and unique but the Ogreberry smells like fruit loops, lemon and the strongest note I smell every single time I test it, I can only describe as the "new" smell a baby gives off. I dont know if that's from the sweet cream of baby formula or what because I don't have a much experience with babies, but this is a very baby-like smell. It's shockingly absurd that this plant smells like an infant. This "new" quality reminds me of northern lights.


Likes
8
Share


@Growmeo_and_Bloomiette
Follow
Lots of SCROG work this week tucking the girls in. It seems to be very rewarding but takes a lot of time. The plants seem to have grown a lot in just a couple of days this week. Really happy about that 😌 It's been a good week and it feels like some of the work put in seems to be showing.
We are having some issues with the pH raising in our tank. It was 6.6 today so we lowered it. Hopefully that's not the cause of the yellowing leaf tips. Will have to keep a better eye on the pH from now on. Humidity and lack of space keeps making some leaves wet, so we put a third fan under the canopy. Let's hope the air circulation is sufficient now. We are done with defoliation for now. One lonely thrip was seen flying around the grow area but they are getting less and less.
We've been anticipating flipping the flower the whole week. Got a better dehumidifier at the end of the week, and did it. Humidity was finally in check and the flower was flipped on day 41 😎 Every SCROG hole was filled with a bud site before the flip. That amounts to a crazy number of 225. Let's see how they develop!

Likes
1
Share

@Growfather1
Follow
Hello fellow growers,
The plants are on schedule and i topped them several times and i will put one amnesia by expert seeds into flower next week.
The amnesia fast by advanced seeds will go into flower 14 days from now need the roots to develop more.
The other amnesia by expert seeds needs at least 14 days in veg before i think about putting her into flower.
The mac1 by expert seeds survived but she is 3 weeks behind the other plant so i flushed the coco and perlite of the roots and put her in a spider farmer dwc system and will put her in a other tent next week.
Amnesia fast clone has no roots yet but next week she will sit in a dwc system.
Thanks for reading my diary and have a nice day.


Likes
4
Share


@Coolbeanism
Follow
Another uneventful week. They're just chugging along. Check out the vid!

Likes
44
Share


@Aedaone
Follow
The temperatures, humidity, height, and watering volume(if measured) in grow conditions are all averaged for the week. The pH is soil pH. Any watering done by me is well water which is 7.6 pH and 50° F. Any listed nutrients are ml/gallon of soil spread evenly across the top of the soil. Daylight hours this week will be below 13.5. I can't use halves in the grow conditions, so I'm noting here.
Day 1 we had a high temperature of 85°. Skies were cloudy all day. We had a huge thunderstorm with high winds roll through followed by heavy rain most of the day. I added another 100 ml of feather meal top dressed to each pot.
Day 2 we had a high temperature of 91°F. Skies were partly cloudy. I watered about 5 gallons per pot. I treated with Growers Ally fungicide.
Day 3 we had a high temperature of 94°F. The girls were thirsty. I watered about 6 gallons per pot. I really wet them and the ground under the pots. They're feeding on the runoff in the soil as they've rooted through the pots.
Day 4 we had a high temperature of 94°. It felt like 102°F. Skies were sunny and clear. I watered about 5 gallons per pot twice today. The girls were super thirsty. I added 80ml of Coop Poop top dressed.
Day 5 we had a high temperature of 90°F. Skies were partly cloudy. I watered about 5 gallons each pot.
Day 7 we had a high temperature of 89°F. Skies were mostly cloudy to overcast. We had a lot of rain today so no need to water
Likes
7
Share


@Naujas
Follow
New beginning-in a suitcase :) this is my 4th growth in a suitcase :) Sweet Seeds - Cream Caramel auto:) I think it will be an interesting growth, I don't know yet if I will try to train it, or if I will have to freeze the top of the plant at the base:) I will decide everything as I go ;) , 1 day after germination it was transplanted into its final pot, because I wanted to plant it a little deeper, so that there would be more space in the future:) good luck to everyone.

Likes
14
Share


@BushDoctor740
Follow
Last of the 5 Papaya Cookies still going strong.Ive given her just plain water when the pot is dry.She is still showing some signs of new growth and has more time to develop.cut the last Papaya down trichomes were cloudy. I’m going to dry her a little differently than the rest.Im going to hang in small branches on hangers as I’m trying to avoid any molding on the big center cola.Drying at 67 degree and 62 percent humidity and she smells amazing.
Likes
14
Share


@Fat_Olsh_Farms
Follow
Not a huge producer but looking pretty. Starting flush.
Beautiful blue tones. Very pretty buds on both of my twisted trees plants. Can't wait to see how my Twisted cookies turns out.
Likes
16
Share


@eldruida_lamota
Follow
Vamos familia, aquí os traigo la 3 semana de crecimiento de estas Royal Gorilla de RoyalQueenSeeds.
Vaya color, y van con buen ritmo, ya se realizó el trasplante a maceta definitiva.
Hasta aquí estoy bastante satisfecho
Añadimos flash root, tucan ,gold Joker y la base de crecimiento de Agrobeta , (Blue line).
Aparte aplique tetra 9 de Agrobeta de manera foliar.
Agrobeta:
https://www.agrobeta.com/agrobetatiendaonline/36-abonos-canamo
Mars hydro:
Code discount: EL420
https://www.mars-hydro.com/
Hasta aquí es todo , espero que lo disfrutéis, buenos humos 💨💨
Likes
Comments
Share


Likes
16
Share


@Sadhus
Follow
Flo depuis 4 jours
Placer dans la tente spécial flo 2000w led full spectrum control humidité température pour un vpd de 1/1,10 kPa 👌


Likes
158
Share


@Ezzjaybruh
Follow
boop beep boop
New pics of coop
And pics of dukie too..
Hope you enjoy demz
They been bored with this cold weather having to stay inside so much.
One video you need to turn up volume to hear cooper he howls to match the tone of the fire trucks after they go by.. lol it’s great

Likes
4
Share


@Albargina
Follow
Otra semana mas, y sigo enamorandome cada día, las Blue Elite no paran de sacar resina blanca, y las Rica CBD estan hermosisimas, con grandes y gruesos cogollos, empiezo a notar las macetas de 3L y que la lámpara está ya para el retiro😬, aun así estan saliendo unas piedras con forma de cogollos muy interesantes😂

Likes
8
Share


Likes
3
Share


@jaydee702
Follow
Girls are thriving to the max looking like an awsome harvest coming in around 6 more weeks From the rate they are growing its going to be at least 8 ounces hopeing for close to an elbow(pound) My ppm went up to 1420 from 1160 cant get to some fresh water till tomarrow . having no sighns of stress hope it will be ok till i can bring the ppm back to the 11 hundreds .Im the one stressed atm crossing my fingers the girls dont get burnt before tomarrow

Likes
8
Share


@4F1M6
Follow
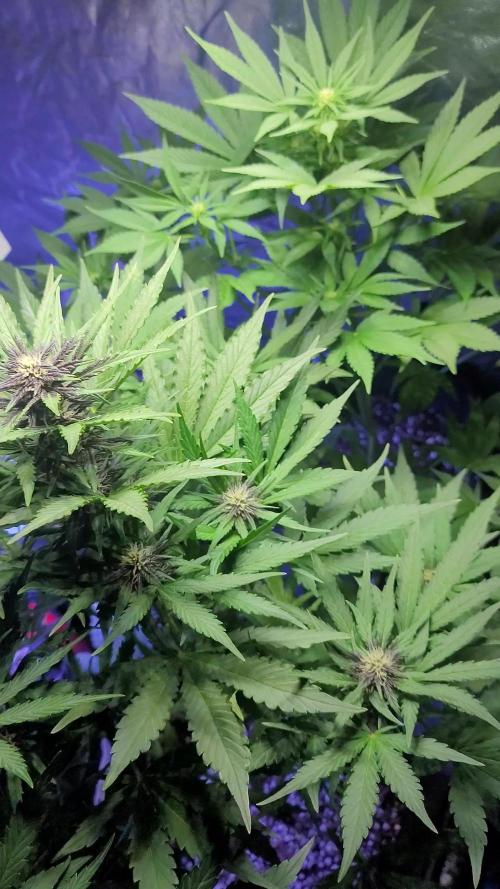
This ladys packing on to 4 fatty colas and stacking them to the tits. She has other branches obviously lol but the 4 colas are all sharing dominance and really getting fat. Bud structre is really coming in now. Very round and dense. Lots of flowers already piled on at every bud site. Trichomes are piling on thick already. This is gunna get mighty frosty!
I reduced the nitrogen dose again. I also stopped giving her vigorous. Its a pure bloom mix now as this lady is booming with flowers. Until next update. Happy growing and stay lit fam.

Likes
12
Share

@For2itous
Follow
The girl I only put about 3g soil in is taking off quickly. The other plant that I filled with more to the top is doing well also just not flowering as fast but stacking on growth quick. They seem to love when I give nutes but I always try to flush with water every time or 2 just to combat buildup. Appreciate any tips and happy growing 🤙🎄
Likes
142
Share


@MadeInGermany
Follow
Hi everyone :-)
This week the buds developed super ;-) All are beautiful 😍.
Super genetics 👍.
Blue Cheese pheno 1 is slowly coming to an end :-)
This week I will start to use up the remaining nutrients and harvest in 10-14 days ;-)
Everyone else needs something else :-) have fun with the videos, stay healthy 🙏🏻 and let it grow 🌱


Likes
43
Share

@MadeInGermany
Follow
Flowering day 74
since time switch
to 12/12 h.
Hey guys :-)
Finally the time has come .
The lady was harvested and hung upside down in the dry tent 😍.
Before that, she stood in the drying tent in complete darkness for 2 days and the large leaves were removed.
The small leaves stay attached during the drying process so that they protect the buds and allow them to dry more slowly and evenly :-) .
In the dry tent, the temperature is 18-19.5 degrees and the humidity is 54-58% 👍.
In this environment they are now allowed to hang for 10-14 days before they are fine-tuned and trimmed clean by hand.
then after trimming they come to ferment for 6-12 weeks in dark jars with bobeda packs 62% to keep the perfect humidity.
After a few weeks, the Boveda packs 58% are used so that they can slowly dry out :-) .
Of course there is one last update after trimming.
Until then, I wish you a lot of fun with the update.
Stay healthy and let it grow 💚🙏🏻.
👇🏼👇🏼👇🏼👇🏼👇🏼👇🏼👇🏼👇🏼👇🏼👇🏼👇🏼👇🏼
You can buy this Nutrients at :
https://greenbuzzliquids.com/en/shop/
With the discount code: Made_in_Germany you get a discount of 15% on all products from an order value of 100 euros.
👇🏼👇🏼👇🏼👇🏼👇🏼👇🏼👇🏼👇🏼👇🏼👇🏼👇🏼👇🏼
You can buy this strain at :
https://www.exoticseed.eu/
Water 💧 💧💧
Osmosis water mixed with normal water (24 hours stale that the chlorine evaporates) to 0.2 EC. Add Cal / Mag to 0.4 Ec Ph with Organic Ph - to 5.8 - 6.5
MadeInGermany

Likes
24
Share


@MrJones
Follow
So work has been very busy - but plants look like they are doing well, last week we added the SCROG and top dressed, then just watering (De-chlorinated / PH 6.8) and 1 watering with Recharge.
The tent is alive with flowers, tomorrow I am going to add a second SCROG net to help with the weight when these flowers become
massive, also will clean out the plants a bit - and may try to create a compost tea.
Remember last week I moved the little girl over to my grow cabinet she is doing well but weird phenomes produce such a short plant when her sisters are like triple her size.
02.06.20 - Today I defoliated the little girl - look at all the flowers I found, I topped dressed with Organically Done Bloom Boost with Recharge.
02.06.20 - This afternoon I defoliated and cleaned out all 4 of the girls, topped dressed with Organically Done Bloom Boost (De-chlorinated / PH 6.8) - along with a few doses of optics overgrow planned in the morning - I like to use optics overgrow for insect an inoculant and as a WPM prevention, the other amazing things this dose it just a bonus.
02.07.20 - Uploaded a few pics of the day after defoliation - all looks great!
02.07.20 - Just a few more pics from this evening - the plants are responding well to the cleanup - also pushed the light to 100% now just have to keep things watered and let the buds get fat and juicy!