


Likes
Comments
Share


@KarlOlga
Follow
Heute (01.04) noch mal entlaubt und alle Triebe auf gleiche Höhe gebracht bei der Mango. Die bloody skunk holt auf und ist aber direkt nach dem Topping in die Blüte gegangen.
Bin gespannt!
04.04- paar Blätter entfernt
06.04 - LST und paar Blätter weg!


Likes
7
Share


@hooolian
Follow
23/01/22: Plants are really tall and flowering well with lots of bud sites - pistils are long and prominent - the beginnings of the trichomes are starting to spread onto the leaves to make them sugar leaves. all looknig very healthy - the ventilation system in this tent is great with an intake fan and two circulation fans. ideal temperatures - looking very well.
average around 36 inches in height the largest one is around 47 inches.

Likes
15
Share


@CG420
Follow
Tras acabar la segunda semana de floración así se presentan las pequeñas.
Hemos ido defoliando alguna hoja de la parte baja de la planta, aireando un poco a las niñas por la zona baja .
Las plantas ya empiezan a mostrar sus primeras bolitas y empezamos a añadir en la solución top Candy y pk13-14 para ver engordar esas bolitas💚.

Likes
7
Share


@Sunstonedgrows
Follow
Well the pas week has been a lot! We had some dehydration issues, did some defolitation, and additional LST to prep for flower. Starting today, this plant has been kicked into the flower tent and will be starting its journey!
Before we went to flower, I gave this guy 1tbsp of Dr. Earth tomato blend. Over the next week or so we'll be switching to Dr. Earth flower girl.
Cheers til next time!
-Dj Sunstone

Likes
19
Share


@Robin87
Follow
Day 35 of flower! Isn’t she beautiful! Not much else to say, environments been running perfect the last few weeks with day time temps sitting at 25 c with the rh at a lovely 55% and at night dropping to 21c, beautiful. , no other work has been applied to this girl, nothing but H2o

Likes
9
Share


@I_Identify_As_A_Dan
Follow
Week 25 for Black lebanon by SSSC
Shes still bulking up in weight clearly because every time i come down to check on her her branches are falling more 😂
Found 2 caterpillars on her but couldn't find any bud rot... So lets stay positive on that
Also found a plant with PM about 5cm away from the plant so ripped that up... lets hope it didn't have time to jump over 😬
For now shes proving to be very resistant in general to whatever mother nature throws at her.

Likes
33
Share


@microgrowshow
Follow
What a week for this girl! After seeing both of my Sweet Seed autos take a hit from my lack of watering with runoff, I decided to take preventative matters with this Gelato plant and flushed her clean with 8 gallons of plain pHed water, and then a final gallon of a light feeding mix. Since doing that 4 days ago, definitely have seen some further discolouration, but as far as I can tell, It's stopped spreading to the new growth, so I'm 'hoping' to be in the clear but you really never know. I got the soil pH up from 5.4 to 6.5, and the ppm down from 1100ish to just under 400 (which is typical ppm for a flushed plant). Going to keep a close eye, but damn do I feel like she went through some serious shock. Bud development has pretty much slowed down, so hoping she bounces back and start stacking, but I also don't know if this is from the shock of the flush, or the low temps I've been faced with this week. Anyway, definitely learned my lesson on this run! Organic growing here I come 😁

Likes
25
Share


@Sators
Follow
Day 36. topping for seven branches.
Day 38. Water with 2L nutrients mix.
Day 39. does super cropping for four brunches.
Day 40. Switch to 12/12h

Likes
14
Share

@tuzeus
Follow
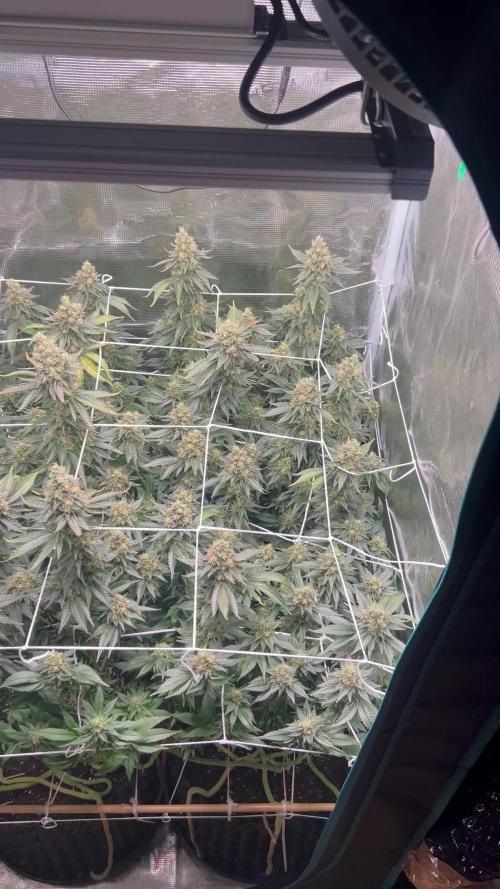
This is maybe the last week. Trichomes are milky but also clear, I’m still waiting for the amber. Even though I don’t want much amber. Maybe I will chop this weekend, I’ll decide in the next days. I fucked up a bit with the light. I see some foxtailing even though it’s not really concerning. I changed to the Athena fade to eliminate nitrogen. I’m expecting way more fade in the next days. The end is near. Cheers.

Likes
128
Share


@Tropicannibis_Todd
Follow
💩Holy Crap We Are Back At It And Loving It💩
Growing in a 11 ounce pot 👈 👀 👀 👈
Growmies we are at DAY 49 and she's just killing💀it👌 TALK ABOUT FROSTY 👈 Amazing results thus far for the Tiny Pot 😀
👉Added straws within the Tiny pot to help watering in week 4 👈
So I'm starting to see she needs watering every single day and now need nutrients 🙃
Lights being readjusted and chart updated .........👍rain water to be used entire growth👈
WATERING SINGLE TO TWICE DAILY 😋
👉I used NutriNPK for nutrients for my grows and welcome anyone to give them a try .👈
👉 www.nutrinpk.com 👈
NutriNPK Cal MAG 14-0-14
NutriNPK Grow 28-14-14
NutriNPK Bloom 8-20-30
NutriNPK Bloom Booster 0-52-34
I GOT MULTIPLE DIARIES ON THE GO 😱 please check them out 😎
👉THANKS FOR TAKING THE TIME TO GO OVER MY DIARIES 👈
Likes
6
Share

@GrowinSho
Follow
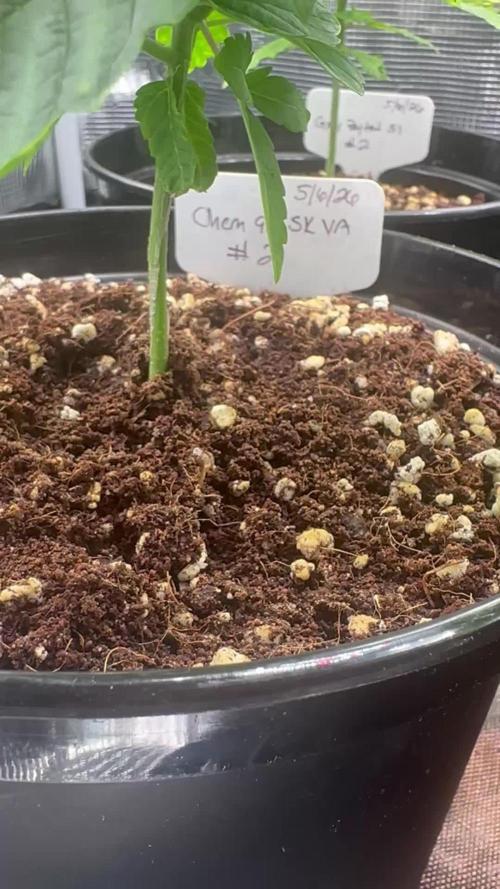
Had some issues with the tray2grow (operator error) but I figured it out. They should be completely healthy next week.


Likes
34
Share


@JonnyKush
Follow
Day 65
past nutrition problems I believe have slowed growth. unfortunately on a plant I think I have problems with the compaction of the soil which has caused too much irrigation. the plant does not eat and a little slower than the others. now after 4 days to dry i will give only datpo water which seems to burn for nutrients, i believe brought about by the fact that they are deposited in the soil. all in all they continue to grow and hope for the best! 💚🌱
Likes
7
Share


@GreenMoon
Follow
minor bugs bites biting i have sticky traps i use Fox farm happy frog soil any advice for faster budding because i still don’t see any
Processing
Likes
12
Share


@2Stones1Bird
Follow
Checkout my Instagram @smallbudz to see the Small budget grow setup for indoor use, low watt, low heat, low noise, step by step.
13/12/2019 - Change the light schedule to 12-12h after 8 weeks of no signs of flowering I think is a photo not and auto.
16/12/2019 - Fed her 1.5l of 6.5PH water with 0,5ml of each: Grow, Bloom and Max, and 1ml of each: Heaven, Alga-mic and Vera, noticed about 10% run off, I use about 1/3 of the nutrient dosage on the chart, to achieve about 200/300PPM (500 scale).
17/12/2019 - Did some defoliation on the lower branches mainly.
Likes
24
Share


@TheIceCreamParlour
Follow
First week of flower in the Parlour.
They started the week receiving a feed of 1.8ec Calcium at 6.4 PH. Reason being the Pinapple they are sharing the tent with were showing cal deficiency with patchy leaves and some major droop. Back on regular feeding schedule now and needing a watering every day. I'm doing a day of ph water then next day nute feed. Stops any build up but also keeps costs down. If they show any deficiencies then I'll take the hit and switch to nutrients every day. The BioGreen range I'm using is exactly that, biological. So in theory there shouldn't be any salt issues.
As in the title its my first time trying autos so I'm pretty impressed with how much flower they have produced in just 7 days. One seems to be a slightly different pheno but both are looking happy and healthy.


Likes
93
Share


@Natrona
Follow
FBA2502 Plants 1-6
Week 7 May 11– 17
FLOWER 3
Nutrients :
Micro 25 ml
Gro 10 ml
Bloom 30ml
CalMag 30 ml
Recharge 10ml
Green sensation 16.5ml
Power buds 7.5 ml
5/11 PH 6.56, PPM 1560, temp 69
2ltr each
5/12 PH 6.31, PPM 1120, temp 68
1 ltr each
5/14 PH 6.66, PPM 1280, temp 70 1 ltr each
5/15 PH 6.66, PPM 850, temp 72 1 ltr each
5/11 Defoliation, feed, pics & videos
I made 4 gallons, used 3 to water then poured the runoff back into the rest in the bucket. The next feeding, I added a gallon of tap water to residual and ph to 6,31 temp 69 & PPm 1120. Did the same on 5/14 and 15 using up the remainder of the feed solution.
I must monitor and control the tent environment manually. For the past month, the humidifier has been an issue putting out way too much humidity; often leaving water in the bottom of the tent. In addition, the temperatures are also out of control. I added an AC last week to keep the temperature below 80. I finally determined the exhaust vent is also broken and has been for some time.
I have been giving good reviews on the AC infinity system. However, during the time I’ve owned this tent (2 yrs), I had to replace the lights twice, fans, humidifier and now the vent twice also. Everything but the tent containment has been replaced. AC infinity does stand by their products, but they are in California, and it takes at least 2 weeks to receive the replacement. This is extremely frustrating at the critical transition to flower for my equipment to fail again. For the time being until a replacement arrives, I pulled the 4” exhaust vent from my 3x3 and hooked it up. I have the AC pushing air in and the exhaust pulling air out. This should create a neutral pressure tent environment-neither positive nor negative. I do have 3 circulating fans in the tent to move air around the plants.
It looks like growth spurts have slowed and plant height has been reached. Now is the time for buds to fatten and frost up. All of them (6) are short remaining less than 3 ft. They range from 15 to 31 inches. The tallest #4 &5 and #6 have very light leaves and appear nutrient deficient compared to the shorter phenotypes. Pictures taken later in the week show fading on a few the older leaves. All are receiving the same solution and are in the same soil blend. Moving the gals in and out of the tent for their glamor shots, I bent one limb and snapped another. The bent one I taped with a splint and the snapped one I medicated manuka honey and wired it back to the main stalk.
Leaves look like sativa leaning. I hope FBA2502-2 is a good daytime. I’m getting excited to see what develops in the next month or so. News Break: I’ve been informed that 2502 is FastBuds New Frostbanger and is indica for nighttime. I’m disappointed that I didn’t get a sativa to test because I really need a daytime strain. The 2 Blue Cheese plants I just grew are also nighttime.
Upon opening the tent, a faint odor was detected, and some stickiness was observed during the process of defoliation. Pictures of the puffy buds even show differences. #4 &5 buds hairs are different from the others being crinklier and the others are straighter. Some like #2 &5 are showing frost on the leaves. Wow at the beginning of flower to have that much frost. They are living up to the new strain’s name.
I’ve noticed that when I water, sometimes water shoots out of the side holes I the air pots. I will pack the soil firmly into the sides for future runs.
Measurements:
#1 15”
#2 20”
#3 17”
#4 30”
#5 31”
#6 24”
Your likes and comments are appreciated. Thanks for stopping by.
Growers love 💚🌿
💫Natrona💫
Likes
37
Share


@rhodes68
Follow
12/20 Week 13 The grow ends this week
Blondie is finishing off in flush for her last days.
Nice LSD-25 plant recovered and produced
12/23
Blondie harvest tomorrow due to weather its cold but humidity low
12/24
Harvest day and the end of the grow, thanks all for following along hope something helped someone.
Likes
27
Share


@Oetelando
Follow
We Have Week 9 Day 1.
Everything looks good and the Trichomes get Brown.
Some of the Strains get Harvested in 5-6 days and the rest in 8-10 days.


Likes
4
Share

@Yamamoto420
Follow
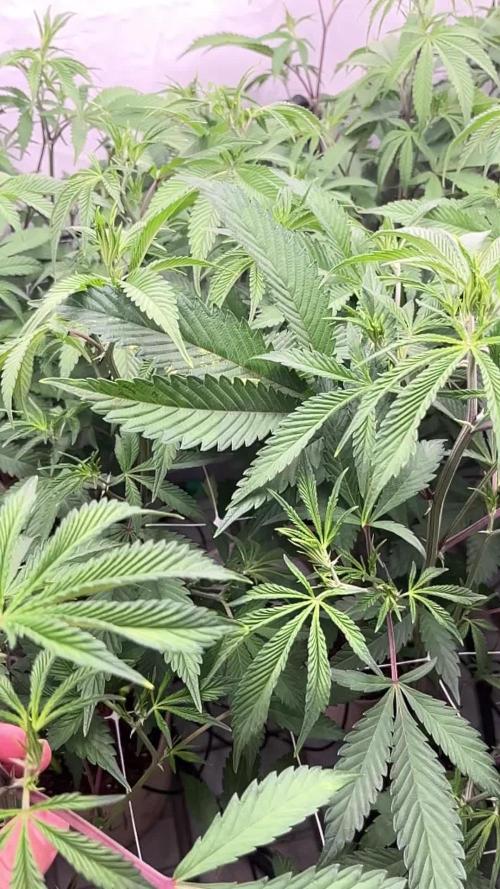
Hello guys, its the first week of flower day 2 the plants look healthy after doing some lollipop few days ago, i finished my PH - (phosphoric acid) i didnt have time to buy new bottle so i tried to squeeze lemos to the 200L reservoir but it doesnt hold the ph 5.8 for long, after 5-10 hours ithe ph is up again to 6.4 , i cants effores myself to buy alot of lemons and squeese every day, so i took 15g Citric acid salt and melt it with small amount of warm water, i made it concentrate so few drops can make the job done. So far so good it works fine, gonna lift up the lights tomorrow and wish me good luck for the flowering phase.