
Processing
Likes
Comments
Share


@DoItBigGrows
Follow
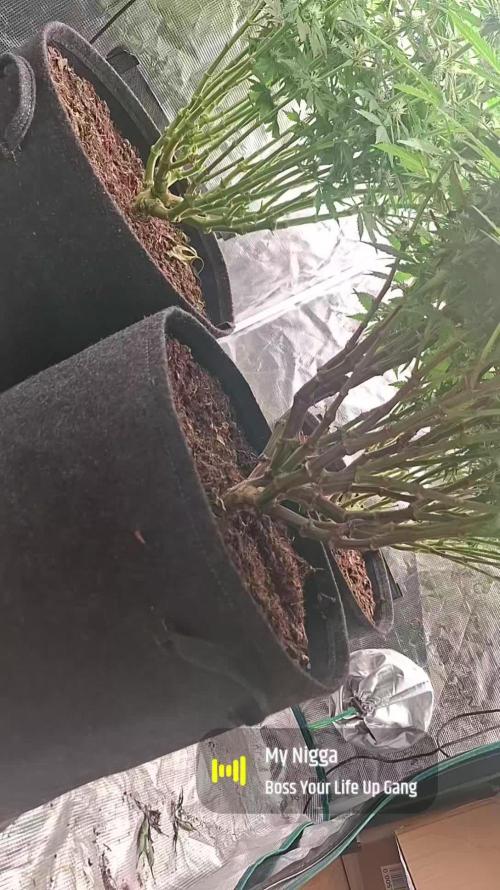
We are going to send these two into flower the second I get my hands on a 3x3. The plan is to move them into the 3x3 until they finish up. Leave the 5 Autoflowers in the 4x4 until they finish then start a perpetual cycle between the two tents. A 3x3 for Veg and 4x4 for Flower! I’m extremely excited about the future!


Likes
11
Share


@Original_Growers
Follow
Day 1.
The cuttings after being rooted in the special tray were transplanted into small jars and allowed to acclimatize in the appropriate boxes. After a few days we transplanted them into 18 L pots filled with plagron growmix, a prefertilized substrate, and then they were placed inside our cultivation box, the one in the photos. Being a prefertilized substrate we watered with only water with a pH of 6.5 until the water ran out into the saucers. As the 18 L pots are very large, no more water was needed for the first 5 days.
DAY4.
The plants were topped.


Likes
57
Share


@BudBoutique
Follow
Welcome to Bud Boutique Grow Diary - really appreciate all your love and support :)
Dont forget to check out my other current grows!
🗓️ This Week:
- Day 52: the end is near
- Day 53: Trichomes check from #1 and #2 - looking super good almost all cloudy, a few amber and clear. perfect point to chop
- Day 54: this one is finished, let's chop them both #1 & #2 !! ✂️✂️✂️
- both phenos got still super purple beautiful leaves
- now its time to dry inside the tent at about 60%rh and less than 20°C/68°F trying to get it even lower for the next 10-14 days
Thank you for still staying with me 💚
___________________________________________
--- 🌱 Strain (Sponsor) 🌱 ---
🏷️ PEACH GIRL by Art Genetix
https://www.artgenetix.world/product-page/peach-girl
--- 🥗 Nutrients and Feeding (Sponsor) - (APTUS Ambassador) ---
🍸 APTUS: full nutrient schedule extreme
-- Regulator, N-Boost, P-Boost, CaMg-Boost, K-Boost, Allin1 Liquid, Startbooster, Topbooster, Enzym+ every feeding
-- Fulvic-Blast, NutriSpray as Foliar each once a week
🔗 https://aptus-holland.com/
--- ♻️ Grow Control (Sponsor) ---
TROLMASTER: TENT-X + LM14 Light Adapter to dim/sunrise/sunset lights + Temp & rH Sensor all remote on App
🔗 https://www.trolmaster.eu/
--- 🚿 PetraGrow (Sponsor) ---
CannaFogger Foliar Spray
🔗 https://www.petratools.com/product/petragrow-cannafogger-atomizer-new-mini-fogger
--- 🏭 Grow Setup ---
💡LUMATEK Zeus Pro 600
* 🏠🌿 Indoor: Homebox 120x120x200cm (4x4)
* 📐🌀 PrimaKlima exhausting Fan 1180m3/h (running on 60-80%)
* 🌀 Can Light Filter 800m3/h & 1x Fanbox 1x Dyson fan for Air circulation
🔗 https://lumatek-lighting.com/zeus-600w-pro-29/
🔗 https://primaklima.com/de/shop/ventilatoren-de/ec-ventilatoren/pk160ec-tc/
🔗 https://canfilters.com/products/filters/
All Likes and comments are highly appreciated!!!
👨🌾 don't forget to check out my Instagram for daily educational content: budboutiquee
- Bud Boutique

Likes
12
Share


@viriato0811
Follow
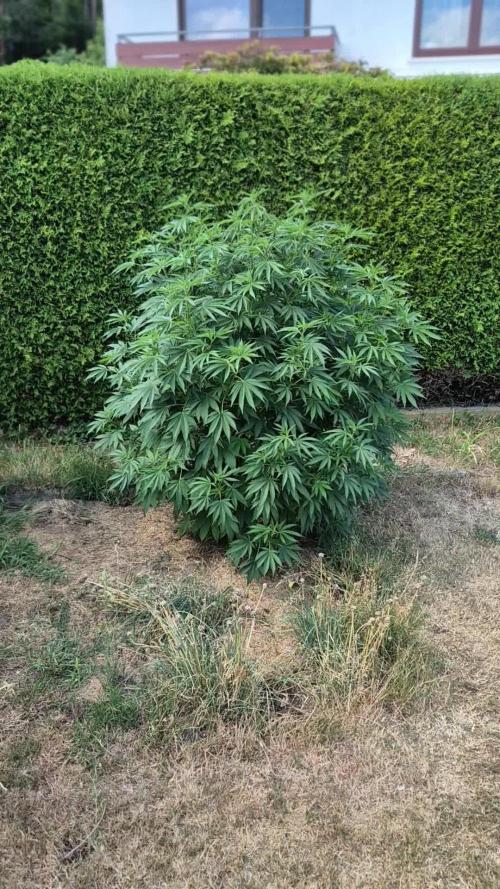
I am loving how strong this sativa strain is. I keep defoliating her to expose as many bud sites as possible. At the same time, I am trimming those side branches with low chances of making it to the top. 🌱🌱👍🏻👍🏻


Likes
41
Share


@TheBulldozerSicily
Follow
Domenica 30 giugno
Aggiungo 50 lt acqua e nutrienti perché impianto a secco e piante mosce, ottengo 1640 ec ph 6.5
Lunedì 1/07/2024 aggiungo la rete scrog per supporto apicali
Mercoledì 3 luglio
Aggiungo altri 50 lt con o nutrienti
Sabato 6 luglio Aggiungo 50 lt acqua per livello basso
Stanno bevendo un sacco!!!


Likes
2
Share


Processing
Likes
4
Share


@Tried_and_Tested
Follow
In this dairy I will be growing two, Critical + 2.0 photoperiod plants alongside 4 others (see other dairies) using the methods of Topping, Low Stress Training, ScrOG and slight defoliation under the screen. I am growing in a 4x4 area and will be using a 250W MH, 400W & 600W HPS over the grow period. The other 4 plants will be grown using the same technique and environment, I am just splitting the dairies into separate strains as recommended by GrowDairies.
The seeds were placed directly into solo cups that were pre-soaked with plan, pH'd water overnight beforehand. After three days all seedlings had emerged, and I placed them in the shadow of my other plants currently being grown for three more days. After this I transplanted them directly into the 11L pots that they will be in until harvest (see photos).
I will be growing the plants until the are roughly 6 weeks old or 1m tall, whichever comes first. I will be bending them and keeping the branches low to build an even canopy, so this time period could change. All of the seedlings are being grown in BioBizz all-mix soil, so I will not be using nutrients either for the first 1-2 weeks.
Any questions or recommendations, please let me know! Thanks :)

Processing
Likes
15
Share


@Silverback_Guerilla
Follow
SUNDAY 5/5:
Rearranged the gardens..have 17 plants in the 4 x 5 now...yowsa!
MONDAY:
Plucked some dead leaves and did a trichrome check on them both...about half cloudy now..👌
TUESDAY:
I observed some white spots(maybe powdery mildew) on a few leaves here and there, so I sprayed them today with Trifecta Crop Cure, a concoction of a bunch of natural plant oils. I already decreased the humidity in the room to 45% with my new 70L dehumidifier, so I think they'll be fine. I'll spray them again tomorrow and the next day, then I'll have to hope that did the trick, because they are entering the harvest window.
WEDNESDAY:
I watered them today and included a bunch of terpinator, bud candy, bembe, and cha ching. It was their last dose of any nutes...flushing with spring water from here on out.
THURSDAY:
Took a couple of photos and tried installing my new Solacure FlowerPower UVB light, but it was dead on arrival.😢..back to the 15.0 reptile UVB lights for now I guess...
FRIDAY:
The guy at Solacure is awesome! He immediately Fedex'd a replacement!👍
SATURDAY:
I took a few photos and inspected trichromes...I guess that's it for them both! I'll start flushing tomorrow.


Likes
35
Share


@Fatnastyz
Follow
2-23
I thought she was over watered, but she is under. Gave her 1 gallon ph water.
2-25
Shes a happy camper.
2-27
1 gallon ph 6.2
5 ml cal/mag
1 ml drops
15 ml EM1
1.5 ml Amplify
Forgot Yucca
3-1
Big defoliation and lolipopped.
Drink tomorrow


Likes
7
Share


@Eddjack
Follow
Ci siamo !!! No vedo l ora di farmi il regalo di natale. Odora di dolce, fragola e zucchero. Il terreno e carico di nutrienti infatti credo che questa settimana andrà ad acqua . Piena di gemme appiccicose e profumate sarà pronta prima di natale speriamo bene.
Dajeforte growers!
Likes
10
Share


@Dendegrow
Follow
Harvest Report – Blue Sunset Sherbert
The weed turned out absolutely phenomenal!
The colors were stunning – incredibly dark, almost black, with deep purple hues that really popped.
It was harvested at Day 80, with about 20% amber trichomes – just the right timing for a balanced effect.
Check out the pictures – they speak for themselves!
Stay tuned for the smoke report!
---
Erntebericht – Blue Sunset Sherbert
Das Weed ist einfach phänomenal geworden!
Die Farben waren atemberaubend – richtig dunkel, fast schwarz, mit tiefvioletten Tönen, die richtig hervorgekommen sind.
Geerntet wurde bei Tag 80, mit etwa 20% bernsteinfarbenen Trichomen – genau der richtige Zeitpunkt für einen ausgewogenen Effekt.
Schaut euch die Fotos an – sie sprechen für sich!
Bleibt dran für den Smoke Report!

Likes
3
Share


@GrowBro87
Follow
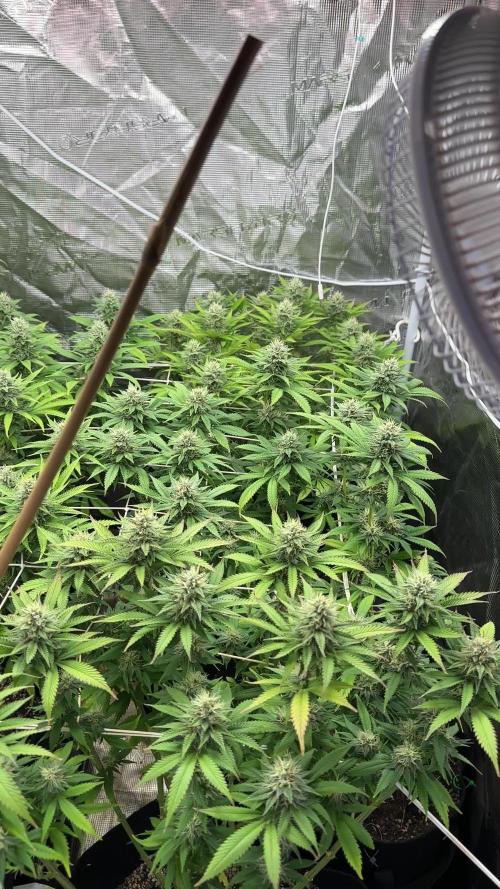
Diese Woche habe ich beide Pflanzen entlaubt, sodass mehr Licht an die Blüten kommt. Gegossen wurde etwa alle 2-3 Tage und gedüngt nach Herstellerangabe mit 50% Wachstumsdünger und 50% Blütendünger. Beide Pflanzen entwickeln sich gut und ich hoffe es bleibt auch so.
Likes
4
Share


@NigelCake420
Follow
This was an easy to grow varietal for me... Plant was extremely stable... Great flowering time period 8to9 weeks... Other phenols took longer... Will keep this cutting fo good
Likes
5
Share


@ricoo
Follow
They are growing nicely, i forgot to upload for some time and now they are finally fully flowering, i pretty much fertilze them with everything.
Likes
25
Share


@JeyGanesha
Follow
Questa watermelon della korngarden seed continua a crescere perfettamente 👍💪Buona genetica...
Me gusta mucho come viene su....
Per ora non posso che fare i complimenti a korngarden seeds,..
Per come cresce,molto resistente facile da fare anche per principianti...poi vi dirò com'è a livello di potenza,terpeni,ecc.....
Likes
6
Share

@Stonerapaisana
Follow
22/08/2025 - Apenas tenho regado cerca de 1L de agua de 2 em 2 dias por vaso.
23/08/2025 - o vídeo do dia anterior pareceu que estava demasiado amarela, ao vivo não parecia tanto, decidi filmar hoje e subir a ver se não era alguma cena na câmera.