Likes
13
Share
@Rungood
Follow
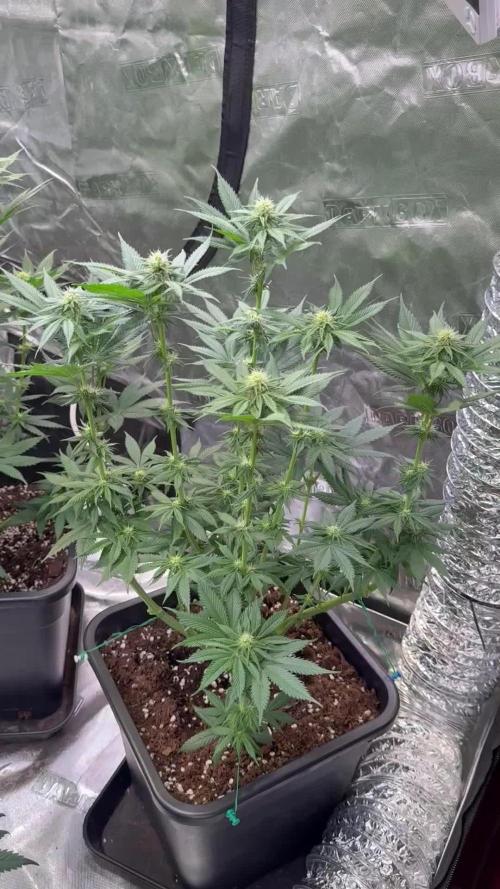
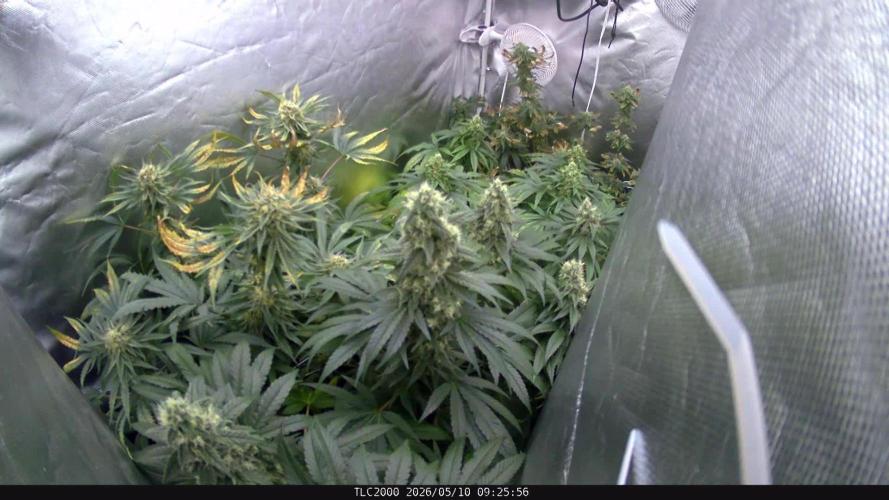
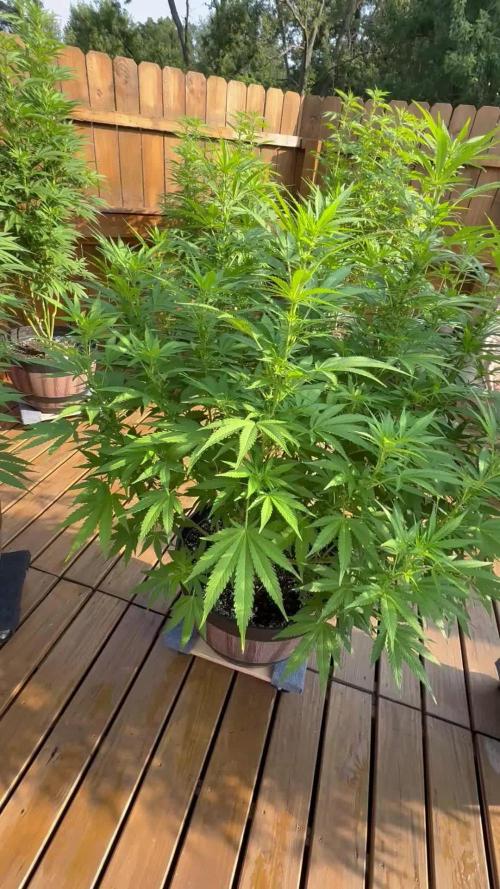
La plante grandit de jour en jour et ses bud commence a faire des superbes filament orangé ,aucune carence pour le moment... wait and see
Likes
31
Share
Hey all! 🙌 It's me again, after a hiatus I'm back in action and this time I'll be growing two plants! The strain is Green Gelato from Royal Queen Seeds and the two babies are going to be Pistachio and Matcha, two green ice creams flavors to match with the strain name! 😋 I started soaking both seeds in a glass with water for 24 hours to hydrate them (I forgot to take a photo of this!) and after that I placed them in a jiffy pellet. After some days Pistachio was the first one to show while Matcha was still being a little behind. During this I made a small mistake, instead of opening the cardboard box where I placed the seeds I left the baby plant inside so she grew a bit too much during the night... ooops! But nothing too serious (I got it fixed after moving her into a cup). Some days after Matcha appeared but it seemed she was having a small issue, it seemed like part of her shell was still stuck to her so I helped by removing it and then she started to grow normally once again. Right now I moved Pistachio to one of those red cups and I used some mycorrhizas on her! Glomus mosseae and glomus intraradices to be more precise! Next week I'll be doing the same with Matcha. 😊 I also started making a timelapse (I think it looks awful haha but it helps to see how Matcha started to recover!) I hope you'll all enjoy the photos! 😃 See you all next week!
Likes
6
Share
@Simba732
Follow
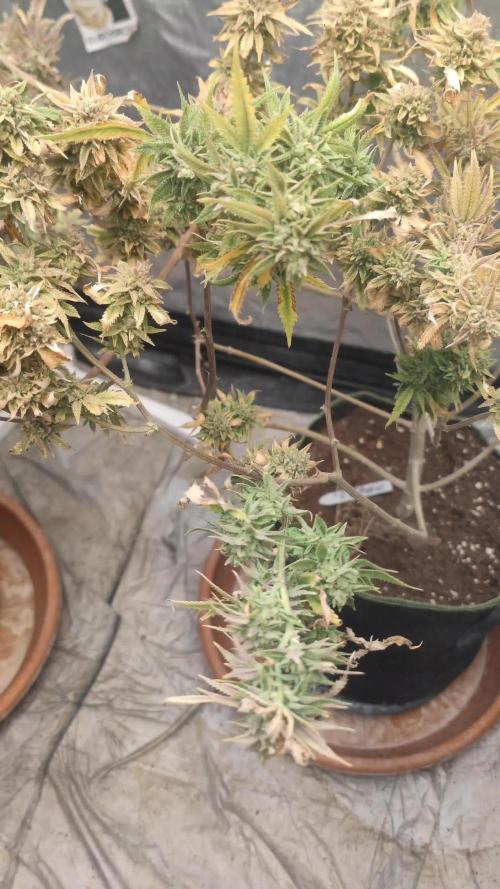
Hello boys and girls we’ve officially reached the finish line! 🕺🏾🎊🍾 It’s been an amazing experience growing this strain. This week we wrapped things up and flushed using Flawless Finish. Tropicana’s colors showed out with some buds going purple, her profile is a real nose-pleaser and I’m pretty happy with how my trichomes are looking (all turned milky with very few ambers) She was thoroughly set free from the salts, and after her final watering 4 days ago I just let her ride it out. Right after these photos, she’ll be chopped and set to dry! I’ll be back with updates once she’s dried and I begin the curing process. 🤝🏾 It’s been a pleasure growing this beauty alongside all of you thank you for the encouragements. Mama Tropicana sends her love too 😊 I’ve got other strains running in the garden from Fastbuds and more, so feel free to follow along. A great harvest season is upon us 🙌🏾😋 Happy growing and happy weekend, gang! 💚
Likes
6
Share
Missing a lot of footage. This is set to be a full seed to harvest video on YouTube so I don't always remember to capture content for grow diaries smh I'm still learning. This was just a feeding for the week. Everything is running smoothly. Thanks for stopping by.
Likes
4
Share
@Jabbamo
Follow
_____________________________________________________ Do. 2.4. - 3,2 Liter pro Pflanze gegossen (ca. 50ml Drain) - 1L Nährlösung per Hand angegossen - 8L Nährlösung per Gießsystem - 0,5L klar spülen zur Systemreinigung 1,2 ml / Liter "Calmag" 1,5 ml / Liter "Bio Grow" 4,0 ml / Liter "Bio Bloom" 4,0 ml / Liter "Top Max" Ph 6,2 / 800 ppm _______________________________________________________
Likes
18
Share
Hi 😌 beginning of week 8, the gagarin auto (2 gallon pot) is getting closer to the finish line so is the white widow auto, the gurilla glue took two weeks and still berly recovered from over watering. The gelato's doing great.
Likes
38
Share
@Kirsten
Follow
Black Opium is looking very nice, healthy green colour and we are growing nicely. As she's still a little tall I have left the prop, so the stem gets to strengthen up and she won't fall over in the meantime. Here is what I fed this week. 11.7.25: I watered with 1ltrs of dechlorinated water PH'd to 6.6 containing the following nutrients; 💜 1ml Ecothrive Trace 💜 1/4 TSP Ecothrive Biosys PH: 6.6 PPM: 400 14.7.25: I watered with 1ltrs of dechlorinated water PH'd to 6.3 containing the following nutrients; 💜 1/4 TSP Ecothrive Biosys PH: 6.3 PPM: 373 16.7.25: I watered with 1ltrs of dechlorinated water PH'd to 6.5 containing the following nutrients; 💜 1ml Ecothrive Trace 💜 1/4 TSP Ecothrive Biosys PH: 6.5 PPM: 363 Thanks for checking in this week and hanging out 😊💚✌️🍃😁
Likes
27
Share
1/20/2023- So much to do pre grow and over the next 16 days, absolute first order of business is that I have to take down my current Grow---TIMBER-- Then I have a list of things I have to get done in order to be ready to start this grow 1 Feb. With that said T - 2 days until start 48 hour Flush T - 2 days until Start 48 hours of Light T - 4 days until TIMBER!!! Items that need to be done before 1 Feb 2023 1. I need to clean the tent out 2. I need to clean the equipment- Proper Sanitization between grows in Hydro is a must!!! 3. I need to get the hole in the ceiling above my tent repaired- For my last grow I had a deep sink installed in my grow room, to make Hydroponics a little bit easier and have a water source in the same room. The seals on the pipes they were installing broke and leaked through the ceiling causing some damage all the way across my grow room, I was already weeks into my grow and couldn't risk them working above my tent and it would have been very awkward positon for them to be working in as well, so have to get this done quickly between chop and germination. 4. I have to install my new light- I was using a Vivosun 4000 and for this grow I am switching up to a Spider-farmer SF 7000. 1/20/23- For this upcoming grow I am working with M/F photo seeds so I ordered 4 Sex determination kits. I recieved my my 4 Sex determination testing kits from Rimrock Analytics today. I will be using these to test my plants at week 2 of Veg so that when/if I take clones I know I am taking them off females. As well as I don't want to accidently pollinate my tent during this grow I am looking for big beautiful buds not seeded buds. :-) 1/24/2023- Harvest of current grow- Started at 2:00pm and finshed wet trim and firt batch into the freeze dryer. 1/25/2023- Next batch into the freeze dryer and cleaning all my equipment for this Grow. T-1 Day until the workers are supposed to be here to fix the hole in the Grow Room. T-3 days until I instll my new Gorilla Grow Tent and my New Light Spider Farmer SE-7000 for this grow. T-7 Days until Start of Germination 1/26/2023- Harvest is done ran through the Freeze dryer and dry tim completed. 1/27/2023- Grow Room repairs completed. Hole is gone Letting the paint dry before I install the new tent. T-2 days until Install the New Gorilla Grow tent and the new Light T-3 days until I put the hydro equipment in the new tent T-5 days until Germination 1/29/2023- Day 0- Final Pre Germination activities Germination Start T-3 days The paint on the ceiling was dry and it was time to finish prepping for Germination. I got the following items knocked off my list. New 4X4 Gorilla Grow Tent is up and ready New Spider Farmer SE-7000 Light is installed- Thanks Moony Grows for the suggestion and for the Code that got me some money off and free shipping (Moonygrows)!! I turned the lights all the way up to max and set the timer to 18/6 0600-0000. I will keep an eye on the temperature and humidity without my plants and see how hot it gets with the new light. I put my Hydro system back together and put in 40 gallons of water into it, time to monitor for leaks the next few days. I Setup my cloning machine for Germination Days 3-11 1/30/2023 let me break down the situation, ROOM in the TENT.. Enough said.. No really I tried putting my exhaust system up in the new tent with my new light, The light is so big corner to corner that it really didn't give me enough room for the lights be be raised, with the exahust hanging the buckets my plants are Starting in are 2 and 1/2 feet off the ground, great for plenty of room for roots but not so great for upwards space for the plant to grow. In a 6' 11 tent with the exauhst in side and hanging that only gave me a little over 4 feet of grow room to play with. My last grow if you saw my diary, anyone could tell I was struggling to keep the buds off the lights. No good, Since space was such an issue I was running my carbon filter inside on the ground but It really needed to be up sucking the heat out not shooting the cool out. With that setup I was sucking air through the filter and pushing it out the tent at a bottom exhaust hole cold out. Wasn't doing me any good for my heat. I was hitting temps of up to 85 degrees. I bought a portable AC unit and have been running it in the grow room to try and keep temps below 85 and I have had to lower the power on my lights during grow also not ideal.. With that said a friend of mine MoonyGrows (Check out his diary) took the time to look at my issue send me a picture of my grow tent setup with detailed instructions on how to suck the air out from the top but putting my filter and fan on top of my tent so no room issue and I am sucking the air out from the top where the heat is instead of pushing the air out from the bottom where the cool is... THANK YOU MoonyGrows For taking the time to help me get this straightened out.. Now I have room and I have the exhausts working right and now my temps with everything at 100% are topping out at 80 this dropped the temp by 5 + degrees at 100% max. T-2 days until Start of Germination Prepped my seed tray with humidity dome Prepped my Rapid Rooter plugs. I Used RO water, and I added a few drops of Hydrogen peroxide to Oxygenate the water. I then PH balanced between 5.7-6.0 the same that they will be getting in the Cloning Machine and when they get to thier final grow pod. I perfere the 5.8x range and I hit 5.84 for these rapid rooters. If you want to see a complete video on the process HowWeedGrow has an amzing video that shows step by step how to do it and explains it better than I ever could including how to plant the seeds. Which I will cover when I get to that step on Wed. https://www.howweedgrow.com/how-germinate-weed-seeds-cannabis-rapid-rooters/ 1/31/2023 T-1 day until Germination Start All set and ready have my Rapid Rooter plugs ready to go have my seeds out.. Have my seed tray warming up tonight. Tomorrow morning right into the Rapid Rooter then strait into the tray. I will spray the dome to start the humidity in there. 2/1/2023 Germination Day!! Let the games begin! 0600am Put the seeds into the Root Riots. And then put the seeded Root Riots into their first home the Seed tray. I have them under the light 24/7. Sprayed the dome 7:30pm Sprayed the Dome to keep humidity going on the dome. 2/2/2023 Day 1 of Germination Sprayed the Dome in the morning Sprayed the Dome in the evening 2/3/2023 Day 2 of Germination Roots are starting to come out the bottom of the root riot plugs and the heads are slowly popping out of Number 4 just below the surface. Afternoon- Number 4 has popped up Evening- Number 3 has popped up as well. Happy Dance!! 2/4/2023 Day 3 - Germination Surprise Surprise Surprise- all 4 have now poked their heads up.. Happy day!! 100% Germination succeeded. Now major milestone to track is how many are female and how many are male. I will take look at the roots this afternoon/evening and see if they have enough root to go into the cloning machine for the next 7 days before they go into their Hydro Pods. Day 3 - Germination - Evening.. Roots looked good and they were tall enough to make it into the cloning machine. Now that they are all in the cloning machine I have switched the lighting to veg state 18 on 6 off. 2/5/2023 Day 4 - Germination - Morning All the Ladies (fingers crossed) looking great stretching nicely and look nice and green, Photo synthesis underway.... UPDATE!! After a very interesting POD cast on FSTS by Dr. Bruce Bugsbee from Utah University, I have shifted my lighting to 24 hours on through seedling and then I am going to shift to 20 hours on the rest of Veg. 2/6/2023 Day 5 - Germination While Checking on my conditions inside the new tent last night, I found that the Humidity was down to 39 Percent. I added an AquaOasis Cool Mist Humidifier, the reason I selected this humidifier is that I needed one that could be turned on and off utilizing my Inkbird Humidity Controller IHC200 that I have my Pro Breeze Dehumidifier currently running with. Root structures are starting to get there about 1/4 of an inch. 2/7/2023 Day 6 - Germination Everything seems on track more roots poking out of each today. They are each getting a little taller as well. Checked in the evening and number 3 was drooping the Root riot plug on the bottome was dry and the roots were not in the water yet. I raised the water just enough that the longest root that was sticking out is now hitting the water. 2/8/2023 Day 7 - Germination Everything looked good while checking in on them this morning number 3 is now full up and no droop again. 2/9/2023 Day 8 - Germination T-2 days until Plant into Forever Pods and we start week 1 of Veg .. :-) Surprising thing to me is that number 1 and 2 were later in popping then 3 and 4 but the roots are growing longer in 1 and 2. 2/10/2023 Day 9 - Germination Number 1 and Number 2 are definitely ready for transplant today.. Based on how they were yesterday and where they are today I am hoping by tomorrow 3 and 4 are ready. Today they look to me where 1 and 2 did yesterday.. I really hope 3 and 4 catch up by tomorrow since.. T-1 day until transplant to new/ final home for grow. Need the roots long enough to have some clay down in the basket to keep the root riot out of the water and only roots in the water.. 2/11/2023 Day 10 - Germination Today they got placed in thier forever Home, 7 days from Sprout and 7 days until Week 1 Start. PPM- 180 this is water out of the Tap Temp Water: 70.7 Temp Tent: 77 Humidity: 40% I have a humidifier going 24/7 to try and bring this up.. I also have Humidity Domes on each plant. 2/12/2023 Day 11 - Germination Sprayed the domes, all are looking good.. Nothing much to do at this phase but Keep monitoring the PH level in the system and making sure they have a comfortable home. T-6 days until Week 1 start 2/13/2023 Day 12 - Germination Sprayed the domes, They were looking a little yellow today so I moved the light down to assist. Nothing much to do at this phase but Keep monitoring the PH level in the system and making sure they have a comfortable home. T-5 days until Week 1 start 2/14/2023 Day 13 - Germination Sprayed the domes, They were looking a little Florissant yellow today, with what looks like slight burn on the tips, I talked with a fellow grower and we agreed that It was probably that I was drowning them, Yes you can drown you plants even in Hydro, but only early on.. :-) It usually happens with the water being too high, which soaks not only the roots but the medium (root Riot plug in this case). I lowered the water from touching the bottom of the pot to about 1" away. This will probably take 3-4 days to resolve. I will continue my daily monitoring. T-4 days until Week 1 start 2/15/2023 Day 14 - Germination Sprayed the domes, continue my daily monitoring they look a little darker green instead of lime green now that I lowered the water levels in the system, so I think that I might have resolved the issue but it will take a few days for recovery to happen. T-3 days until Week 1 start 2/16/2023 Day 15 - Germination I looked in on them this morning, 3 and 4 look like they are doing well and recovering nicely. Number 1 not so much it has brown spots on the leaves, this very well can still be a side effect of the overwatering but I decide to go ahead and add Nutes earlier than I was planning just incase. I was going to wait until Saturday but I think intervention is necessary now especially after drowning them early on. I added 1/2 what I am planning on adding for week 1 start. I also think I am going to adjust my chart to add 1/2 2 days after plant from now on. I don't think it would hurt it to have some Nutes to pull from. .25ml/Gal Calmag = 12.5ml 1ml/gal GH FloraMicro= 50ml 1ml/gal GH FloraGro = 50ml 1ml/gal GH FloraBloom = 50ml T-2 days until Week 1 start = I will drain the system and start it over on Saturday with Week 1 Nutes. 2/17/2023 Day 16- Germination I didn't even want to post today after looking in on them this morning, 3 of the 4 are now showing signs of dronwing.. Brown spots on the leaves, the water levels were still too high.. I drained about another inch out of the tanks.. Will see how quick they recover.. I start week 1 tomorrow and will have to ensure my water levels are at least 1" away from the basket on this round.
Likes
33
Share
@BADKUSS
Follow
Hello everyone, here are the little ones is doing well apart from a small delay but I hope that it will arrange. I think this is due to the fan that gives directly above .... otherwise I started knitting and watering with clear water this week ....ps: i also pinch the apices to promote secondary branch growth I think I'll start flowering next week .... now place to photos ... Peace
Likes
46
Share
Hey, cannabis enthusiasts and connoisseurs! 🌿🔥 The journey with our Runtz F1 has been nothing short of legendary, and now we’re at the stage that every grower eagerly awaits—the trim and smoke report. This Runtz F1 has delivered beyond expectations, and I can’t wait to share the details with you. Let’s dive in! The Trim Process 🌾✂️ The trimming process was an experience in itself, filled with care and attention to detail. Here’s how it all went down: • Breaking Down the Branches 🌿: • First, we carefully broke down the plant into manageable branches, making sure to preserve the integrity of each bud. The structure of the Runtz F1 made this easy, with its dense, compact colas ready for precision trimming. • Trim Bin Magic ✂️: • Using a Trim Bin, we meticulously trimmed away the sugar leaves, leaving behind only the most beautiful, resin-coated buds. The Trim Bin isn’t just a tool; it’s a game-changer, allowing us to catch every last bit of precious kief that falls during the process. This extra kief is like a bonus for those special moments when you want to add a little something extra to your smoke. • Preserving Terpenes with Grove Bags 🛍️: • Once trimmed, the buds were placed into Grove Bags for curing. These bags are revolutionary in the cannabis world, designed to lock in terpenes and keep your buds fresh for the long haul. Unlike traditional jars, Grove Bags use a special TerpLoc technology that creates a perfect microclimate within the bag, balancing out oxygen and moisture levels. This means your buds cure evenly without the need for burping, preserving that incredible citrus terpene profile we’ve come to love from the Runtz F1. The Legendary Smoke 🌬️🔥 Now, let’s talk about the smoke—because this is where the Runtz F1 truly shines. • Flavor Explosion 🍊🍋: • The moment you take your first inhale, you’re hit with a symphony of citrus flavors. It’s like walking through a citrus grove with the sun shining down—notes of oranges, tangerines, and lemons come through strong, each one distinct yet harmoniously blended. But the magic doesn’t stop there; an underlying hint of vanilla sneaks in on the exhale, rounding out the flavor with a creamy, smooth finish. It’s an experience that dances on your palate, leaving you craving more. • Aroma 🌿🌸: • The smell is just as captivating as the flavor. As soon as you open the Grove Bag, the room fills with that zesty citrus aroma, complemented by a subtle sweetness from the vanilla undertone. It’s the kind of smell that makes you pause and appreciate the craft that went into growing this plant. • The Effects 🌟: • The effects of the Runtz F1 are as balanced as its flavor profile. Expect an initial wave of uplifting energy—perfect for daytime use or when you need a creative boost. As the high settles in, it mellows into a relaxed, yet focused state. It’s the best of both worlds: energizing without being overwhelming, and calming without knocking you out. This makes it an ideal strain for those who want to stay productive while still enjoying a potent, flavorful smoke. Final Thoughts and Invitation 🎥✨ The Runtz F1 has proven itself to be a true connoisseur’s strain—a perfect blend of flavor, aroma, and effects that’s both complex and satisfying. This was a journey that showcased the importance of patience, precision, and care, from germination all the way to the final cure. If you want to dive deeper into the entire process, from the first week of veg to the final trim, I’ve documented it all on my YouTube channel. Join me there for a closer look at how this incredible strain came to life, and learn more about the tips and techniques I used to bring out the best in these plants. Thank you to everyone who’s been part of this journey, from the community to the amazing brands like Gro Diaries, TrolMaster, Aptus Holland, Kannabia, and more. Your support and tools have been invaluable. Remember, the magic is in the details—so never stop learning, growing, and enjoying the fruits of your labor. Stay positive, stay curious, and keep spreading the love! 🌿💚 #RuntzF1 #LegendarySmoke #CannabisConnoisseur #GroveBags #TrimMagic #StayPositive #GreenMagic #YouTubeJourney Germination method 🌱 @thecannakan Genetics Runtz F1 @zam.nesia Runtz auto @kannabiaglobal Nutrition @aptusholland 🌿 @aptus_world 🌎 @aptus_es 🌍 @aptusbrasil 🌱 @aptus_thailand 🌿 @aptus_portugal 🌳 @aptususa_official 🍀 @aptusplanttechnz 🌺 @aptusplanttechaus 🍃 Ambient controls🎮 @trolmaster.eu @trolmaster.eu.support @trolmaster.support @trolmaster.agro Soil @promix_growers_eur @promix_cannabis LED - @lumatekeu Watering- @autopot_usa @autopot_global Love and attention- @dogdoctorofficial #aptus #aptusplanttech #aptusgang #aptusfamily #aptustrueplantscience #inbalancewithnature #trolmaster #trolmastereurope #trolmastersecrets #Autopots #RuntzBattle #KannabiaVsZamnesia #GreenJoy As always thank you all for stopping by, for the love and for it all , this journey of mine wold just not be the same without you guys, the love and support is very much appreciated and i fell honored and so joyful with you all in my life 🙏 With true love comes happiness 💚🙏 Always believe in your self and always do things expecting nothing and with an open heart , be a giver and the universe will give back to you in ways you could not even imagine so 💚 More info and complete updates from all my adventures can be found ⬆️ link in the profile description ⬆️ Friendly reminder all you see here is pure research and for educational purposes only 💚Growers Love To you All 💚
Likes
6
Share
@Gamfin
Follow
// Day 78 I put her inside. I know, that's cheating, but I do not care right now. The weather will be abyssymal in the next days and I do not want to keep her just in my room at the balcony door because she stinks amazing, but I can't let her stink up the apartment. And she is pretty late in flower, I really want her to work on the buds, let them thicken up and I just want to enjoy the outcome in the end. This grow is already incredibly long for an autoflower and she still needs 2-3 more weeks, when looking at her bud sites. I don't want to harvest trash buds after investing 3 to 4 months into a plant. If the weather is good again, she will be back outside. If the weather is trash with rain all day, I'll keep her in the tent. My main concern is her bud development. The sites are huge but the calyxes are just not fattening up. You can see it in the pictures, they're very airy and overall not "sexy" looking, if you know what I mean. I hope that she finishes nicely since this grow went amazing so far. She is an absolute unit and I want her to finish perfectly. Let's see how she developes in the next 14 days. With 78 days, this plant is very old, but I've seen autoflowers getting harvested after 90 days or even 100 days. So I will just keep calm for now and I try to enjoy the last 2-3 weeks of her grow life.
Likes
21
Share
Looks like she'll be growing some serious leaves, some solar panels to soak up all that light. She'll be staying indoors just incase the Blueberry OG ends up being an outdoor male.
Likes
21
Share
@Hashy
Follow
******************************************** Week 11 mid flower (week 5 flower) ******************************************** Light cycle=12/12 Light Power=160w 67% Extractor controller settings (during lights on). High temp= 26c Temp step=0c High Rh= 52% Rh step=0% Speed max=10 Speed min=3 Extractor controller settings (during lights off). High temp= 21c Temp step=0c High Rh= 56% Rh step=0% Speed max=10 Speed min=3 Smart controller settings (during lights on). Lights on=9.00am Radiator on= -22.5c Radiator off=+23.0c Top fan on= Smart controller settings (during lights off). Lights off=9.00pm Radiator on=-18.5c Radiator off=+19.0c Top fan on VPD aim=0.9-1.4 DLI aim=35-40 EC aim=0.8-1.6 PH aim=6.0-6.5 💧💧💧💧💧💧💧💧💧💧💧💧💧💧💧💧 NPK= 9-18-28 Method= Automatic Feed=Flower nutes Neutralise=0.1ml/L Plagron bloom=4.5ml/L Plagron Power buds=1ml/L Green Sensation=1ml/L Easy Ph Up=0.035ml/L (1ml=23 drops, each drop is 0.043ml) Ec=1.6 PH=6.3/6.3 Runs=18 Run times=4mins (L/L each) Gap times=16 mins Total runtime=72mins(L/L each) Total flowrate= ml/min(ml/min each) Auto start time=10.00am Auto stop time=15.44pm 💧💧💧💧💧💧💧💧💧💧💧💧💧💧💧💧 ******************************************** ******************************************** 📅15/12/24 Sunday (Day 71)(flower day 31) 📋 removed support from snapped cola as its mended now. Slight adjustments and defoliation. 💧 Automatic mid bloom nutes Ph up=0.43ml, 10 drops Ec=1.6 PH=6.3/6.3 Volume=12L Volume left=1.5L Volume used=10.5L(ml/min) Volume each=5.25L(ml/min) Runoff. Total runoff=2.4L Ec=3.4 PH=/6.2 💧 📅16/12/24 Monday (Day 72)(flower day 32) 📋 📅17/12/24 Tuesday (Day 73)(flower day 33) 📋 📅18/12/24 Wednesday (Day 74)(flower day 34) 📋 💧 Automatic mid bloom nutes Ph up=0.43ml, 10 drops Ec=1.6 PH=6.3/6.3 Volume=12L Volume left=2.5L Volume used=9.5L(ml/min) Volume each=4.75L(ml/min) Runoff. Total runoff=0.4L Ec=3.2 PH=/6.4 💧 📅19/12/24 Thursday (Day 75)(flower day 35) 📋 📅20/12/24 Friday (Day 76)(flower day 36) 📋 📅21/12/24 Saturday (Day 77)(flower day 37) 📋 Slight defoliation H=92cm D=23cm Dli=46 8 ppfd=1080 ******************************************** Weekly roundup. 📋 It's been bitter cold outside this week so the radiator has been in use a lot this week using 38.95Kw £9.73 She is loving everything so far, a little behind the other strain in development but not by much, got nice spacing between the flowers and great airflow around her. Back soon. Take it easy. ********************************************
Likes
12
Share
MIMOSA by ROYAL QUEEN SEEDS Week #14 Overall Week #13 Veg This week no real issues to report the sun did get to her a little bit had to move her to a new location other than that she's a strong plant to grow she's one that can take some heat. Stay Growing!!
Likes
56
Share
La cookies oramai e in piena vegetazione le cima praticamente non si vede più e tutta la pianta e ricca di buove foglie....devo direbche questa sp3000 della Marshydrø è veramente una bomba💣👍stimola molto la crescita di nuovi germogli....sono veramente contento delle sue prestazioni....
Likes
2
Share
Likes
3
Share
@Fyno_TH
Follow
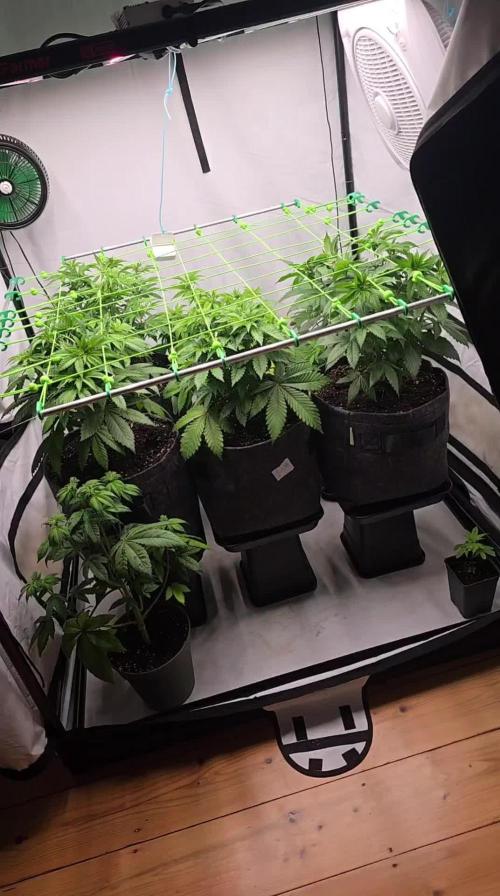
Week 6 update 🌱🔥 — the canopy is fully spread across the net, every corner filling with green. Main plant is wide and strong, really showing her structure before flip. The second plant is still smaller but pushing steady new growth and holding strong 💪. Feed mix this week: Corex + Eldex + Terra + CalMag + Bud Candy + Mira + Terpinator (~1300–1400 ppm @ pH 6.0). Main plant is now drinking over 8L of water with 10–20% runoff — coco is flushing clean and roots are thriving. Temps holding around 26–27.5 °C with RH stable 55–65% 🌬️. Leaves are praying under the Spider Farmer G3000 with no burn, no deficiency. 👉 Next week will be Flowering Week 1 🚀🌿. Excited to flip them and watch the stretch + bud sites start stacking 👀✨
Likes
Comments
Share
@UDUDUDUDU
Follow
it's tuff running many plants and a garden' especially when growdiaries takes 5 hours to upload... But yes. From here on out, itll be smooth sailing. Eggspect one picture a week ;)