


Processing
Likes
Comments
Share


@Yukagrls
Follow
She is growing healthy and strong. I turned her around a little bit, because they start moving around and I read that is good for them. I hope the pictures can show how fast she is growing. :)

Likes
3
Share


@TyRun
Follow
Intermediate Results
Overview
This grow was intense! Setting up the grow consumed so much of my time and focus that I started slacking at work, and it took me a month to get back on track. But hey, what’s the point of a job if it gets in the way of growing? 😉 In the end, everything worked out, and I gained invaluable experience.
This was my first grow using coco coir. At first, I didn’t get it, but then it just clicked! Now I’m hooked: "I’m here to stay." Coco is more controlled than soil, flushes easily, and you can introduce beneficial microbes, which thrive in it. My main takeaway from this grow? If you buy coco, don’t forget CalMag!
Next time, I’ll definitely install HEPA filters at the intake. The amount of dust was insane, and the grow box pulls air like a vacuum cleaner. Watching the timelapse, you can see the box sucking in every bit of dust. I vacuumed the intake filters weekly. The plant was incredibly sticky, but that also meant it caught a lot of lint and fibers between trichomes, especially visible under a microscope. Smoking microplastics? No, thank you!
---
On CO2
CO2 only works if everything else is dialed in. If the plant experiences stress from deficiencies or overfeeding, you can forget about it. Since CO2 supplementation requires turning off the exhaust fan, it’s hard to manage temperature and humidity. The plant releases so much moisture that RH jumps to 80% within minutes. It’s doable, but definitely a challenge.
---
On Magnetic Fields
No clue what’s happening here yet, but it’s fascinating! I’ll test again with a control sample.
---
Nutrients
Dreams do come true—I’ve tested almost everything Advanced Nutrients offers. It wasn’t all smooth sailing; their feeding charts need adjustments for your conditions, and you usually need to feed less than recommended. Overall, I’d say the nutrients performed 100%, and I see no reason to switch. I’ll stick with them for future grows.
---
Strain
This strain is reliable, though not the most productive. It flowered exactly as advertised and delivered a frosty finish. It tolerated all my mistakes like a champ—especially mold. Despite an abandoned SCROG plan turning the plant into a bouquet, there wasn’t a single mold spot, even in the densely packed lower buds that got almost no light. Zero mold issues!
---
Aroma
As advertised: pine, wood, and citrus. At first, I thought it smelled like grapefruit, but now I’m leaning toward bergamot. Bergamot with a classic weed aroma—a recognizable twist on the usual scent. During the grow, the smell was strong, but the carbon filter handled it perfectly.
---
Flavor
It’s too early to say, but the flavor is definitely there! Embarrassingly, all my past harvests tasted the same—like nothing. Just smoke. This one has a distinct sour taste. I’m excited to see how it develops after curing.
---
Effect
Too early for a full review, but I love what I’ve tried so far. The high lasts about three hours, with euphoria and relaxation. It’s the perfect evening strain. I’ve smoked a lot over the years, but I’ve never experienced true euphoria—until now. Guess I’ve been stuck with garbage and ditch weed before. 😅 It’s not a strain for productivity or chores, but it’s perfect for chilling, watching something, or chatting. No anxiety, just great vibes. It feels like having a beer after a long day: you relax, and life feels good again.
---
Roots
The roots were healthy—maybe too healthy! While the AirPot (20L) prevented root circling, it didn’t eliminate it entirely. There were dead zones at the bottom where roots circled around the perimeter. A dense root mat formed at the bottom (so dense you couldn’t poke a finger through it), which likely contributed to salt buildup. Breaking through that mat required more water, and I suspect this caused EC to spike 1.5x the next day if there was no runoff. Next time, I’ll mix some pumice with the substrate at the bottom, about 3–4 cm deep.
---
Timelapse
I only got the timelapse running after the switch to flowering, so it’s not from the beginning. Still, it’s an incredibly useful tool for understanding growth rates. I’ll definitely use it for future grows. Comparing yesterday to today is one thing, but rewinding a week to see how things were is game-changing. I recommend it! You can even use an old phone with a timelapse app if your camera doesn’t support it by default.
---
What’s Next
I’ve grown fat buds before, but I’ve always neglected curing. This time, I’m doing it by the book with full control. Drying in the grow box with RH controlled at 50–60% (averaging 55%) for a slow, even dry. Temps are kept between 20–23°C, with frequent venting to keep it below 21°C for terpene preservation. After 7–10 days, when small stems snap with a characteristic sound, I’ll trim and jar them with humidity sensors. For the first two weeks, I’ll burp the jars twice daily, then reduce to once daily for the next two weeks. After that, I’ll monitor the RH sensors and adjust as needed. I’ll share the details after curing is complete.
After drying, I’ll weigh the buds, take photos, and share another post in a month or two after curing to report on the flavor and aroma.
For now, I’m taking a breather, fine-tuning my setup, and preparing for my next grow: Wizard Trees - Zangria S1.

Likes
9
Share


@Cestlaweed
Follow
Se realizo podas de bajo y comienza segunda semana de LSD 25.
Gran estirón al final de la semana.
Temperatura se comienza a elevar hasta valores de 31 grados.


Likes
4
Share


@Prototype0181
Follow
This run i'm gonna play around a bit with Bio-tabs & Biobizz for the In House genetics and Aficionado French connection strains i got.
For LIT Farms Diamond Gelato & Dutch Passion The Ultimate i'm gonna stick with what i know best ( Canna Terra & Advanced nutrients combo ).
All plants have been transplanted to their final home's on 06-15 in 5 gal's and all of them are doing fine, even with the extreme heat and drought we got over here at the moment, to be continued.
Stay elevated growmies💚

Likes
2
Share

@Bendene
Follow
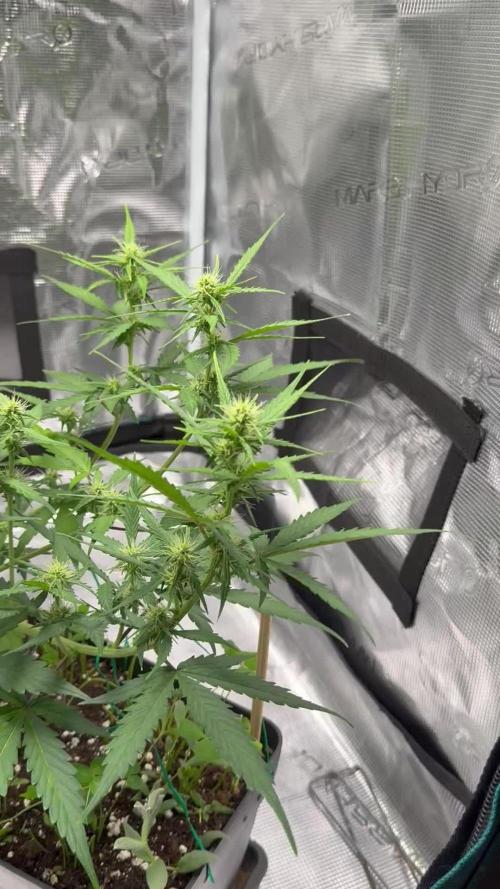
Half of week 6 was still in veg but now it switched into early bloom - I still expect a tiny bit of stretching.
The bud structure is great many little buds sites
Cylaxes are still at early development stage.
I have been collecting the clover leaves and leaves from defoliation and dried them out, blended them into fine powder- so the earth worms can feed on them.
Made a top soil mix ( used dried soil from the surface of the pot + powder leaves, one tea spoon of rizobacter and half tea spoon of mycorrhiza ) then I sealed with another layer of Light mix by Biobizz
Likes
36
Share


@Coopmc
Follow
First 2 transplanted I’ll do the other 3 or 4 soon
6 for 6 Go Fast Buds!!!
Strawberry Bannana for the win!!
Likes
63
Share


@LandoftheLongGreenCloud
Follow
Sorry I've missed the week transition too flower but I've been ridiculously busy as you guys can see but don't worry about the 2 choc mints in flower there's viable clones cut the genetics will live on let's check out these flowers

Likes
4
Share


@JardineiroBr
Follow
Essa é a maior das 3 moby veio para o lado de fora pois está grande e os pássaros não comem mais espero.
Logo mais começo a cadastrar a floração.

Likes
42
Share


@Reyden
Follow
Ci siamo! Siamo arrivati quasi al traguardo...questi giorni le ragazze sono al loro massimo splendore e l'odore nella stanza e fortissimo! Anche questo aggiornamento è stato fatto grazie all'aiuto di mia madre che gentilmente mi ha tenuto e curato le bambine, sono contento perché sembra che è riuscita a seguire tutte le mie istruzioni e questa volta non ci sono stati problemi...è la prima volta che mi capita di competere in un contest e farmi mandare foto per mail..chiedo scusa se la messa a fuoco non è sempre delle migliori e personalmente non posso chiedere di meglio, è un lavoro che mi serviva e sono dovuto partire lasciando tutto indietro...tornando ai nostri fiori, il green sensation di Plagron devo dire che ha fatto la differenza, contando che il cibo questa volta è stato preparato interamente da me, ha fatto un ottimo lavoro e i fiori sembrano dirlo forte! Cercherò di aggiornare l'ultimo step prima della fine...tra due giorni farò tagliare le ragazze! A presto!!!

Likes
4
Share


@AustinRon
Follow
OG 4Q24 Flower Week 7
Orangegasm (Fem) [ IRIE Genetics ]
12/12 @ Bolt (Day 21)
Germination: 20 November 2024
#3A Earliest Harvest Date: 9 February 2025
#3B Latest Harvest Date: 19 February 2025
_________________________________________
Start of Week: [Wed Jan 22,
2024 CR2 4Q24 43:F:6:1]
End of Week: [Tue Jan 28, 2024 CR2 4Q24 49:F:6:7]
OrangeGasm Fertigation:
- MAX: EC: [ 2.4, mS]
- LightIntensity MAX: [ 850, µMol/m2/s]
______________________________________
__
Wed Jan 22, 2025
OG 4Q24 43:F:6:1
- [x] R&R Each Drip Ring Assembly (Assure NO Fertigation/Bio Build up)
Runoff
- Amount: [ .5, l]
- EC: [ 3.8, mS/cm]
- EC∆: [ 1.2, mS/cm] # Danger!
Refresh Res (Filtered, pH’d Tap Water)
- [x] Amount: [ 2, gal]
- [x] Primer A&B: [ 35, ml]
- [x] SLF-100: [ 10, ml]
__
Thu Jan 23, 2025
OG 4Q24 44:F:6:2
Refresh Res (Distilled Water, pH: 7, EC: 0.0)
- [x] Amount: [ 2, gal]
- [x] Primer A&B: [ 39, ml]
- [x] SLF-100
Runoff
- Amount: [ 1.2, gal]
- EC: [ 4.3, mS/cm]
- EC∆: [ 1.6, mS/cm] # DANGER
__
Fri Jan 24, 2025
OG 4Q24 45:F:6:3
Runoff
- Amount: [ 0.3, gal]
- EC: [ 4.1, mS/cm]
- EC∆: [ 1.4, mS/cm] # DANGER

__
Sat Jan 25, 2025
OG 4Q24 46:F:6:4
Dump Res
- [x] Remove Chiller and Fertigation Pumps
- [x] Dump and CLEAN Reservoir, Note Sediment
- [x] Detach Main Feedline
- [x] Clean Chiller Pump
- [x] Clean Fertigation Pump
- [x] Dry ALL Components
- [x] REASSEMBLE When Dry
- [x] Clean 1/2” Fertigation Mainline
Watered In Primer A&B, CalMag Fuel, Silica Skin
- Amount: [ 1.9, l]
- EC: [ 2.7, mS/cm]
Refresh Res w/ Full Hydro (Primer A&B, Silica Skin)
- [x] Amount: [ 4, gal]
- [x] EC: [ 2.7, mS/cm]
- [x] Primer A & B: [ 73.1, ml]
- [x] SLF-100: [ 40, ml]
Runoff
- Amount: [ 0.25, gal]
- EC: [ 4.1, mS/cm]
- EC∆: [ 1.4, mS/cm] # DANGER
__
Sun Jan 26, 2025
OG 4Q24 47:F:6:5
Refresh Reservoir - 2 Gal, EC: 2.7
- [ ] Check, R&R Fertigation Manifold Filter as Needed
- [x] SLF-100: [ 10, ml]
- [x] Primer A & B: [ 40, ml]
Runoff
- Amount: [ 1.25, gal]
- EC: [ 4.2, mS/cm]
- EC∆: [ tbd, mS/cm]
__
Mon Jan 27, 2025
OG 4Q24 48:F:6:6

Watered In Primer A&B, CalMag Fuel, Silica Skin
- [x] Amount: [ 1.9, l]
- [x] EC: [ 2.7, mS/cm]
IPM
- [x] Spray sides - cover Air holes of Airpot
- [x] Spray tops of pots to drench
- [x] Dr. Zymes, 28ml/quart @ 85°F
- [x] APPLY Mosquito Bits to Top of Containers
Runoff
- [x] Amount: [ 1.5, gal]
- [x] EC: [ 4.9., mS/cm]
- [x] EC∆: [ 2.2, mS/cm] # *** Plants Should Be Fried!
Need to R&R Pre-Filter again. Fan Flow significantly diminished.
__
Tue Jan 28, 2025
OG 4Q24 49:F:6:7

Replace ACI Pre-Filter
- [x] Remove Plants
- [x] Disconnect Irrigation Emitters
- [x] Remove and Rinse Drain Tray
- [x] Drop Front of Light
- [x] Remove & Replace Pre-Filter
- [x] Verify Airflow (Make sure we don’t need to change the carbon in the filter)
- [x] Raise front of light to run position
- [x] Replace Drain Tray - Reposition Shims
- [x] Replace Plants AS THEY WERE
- [x] Replace Emitters
- [x] Verify Irrigation
Runoff
- [x] Amount: [ 0.5, gal]
- [x] EC: [ 4.8, mS/cm]
- [x] EC∆: [ 2.6, mS/cm] # *** Plants Should Be Fried!

Likes
32
Share

@DevelGrow
Follow
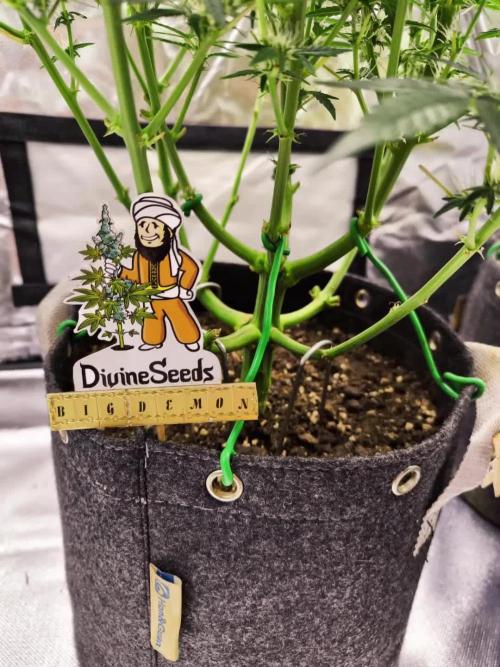
Hallo Freunde 👋 BigDemon von Divine Seeds ist 49 Tage Alt! Sie entwickelt sich Prima, bildet überall buds mit vielen Seiten Triebe ! Jetzt müssen die buds noch wachsen!!! Bis dahin keep Green and grow High ✌️🍀💚🍀

Likes
1
Share
@Wierie
Follow
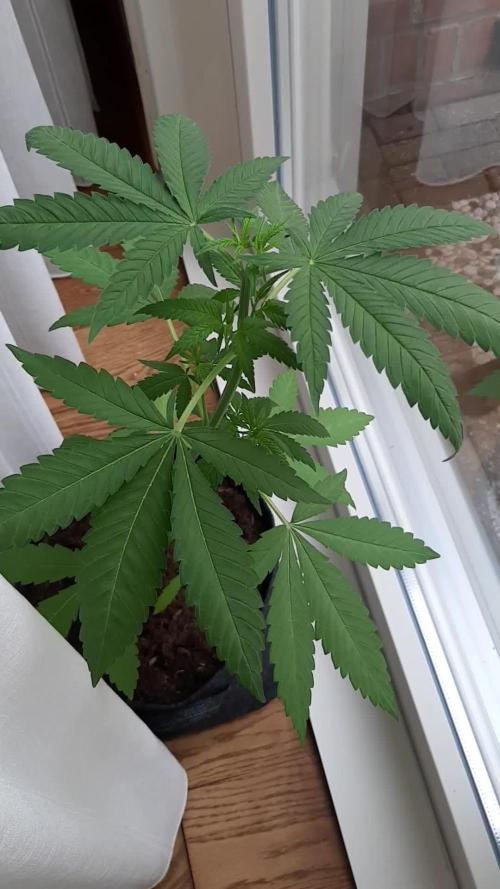
This week i Topped her ..
Gave her some time to recover..
Put her into flower after that ...
Still feeding 6.5 /6.4
With pokon
0.5 liter around evry 2 days ..
Wil feel the weight of the pot if she needs some
Tips at the end of the leaf are down at the moment ..
She has been moved from her normal place so might be a bit of light stress..
Will keep a close eye on the lady...🌴🌴🌴
...

Likes
3
Share

@Cannarich
Follow
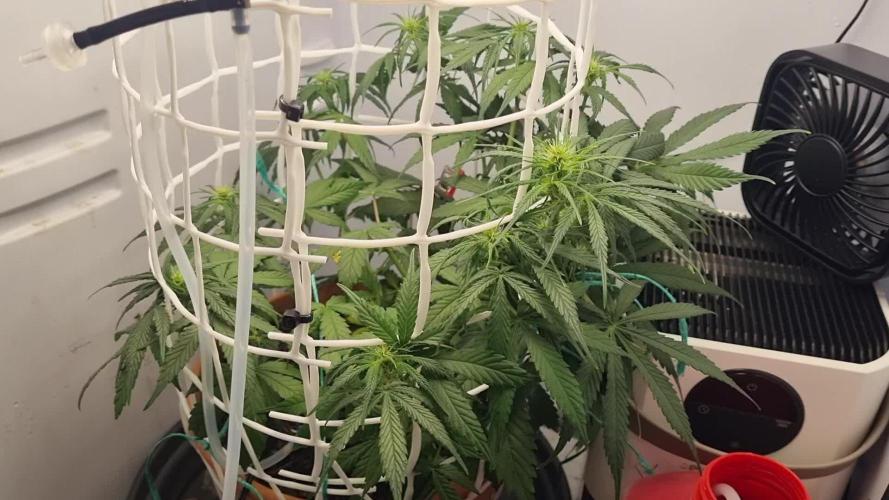
Growth spurt slowed. Starting to fill. Less worried about it getting out of control now. I should have used a more conventional training and topped it. The one advantage I'll have, because it's never been topped, is the shortest time to harvest the way I have done it. Accidental HST on one branch yesterday, so it'll be interesting to see what that brance does now.

Likes
41
Share


Likes
17
Share


@Smokwiri
Follow
Development is good, plant smells very nice
Not too skunky, i like it ;)
Plant is loving the nutrients...

Likes
15
Share


@spacetaste
Follow
noticing a lot more smell this week, but all together shes looking great- still a little torn on whether i should flush or not. any input?zzz
Likes
22
Share


@Smith420
Follow
I used a bounty paper towel inside of a 6x4 glass storage container cut to match size. Sprayed distilled water generously over, then gently placed seeds evenly apart from each other. Placed a second paper towel and sprayed again with distilled water. Sprayed inside lid and closed for 48 hours prior to opening. Left raised above ground floor on cardboard box directly in front of heat intake duct. Temp and humidity were around 75-80F and 60-70%humidity. after a successful beginning, I then planted each seed using latex gloves into 4 different pots ; 1-5gallon happy frog only, 1- 5gallon pot happy frog with clay pebbles, 1-3 gallon pot happy frog only and 1-3gallon happy frog and clay pebbles. I covered each seed with a cut up 2litre clear soda bottle with small holes poked on the tops. I sprayed down the soil and the plastic containers. I left them covered until I noticed the cotyledon leaves then I removed the plastic covers, increased circulating fan speed and added a bag of exhale co2. Watered daily 2-3 times by misting with spray. (Distilled water in humidifier and used in feeding)

Processing
Likes
7
Share


@420keef
Follow
So i had to take all my plants inside because i found bud rot on 2 of them & the weather wasn’t going to get any better, had to transform my bedroom into a grow room😂 & i have 2 more plants which i am going to finish next to a window.. The smaller plant to the right is a Northern light by zamnesiaseeds that has a seperate diary if you are interested! I really hope the bud rot doesn’t spread anymore & if anyone has any tips or tricks for that they are always welcome!

Likes
92
Share


@DogDoctorOfficial
Follow
Week 9 - First Week of Flowering 🌸
The dark period has ended, and these ladies came back into the light fully energized and ready for action! It’s just the first week of flower, and they’re all praying, stretching, and absolutely thriving—filling up every inch of the tent. This grow space is officially packed from wall to wall, with each plant competing for its share of light and showing off some of the biggest, healthiest leaves I’ve seen yet! 🌱
A few strategic plucks here and there have kept airflow smooth and light penetration balanced. Those big leaves? They’re a sign of happy, healthy growth. Large leaves help the plant capture maximum light energy, essential during this stage, especially as they start focusing on developing those flowers. When plants grow huge, vibrant leaves like these, it means they’re well-nourished and content in their environment—a true testament to the well-balanced conditions we’ve got going in the tent!
Flowering Parameters 🌡️
Room Environment:
• Temperature: 26.7°C
• Humidity: 63.3%
• CO2: 960 ppm
• VPD: 1.29 kPa (prime zone for flowering health!)
Lighting:
• Light Intensity: 835 PPFD (ideal for boosting flower growth)
• Solution: pH 5.96, TDS 460 ppm, temp 21.1°C
• Medium: Moisture: 100%, TDS: 520 ppm, Temp: 21.6°C
Carbon Filter Installation & Smell Management 🌬️🌱
With the transition to flower, the scent profile is already starting to kick in—crazy for the first week, right? 🌸 To keep everything fresh and under wraps, I’ve set up a carbon filter system. Here’s how it’s working: I’ve connected the filter to my Aerofan, which pulls air directly from the tent. This air is cleaned by the filter and released into the main room, where it then passes through another filter before exiting my space. This dual-filter setup means no scent escapes into the wild, keeping things stealthy and the grow room a peaceful, scent-contained environment. Perfect for anyone concerned about keeping their home free from that telltale aroma! 🕶️🌬️
Enhanced Lighting with Emerson Effect 🌞
This week, I’ve introduced an extra 15 minutes of red light at the beginning and end of each light cycle. Why? Well, this red boost taps into the Emerson effect, enhancing photosynthesis efficiency, especially during the flowering stage. By stimulating a little extra wake-up and wind-down light, we’re mimicking the natural sunrise and sunset experience for these plants, which can help reduce flowering time. Not only does it encourage smoother transitions into day and night, but in theory, it’ll help these ladies finish a bit faster, while giving them a little nudge to build more substantial, quality flowers. 🌇
Nutrient Adjustments 🌱
Now that we’re in flower, I’ve swapped out the Start Booster for P-Boost and TopBooster to specifically support flowering needs. Here’s why:
• P-Boost brings in additional phosphorus, vital for energy transfer and cell division as the plant channels more resources into budding sites.
• TopBooster supports the flowering phase by improving flower quality and density, helping to build those big, aromatic buds we’re after.
These changes bring the nutrient mix in line with what’s most beneficial at this stage. All this precise dialing in is easy to manage thanks to the TrolMaster system. From pH to nutrient scheduling, the TrolMaster ecosystem and ThinkGrow LEDs have been the ultimate teammates in this grow journey, giving me real-time data, fine control, and peace of mind. 💯
(Not introducing UV light just yet, but stay tuned as that’s coming soon for an added boost!)
Looking Forward 🌟
Next week, we’ll be upping the reds, giving us an even greater chance of activating those flowering signals for a smoother, faster transition through the cycle. I’ll keep tweaking and fine-tuning every parameter to make sure these ladies get exactly what they need to thrive.
Big thanks to the TrolMaster system for keeping everything in balance and optimized, along with the supportive Grow Fam following this journey! Your enthusiasm, advice, and support are a huge part of this grow’s success. Keep following for more updates, and stay tuned for what’s next! 🌿✨
P.S. Deep Dive: TrolMaster’s MBS-S8 CO₂ Sensor & Smoke Detector 🚨
The MBS-S8 CO₂ Sensor from TrolMaster is a powerhouse for growers, especially when it comes to optimizing plant growth and efficiency in a controlled environment. This sensor continuously monitors CO₂ levels and integrates directly with the TrolMaster ecosystem, giving you real-time data on CO₂ concentration. Ideal levels of CO₂ can significantly boost growth and yield during certain stages, so understanding and managing CO₂ is key. With the MBS-S8, I can control CO₂ levels precisely, keeping them within the optimal range for photosynthesis. This sensor is a game-changer because it adjusts CO₂ delivery automatically, giving plants exactly what they need without any extra monitoring from me.
Meanwhile, TrolMaster’s Smoke Detector is an essential safety device, especially in spaces with electrical equipment, lights, and heat-generating components. This detector can be set up to alert me instantly via the TrolMaster app if any smoke is detected, allowing me to respond immediately to any potential issues. Fires and smoke are rare in controlled grow setups but having this safety measure provides peace of mind and lets me focus on the plants without constant worry. It’s an incredible tool for any grower prioritizing safety and proactive monitoring.
Discount Codes so you can save big on your next check out 💚💚💚
Kannabia - DOGDOCTOR 30% off
SeedsmanSeeds - DOGDOCTOR 10% off
CannaKan- DOGDOCTOR 15% off
terpyz.eu - DOCTOR 15% off
The Neutralizer - PORKIT5-DOG 15% off
As always thank you all for stopping by, for the love and for it all , this journey of mine wold just not be the same without you guys, the love and support is very much appreciated and i fell honored and so joyful with you all in my life 🙏
With true love comes happiness 💚🙏 Always believe in your self and always do things expecting nothing and with an open heart , be a giver and the universe will give back to you in ways you could not even imagine so 💚
Friendly reminder all you see here is pure research and for educational purposes only
Growers Love to you all 💚💚💚


Likes
3
Share


@theicyeffect
Follow
Always cool to see what old school strains are all about. If there’s something experience has taught me is that classics are classics for a reason, and that’s the theme of this cycle.
The germination was exceptionally fast, followed by the development of a thick stalk and huge broad leafs, this Gorilla surely started strong.
Humidity and temperature kept fairly high throughout the week (70%/ 24°C), with regular misting, which they love!
So far so good, feels like a happy and healthy seedling. Let’s see what she’s got 💪🌱

Likes
9
Share


@newenglandgrowers
Follow
Cut the plants down on the 24th of April, drying room levels are 72°F and around 60%RH, I'm currently on Day #14 of drying and the buds don't feel fully dry yet, the main tops feel crunchy and dry but the lower smaller buds are still quite moist and smell like chlorophyll, I think I may harvest the main tops so I don't overdry and leave the rest in the tent for another few days, either that or put the rest of the buds in a brown paper bag to finish drying. Finished dry trimming the plant ended up with 200 grams dry weight not including trim there's another 2 ounces of trim which if you want to include that would bring the total weight from this 250W LED to 256 grams. I'm super happy with the result of this especially for my first grow and from one autoflower, it can only get better from here on out. FYI Not sure why I can't edit the lights I used but the bloomgro 600W LED is PULLING AN ACTUAL 250W FROM THE WALL so the gram/watt should be .8g/W
