


Likes
Comments
Share


@Lily_Bloom
Follow
Noticed a little late that the plant needs more water than nutrients again... Burned Frankensteins tips a little.
Likes
6
Share


@Saltoa
Follow
hello yesterday the top of my plants,they look happy .. I can water them today.I can tell the name of the song to those who are curious :)
Likes
2
Share


@fridge
Follow
end of week 1 flower | stretch is going well | no deficencies | running 80% hesi mineral scheme this time

Likes
10
Share

@420DeepGrow
Follow
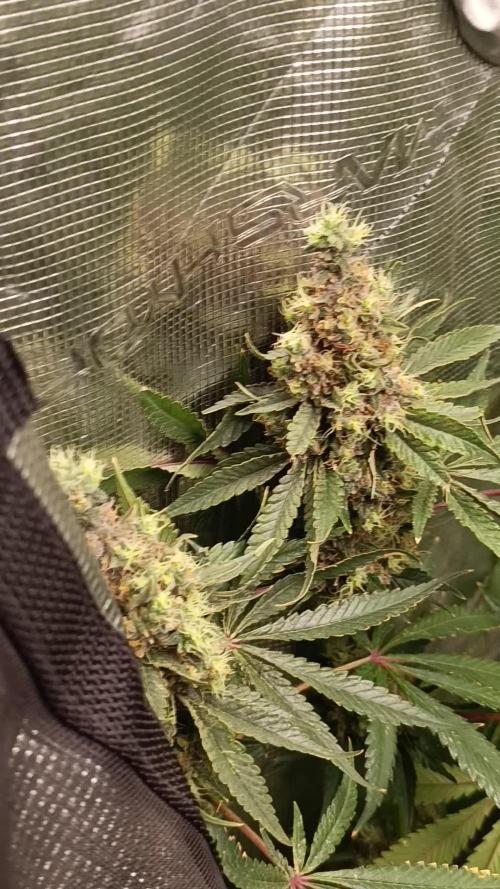
📆 Semana 12
Las dos Variegated Parmigiano de interior entran ya en la recta final, con los cogollos cada vez más compactos, pesados y cargados de resina. Los signos de maduración son cada vez más evidentes y se acercan al momento de la cosecha.
La planta de exterior continúa avanzando y desarrollando sus flores, aunque mantiene algunos erizos en los cogollos. Seguimos observando su evolución mientras las de interior terminan de madurar.
💧 Master Piece: lavado de raíces
💧 pH: 6.2–6.4
🌡️ Agua: 19–21°C
🌫️ Humedad: 40–45%
💡 Luz: PPFD 900–1000
🔥 Nota: Cambio la nutrición por Master Piece para comenzar el lavado de raíces de las plantas de interior y afrontar estas últimas etapas antes de la cosecha. La exterior continúa su desarrollo, mientras las de interior terminan de madurar y aumentar la producción de resina.
¡Seguimos creciendo fuerte! 💪

Likes
93
Share


@DreamIT
Follow
Purple Berry Kush by Spliff Seeds
🏜️4.7 Days off
🏜️5.7 🤘🦄
🏜️6.7 excellent recovery, really excellent. @weed__mee what do you think? 😁🤘🦄
🏜️7.7 Cutting done according to manual, contrary to how I act initially. patched up to the third node above and below, I await developments, today irrigated 🤘
🏜️8.7 🤘
🏜️9.7 🦄
🏜️10.7 Why do I always start so late? damn me! i'm really off with the timelines i wanted to adopt. never mind, I'll make up on the next plants worthily 🤘
__________________________________________
❓ Are you new to the world of the cultivation and don't know where to safely buy your seeds?
🦄Fast and anonymous shipping. Take a look at their very nice graphics
✅https://www.spliffseeds.nl
______________________________________________
👀 Are you looking for a good lamp to start with? 👀
🌞Viparspectra has something more than the others, take a look at their site.
⏩ Use "GDVIP" for an extra discount or "ViparDreamIT" for an extra 5 %% discount
👀 Search for it on Amazon
✅Amazon US: https://amzn.to/30xSTVq
✅Amazon Canada: https://amzn.to/38udUVe
✅Viparspectra UE: bit.ly/ViparspectraUE
👀 Watch my ViparSpectra XS1000 unboxing on YouTube, leave a like and write to the channel 🦄
✅http://bit.ly/UnboxingViparSpectraDreamIT
______________________________________________
📷🥇 Follow the best photos on Instagram 🥇📷
https://www.instagram.com/dreamit420/
🔻🔻Leave a comment with your opinion if you pass by here🔻🔻
🤟🦄💚 Thank you and enjoy the growth 💚🦄🤟

Likes
9
Share


@wheedtobeus420
Follow
Day 52 looking just beautiful I can’t even with this lady. She has impressed me every step of the way. So happy with how she is frosting up and showing out. Jeez fast buds hitting it out of the park with these original release 🔥🔥

Likes
6
Share


@Magical_Surgeon
Follow
After you found some good sector and clone it you let the mycelium grow and fill almost all the petri dish like I did last week.
So now you're ready to move forward.
Making grain spawn!🍄🍄
For grain you can use Organic Rye Berries, but you can also get away with wheat berries, or brown rice or even corn kernels(which I used myself) !
And you'll need some mason jars or honestly I used some jars that I had home just clean them very well and sterilise before using
Making a grain spawn can be broken down into 6 easy steps.
🍄Hydrate Grain By Soaking
🍄Make Specialized Lids
🍄Simmer, Drain and Dry The Grain
🍄Sterilize
🍄Put your agar in the jar
🍄Colonize
🍄Soak the grain by placing it in a bucket, covering in water, and leaving it for 12 -24 hours. Easy.
🍄Drill 1 hole on top of the lid. Right in the center and cover with a small dab of high temperature silicone sealant, and leave it overnight to dry. And your jars are done. There other diff types for different methods like liquid culture etc. But I'm just going roughly through what Ive done.
🍄The next step is to simmer the grains on the stove. This will thoroughly hydrate the grains, and will soften them to make them easier for the mushroom mycelium to consume.
Cook soaked grain on the stove for about 15 minutes. You don’t want to cook it too long, because eventually all the grain will crack and you’ll get some mushy grain spawn. We don't want that. 🧐After the grains have simmered on a low boil, you’ll need to drain them off. What I did is I drop them in the sink with the drain cover on. The grains will drain over an hour or so, after which you can go ahead and fill your jars.
🍄Once your jars are filled, they need to be sterilised.This kills off all the other nasty contaminants in the grain cover the lids in tinfoil (to prevent water dripping into the lid) and then just pressure sterilise them for about 90 minutes at 15 psi.
🍄After that let them cool down. Get your SAB, wipe down the walls with some alcohol wipes and place the jars inside. And wait untill they will be warm to the touch... not hot and painful 😤patience is key. Bring in your plates that had been stored by you in a dark place. And what u have to do is sterilise your scalpel and just accurately and efficiently decide your mycelium into about 10 pieces and quickly place them in your jar. And complete for every jar u make. You have to be very quick. The more you keep you're jar and your agar plates lids open the more cans they will get contaminated. There certain technics you can see online..
🍄Ones you're done close all your jars lids tight and Jake your jar so the mycelium pieces will mix around the jar and place them in the dark place to colonize. And just keep waiting... 😅 Untill the mycelium will conquer your grain. Keep your eyes on the jars, any weird smells or colour during the waiting time.. because that would mean you got a contamination going on. Oh yeah and when about 55% of your jar is filled with mycilium shake the sh*t out of it so it will break the mycilium inside and make spread more faster.

Likes
18
Share


@Grower_Of_Persia
Follow
week intel:
its time to harvest some of plants the ones that is mature enough. indica dominant plants will done first always so we should harvest them first
because my base nutrients and one of boosters was salt based, i'll do flushing this week to get some relieve to plants in the last days
stresses :
flushing
Drought stress via watering only one time with flushing this week
feeding:
day 1 : i flushed them with Advanced Nutrients Flawless finish and adjusted ph
day 3 : no more feeding from now on
day 5 : no more feeding from now on
guide of the week :
i harvest in 2 parts : first i harvest top of the branches and will let the lower buds to ripe another week then ill harvest the second wave.
indica dominant plants will get done 1 or 2 weeks sooner than sativa dominant plants that will often takes more than 8 weeks so be aware to harvest them sooner.
my dry and cure style is this:
3 days of hanging upside down to get water activity lower to around 0.6 in 50% humidity and 26 C temp (i know its a little high but we are in a hot summer right now and i cant get it lower even with air conditioner) and then after 3 days of drying i remove leaves and stalks, trim buds and move them to jar for the rest of their life :D . and in the first 4 days of curing i open the jar door and let hem get some fresh air in the jar for about 5 minutes and close the jar door again, after 4 days of curing like that buds are smokable but they will get better as they getting cured about 1 month.
im happy as hell with this harvest :D.

Likes
3
Share

@NyBushDr
Follow
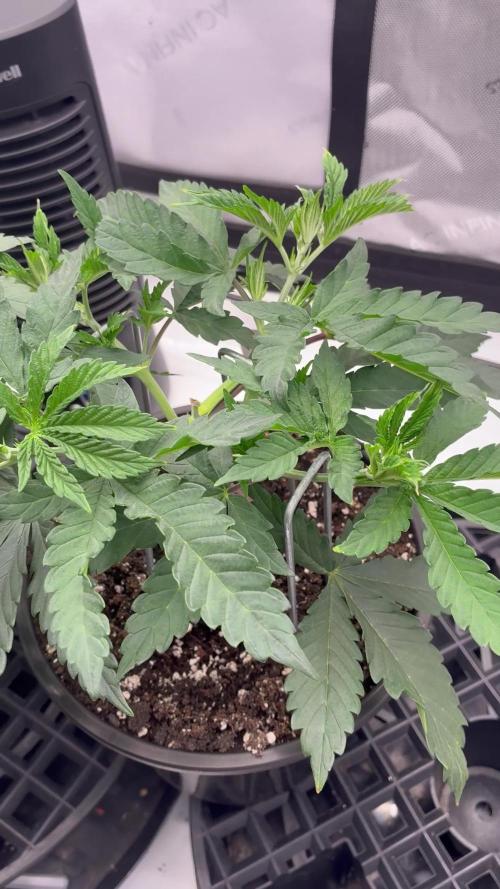
Good morning, weekly update time! We just finished up week 3 of veg as we land on day22 now. I noticed these ladies like it a little cooler as anything over 80 gives me some tacoing 🌮! I dropped lights on temp to 79 and have humidity at 70, I slowly changed vpd from .9 to 1 over the week ! The girls recovered from mainlining quickly and needed their first training, because of that I started using silica to harden up those trained mains! From here on out I’ll give fish shit and silica every other watering. The ladies got their bi weekly top dress of 1/4 cup worm castings to keep all that natural goodness working into the soil and down to the roots. I’m very happy with the way the run has progressed !
Likes
Comments
Share


@kissrubb
Follow
me encantaría escuchar sugerencia de mas gente con mas experiencia y consejos, espero os guste y muy buenos humos a todos

Likes
4
Share


@SuperGluedGrow
Follow
This week was also uneventful, growth has been slow and I'd say its half my fault with PH issues and over feeding which I'm correcting moving forward; and two unstable genetics. I dont have much info on growth patterns for this strain but its supposed to look a beautiful dark purple so I'm gonna breed a male and female hopefully. I'm also looking forward to the fourth phenos straits, I kind of hope its different just to have fourth completely unique phenos.
Likes
75
Share

@Growbody
Follow
Meine lieben Freunde und Freundinnen, Brüder und Schwestern im Geistigen und Tatkräftigen, herzlich Willkommen zum Greenhouse Summer Outdoor Grow 2026.
Der erste Strain des Outdoor Grows den ich Euch vorstellen werde ist die Purple Lemonade FF von 2Fast4Buds, eine 60% Sativa die laut FastBuds etwas nebulös als eine Kreuzung aus purple und citrus Cali Genetik beschrieben wird. Egal, sie soll sehr fruchtig und zitronig schmecken und könnte schöne Farben bekommen. Außerdem soll Sie eine kurze Blütezeit haben. Hier ist die URL:
https://2fast4buds.com/de/seeds/purple-lemonade-fast-flowering#description
Der zweite Strain der im Set mit dabei ist, ist die Mimosa x Orange Punch fem. von Barney's Farm, die ihre Genetik und den Taste bereits im Namen trägt, eine 65% Indica, die laut Barney's "ein wirklich sensationelles, zitrusähnliches und mandarinenartig-süßes Aroma" haben soll. Auch sie könnte interessante Farben bekommen. Hier die URL:
https://www.barneysfarm.de/mimosa-x-orange-punch-552
Last but not least, der dritte Strain ist die Chocolate Sherbet fem. von Grower's Choice, eine 70% Sativa, deren Eltern Chocolope x Sunset Sherbet sind. Auf den Geschmack bin ich schon jetzt gespannt, cremiges Haschisch. Mit bis zu 240cm könnte sie die größte im Greenhouse werden und würde dann bis zur Decke wachsen. Hier ist die URL:
https://www.growerschoice.nl/de/chocolate-sherbet.html#description
EDIT:
Nachdem die oben aufgeführten Pflänzchen nicht so recht loslegen wollten, habe ich mich entschlossen, fertige Stecklinge von Hanfgarten aus Österreich dazuzubestellen. Die Stecklinge kommen in die Mörtelwannen, die selbst gezogenen kommen in die bereits bewährten 15 und 20 Liter ROOTiES. So kann ich die auch mal direkt in die Sonne stellen.
Der erste Steckling ist die Blueberry von Hanfgarten, eine 80% Indica, einer Kreuzung aus Afghan Indica x (Thai Sativa x Mexican Oaxacan Sativa), die nach 8 Wochen Blüte Mitte Oktober fertig sein soll. Außerdem soll sie fruchtig, beerig und süß schmecken. Auch hier gibt es eine URL:
https://www.hanfgartenshop.de/blueberry.html
Der zweite Steckling ist die Runtz, ebenfalls von Hanfgarten, ein Hybrid aus Zkittlez × Gelato, die auch nur 8-9 Wochen Blüte hat, mal sehen. Wenn sie ein ähnliches Aroma hat wie die Wurlz bin ich happy. Die URL:
https://www.hanfgartenshop.de/runtz.html
Der dritte Steckling ist die Super Lemon Haze, eine 80% Sativa von Greenhouse Seeds, deren Genetik von Lemon Skunk x Super Silver Haze stammt. Mit 9-10 Wochen Blüte steht sie wohl mit am längsten im Greenhouse. I💖Haze und hier sind die URL's:
https://www.hanfgartenshop.de/super-lemon-haze.html
https://shop.greenhouseseeds.nl/feminised-cannabis-seeds/1-seed-pack/super-lemon-haze/?variation_id=604
Auch dieses Jahr gibt es wieder etwas Neues:
Mir ist vor einigen Wochen im Baumarkt ein Foliengewächshäuschen begegnet. Die Aussicht, meine Schätzchen immer im Trockenen zu Wissen, lies mich sofort (also sofort nach einem Recall mit meiner Liebsten) zuschlagen. Danach war nur noch ein teilweiser Umbau unseres Gartens nötig, einen kleinen Weg anders verlegen, ein Fundament ausheben, Bordsteine zersägen, 2 Zentner Beton verbuddeln, Löcher bohren, verdübeln und verschrauben ohne das der Beton ausplatzt, einen haufen Astwerk vom Wein opfern und viel Rasen neu anlegen, das war's schon fast.
Neu:
Sind auch die zwei 90 Liter Maurerbottiche, in denen sich meine Pflanzen wohlfühlen dürfen, 4x soviel Platz wie im letzten Summer Outdoor Grow. Zur Drainage habe ich Rheinkiesel 9-18 verwendet. Da drauf kam mein altes Erdmischungsrezept mit frischem Kompost von Piluweris, Lehm, den die Wühlmäuse ständig in unserem Rasen aufwerfen und Sand aus'm Kieswerk mit gaaanz viel Staub drinne, praktisch Gesteinsmehl. Auch hier gab's was Neues: Hornmehl zusätzlich, hatich früher schon verwendet und ganz vergessen. Der erste Sack Sonnenerde Hanferde wurde mit der oberen Schicht meiner Mischung vermischt. Der zweite Sack kam dann blank obendrauf.
Neu:
Für mich ist auch die angewendete Keimmethode noch neu, die Samen zuerst in einem Marmeladenglas mit temperiertem Wasser mit Zusatz von Wasserstoffperoxyd keimen zu lassen.
Neu:
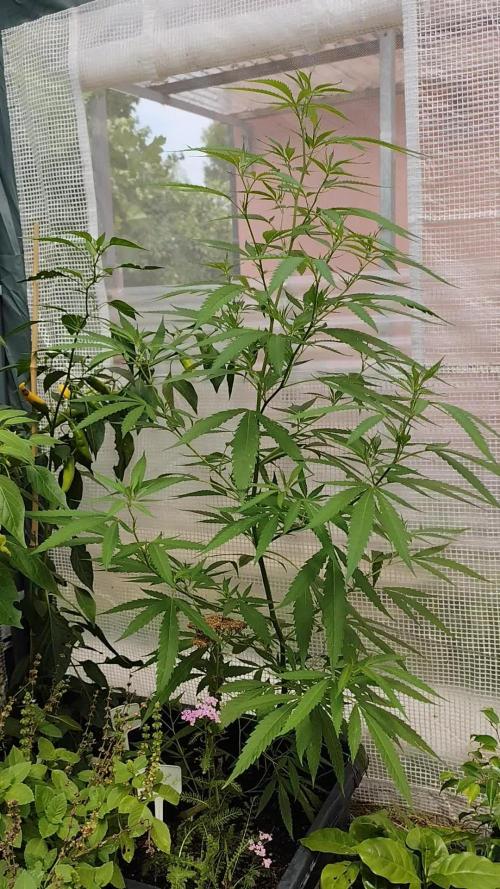
In die Wannen kommen zusätzlich Gäste als da wären erprobte und neue sowie überwinterte Chilisorten, verschiedene Basiliken oder -kums, Weiße Melisse, Roter Klee, paar Blumen und so.
Tag 99: Der Planet brennt wieder, sich tagsüber im Garten aufzuhalten, wird zur Tortour. Tagestemperatur im Greenhouse heute 34°C bei 33%, nachts empfindliche 11°C bei 92% RLF.
Tag 100: Die Minosa x Orange Punch ist jetzt auf 160 cm, die Seitentriebe haben sich schön entwickelt, sie geht deutlich in die Breite. Die Chocolate Sherbet von Grower's Choice, die Größte von allen, kommt auf 186 cm. Sie zeigt Ihre Herkunft mit langen Nodienabständen und spärlicher Belaubung. Die Purple Lemonade FF von 2Fast4Buds hat mit ihren 147 cm nochmal 11 cm zugelegt. Sie präsentiert sich sehr kräftig mir einem dunklen Laub. Bei der Hitze bekommen die drei Grazien 3x am Tag ~3 Liter Brunnenwasser. Die Blueberry von Hanfgarten ist diese Woche auf 156 cm geblieben. Die Runtz von Hanfgarten wächst weiter auf 126 cm. Die Super Lemon Haze Hanfgarten/Greenhousseeds ist mit 125 cm immer noch die kleinste im Greenhouse und hat jetzt bedeutend mehr Platz , die Aji Amarillo wurde kräftig eingekürzt. Die Temperatur ist heute auf 42°C bei 20% RLF, heiß und Furztrocken.
Tag 101: Die Temperaturen sind heute wieder heiß, 34°C bei 36%, nachts 15°C bei 92%. Die 3 Grazien werden 3x am Tag gegossen, das Greenhouse 2x. Der Bach nimmt immer weiter ab. Kurios, es gab eine Regenwolke und man sah deutlich, das es regnete, aber am Boden kamen nur vereinzelt Tropfen an. Das ganze Schauspiel dauerte nur 1 Minute.
Tag 102: Die Temperaturen Tags 32°C bei 39%, nachts 19°C bei 90% und ein paar Tropfen Regen.
Tag 103: Tags 36°C bei 41%, nachts 14°C bei 93%.
Eins kann ich versprechen: It will take a very, very long time 😃 Schön das du es bist, der mich begleitet 👍😎


Likes
23
Share


@Keengardener
Follow
Small update
Everything is going pretty well, nothing has really changed accept size.
Still feeding through the autopot system. Nutrients have been upped slightly to 3ml per litre
I think they are ready to flip over now but not sure wether to put them into a scrog for another week.
They are pretty low and bushy on there own but I’m not sure if they would benefit from a lot of defoliation and lollipopping as the plants aren’t very tall anyway.


Likes
5
Share


@Localbudz
Follow
This past week I pushed the nutrient EC value to 2.8 these plants need it! Tomorrow is the first 12/12 light cycle, will be adding Si to help with internodal spacing. Chitosal definitely sparked growth, one more foliar application before I add it to the reservoir. Am excited to see flower formation this scrog is large. Timing will be improved next time by popping more seeds to guarantee germination.


Processing
Likes
6
Share


@w00tGrow
Follow
Plant is growing good, put scrog a bit higher and waiting for its flowering, it has showed it's sex and hopefuly starts flowering at least after a week. HPS lamp is doing its job perfectly, can't wait to switch it to yelow Sodium.
Likes
13
Share


@tresplantes
Follow
Smell is Even more amazing now al swellin up pretty good
Bluezy has a lil lighter bud structure for now but started swellin up just now
Dantes Inferno has already some good nuggs
Tomb Rider is really headbound and a lil too close to the lamp
Starting to lower the EC from 3 to 2.5
Starting With fade 2 days earlier than planed will give them a 5 day flush instead of 3


Likes
1
Share


@Generix
Follow
So at the start of the week I did what everyone says not to with autos; top/fim em!! As I said this is 💯 an experiment so, why not?? The last pic and vid are 3 days after topping


Likes
18
Share


@Michigangrown95
Follow
The Bruce bangers are huge and falling under there own weight but no complaints here. They are starting to produce alot of trycomes and put on weight. I'm feeding them 600 ppm every 2 days and they could still use more just worried about burning but so far they are just hungry. I harvested the white widow girl they are hanging and will give a final harvest dry weight when they are dry. 2 of the widows got some good purple but all are fire. 🔥 thanks for looking happy growing and god bless.!

