



@Kevs_Best
Follow
KEVS_BEST – Woche 8 Blütephase (Run 3) / Week 8 Flowering Phase (Run 3)
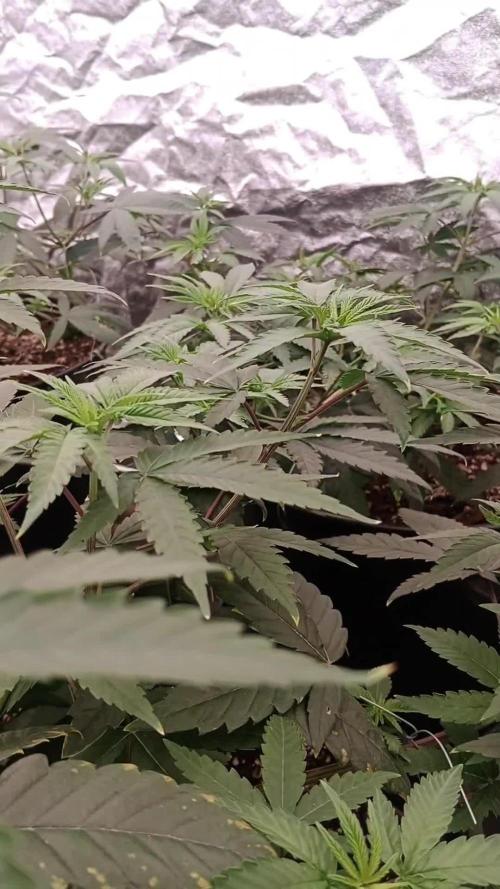
Mit dem Start der achten Blütewoche beginnt der finale Reifeprozess: Die Sherbzooka-Pflanzen zeigen nun ein deutliches Anzeichen für beginnende Seneszenz. Die Zuckerblätter beginnen sich gelblich zu verfärben, Trichome sind überwiegend milchig, erste bernsteinfarbene Köpfe erscheinen – der perfekte Moment, um gezielt Fade einzuleiten.
Die Buds haben nochmals deutlich an Volumen zugelegt, sind kompakt, klebrig und mit einer dichten Harzschicht überzogen. Der Duft ist intensiv fruchtig-süß mit säuerlichen Untertönen – ein unverkennbares Sherbzooka-Terpenprofil.
Diese Woche wird die Düngung langsam reduziert: Zu Beginn der Woche wird eine Mischung aus 50 % Core und 50 % Fade gegeben, gegen Ende steht dann nur noch Fade im Fokus, bevor in der finalen Woche komplett auf Wasser mit Cleanse & Balance umgestellt wird.
Setup:
Die Umstellung verlief bisher reibungslos – EC, pH und VPD sind konstant, kein Stress sichtbar. Die Pflanzen wirken energiegeladen und reifungsbereit.
🌱 Status: Beginn der Endreife.
🔥 Potenzial: Sehr hoch – intensive Harzproduktion, ausgewogene Struktur.
Hinweis:
Die Wochenprotokolle von Grow 1 und 2 folgen zeitnah rückwirkend – aufgrund von Zeitmangel wurden sie bisher noch nicht nachgetragen.
ENGLISH
KEVS_BEST – Week 8 Flowering Phase (Run 3)
Week 8 marks the beginning of the final ripening phase. Sherbzooka is showing clear signs of senescence: sugar leaves begin to fade, most trichomes have turned cloudy with a few amber heads appearing – the timing for the Fade regimen is just right.
Buds have swollen further, covered in a thick layer of sticky resin. The aroma profile is rich, fruity-sweet with sour undertones – a signature Sherbzooka experience.
This week starts with 50% Core / 50% Fade and will shift to full Fade by the end of the week, followed by pure water + Cleanse and Balance during the final flush phase.
Setup:
Environmental conditions remain stable, plants show no signs of stress. Maturity and resin production are peaking.
🌱 Status: Entering final ripening.
🔥 Potential: Excellent – high resin content and strong structure.
Note:
Due to time constraints, the weekly logs for Grow 1 and Grow 2 will be completed retroactively.



@pandrticka
Follow
Tento týden měním menstruaci na 12/12. Holka vypadá spokojeně.
Edit: After various problems with the timer, I switched to flowering only on the last day of the week. I'm changing it back to Growth this week.


@Lazuli
Follow
She flowered very fast. The smaller ones smell different and have more shiny flowers very nice, it smelled very strong at the end, while trimming the buds a smell of fruit and gas spread trough the whole house


@Adam420
Follow
Still growing like a monster.
60 inches/5feet finally.
Still in veg with minor small visual pistils.
Continues to show 7 inch a week growth
Back part of plant has been bent to increase sunlight spots/main tops


@nonick123
Follow
Día 8 (28/10) Subo a DLI 20
Spray solo H2O RO en el top del sustrato
Retiro la cúpula de humedad, porque una de las CBD Auto 20:1 tenia el tallo ligeramente doblado por falta de resistencia
Sin la cúpula y con el ventilador a la potencia mínima (1/10), van a tener una suave brisa que va a hacer que se fortalezca el tallo!
Día 9 (29/10) Las plantas se han estirado mucho y se tambalean un poco
Creo que deberían haber tenido un DLI más alto desde el principio!
Día 10 (30/10) CBD Auto 20:1 y LSD-25 Auto se encuentran "tumbadas" porque el tallo se ha estirado mucho!
Hago un soporte casero con una brocheta de madera + alambre + clip de enrejado para mantener los tallos verticales!
Spray solo H2O RO en el top del sustrato
Día 11 (31/10) Las plántulas se muestran verticales y felices! Una de las CBD Auto 20:1 está mostrando un desarrollo muy rápido!
Spray solo H2O RO en el top del sustrato
Día 12 (01/11) Spray solo H2O RO en el top del sustrato
Día 13 (02/11) Las plántulas se están estirando mucho! Creo que las falta DLI
Subo el DLI a 30
Spray solo H2O RO en el top del sustrato
Día 14 (03/11) Introduzco la 1ª BioTab a 5 cm de profundidad, lado derecho
1er Riego! 750 ml de H2O RO + ORGATREX 5 ml/L + BACTREX 1 g/L
💦Nutrients by Bio Tabs - www.biotabs.nl/en/
🌱Substrate PRO-MIX HP BACILLUS + MYCORRHIZAE - www.pthorticulture.com/en-us/products/pro-mix-hp-biofungicide-plus-mycorrhizae
"GDBT420" 15% DISCOUNT code for the BIOTABS Webshop https://biotabs.nl/en/shop/


@Echevarriaf
Follow
Well it seems i ran into some sort of issue and had to flush. I hope it fattens a bit more even though i feel like the issues may have something to do with the root system. I am at day 44 out f a 55-65 day flowering plant. I just hope i can get through this so that i can start flush this friday and harvest in like 2 weeks.


@Monkeyboy
Follow
Wer now at 48 day, from seed in a green house, only water from tap every day and once a week where I have saved my old coffee grounds I water them down and give a bit of that.
So nice and big and green.
Hopefully all ends well. These were meant to be 75 days seeds, if so not long now.
Angain thank you everyone for you tips and support.




@DogDoctorOfficial
Follow
💙 Project Blue Tent – Week 7
Blue Waffle F1 – Pheno A (Folder 13A)
Welcome back everyone to another week inside Project Blue Tent! 💙🌱
If you're new here, welcome aboard.
This project is all about exploring the incredible Blue Waffle F1 genetics from Zamnesia while putting the complete growing ecosystem through its paces.
Rather than documenting four plants as a single diary, each phenotype receives its own individual journey from seed to harvest. They share the same tent, the same environment, the same nutrition, the same irrigation and the same lighting.
And yet...
They still manage to tell four completely different stories.
As I always like to say:
We're not just growing plants.
We're getting to know them.
────────────────────────
🌿 Week Seven – The Final Cleanup
This week feels like a milestone.
The SCROG has done its job.
The canopy is full.
The plants have established their structure.
And now it's time to prepare everything for the next chapter...
Flowering. 🌸
Plant A is looking absolutely beautiful at the moment.
Her foliage has developed into the rich, healthy green I've been hoping to see, and the overall structure is remarkably balanced. After several weeks of gently guiding branches underneath the SCROG, we've managed to create a canopy that is surprisingly even from one side of the tent to the other.
At approximately 60 cm, she's sitting comfortably within the space we've created for her.
And although she could certainly continue growing vegetatively, I don't want to simply keep filling the tent with more and more foliage.
At some point, you have to stop building the canopy...
...and start preparing it for what comes next.
That's exactly where we are now.
────────────────────────
🕸️ From SCROG to Flower
Over the last couple of weeks, the SCROG has completely changed the way these plants occupy the tent.
Instead of allowing individual branches to dominate vertically, we've been gently guiding them horizontally beneath the screen.
The result is exactly what we were looking for:
A broad, relatively even canopy with many developing tops sharing the available light.
SCROG isn't about forcing a plant into submission.
It's about working with its natural growth and redistributing that growth across the available space.
And looking at the tent now...
I'd say the mission has been accomplished.
The screen is filled.
The plants have claimed their territory.
Now we need to create the best possible starting point for flowering.
Which brings us to this week's main job.
────────────────────────
✂️ Defoliation – Cleaning Today for a Better Tomorrow
This week we're performing a deep, purposeful defoliation across the canopy.
For anyone unfamiliar with the technique, defoliation simply means selectively removing leaves from the plant.
But it's important to understand what defoliation isn't.
It isn't stripping a plant bare.
It isn't removing leaves just because they're in the way.
And it isn't something that should automatically be performed every week.
The purpose is to improve the structure we've already created.
After several weeks of SCROG training, there is now a tremendous amount of foliage packed into a relatively small space. While those leaves are essential during vegetative growth, too much overlapping foliage can eventually create unnecessary congestion inside the canopy.
So we're removing selected leaves that are:
• Blocking developing growth
• Creating unnecessary overlap
• Restricting airflow through the interior
• Shading lower areas that we've decided to retain
• Or simply no longer contributing enough to justify occupying that space
The goal isn't to make the plant look empty.
The goal is to make the plant efficient.
────────────────────────
🌬️ Why Defoliate Before Flower?
Timing is everything.
We're doing this now because the plants are still in vegetative growth and have time to recover before we ask them to transition into flowering.
Defoliation is a form of stress.
Even when performed carefully, removing a significant amount of foliage temporarily changes the plant's balance between its leaves, roots and growing points.
That's why I don't want to perform a major cleanup deep into flowering unless there's a very good reason.
Right now, the plants can take that short period of recovery while they're still operating under an 18/6 light schedule and actively producing new vegetative growth.
After the cleanup, we'll give them time to recover, settle and rebuild their foliage before flipping the lights.
The idea is simple:
Stress now.
Recover now.
Flower later.
Rather than asking the plant to simultaneously deal with a major transition into flowering and a significant amount of pruning, we're separating those events.
One step at a time.
That's especially important in a project like this, where I'm trying to observe the plants rather than simply push them as hard as possible.
────────────────────────
🌿 Plant A – Looking Better Than Ever
Plant A continues to impress me.
The first thing that stands out this week is the colour.
That slightly lighter appearance we saw earlier in the grow has completely disappeared. The foliage is now displaying that rich, healthy green that tells me the current nutritional strategy is working extremely well.
She's vigorous without looking excessive.
Healthy without showing signs of nutritional stress.
And most importantly...
She's balanced.
Her branches have responded beautifully to the SCROG, and the canopy has developed into a very usable structure for flowering.
This is one of those moments where you can look at the plant and realize that the weeks of small adjustments have finally come together.
The topping.
The recovery.
The daily SCROG work.
The irrigation.
The feeding.
The environmental stability.
None of those things created this canopy by themselves.
They're all pieces of the same puzzle.
────────────────────────
💧 The Drip Irrigation System
One of the things I have become particularly impressed with during this project is the automatic drip irrigation system.
It's working beautifully.
With the plants now drinking more consistently and the canopy becoming increasingly demanding, having a reliable irrigation system makes maintaining uniformity across the tent considerably easier.
Each plant is currently receiving approximately 1.2 L per 24 hours, delivered through the drip system.
And the plants are clearly enjoying the consistency.
One of the advantages of automated irrigation isn't simply saving time.
It's repeatability.
Instead of relying on every watering being manually performed at exactly the same interval and volume, the system provides a much more consistent routine for the plants.
That consistency becomes increasingly valuable as the root systems develop and the plants transition toward flowering.
So far...
The system is doing exactly what I wanted it to do.
And honestly, watching four plants respond so uniformly to the same irrigation strategy has been one of the most satisfying parts of this project.
────────────────────────
🥥 Feeding Program
The feeding recipe remains unchanged this week.
And for now, I don't see a reason to interfere with something that is clearly working.
Current nutrition:
• Plagron Hydro A — 1.9 ml/L
• Plagron Hydro B — 1.9 ml/L
• Plagron Hydro Roots — 1 ml/L
Current EC remains approximately:
1.92 mS/cm
with the solution maintained around 18°C and pH at 5.8.
The plants are showing excellent colour, strong growth and healthy leaf development, so I'm perfectly comfortable maintaining the current recipe for now.
We may increase the nutritional strength next week depending on how the plants respond after defoliation and as flowering approaches.
But that's exactly why I don't like changing several variables at once.
First, we observe.
Then we adjust.
The plants will tell us what they need.
────────────────────────
🌡️ Environmental Conditions
The Blue Tent continues to remain remarkably stable.
This week's average conditions were:
• 🌡️ Day Temperature: 28°C
• 🌙 Night Temperature: 27°C
• 💧 Relative Humidity: 65%
• 🥥 Substrate Temperature: 24°C
• 💦 Nutrient Solution: 18°C
• ⚗️ pH: 5.8
• ⚡ EC: 1.92 mS/cm
• 💨 CO₂: approximately 450 ppm
• 💡 Light Schedule: 18/6
• 💧 Irrigation: approximately 1.2 L/plant/24h
• ? Pot Size: 8 L
• 📏 Plant Height: approximately 60 cm
The plants are continuing to respond beautifully to these conditions.
The root-zone temperature remains particularly stable, irrigation is consistent, and the canopy has enough air movement to support vigorous transpiration.
As we move toward flowering, environmental management will become even more important.
The room we've created now needs to support not only vegetative growth...
...but the much denser flowering structure that is coming next.
────────────────────────
🌬️ Why the Cleanup Matters
One of my main objectives with this defoliation isn't simply aesthetics.
It's airflow.
When four vigorous plants completely fill a 100 × 100 × 200 cm tent, the amount of foliage inside that space becomes considerable.
From above, everything can look absolutely perfect.
But underneath that beautiful canopy is another story.
Leaves overlap.
Branches cross.
Interior spaces become crowded.
Air needs to move through all of that.
By selectively removing excess foliage now, we're opening those internal spaces before flowering begins.
That gives us a cleaner structure going forward and makes it much easier to inspect the plants, maintain airflow and monitor the developing flowers.
This is also one reason I'm much happier doing the major cleanup before the flip rather than waiting until the plants are deep into flowering.
Once flowering begins, the priorities change.
I want the plant concentrating its energy on developing flowers rather than repeatedly recovering from major structural work.
So we're preparing the room now.
Clean canopy.
Good airflow.
Healthy structure.
Then...
Flower.
────────────────────────
🧠 Defoliation Isn't About Removing Leaves
One of the biggest misconceptions surrounding defoliation is that more leaves automatically means a worse plant.
That's not true.
Leaves are incredibly important.
They're the plant's solar panels.
They capture light and help drive photosynthesis.
So the objective should never be:
"How many leaves can I remove?"
The better question is:
"Which leaves are no longer contributing enough to justify occupying this space?"
That's the philosophy I'm following here.
We're not trying to weaken the plant.
We're trying to improve the relationship between:
Light → canopy → airflow → growing sites.
And because we've already spent weeks creating the structure with SCROG, this cleanup is simply the final refinement of that work.
────────────────────────
🌱 Plant A's Personality
Every phenotype continues to develop its own personality, even when all four plants are living under almost identical conditions.
Plant A has consistently been one of the more balanced girls in the tent.
She doesn't appear interested in becoming the biggest plant in the room.
Instead, she seems much more interested in becoming an efficient one.
Her growth is structured.
Her canopy is balanced.
Her foliage is beautiful.
And after weeks of training, she has settled into the SCROG extremely well.
Now, after today's cleanup, she looks almost like a different plant.
Less crowded.
More open.
More organized.
And ready for the next chapter.
That's the part of growing I really enjoy.
You spend weeks slowly building something...
Then one day you step back and suddenly realize:
It all came together.
────────────────────────
👀 Looking Ahead
The next few days will be about one thing:
Recovery.
No unnecessary training.
No chasing perfection.
No constantly changing the environment.
Just observation.
The plants have been through topping.
They've been trained beneath the SCROG.
They've filled the canopy.
And now they've received their final major vegetative cleanup.
So we're going to let them breathe.
Let them recover.
Let them continue growing.
And then, assuming everything continues to look as good as it does today...
we flip the Blue Tent into flower. 🌸
This is the point where all those weeks of preparation finally start paying off.
The screen is full.
The structure is ready.
The plants are healthy.
Now we just need to let them do what plants do best.
Grow.
────────────────────────
💙 Thank You
A huge thank you to Zamnesia for making Project Blue Tent possible, from these fantastic Blue Waffle F1 genetics to the complete ecosystem surrounding this grow.
A massive thank you to Plagron for providing the Premium Growbags together with the Hydro nutrient line, which continues delivering excellent results and beautifully healthy growth.
A special thank you to Mars Hydro for the drip irrigation and automatic drainage system. After watching these plants respond to the consistency of automated irrigation week after week, I'm genuinely impressed with how well the system is performing.
Thank you as well to GrowDiaries, for giving growers around the world a place to document their journeys, exchange knowledge and learn from one another.
And finally...
Thank you to everyone following Project Blue Tent.
Every comment, every question, every bit of feedback and every person simply stopping by to see how these four phenotypes are developing means more than you probably realize.
We've spent weeks building this canopy together.
Now the really exciting part is about to begin.
The plants are cleaned.
The SCROG has been filled.
The room is ready.
Flower is next. 🌸💙
Until next week...
Growers Love, happy growing, and take care everyone! 🌱💙


@Growedbypepper
Follow
Tenemos otra semana más de nuestras godberries se ha visto un poco afectada por el clima actual como lo pueden ver en el video
Ya entrando en esta semana aún nos faltan 3 semanas de floración esperemos que el clima mejore y no afecte nuestra cosecha …. Saludos cultivadores … buenas cosechas para todos 🔥🔥 pdta vi que estaban muy caídos los copos debido a su peso y compresión entonces amarre un poco para que capten mejor la luz y tengan un mejor desarrrollo en esta etapa


@GrowinHome
Follow
Plants are looking happy and healthy.
The worms are also still alive.
Ive started tot give the plants 6 liters of water every 4-5 days. Because i'ts such a big container the soil needs alot more time to dry out. Since I started giving bigger amounts of water I see much more worm activity in the top layer of the soil.


@GreeneScene
Follow
Week continued pony-tailing tops until the middle of the week some tops outgrew the ties . She’s grown back week after that defoliation . I’m proud of her she’s almost 1 ft tall 😂. Shes truly a shrub like plant now. We’re waiting for those dry amendments to become available to her and are hopeful for the next 4 weeks to be explosive in uniform growths across the canop


@Kurow
Follow
Very optimal setup for everything so far. you can really tell the first sprout apart right now because of the second set coming in. Can’t wait to start using nutrients soon!



@Brujha77
Follow
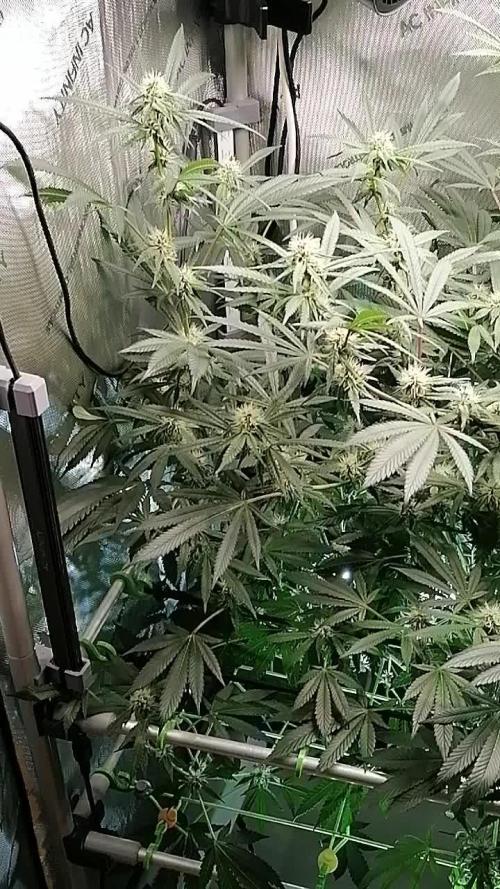
Beginn Woche 5 Blüte
Aktuell nix zu machen außer Gießen.
Ab und an kommen die Sonnensegel weg ansonsten läuft alles bestens. Strech scheint fertig zu sein und die Bud's legen langsam zu. Auch der erste Frost ist zu sehen🍀👍
Heute gab es auch wieder 3l Wasser mit Green Bull.
Bin noch immer am Überlegen nochmal einiges unten raus zu nehmen.. Aber will die Dame auch nicht allzusehr stressen..
Mal schaun.
Werte sind aktuell ca. 1000ppfd bei nem Vpd von 1.3kpa.



@Chubbs
Follow
420Fastbuds-Week 6
What up, fam. Weekly update on the Photoperiod Femenized strains. GorillaMelon,RainbowMelon,
LemonManderian,LemonPaya,PapayaSherbet, and some FastFlowering GG4/Sherbet.
For just putting them outdoors 3 weeks ago, they've adjusted to the heat like a dream mid 90's and tripled in size. To think there's probably 4 more weeks of veg. These are going to get big. I might have to raise up the greenhouse or make it a convertible. I'm still just feeding well water, probably 2 liters, each straight from the hose daily. All in all Happy Growing.


@DogDoctorOfficial
Follow
Quick recap — seed to now (for anyone joining late)
• 🌱 12/12 from seed
• LSD genetics showing consistency and vigor
• Early structure set without aggressive training
• Environment prioritized over chasing charts
• Feed increased gradually, never pushed
• Plants transitioned naturally into flower
• Defoliation timed after structure was established, not before
This is calm, intentional growing. No panic moves.
Why we changed nothing (and why that’s not doing nothing)
Your room conditions:
• 🌡️ Day temp: ~28 °C
• 💧 RH: ~65%
• ⚡ EC: 2.4
• pH: 6.5
• 📏 Height: ~40–80 cm
• 💡 LED lighting
On paper, some growers would panic at 28 °C in flower.
But here’s the key difference between growing by numbers and growing by understanding:
Under LED, leaf temperature ≠ room temperature.
LEDs don’t radiate infrared heat like HPS. So while the wall sensor says 28 °C, the leaf surface is usually 2–4 °C cooler. And the plant does not “feel” the room — it feels its own leaf temperature.
That’s where leaf VPD comes in.
⸻
Leaf VPD — the part most people skip
VPD (Vapor Pressure Deficit) is simply the difference between how much moisture the air can hold and how much it actually holds.
But here’s the nuance most charts miss:
• Room VPD is calculated with room temp
• Leaf VPD is calculated with leaf temp
So if:
• Room = 28 °C
• Leaf = ~24–26 °C
• RH = 65%
👉 our leaf VPD lands right in the comfort zone for early–mid flower.
And the plants are confirming that with their behavior:
• Deep, relaxed green
• No tacoing, no praying too hard
• Internodes strong and structured
• Uniform nutrient uptake across phenotypes
That’s the real data.
We’re not ignoring numbers
We’re letting the plant be the final authority.
Stability here beats “fixing” something that isn’t broken.
⸻
Defoliation — why this time was heavier
Let’s be very clear:
This was not aesthetic defoliation.
This was functional defoliation.
Context matters:
• 🏠 8×8 room
• 🌱 ~27 plants
• 🌬️ Airflow, light penetration, humidity pockets all scale differently
Sometimes a single plant wouldn’t “ask” for leaves to be removed —
but the room does.
Why you defoliated:
• Improve airflow through a dense canopy
• Reduce micro-humidity pockets
• Allow photons to travel deeper, not just hit the roof
• Reset apical dominance and refocus energy on flowering sites
Yes — i went harder than originally planned.
But:
• Genetics are strong
• Plants are healthy
• Root zone is dialed
• Feed is stable
Healthy plants recover fast.
Stressed plants don’t.
These girls are the first category.
And importantly: we didn’t stack stress.
No feed change. No environment change. No light shock.
That’s how we “go hard” safely.
What to expect next week (and what not to expect)
Expect:
• Slight pause as plants redirect energy
• Fresh flower site definition
• Upright posture returning after defoliation
• Strong tops responding to improved light access
Do NOT expect:
• Explosive vertical stretch (that window is closing)
• Deficiency symptoms (unless something external changes)
• Need for immediate correction
Next week is observation week again.
Hands in pockets. Eyes open.
⸻
Gratitude — because this matters
Let’s say it properly:
• Thank you to GD for the platform
• Thank you to the GD community
• Thank you to the Discord family
• Thank you to the OGs, the new faces, the quiet readers
• Thank you to the lovers and the haters — both keep the wheel turning
• Thank you to the sponsors, past and present
• Thank you to everyone who believes growing can be calm, thoughtful, and honest
This is a special report — because it’s not about hype.
It’s about trusting the plant and respecting the process.
📡 Please stay tuned.we never quit https://www.youtube.com/@DOGDOGTHEDOCTOR NEW
🙏 Thank you for your patience and continued support.
FOR DISCOUNT CODES AND MORE JUST FOLLOW THE LINK https://website.beacons.ai/dogdoctorofficial
📲 Don’t forget to Subscribe and follow me on Instagram and YouTube @DogDoctorOfficial for exclusive content, real-time updates, and behind-the-scenes magic. We’ve got so much more coming, including transplanting and all the amazing techniques that go along with it. You won’t want to miss it.
GrowDiaries Journal: https://growdiaries.com/grower/dogdoctorofficial
Instagram: https://www.instagram.com/dogdoctorofficial/
YouTube: https://www.youtube.com/@dogdoctorofficial Deleted by Youtube
Vimeo : https://vimeo.com/dogdoctorofficial Under construction stay tuned ⸻
Explore the Gear that Powers My Grow
If you’re curious about the tech I’m using, check out these links:
🔆 Lighting & Environmental Control
• Future of Grow — Advanced LED lighting technology
https://www.futureofgrow.com/
DISCOUNT CODE: DOG20
• Lumiflora — Under-canopy LED lighting
https://lumiflorade.com/
• TrollMaster — Environmental controllers and automation gear (past collaboration)
⸻
Genetics
• Zamnesia Seeds — Genetics used in this project
https://www.zamnesia.com/
⸻
🌱 Soil, Substrates, Boosters & Root Support
• Plagron — Substrates, bio mixes, and supportive products
https://plagron.com/en/
⸻
🎒 Storage, Curing & Preservation
• Grove Bags — Curing and storage solutions
https://grovebags.com/
⸻
📸 Photography Equipment & Tools
(Not sponsors, but part of my creative toolkit)
• Sony A6700
• Sony full-frame macro lens + few more
• Stacking photography workflow - learning
• iPhone (for behind-the-scenes shots)
We’ve got much more coming as we move through the grow cycles. Trust me, you won’t want to miss the next steps, let’s push the boundaries of indoor horticulture together!
As always, this is shared for educational purposes, aiming to spread understanding and appreciation for this plant. Let’s celebrate it responsibly and continue to learn and grow together.
With true love comes happiness. Always believe in yourself, and always do things expecting nothing and with an open heart. Be a giver, and the universe will give back in ways you could never imagine.
💚 Growers love to all 💚
📸 P.S. – The Eye Behind the Lens
All photos in this diary (for now — except for the ones showing the camera, which I took with an iPhone) are taken with a Sony A6700 paired with a Sony full-frame macro lens and a few more.
Photography is part of the story — it’s how we share the fine textures, the glow, and the quiet details that words can’t always capture.
I’ve also started experimenting with photo stacking — a technique where multiple images, each taken at a slightly different focus point, are layered together to create one perfectly sharp image from front to back.
It’s not digital enhancement or AI; it’s pure photography — a way to reveal the plant’s beauty in microscopic depth, from trichome to petal.
You’ll even see a few shots of "ghost me" capturing the shots — camera, lens, setup — because every grow deserves not just to be cultivated, but documented like art.
FOR DISCOUNT CODES AND MORE JUST FOLLOW THE LINK https://website.beacons.ai/dogdoctorofficial
NEW DISCORD - Official Server Invite Link : https://discord.gg/ksjAkA5T74


@Maincard
Follow
Soaked in distilled water for 24 hours and planted in the ground In a few hours they were out. Watered every other day with 0,1 l


@Jardineiro_Br
Follow
Reduzi um pouco os fertilizantes e parei de subir o PH , as plantas reagiram bem e as manchas sumiram. As cores estão vindo a menor esta com 35 cm , a mais colorida com 56 e a maior que as cores estão começando a aparecer esta com 64 cm.


@eldruida_lamota
Follow
Vamos familia, volvemos con las candy caramelo y es que pronto nos pedirán un trasplante y con este caos veremos cómo conseguimos sustrato.
Ph controlado a 6,5 siempre hay que controlar este parámetro.
Temperatura y humedad correcta En la 2 semana de crecimiento.
Os dejo la web y el código para compras en mars hydro.
web: http://bit.ly/2uJAjgy
ts600: http://bit.ly/3cnv0Ev
code: an420
Ya tengo ganas de ver como florecen estas niñas en las próximas semanas las vemos un saludo fumetillas.
