
Likes
Comments
Share

@shwable
Follow
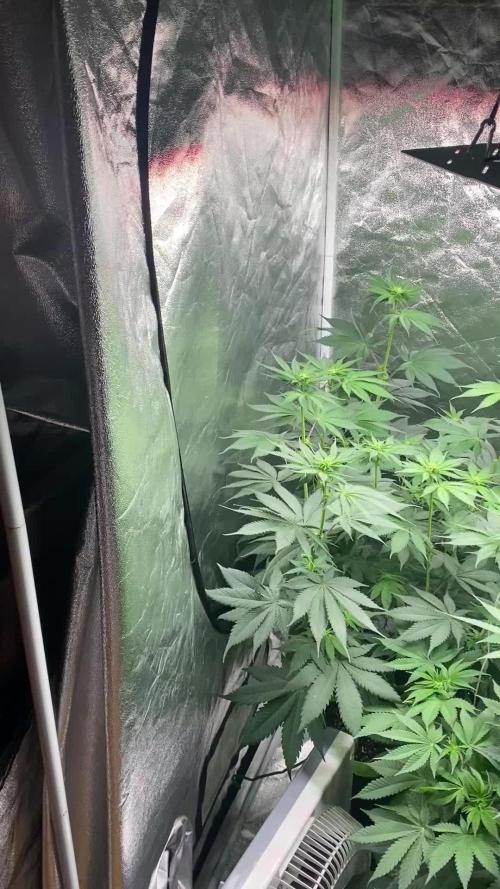
Week 8
Stretch is going good still and the flowers start to form, can't wait to smell the terps!


Likes
17
Share


@Grow_Mary_Green
Follow
Hi meine lieben, 🤗
Die 2. Woche der Wachstums-Phase steht an...
...und die realität schlägt zu.
Hatte versucht diesen Run mit einem höheren VPD-Wert und dadurch ohne zusätzliches CalMag hinzufügen zumüssen, laufen zulassen. Da laut einer Studie, man durch einen erhöhten VPD, kein zusätzliches CalMag unter LED's hinzugefügt werden müsste. Allerdings gieße ich noch mit Leitungswasser.
Also hatte ich mir mal die werte meiner Stadtwerke angeschaut. Und in meinem Wasser habe ich Calcium = 78 mg/l und Magnesium = 5,3 mg/l und somit ein verhältnis von 14:1😰. Was von einer Optimalen versorgung von 2:1 - 4:1 CalMag etwas entfernt ist... 😅
Beste Lösung wäre ein Filtersystem wie der Watertrim zu nutzen. Günstiger ist es Mono-Magnesium (oder bei bedarf Mono-Calcium) zu besorgen und das Wasser im richtigen Verhältnis auszugleichen.
_________________________________________________________
Optimale CalMag-Versorgung in den einzelnen Phasen:
Sämling:
Cal: 50-60 mg/l
Mag: 20-30 mg/l
Wachstum:
Cal: 80-100 mg/l
Mag: 30-50mg/l
Blüte:
Cal: 100-120 mg/l
Mag: 40-60mg/l
______________________________________________________________
Wie mein Ablauf in dieser Woche genau aussah, habe ich auch diesmal für uns Dokumentiert. Ich wünsche dir viel Spaß & Happy Growing 🌱🤗:
_______________________________________________________________
Umgebungswerte der Woche:
- Temperatur: 25°C
- Luftfeuchtigkeit: 65%
- VDP (Room): 1,1
_______________________________________________________________
Tag 8:
- Nur beobachtet 😋
Tag 9:
- Pflanzenhöhe gemessen: 17 cm 🌱
- Stamm-Durchmesser gemessen: 0,48cm = 4,8mm Ø
- Licht Intensität eingestellt - PPFD: 310µmol / DLI: 20 Mol
Tag 10:
Bewässert 👇 (Leitungswasser):
- Volumen: 1000ml
- PH-Wert: 6,15
- EC-Wert: 0,46
- Temperatur: 20°C
Run-Off (Drain) gemessen 👇:
- PH-Wert: 6,5
- EC-Wert: 3,6
- Temperatur: 21°C
- Volumen: 350ml
Tag 11:
- Nur beobachtet 😋
Tag 12:
Bewässert 👇 (Leitungswasser):
- Volumen: 1000ml
- PH-Wert: 6,1
- EC-Wert: 1,52
- Temperatur: 20°C
Run-Off (Drain) gemessen 👇:
- PH-Wert: 6,6
- EC-Wert: 3,1
- Temperatur: ca. 22°C
- Volumen: 280ml
Pflanzen Training: Fimming, Vor-Lollipopping
Lampenabstand eingestellt: 50cm
Licht Intensität eingestellt - PAR - PPFD: 280 µmol / DLI: 18,2 Mol
Pflanzenhöhe gemessen: 20cm 🌱
Tag 13:
- Nur beobachtet 😋
Tag 14:
Bewässert 👇 (Leitungswasser):
- Volumen: 1200ml
- PH-Wert: 6,1
- EC-Wert: 0,48
- Temperatur: 21°C
Run-Off (Drain) gemessen 👇:
- PH-Wert: 6,38
- EC-Wert: 2,5
- Temperatur: 21°C
- Volumen: 360ml
Pflanzenhöhe gemessen: 24 cm 🌱
Stamm-Durchmesser gemessen: 0,70cm = 7,0mm Ø
Lampenabstand eingestellt: 40 cm
Licht Intensität eingestellt - PPFD: 340µmol / DLI: 22 Mol

Likes
13
Share


@knicko
Follow
Als die Jiffys durchgewurzelt waren habe ich sie in 1.2L töpfe umgetopft.
Gieße sie alle 2 Tage mit 180ml.
Nur wasser da ich BioBizz AllMix Erde habe.

Likes
19
Share


@Ryder
Follow
Another week in the books and they seem to be maturing fast. Added some sweet candy and bud explosion by Greenleafnutrients @ 1 gram per 4 litres for each. Today I noticed some very small white pests on top of the pot, i only noticed when i watered as thats when they started moving about. Plants seem fine and with only a few weeks to go im not sure if I could or if its worth trying to treat it, guess ill just let the plants tell me....thanks for stopping by....✌️

Likes
15
Share


@BruWeed
Follow
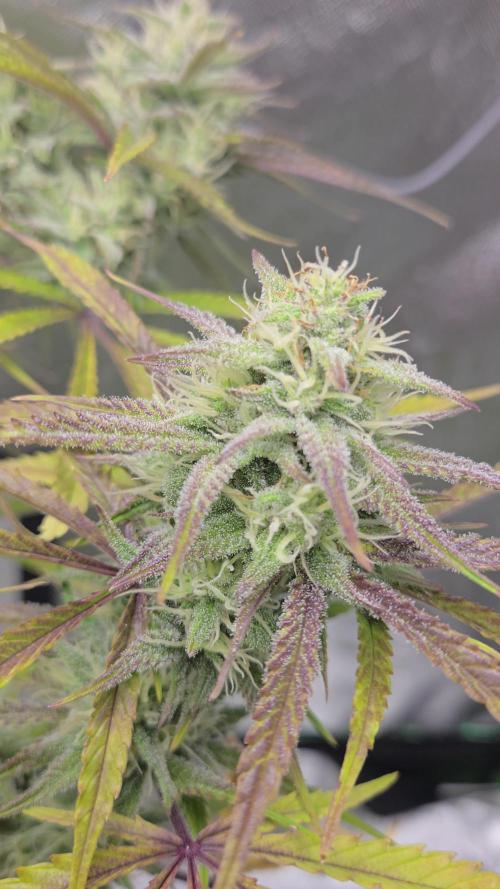
🍀18/07 - Empieza su octava semana en etapa de floración.
🍀Tiene un aroma muy dulce, como si fuera caramelo, es increíble el olor que larga y la cantidad de tricomas, todos se encuentran color blanco.
🍀Ya le agregue Top Wash de Top Crop para que pueda realizar un buen lavado de raiz. Le agregue 30L de agua para que pueda limpiarse correctamente ya que la maceta que utilizo es de 10L.
🍀Es la primera vez que cultivo una planta muy power, en persona parece como si estuviera bañada en nieve.
🍀Hoy esta cumpliendo 104 dias de vida desde su germinación hasta ahora.
🍀Tengo pensado que entre el jueves y el viernes ya podarla para que entre en etapa de secado.
🍀Subi varias imagenes, hay algunas con microscopio y videos.
🍀En estos dias estare subiendo mas contenido de como se encuentra.
🍀🇦🇷😶🌫️Podes seguirme en Insta gran como @bruweed_arg🍀🇦🇷😶🌫️

Likes
5
Share

@Ribemarti
Follow
LAS PLANTAS ESTAN CRECIENDO MUY BIEN, LAS TEMPERATURAS AHORA DE DIA ESTAN ENTRE 25 Y 32 GRADOS Y POR LA NOCHE BAJAN HASTA 16
ESTOY REGANDO CON 2 LITROS CADA PLANTA YA LES QUITE EL PRIMER NUDO BAJERO, VALORARE ESTA SEMANA SI QUITO ALGUNO MAS, O YA NO PODAREMOS
PROXIMO RIEGO YA SERA CON LOS ABONOS DE FLORACIÓN
EN EXTERIOR ES MUY IMPORTANTE UNA PREVENCION PARA NO RECIBIR PLAGAS, YO UTILIZO ACEITE DE NEEM
Likes
4
Share


@IndianaGrow
Follow
The girls are picking up on growth now and getting bigger and bigger everyday, look like the Zkittlez XL are growing so much better as it growing in the fabric pots better oxygen going through the root now its the end of week 3. It time to cook up some compost tea to feed these girls before they going in to the flowering stage after next week

Likes
8
Share


@Chubbs
Follow
420Fastbuds-Week 6
What up, fam. Weekly update on the Photoperiod Femenized strains. GorillaMelon,RainbowMelon,
LemonManderian,LemonPaya,PapayaSherbet, and some FastFlowering GG4/Sherbet.
For just putting them outdoors 3 weeks ago, they've adjusted to the heat like a dream mid 90's and tripled in size. To think there's probably 4 more weeks of veg. These are going to get big. I might have to raise up the greenhouse or make it a convertible. I'm still just feeding well water, probably 2 liters, each straight from the hose daily. All in all Happy Growing.
Processing
Likes
52
Share


@HazeyBobby
Follow
The week starts Monday Jan-27, being day 27 of flowering.
Plants are looking very good and healthy, albeit some bigger buds at this stage is missing.
Carried out more minor defoliation, only trimming fan leaves on one side of a bud site in alternate fashion. Strategy is to expose more bud sites to light. Leaves are getting sticky and glistening brightly.
The canopy has a few branches stretching out typical of Sativa genetics. Hoping the bud sites grow bigger soon filling up the space.
Feeding a high EC nutrient mix whilst monitoring run-off EC which remains below feed EC.
Light is maintained at 30cm above the canopy, with daily fertigation at lights on - watering just under 3L per day. Maintaining an average RH in the space at 50%.
---- updates for prior 4 weeks --------------------------------------------------------------------------------------------------------------------------------------------------------------------------------------
-----------------------------------------------------------------------------------------------------------------------------------------------------------------------------------------------------------------------
The week starts Monday, Jan-20 still flowering away.
Bud sites are beginning to take form and the ScrOG setup looks full, ready for the development of some large buds.
Removed a few more leaves from above the canopy which were blocking bud sites below. Also cut small stems (with bud sites) below the canopy from both plants which were unlikely to grow strong. It's now looking clearer below the canopy.
The canopy is still thick with beautiful luscious green leaves typical of an Indica. Run-off EC has been slowly rising over the weeks but still under the feed EC - will be keeping my eyes on this.
Light is maintained at 30cm distance from canopy, with daily fertigation at lights on - watering almost 2.5L per day. Maintaining an average RH in the space at 50%.
-----------------------------------------------------------------------------------------------------------------------------------------------------------------------------------------------------------------------
The week starts Monday, Jan-13 in flowering stage.
The plant is growing thick and fast, with very short node intervals creating a thick canopy.
Carried out substantial defoliation of almost all the big fan leaves and a few little stems that were not likely to make it above the canopy. Avoided defoliating the major cola branches. This encourages the plant not to waste resources on a node which is only going to produce “popcorn” buds.
The plants reacted well to the defoliation and were looking good by the end of the light cycle for the day. The net is completely full and this will be the last week of applying any LST as part of the ScrOG setup.
Light is maintained at 30cm distance from canopy, with daily fertigation at lights on - watering almost 2.5L per day. Lowered the average RH in the space to 50%.
-----------------------------------------------------------------------------------------------------------------------------------------------------------------------------------------------------------------------
The week starts Monday, Jan-06 in flowering stage.
The net is filling up nicely with the ScrOG process being enjoyable - just tucking branches nicely under squares once stretched enough. The Indica dominant strain is really shining with incredible dense growth and thick branches that don't bend as easily as it's Sativa neighbour.
Light is maintained at 30cm distance from canopy.
-----------------------------------------------------------------------------------------------------------------------------------------------------------------------------------------------------------------------
My grow setup includes;
- Secret Jardin DS120W tent (120cm x 60cm x 180cm) placed inside the bedroom. Passive intake of air is from a closed off section of the room where the central heating boiler sits - the intake is warm air (20 degC.) and fairly dry (40% RH) during the winter months.
- Mars Hydro SP250 LED light
- extraction fan - AC Infinity Cloudline T6
- ventilation fans
- aquarium heater
- small oil heater
- small dehumidifier
- 20L Airpots and 3.5L general pots for seedling stage
- Canna Coco substrate and nutrients
- pH and EC/TDS meters
- Thermo/Hygro meter
Likes
32
Share


@Hawkbo
Follow
Harvested one last night on 6.17 the other got last watering today. The nugs are real solid I like the purple tint and the smell is strong.These came out much better compared to my last ones.
Likes
3
Share


@RandA
Follow
Ciao a tutti, dopo 4GG le bimbe sono esplose! Grazie al Rizhotonic aggiunto sia in terra sia per via fogliare. Ho evitato di fertilizzare con BioVega in quanto ho utilizzato il terriccio Biocanna che lo è gia. Attendo impaziente!😛😎
Giorno 14-03 le bimbe si presentano omogenee e forti, non rilevo nessuna carenza, continuo ad aggiungere il Rizhotonic e annaffio solo con acqua.
Giorno 16-03 2ml di Rizhotonic per via fogliare.
Giorno 17-03 passo alla 600 HPS per la fioritura, ho aggiunto 2ml di BIOVEGA la temperatura è stabile a 26.5C.
Likes
3
Share
@Olduffybastard88
Follow
We are moving back inside so I can flower the plants on12/12 cleaned them up nicely with all lower shots removed haven't had 1 problem with these plants they pretty much taking care of themself and have big nice chunky stocks

Likes
37
Share


@Reyden
Follow
Non pensavo che queste Fast Flowering potessero crescere così velocemente! E sono curioso di vedere come prenderanno spazio le radici ora che le ho travasate nei loro vasi finali! Anche qui le piccole macchie sulle foglie sono di zeolite pure 10 micrometri di Dogma Organics e il terriccio è stato preparato con il loro 4 componenti Super Soil che è una vera bomba…diversi guani, letame bovino, micorrize, vermi compost arricchito con acidi umici e fulvici, Cal Mag fatto di rocce triturate meccanicamente, ceneri arboree e febacee tritate ecc…ditemi voi se non è un Super Terriccio questo!? In attesa delle prossime settimane 👀


Likes
151
Share


@BioBuds
Follow
Yesterday I discovered that, in order to change my timer, I didn't put the clock back onto it. Now they had 3 hours more light on the third day of flowering. Exactly the kind of oopsies this grow really doesn't need.
But it happened and all back on a normal schedule, but I hope the OHS en GG4 aren't affected by it too much... One accidental re-vegging is more than enough for a year.
Also, these sensitive strains can hermie on me for lesser reasons so from now on I'll be checking for male signs daily.
The XTraKush is performing as advertised, with enormous stretch, these plants can go 10 ft up according to the breeder. So I'm tying them down and managing this to fill out the space.
With all the stuff going on, this 'underdog' strain might even prove most resilient, when all is said and done.
They seem to respond really well to the SP-3000 light and If you are in the market for a new light, consider this option from Mars Hydro.
Thank you @MarsHydroLED for letting me try it, it is a dream of a light. I compared it to my old light again and PAR values are not even in the same ballpark.
Thank you for checking my diary and taking the time to read my adventures!
Hug Bud
Likes
8
Share


@PepitaVerde
Follow
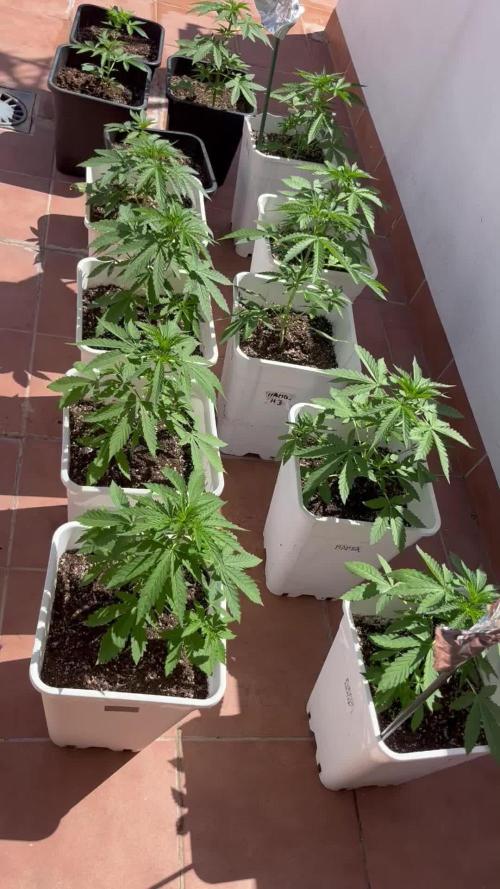
Puse variedades con distintos tiempos, por lo que a unas las dejare de fertilizar antes que a otras, al igual que con los lavados de raíces


Likes
42
Share


@DrLaggis
Follow
🌱 Day 43 - Beginning of the Third Flowering Week 🌱
Hello grow friends! 🌿 Today marks the start of the third week of the flowering phase. This week, I’m trying to adjust my nutrients a bit. I plan to slightly increase BioBizz Grow, as well as BioBizz Bloom, according to the feeding schedule. 🌱💧
I’m continuing to prune and thin out the plants a little each day, aiming to keep them stress-free. ✂️😊 The terpenes and buds are developing wonderfully so far, but I’m still struggling with very high humidity levels. 🌡️💦
Since my grow setup is on the second floor and we’re currently experiencing humid temperatures here in Germany, it’s been a challenge. I’m trying to reduce the humidity from 62% down to 50% during the day, but it’s proving difficult. 🌬️📉
I’ll keep you updated on how things progress! 🌿✨
🌱 Day 47 - Everything is Going Well 🌱
Watering and Nutrients
Today, I watered and fed the plant again. 🌿💧 Each plant received 1 liter, which is about 10% of the pot's volume. The plant is responding well to the nutrients, and growth is steady.
Defoliation and Light Exposure
I’ve done some light defoliation to ensure that every part of the plant gets proper light exposure. ✂️💡 My goal is to avoid any shadowed areas, allowing the buds to develop fully.
Temperature Management
The temperature is still quite high, reaching 27-28°C during the day. 🌡️🔥 I’m finding it difficult to bring it down, but the plant seems to be handling it well. To maintain a healthy environment, I keep both the fan and the exhaust system running on the highest setting, ensuring good air circulation. 🌬️🔄
Humidity Control
Currently, the humidity is sitting at around 45-50%. 💧 It’s not perfect, but I’m monitoring the plant closely and making adjustments as needed.
Careful Defoliation
I continue to remove one or two leaves each day to minimize stress on the plant. 🍃🌿 This slow, careful defoliation ensures that the plant stays healthy while making sure all buds have access to light.
Guard Dogs on Duty
My dogs took a peek into the grow tent today and are now keeping a watchful eye over the plant. 🐕🌱 They’re doing a great job of “guarding” it! 🐾
I hope you enjoyed this update! I’ll continue to keep you all informed, and don’t forget—I post daily update pictures of the plant! 📸🌿 Stay tuned for more!
Likes
7
Share

@RealGrowDiary
Follow
Day 63
The Plant looks Yellow becuase of some Nutrient inbalanced, but shes growing good under 13/12 Light.
I will switch the last photo in the small tent because of the 12 hours light only
Processing
Likes
4
Share


@Birthdaycakeuk
Follow
Satisfied. However one of my plants is showing signs of either dying or it is dead. Hanging over and the leaves haven’t got as big as tho other plants.
