The Grow Awards 2026 🏆 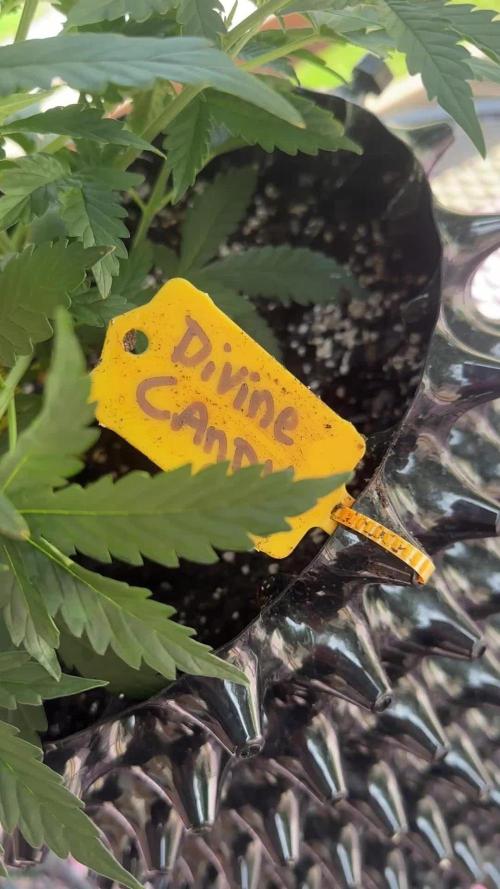


Likes
Comments
Share
@Susquihanna
Follow
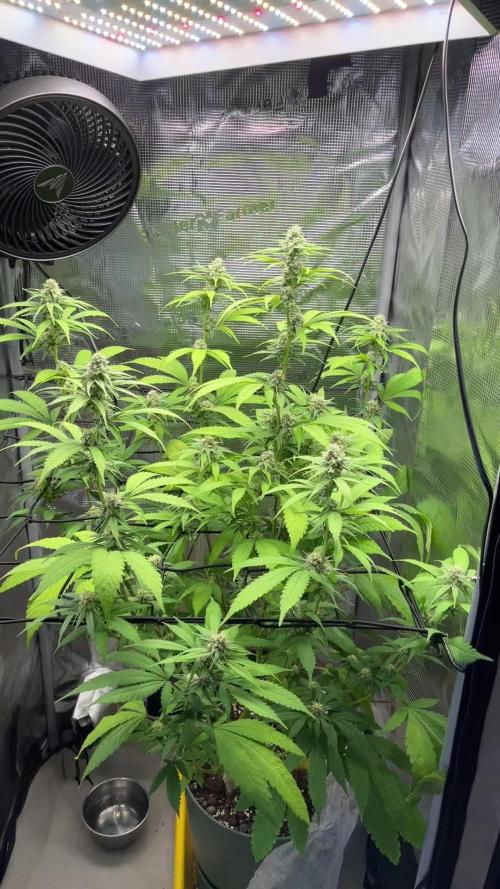
2nd Time Around "I WANT CANDY" grew 4 inches this week and is very bushy. @DivineSeeds website says that Auto Candy will have thick growth on the sides of her plants and I can attest that it is true. I tried to take a couple of pictures that showed how thick she is. It rained a little this week, so I only fed her a couple of times.
I can't wait for her to start flowering and smell her melted sugar aroma.
As always, Let's chat it up! See ya next week.

Likes
13
Share
@GanjaFarmar
Follow
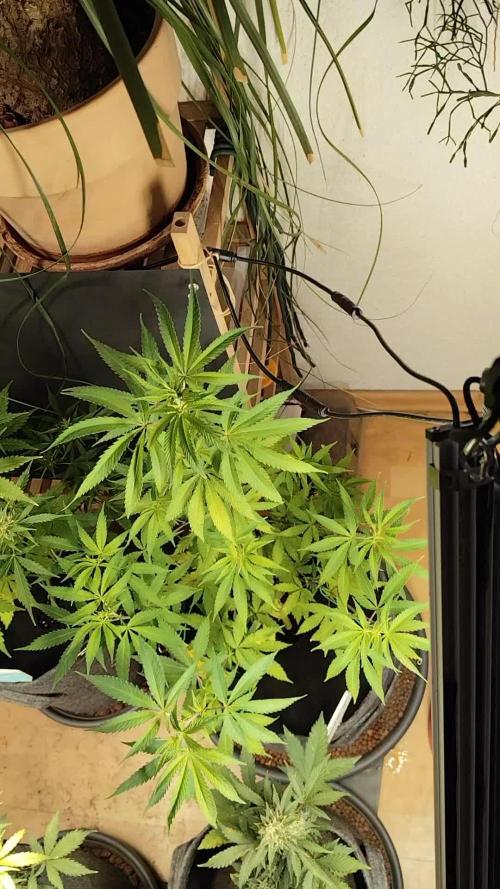
Day 50 from seed and these BCN criticals have a lovely citrus smell. When i open the tent, its the first thing i smell.
Theyre all healthy and running. Lights are still on 20/4. Bit of redish/amber hairs showing up. When i loom at other pictures its just the genes of the genetic. I Cant wait to harvest this!
Ive started adding more biobizz as it states on the chart. And then i water with normal tap water every 2 days!
I will post an update for week 8 next week!
One love!

Likes
7
Share
@Growbody
Follow
Herzlich Willkommen zu meinem Growbericht der Membrana Hyper Autofem von VIP Seeds.
Die URL für den Strain findet Ihr hier:
https://www.vip-seeds.com/membrana
Für den Grow verwende ich den großen 15 Liter WideVersion Stofftopf von ROOTIES. Bei meinem ersten Grow mit den ROOTIES kam nur die 9 Liter Version zum Einsatz, da haben die sich gut bewährt.
Auch die Smart Start Plugs von Zamnesia werden wieder verwendet, dieses Mal ohne den Samen vorher einzuweichen.
Und die Erde und der Dünger von BioBizz findet wieder Verwendung.
Tag 67: Die Membrane Hyper Autofem von VIP-Seeds wächst immer noch sehr filigran weiter. Die Blätter sind Hellgrün.
Schön, dass du dir mein Tagebuch angesehen hast. Bis bald. ✋😎

Likes
16
Share
@Ensign420
Follow
Introduction - Week 14|07 Summary -
Ensign's log, stardate 9437.65,
Great week of growing! Wow what a good week!
Growth in the main tent has all around been incredible!
Submitted my first submission to the Global Grow Cup! Filmed a video of the solo cup container (marked with the ticket/order number) that will be used for the competition. Also had to fill and prove the solo cup holds 2 cups of soil. Now I need to root a clone (for the first time), transplant her into this cup, and submit my 2nd entry before the 30th of this month.
As far as my first attempt at cloning, have already begun the rooting process! Managed to take cuttings from 3 out of the 6 phenos in the main tent (the first cutting was also my first time topping). Soaked the cuttings for two days before planting them into Coco Coins. So far everything has gone surprisingly well! The clones are now rooting under the propagation dome with the vents fully closed. Will check for roots soon!
At the end of the week, growth was just raging! Was planning on flipping to flower in a week, but decided to begin the first week of flower next week! Thus this is the last week of veg. Plan to flip to 12/12 next Monday!
Onwards to next week!
[START OF WEEK 14|07]
==========================================================
Garlic Budder #1 - WEEK 14|07 - Full Veg Wk5
Garlic Budder #2 - WEEK 14|07 - Full Veg Wk2
Garlic Budder #3 - WEEK 07 - Full Veg Wk5
Garlic Budder #4 - WEEK 06 - Full Veg Wk4
06/03/24 → 06/09/24
This Week's Estimated Goals
----------------------------------------------------------------------------------------------
DLI: ~26 mol/m²/d
PPFD: ~400 μmol/m²/s
VPD: ~1.0 kPa
This Week's Meter Readings & Averages [Lights On: 16:00 - 10:00]
----------------------------------------------------------------------------------------------
DLI: 24.56 mol/m²/d
PPFD: 379 μmol/m²/s
VPD: 0.91 kPa
Soil %: [32.7, 37.6, 37.9, 34.1]
==========================================================
Day 01 - Monday - 06/03/24 - Total Days: 098
-----------------------------------
Daily Averages [~23:00]
- Temps: 80.7°F [27.1°C]
- Humidity: 74.4%
- VPD: 0.90 kPa
- Soil %: [31, 34, 39, 35]
-----------------------------------
- [09:57]: Quick morning check!
--- #1 is looking a bit droopy, but almost lights off (at 10:00) so not concerned.
--- Nice! Mainly wanted to check on #4 and she is looking great! She’s perked back up and looking good!
- [23:08]: Evening check.
--- Wow! It’s a jungle in here!
--- #1 has gotten too big? Nah!? Keep on growing girl!
--- #2 is growing and definitely getting bigger! Growth just looking really weird.
--- #3 has continued to get larger and is looking quite uniform in growth!
--- #4 is growing and looking perky again!
--- Even the original #1 and #2 phenos (in the back) are looking good!
--- Wow! #4 is really getting close to the light.
- [23:14]: Checked down both fill tubes.
--- Both reservoirs were completely dry!
- [23:27]: Checked the Ecowitt soil moisture sensor data:
--- 30% - [CH01 EB1 - Garlic Budder #1]
--- 34% - [CH02 EB2 - Garlic Budder #2]
--- 39% - [CH03 GFP - Garlic Budder #3]
--- 32% - [CH04 FPT - Garlic Budder #4]
- [23:32]: Poured 4 cups of distilled water down EB1’s fill tube.
--- Poured 2 cups of distilled water down EB2’s fill tube.
- [23:38]: Checked the humidifiers.
--- Refilled the 4X4’s humidifier with distilled water.
--- Tomorrow, plan to defoliate and start cloning for the first time!
--- Going to take multiple cuttings from both #1 and #4 for sure, but still deciding on the rest.
--- Getting hyped!
Day 02 - Tuesday - 06/04/24 - Total Days: 099
-----------------------------------
Daily Averages [~23:00]
- Temps: 81.4°F [27.4°C]
- Humidity: 74.3%
- VPD: 0.93 kPa
- Soil %: [29, 35, 38, 32]
-----------------------------------
- [11:59]: Time to film the first entry for the Global Grow Cup!
--- Going to be using BuildASoil 3.0 potting soil.
--- Filming the video using a stand and my phone.
--- This video is mainly to establish the container that the plant will be grown in. Also to prove that the container is a 16oz container and that it can hold 2 cups of soil.
--- The ticket (order) number also had to be written on the cup.
- [12:36]: Done!
--- The video had to be done in one continuous shot with no edits (my original submission does not have the logo).
--- There was also a photo that needed to be shot which shows the cup filled with 2 cups of soil (just like the video, the original image submission did not have the logo).
--- I think I did everything correctly, but also sent an email for verification of submission and validation.
--- Getting hyped!
--- [*smokes a bowl]
--- Going to defoliate today along with for the first-time, going to take cuttings for clones!
--- After a bit of online research, decided to split the cloning process into two days.
--- Today going to take cuttings and will soak them in a solution of aloe for 24hrs. Afterwards will change the water out and use straight distilled water.
--- Then in a couple days, plan to transplant into coco plugs (Coco Coins) for rooting.
--- For optimal results, also be using a rooting hormone (Clonex).
--- Well.. Here goes nothing!
- [17:01]: Evening check.
--- Wow! #1 is looking huge! Her main top is stretching above the lower canopy which is continuing to bush out.
--- #2 is growing along. Growth is gnarly and a bit droopy, but she’s getting taller!
--- #3 is looking great! Still a bit small, but she is continuing to get larger.
--- #4 looks like she needs a watering.
--- Both plants in the back are also looking surprisingly great as well!
- [17:05]: Checked down both fill tubes.
--- Both reservoirs were completely dry!
--- As far as today's defoliation, going to leave #2 and #3 alone and will focus my defoliation and cloning on the rest of the plants.
--- This will be my first attempt at cloning, also going to try topping for the first time today.
--- No pressure Ensign. What can possibly go wrong right?
- [17:27]: Time to start the cloning and defoliation process!
--- Filled a measuring cup with 3 cups of distilled water.
------ Added 3/4tsp of Horticultural Aloe
------ Added 1 more cup of distilled water
--- Mixed the solution and poured an even amount into three separate solo cups.
--- Made sure to mark two of the cups (#1 and #4). The unmarked one will be for any other clones from amongst the 6 phenos (if any at all).
- [17:43]: Time to top and defoliate #1!
--- Using a pair of brand new trimmers (AC Infinity),
--- Gently cut the main stalk to even out the canopy.
--- Then trimmed and cleaned most of the nodes leaving the top node or two.
--- Also trimmed the leaf fingers a bit before placing the top cutting into the cup of aloe solution.
--- Now for the rest of the cuttings!
--- [~45 minutes later]
- [18:32]: Managed to finish defoliating and cutting the rest of the clones.
--- Took two more lower cuttings from #1 (3 clones total).
--- Took 3 lower cuttings from #4
--- While defoliating, decided to try and clone the original #2 pheno as well. Took 4 small cuttings.
--- Similar to the top cutting, trimmed and cleaned each lower node for each cutting before placing them into the cups.
--- Before finishing up the 2nd cutting, I noticed the first cutting (the top cut that was also trimmed) was drooping.
--- So I did not trim and the leaf fingers for the other cuttings.
--- In total there were 10 cuttings taken for potential clones.
--- My main focus was to take cuttings and to clean up all the lower growth from both #1 and #4.
--- Defoliated and cleaned up the back original phenos as well (also trimmed back the cover crop).
- [18:35]: Temporarily placed the cuttings onto the floor of the 4x4 tent.
--- Took the trimmings (about 3 cups) and spread them onto the top mulch of #1 and #2.
--- Time to set the environmental controls for the 3x3 veg tent.
- [18:43]: Within the AC Infinity App,
--- For the Veg Tent [3x3] controller,
--- Adjusted the 'Vegetative [18/6]' Schedule for the grow light.
------ Set the Mode to ‘On Mode’
------ Set the START/END times to 04:00PM/10:00AM
------ Set the MAX to 1
--- The IonBoard S33 is now utilizing around 60.8W (at intensity 1 out of 10).
--- Adjusted the 'Vegetative [18/6]' Schedule for the exhaust fan.
------ Increased the Humidity’s HIGH trigger value from 81% to 87%
--- Adjusted the 'Vegetative [18/6]' Schedule for the humidifier.
------ Decreased the VPD target value from 1.5kPa to 0.8kPa
- [18:52]: Moved the cuttings into the 3x3 veg tent.
--- It begins! I think.
--- Going to let these cutting drink some aloe for a day before switching to straight distilled water.
--- Hmm. Could be the white floor of the 3x3 veg tent, but have noticed the S33 has a whiter spectrum whereas the FC-6500 seems to be warmer in color.
--- Anyways,
- [18:58]: Poured 4 cups of distilled water down EB1’s fill tube.
--- Poured 2 cups of distilled water down EB2’s fill tube.
- [19:06]: Filled a pump sprayer with 5 cups of distilled water.
--- Focused mainly on the straw mulch of #4.
--- But also misted the straw mulch for the rest of the plants a bit.
- [19:12]: Checked the humidifiers.
--- Refilled the humidifiers with distilled water.
- [19:44]: Going to be using Clonex rooting gel before planting the cuttings into Coco Coins (pre-soaked with microbes and aloe). But before that begins, going to transfer the Clonex gel into a squeeze bottle.
--- Gently peeled back the seal on the original Clonex bottle. Just enough make a tiny opening,
--- Then slowly and carefully poured the gel into an empty squeeze bottle.
--- Also removed the sticker from the original bottle and placed it onto the new one.
- [19:54]: Perfect!
--- Instead of applying the gel to the cutting, going to be applying the gel to the Coco Coin.
--- This squeeze bottle will make applying the gel a lot easier.
--- Will take PPFD readings tomorrow.
--- Also will change out the aloe solution to distilled water.
--- I really hope I didn’t screw things up before they could even begin.
--- Don’t die on me ladies!
--- Please.
Day 03 - Wednesday - 06/05/24 - Total Days: 100
-----------------------------------
Daily Averages [~23:00]
- Temps: 81.9°F [27.7°C]
- Humidity: 75.5%
- VPD: 0.90 kPa
- Soil %: [29, 36, 38, 36]
-----------------------------------
- [09:40]: Quick morning check!
--- #1 is looking a bit droopy, but looking okay. Topping is a high stress technique so going to take some time to recover. Don’t plan on flipping the main 4x4 tent to flower for a good week or so which should be enough time.
--- #4 looks great! The defoliation seems to have no effect on growth. Nice!
- [09:41]: Also quickly checked on the 3x3 veg tent,
--- Nice! The cuttings are looking great!
--- No yellowing and they all seemed to have turned up towards the light.
--- So far so good!
- [22:53]: Evening check.
--- #1 is continuing to dominate this grow! She has spread wide and looking incredible!
--- #2 is looking gnarly, but getting there.
--- #3 is getting larger! But still a runt. By far, her leaves are the darkest of the bunch, but she is still growing!
--- #4 looks happy and growing along beautifully! Wow!
- [22:55]: Checked down both fill tubes.
--- Both reservoirs were completely dry!
- [22:59]: Poured 5 cups of distilled water down EB1’s fill tube.
--- Poured 2 cups of distilled water down EB2’s fill tube.
- [23:05]: Checked on the 3x3 veg tent.
--- Ooo yea! The cuttings are still green! Nice!
- [23:07]: Took PPFD readings.
--- The cuttings were around 121 μmol/m²/s which gives a DLI of 7.84 mol/m²/d
--- Nice! These levels are on the lower range for seedlings (~100-300), perfect! I think.
- [23:14]: Swapped the aloe water out to straight distilled water.
--- Going to let these cuttings soak for one more day before planting.
--- Please don’t die girls!
- [23:15]: Checked the humidifiers.
--- Refilled the humidifiers with distilled water.
--- Ooo yea!
--- Tomorrow is the big rooting day!
Day 04 - Thursday - 06/06/24 - Total Days: 101
-----------------------------------
Daily Averages [~23:00]
- Temps: 81.9°F [27.7°C]
- Humidity: 75.2%
- VPD: 0.91 kPa
- Soil %: [32, 38, 38, 34]
-----------------------------------
- [16:20]: Evening check.
--- #1 is a bit droopy, but growth is looking green and healthy.
--- #2 is looking bigger! She’s also looking sort of droopy.
--- #3 is growing along nicely! Looking good girl!
--- #4 is looking great! A bit droopy but plan to water today.
- [16:23]: Checked down both fill tubes.
--- EB1's reservoir still has some water.
--- EB2's reservoir was completely dry!
- [16:23]: Checked the Ecowitt soil moisture sensor data:
--- 28% - [CH01 EB1 - Garlic Budder #1]
--- 36% - [CH02 EB2 - Garlic Budder #2]
--- 37% - [CH03 GFP - Garlic Budder #3]
--- 30% - [CH04 FPT - Garlic Budder #4]
- [16:30]: Using a pump sprayer,
--- Misted the straw mulch of #4 with 6 cups of distilled water.
--- Focused mainly on the straw mulch.
--- Also misted the straw mulch of #3 (in the grassroots fabric pot) a bit.
- [16:43]: Poured 5 cups of distilled water down EB1’s fill tube.
--- Poured 3 cups of distilled water down EB2’s fill tube.
- [16:52]: Checked the Ecowitt soil moisture sensor data:
--- 56% - [CH01 EB1 - Garlic Budder #1]
--- 44% - [CH02 EB2 - Garlic Budder #2]
--- 40% - [CH03 GFP - Garlic Budder #3]
--- 45% - [CH04 FPT - Garlic Budder #4]
- [17:01]: Took general PPFD readings.
--- #1 was around 379 μmol/m²/s which gives a DLI of 24.56 mol/m²/d
--- #2 was around 333 μmol/m²/s which gives a DLI of 21.58 mol/m²/d
--- #3 was around 293 μmol/m²/s which gives a DLI of 18.99 mol/m²/d
--- #4 was around 378 μmol/m²/s which gives a DLI of 24.49 mol/m²/d
- [17:09]: Took the weekly height and light distance measurements.
--- #1 was about 21" tall.
--- #2 was about 13.5" tall.
--- #3 was about 9.5" tall.
--- #4 was about 19.25" tall.
--- Hmm..
- [17:19]: Adjusted the right oscillating fan a bit.
--- Re-angled the CloudRay S6 oscillating fan upwards. Been noticing that the air has been hitting the tops of the plants so easing off a bit (#1 is still getting hit, but she’s huge so not too worried).
- [17:23]: Back to the measurements!
--- #1 was about 9.5" away from the grow light.
--- #2 was about 17" away from the grow light.
--- #3 was about 17.5" away from the grow light.
--- #4 was about 11.5" away from the grow light.
- [17:46]: Checked on the 3x3 veg tent.
--- Cuttings are still green! They do look a bit droopy but no signs of yellowing.
--- Okay!
- [17:55]: Time to begin the rooting process!
--- For my first attempt at rooting, going to be using Coco Coins pre-soaked in saponins, microbes and aloe.
--- To further help with rooting, going to also be using Clonex rooting gel.
--- Filled a measuring cup with 4 cups of distilled water.
------ Added half of 1/64tsp of Quillaja Saponaria Extract [60]
------ Added 1/16tsp of Horticultural Aloe
------ Added 1/8tsp of Mycrobe Complete
--- Mixed the solution thoroughly.
--- Time for the Coco Coins!
--- 10 cuttings means 10 Coco Coins.
- [18:09]: Dropped 10 Coco Coins into the measuring cup.
--- The coins immediately started to expand.
--- A bit too much.. Oops!
--- Poured the solution and Coco Coins into a pitcher.
--- Added 2 cups of distilled water to the solution (now at 6 cups).
--- Great! The coins are pretty much fully expanded, but going to wait a bit longer to fully saturate each coin.
--- [~20-30 minutes later]
- [18:42]: Great!
--- Took the seedling and flood tray from the AC Infinity propagation dome and placed all 10 Coco Coins into the slots.
--- Gave each Coco Coin a quick shake to remove excess solution. The coins were not dripping with solution but still pretty saturated.
--- Arranged them into 3 groups with the cuttings in mind.
--- Also tried to keep the pre-made holes intact.
--- Time to inoculate the Coco Coins!
- [18:54]: Using a squeeze bottle,
--- While keeping the nozzle from making contact with the coco, gently filled each pre-made hole with Clonex rooting gel. Just enough gel to fully cover the hole of each coco coin.
- [19:00]: Time to plant the cuttings!
--- Gave each cup a misting of distilled water. Focused on wetting the top growth with water.
--- Okay!
--- To avoid mixing cuttings up.
- [19:01]: Starting with the original #2 pheno cup,
--- For each cutting,
--- Using a pair of clean trimmers, made a final 45° cut about 1/2" from a bottom node.
--- Then stripped away and scared the protective membrane below the node before planting.
--- Made sure the node was about 1/2" below the surface of the coco.
--- To help with planting, while inserting each cutting, gave the Coco Coin a gentle squeeze to loosen the coco. This also helped to ensure the coco and gel was in good contact with the cutting.
--- Once the cutting was planted into the Coco Coin, made sure to place back in the same spot (made sure to keep the cuttings in their groupings).
--- Once a cup was complete, made sure to keep the label with the group.
--- Re-misted the top growth as needed to keep it wet.
--- Also wiped the trimmers with isopropyl alcohol in between cuttings (plan to use 10% bleach solution for next time).
--- Repeated this process until all 10 cuttings were cut, planted, and in the tray.
--- The coco coins fit perfectly into the tray and don’t reach the bottom. Nice!
--- The bottom air gap is important.
--- Poured a bit of distilled water through one of the empty slots into the bottom of the tray. Just enough to fill the bottom of the tray, but not enough to reach any of the Coco Coins (~1/4cup).
- [19:35]: Placed the propagation tray with cuttings into the 3x3 veg tent.
--- Placed the first layer of the propagation dome on before giving the sides a misting of distilled water.
--- Also sprayed the top of the propagation dome before covering the cuttings.
--- Vents are all fully closed.
- [19:40]: Placed the bar lights onto the top of the dome before configuring the controller.
------ Set the START/END times to 04:00PM/10:00AM
------ Set the bar light’s intensity to 2 (out of 10).
--- Also made sure the propagation light controller’s time was in sync with the Controller 69 Pro.
- [19:47]: Took PPFD readings.
--- The cuttings were around 136 μmol/m²/s which gives a DLI of 8.81 mol/m²/d
--- The PPFD levels are similar to the floor.
--- Perfect!
--- Going leave the IonBoard S33 on during this rooting process.
--- Will check back tomorrow to cycle the air under the dome.
- [19:56]: Checked the humidifiers.
--- Refilled the humidifiers with distilled water.
- [20:17]: Quick night check!
--- Ooo yea! Growth is raging and looking perky!
--- Mainly checked on #1 and #4 which were looking incredible!
--- Keep on growing ladies!
Day 05 - Friday - 06/07/24 - Total Days: 102
-----------------------------------
Daily Averages [~23:00]
- Temps: 82.7°F [28.2°C]
- Humidity: 76.2%
- VPD: 0.89 kPa
- Soil %: [37, 40, 38, 35]
-----------------------------------
- [10:03]: Decided to increase the ambient temp in the 3x3 veg tent.
--- Within the AC Infinity App,
--- For the Veg Tent [3x3] controller,
--- Adjusted the 'Vegetative [18/6]' Schedule for the heater.
------ Increased the Temp target value from 78°F to 82°F
--- Hopefully this will help to keep the veg tent at a more consistent temp.
- [22:26]: Evening check.
--- Ooo yea! The garden is looking incredible!
--- #1 is looking perky and just bushing out! Wow!
--- #2 is getting big! Growth is weird and leaf fingers are huge! Just going to let her grow.
--- #4 is looking happy and growing along like a champ! Nodes are starting branch out and she is turning into a bush!
- [10:28]: Checked down both fill tubes.
--- Both reservoirs were completely dry!
- [22:33]: Poured 5 cups of distilled water down EB1’s fill tube.
--- Poured 3 cups of distilled water down EB2’s fill tube.
- [22:40]: Checked on the propagation dome (inside the 3x3).
--- Ah yea! Looking great ladies!
--- Lifted the top of the dome to let some fresh air in for a bit.
--- Wow!
--- Leaves still look nice and green!
--- So far everything looks great!
--- Just going to continue on!
- [22:53]: Checked the humidifiers.
--- Refilled the humidifiers with distilled water.
- [11:01]: Decided to adjust the humidifier for the 3x3.
--- Within the AC Infinity App,
--- For the Veg Tent [3x3] controller,
--- Adjusted the 'Vegetative [18/6]' Schedule for the humidifier.
------ Increased the VPD target value from 0.8kPa to 1.5kPa
--- The higher VPD level will essentially turn the humidifier off.
--- I won’t be needing the humidifier for a good week so might as well save the water.
Day 06 - Saturday - 06/08/24 - Total Days: 103
-----------------------------------
Daily Averages [~23:00]
- Temps: 81.6°F [27.6°C]
- Humidity: 74.9%
- VPD: 0.91 kPa
- Soil %: [35, 40, 37, 31]
-----------------------------------
- [07:40]: Quick morning check!
--- #1 and #4 are looking perky and happy!
--- Also checked on the propagation dome,
--- All cutting still look green! Hyped!
- [20:02]: Evening check.
--- Wow the garden is raging with growth!
--- #1 has blown up! She has clearly recovered and growth is ramping up again!
--- #2 is stretching upwards!
--- #3 is now the smallest of the 4, but still getting larger!
--- #4 is looking incredible! Wow! Growth looks perky and happy!
- [20:05]: Checked down both fill tubes.
--- Both reservoirs were completely dry!
- [20:10]: Poured 6 cups of distilled water down EB1’s fill tube.
--- Poured 2 cups of distilled water down EB2’s fill tube.
- [20:16]: Checked the Ecowitt soil moisture sensor data:
--- 35% - [CH01 EB1 - Garlic Budder #1]
--- 40% - [CH02 EB2 - Garlic Budder #2]
--- 36% - [CH03 GFP - Garlic Budder #3]
--- 27% - [CH04 FPT - Garlic Budder #4]
- [20:19]: Using a pump sprayer,
--- Misted the straw mulch of #4 with 5 cups of distilled water.
--- Focused mainly on the straw mulch.
--- Also misted the mulch of #3 a bit (in the fabric pot).
- [20:27]: Checked propagation dome (in the 3x3),
--- To cycle the air under the dome, lifted the top off for a bit.
--- Ooo yea! Everything is still green and looking great!
--- Keep on rooting ladies!
--- Oops!
- [21:45]: Checked the humidifiers.
--- Refilled the humidifiers with distilled water.
Day 07 - Sunday - 06/09/24 - Total Days: 104
-----------------------------------
Daily Averages [~23:00]
- Temps: 81.5°F [27.5°C]
- Humidity: 74.8%
- VPD: 0.91 kPa
- Soil %: [36, 40, 37, 36]
-----------------------------------
- [08:18]: Quick morning check!
--- Nice! The main tent is looking great! #1 and #4 are both raging with growth!
--- Checked on the propagation dome (inside the 3x3) and the clones are still looking green!
--- Wow! Everything is going almost too well! Just keep on growing!
- [19:08]: Evening check.
--- Garden is just exploding with growth! Seems everyone has fully recovered from the defoliation and topping!
--- Wow #1 is bushed out and looking incredible!
--- #2 is growing really starting to get large! Growth still is funky, but stoked none-the-less.
--- #3 is starting to fill in the pot! Getting larger!
--- Wow! #4 is getting taller and looks healthy and green!
- [19:12]: Checked down both fill tubes.
--- Both reservoirs were completely dry!
--- Wow the canopy is really starting to get taller and closer to the light. May need to raise it up soon.
--- Absolutely surprised how low the light levels have been throughout this entire cycle. Barely moved the light and have not increased the intensity past 2 (out of 10). Less is really more.
--- Anyways!
- [19:18]: Checked the Ecowitt soil moisture sensor data:
--- 36% - [CH01 EB1 - Garlic Budder #1]
--- 41% - [CH02 EB2 - Garlic Budder #2]
--- 37% - [CH03 GFP - Garlic Budder #3]
--- 34% - [CH04 FPT - Garlic Budder #4]
- [19:19]: Poured 6 cups of distilled water down EB1’s fill tube.
--- Poured 3 cups of distilled water down EB2’s fill tube.
- [19:24]: Checked propagation dome (in the 3x3),
--- To refresh the air, lifted the top off for a bit.
--- Sweet! Still green! Wow!
--- Using a spray bottle, misted the top growth with distilled water.
- [20:35]: Checked the humidifiers.
--- Refilled the humidifiers with distilled water.
--- Wow what a week!
--- Growth has been just insane in the 4x4 tent! All plants have fully recovered and have just exploded with growth.
--- I think it’s time to flip to flower!
--- Also, I’m absolutely baffled about how well the cloning process has been going.
--- So far no issues!
--- Not complaining, but just surprised. Keep on growing ladies!
--- If all goes well, should have fully rooted clones soon ready for transplanting (into solo cups of course).
--- Absolutely hyped for next week!
--- Maximum warp Ensign, Engage!
[END OF WEEK 14|07]

Likes
5
Share
@tNASTY3k
Follow
Day 14 - She's thriving it seems so far. She's bursting with tri-leafed nodes. I've changed the environment a bit. I have not been successful cooling the room enough to bring down the VPD from 1.3kPa or so. Instead I'm approaching it from a humidity perspective. I have the threshold up to 70%RH. I'm peaking the humidity to lower the VPD to .9kPa since I can't really effectively cool the tent to the low 70's. There is a slight aroma from the seedling. The infamous skunky smell is only observable when very close to the plant. I have not been using the filter on the exhaust fan though.


Likes
2
Share
@Sense63
Follow
Mal sehen was wird ..was wird 👉😏
Gude zusammen,
am 8.4.25 wir eine 30l Wassertank und mit einem Tropf-Blumat und 3 Verteiltropfer pro Topf angeschlossen nach etwas einzustellen bin ich jetzt in einem Bereich von 5-6
bei der Blueberry OG ist echt gut was los 😑👉
Mal sehen was wird ..was wird 👉😏
Stay High
Let's see what will happen ..what will happen 👉😏
Gude together,
on 8.4.25 we connected a 30l water tank and with a drip blumat and 3 distribution drippers per pot after some adjustment I am now in a range of 5-6
the Blueberry OG is really good 😑👉
Stay high

Likes
87
Share
@Mrs_Larimar
Follow
2021-12-26
We Prelonged to 12 Weeks vegetation again, so this Lady can get a "Monster"
i forgot the photoshoot for her, so you just see my lovely Smoochie
I update the next Days
2021-12-27
Today i transplanted the Puddin into ahuuge 75l Bucket,
and took her into a Tent, for two more Weeks of Vegetation
She got a Topdressing, because she was looking a little pale
I unleashed her too. now she can spread the Wings
here are some Codes
Lights:
https://viparspectra.eu/discount/M.Larimar
And for the Fertilisers:
https://greenbuzzliquids.com/en/shop/
Code: mrs_larimar
Likes
10
Share
@Diegobike
Follow
Esta semana ha Sido súper buena para mí planta cada vez se ven más pistilos y la resina y su olor no dejan nada de que hablar. Simplemente son innumerables los terpenos que tiene esta planta a metros puedo olerla. Últimamente todos los días llueve con gran intensidad gracias a tanta humedad algunos cogollos presentaron botritis pero pude calmarla quitando los cogollos afectados y aplicándoles un poco de agua oxigenada. En resumen va de locos ya quiero probarla

Likes
7
Share
@brapzky
Follow
I figured nothing could go wrong with 50% amber / 50% milky trichomes.
Harvest day, Medical Mass: Huge buds and no traumas but got bud rot because of too high temps. The best I've ever smoked.
Harvest day, Pineapplex Express: Got an early trauma when transplanting but handled it beautifully. Potent smoke.
Pretty satisfied for a first grow, and I have a lot of changes for my 2nd grow!


Likes
2
Share
@Ctrellis90
Follow
Alright, it's the end of week 2 veg and we're starting to take off!
Have you ever seen a plant with the mutation mine has? She doesn't have a main stalk lol but instead has two! Plus her fan leaves are looking a bit screwy lol. I'm a fan of mutated cannabis though and love to see how they do so she's definitely staying around.
I'm not a big auto grower myself so I don't have that high of expectations but I'm sure these ladies will look great once they get another week or two under their belts.
We're continuing the alfalfa Ferment from Growing Organic (discount code CollinT), these girls have craft blend mixed into their medium so we won't be top dressing until late veg early flower. Then we'll throw down some castings and more craft for transition/early bloom. We'll see how well we do.
Thanks for stopping by and we'll see ya next week.
Likes
77
Share
@KingSalomonsWeed
Follow
29.12.
Day 92 Flower 51
Hallo Leute
Sieht gut aus. Ich kämpfe immer noch etwas mit Spidermites.
Noch ist sie echt Durstig.
Die Knospen wachsen.
Und davon gibt's ne Menge. 😍
Süßigkeiten Regen heißt es ja auch.
Wird bei vollen 70 Tagen Blüte geerntet.
Ich will POWER BUDS
GROSSE POWER BUDS
Noch 19 Tage zum mästen.
Danke Leute
Ach ja, das Update... Ich sage es Mal so. Macht baldigst wieder eins denn es läuft nicht.
01.01.xxxx Hallo. Das war's mit Durstig. Ihre Knospen sehen toll aus. So viele...
Alle Marke fest und klebrig. Freu.
02.01. Der Duft ! Es kommt eine Menthol Note dazu. Also Hustenbonbon.
03.01. Schxxxx ne Nachbarpflanze nicht von Zamnesia infiziert sie gerade mit
Spidermites.
Deswegen geht heute die Nachbarpflanze.
Diese lasse ich mir nicht versauen.
Da hängt was dran.
04.01. Dieser Duft! Liebe Leute, wer es ausgefallen haben möchte. Wem ne Gelato gefällt der wird hier auf seine Kosten kommen.
ZAMNESIA hat hier etwas großartiges gezüchtet.
Werbung? Erfahrungsbericht.

Likes
25
Share
@pifflestikkz
Follow
Day 8
08/07/24 Monday
Light water with De-chlorinated tap pH 6.2 with half t spoon of DyNoMyCo.
They seem to be loving it!!
Germination week complete, Let's start the VEG 🤩
Updated short videos of strains ,✌️💚
Day 11
11/07/24 Thursday
De-chlorinated tap water pH 6 with calmag.
Lite waterings of 250ml. Due to high humidity.
Likes
9
Share
@MG2009
Follow
11/07/20
Was gifted a
(It's MENDO DOPE)
She has been sexed but not sure what pheno, but they're all good.
Going to veg for a week then flip to
12-12.
Ps.
Took some clones for saving this is some crazy terpy shit!😍
Clones are on 12-12 schedule, in my experience they will root faster this way. This girl is potted in big roots soil and its time to pot up and flower.She is in florecent light tent for one more week than to LED to finish her off under11-14 schedule.
Ps.
Clones are looking happier than first pic 5 days ago.


Likes
17
Share
@Wakesk8
Follow
2/3 weeks to complete !! Almost Done ✔️!!
To be honest I was expecting better result but some plants looks amazing !


Likes
Comments
Share
@Dr_Zauberer
Follow
Day 97
Chop chop. Smells very fruity and lemony. Dont smell amnesia too much but the trichomes are 80/20 so we gucci :) i usually wait til all the pistiles are brown too cuz i think it looks better haha

Likes
18
Share
@TheGreenLeopard
Follow
easy enough week. added dehumidifiers in both tents as i really have them packed and its best we take care of that now than run into diffs later. nutrients all good, much the same. harvested bday cake auto 45g wet weight. maybe was hard on her at the start but whatever.. looks good, hopefully tastes as good. 3rd week in and these girls are massive.. like really impressive. no hype.
