
Likes
Comments
Share

@420-Grow
Follow
Sie wird immer harziger macht auch keine Probleme bis jetzt mal gucken was rauskommt


Likes
12
Share


@Chamed33
Follow
Plant is looking great so far I had to flush it 2 days ago to readjust my run off water ph

Likes
7
Share


@Andres
Follow
it seems that its vegetation is very fast ... we will see with the passage of the weeks ... we hope that it does not enter in flowering yet...

Likes
7
Share


@OwlGang_Uk
Follow
Gorilla Glue #1 - Harvest Comment - I Am Very Satisfied With What I Got, I got 3 ounce 7 grams - I Uses Advance Nutrients PH perfect In veg then I switch to the iguana juice organic juice for the flowering stage. I notice a much more slower growth when I switch to organic nutrients.00
Likes
23
Share

@eldruida_lamota
Follow
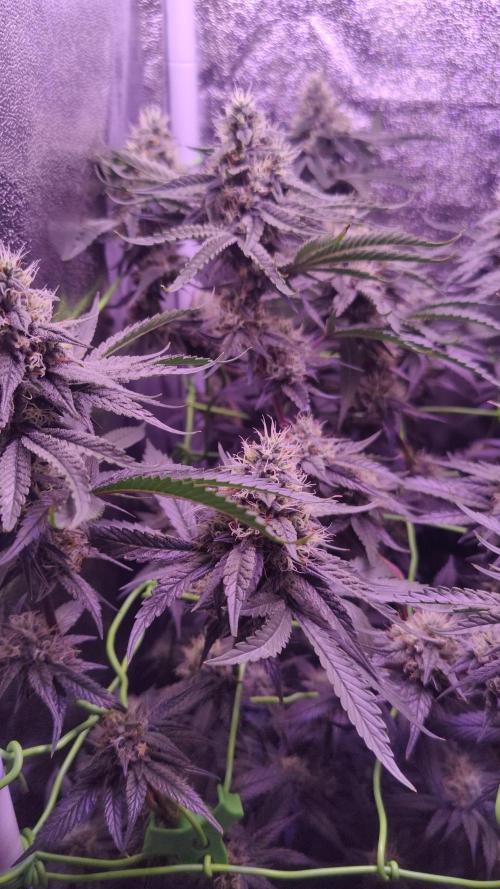
Vamos familia, actualizamos la décima y última semana de floración de estas Lemon Cherry Runtz de FastBuds.
La temperatura que estuvo entre los 23-24 grados y humedad entorno al 40% están dentro de los rangos correctos.
En cuanto a las plantas las veo muy bien, estiraron guay y ensancharon bien.
Ya van 2 semanas solo agua para limpiar bien las plantas.
Hay que reivindicar que en este indoor no tengo ni plagas ni problemas.
Las flores han madurado y explotado bien, por el momento todo correcto.
Tienen un aroma cítrico y veo una resinada bastante seria, creo que si no es la mejor del cultivo estará entre las mejores.
- os dejo por aquí un CÓDIGO: Eldruida
Descuento para la tienda de MARS HYDRO.
https://www.mars-hydro.com
Hasta aquí todo, Buenos humos 💨💨💨
Likes
7
Share


@Greenfingers666
Follow
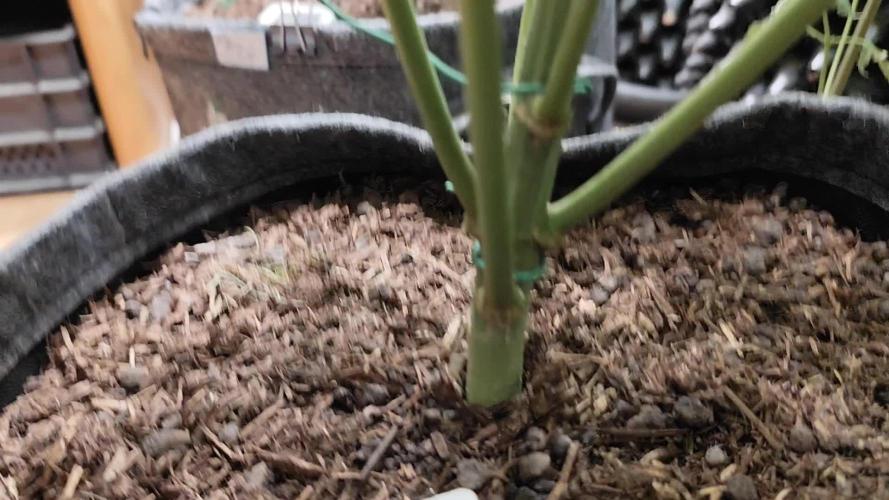
6 weeks old C/Mass clone mum we took about 5 cuttings from her so she's going to be fat already she has lots of branches growing off her short internode spacing so tight bud formation.
As you can see we have opened her up without damaging her so no recovery or time wasted.
We have pulled down all the main branches with soil clamps (fantastic) Its like a rib cage pull down and secure branches then all the small what would have been not much will now become much, much more.
she has 3 weeks now to transform into a tree.
The 3 girl scout cookies are the little supporters put in the 3 corners their autos from weed seed express{big up dem} for the freebies, the other 3 are for different projects.
so here we are.. I know now not to overwater dem because my self contained unit contains the moisture hence da reader always in the soil to give me the correct reading.
ph, ppm, and temp simple get a reader😇😇


Likes
63
Share


@Ganjagrandaddy
Follow
Day 7 Veg: A great start for the ladies has been slowed slightly by leaving them a few days too long in their germination pots. I usually plant into the final.pot from seed bit uad to wait this time for space. They took a hit with transplant shock I think and a few deformed leaf sets have resulted. I think this will sort itself once the plants resettle bit with time being precious on autos , I hope its soon. One of the Banana Mash is a real mutant it seems with two odd looking leaves and a tiny bit of new node showing through.
The Purple monkey are all doing very well so far and rhe transplant has not hit them so hard. i also think I have a mango cream growing from a seed that popped out of the mango crop I did. lets see.
Be safe and free Growmies.

Likes
5
Share


@chickensushi
Follow
Week 5 the flowers are coming through more and the plants are near to filling out the tent.

Likes
15
Share


@Geili_Seili_fireinfireout
Follow
Absolut super angewurzelt. Spargeln extrem!!! Das wildeste was ich je gesehn habe an spargeln😅
Bin gespannt wie das in der preflower phase wird🙈😅😅
Likes
189
Share


@Green_Man_420
Follow
Welcome welcome to another diary.
First of all a big shout to James at RQS for hooking a brother up again. You sir are a legend ✌️
Having to start a little early on this year as the supply has ran dry 🙄 let’s see what these little ladies can do.
I will update once we have got some life. Until then peace out
Update. All seeds are up and now in the tent. ✌️
Processing
Likes
31
Share


@Mr_Motalovah
Follow
Hello growers and tokers! 👋 👩🌾 🧑🌾.🔥💨
As you can see these ladies are growing nicely.
They're both at the same height 59cm but one is wider than the other.
Quite nice so far. That's 12cm in one week same as the Royal Gorilla.
Evenly spread canopy, the one that had better shape from the start now has longer colas.
Both are stacking nodes nice and tight.
They have a nice green color to them but you can't really appreciate that in the pictures.
I'm still trying to get a hand of this new phone, I might just go back to the camera. 🤔
Starting to get a little shine to them, I think this strain will be the first in forming trichomes.
They give off a nice smell but I can't put my finger on it yet.
Feeding 1,5L each, every other day. Will be increasing as they ask for more.
How do they ask for more?
When feeding if the soil is drier than normal I give a 150-200ml increment of water.
I do that until they stop feeding so much then i just maintain that amount.
I start reducing if it takes longer to dry.
That works good for me. The old finger in the dirt trick. 👍
Nothing like knowing exactly what your ladies need first hand.
**Info and pictures were taken at day 12 of flower.**
Hope you enjoyed this week's update. Stay tuned for next week. 😃
If you like this check out the other diaries of the strains in the tent. 😄
Take care and stay safe!
One love!✌️🏽

Likes
13
Share


@SaucePan
Follow
Topped and taking off... she looks healthy.. I’m excited to see where she takes me
Likes
16
Share

@Growbody
Follow
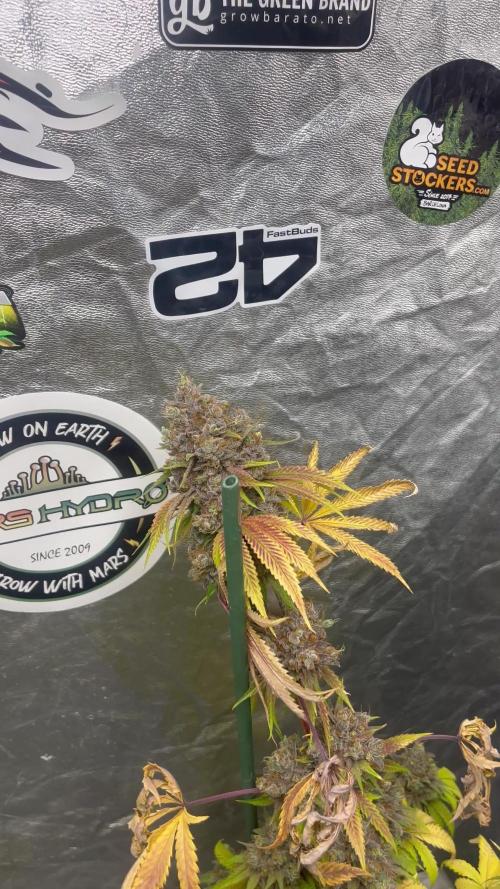
Herzlich willkommen zu meinem neuen Grow mit der Orange Sherbet Auto von 2Fast4Buds. Die Eltern sind Cookies Auto F5 x Tangie´matic, der Typ ist F3 Feminized Polyhybrid Autoflower. Der Strain war Winner of the American Autoflower Cup 2025, Kategorie Best Auto Hash. Die Aussicht auf frischen Orangensaftgeschmack macht mich wunderfizzig.
Wieder verwendet wurde für diesen Grow der 15Liter Stofftopf von ROOTiES, die Sonnenerde Bio Hanferde, BioBizz Wurmhumus, BIONOVA + zamnesias MonsterBud Mix Living Soil, zamnesias Smart Start Plugs und Plagrons Seedbooster Plus. Hat sich alles bestens bewährt.
Tag 50: 1,25 Liter Wasser.
Tag 52: 1,0 Liter Wasser.
Tag 54: Die Orange Sherbet Auto von 2Fast4Buds hat viele Äste deren Spitzen fast alle auf einer Höhe sind. Und überall sind Blüten zu sehen. Sie hat sich nochmal 16 cm gestreckt. 1,0 Liter Wasser.
Tag 55: Sie ist einfach schön anzuschauen.
Schön, dass du dich für meinen Grow interessierst. Schau gerne wieder rein. 👋😎
Likes
45
Share


@BodyByVio
Follow
Beautiful flower full of trichomes. Smell and test fantastic. Very fast flowering. She was done on day 49 but I cut her down few days later.
I love the strain, the only thing that I will like this strain to have is a better yield. Beast quality buds I ever grew.

Likes
17
Share


@The_Doctor_Green
Follow
Registro esta semana como la primera de floracion ya que se nota con facilidad donde van a crecer los cogollos!.
Espero que sean grandes!!🤞🤞🤞😁😁😁🚀🚀🚀🤪🤪🤪.
2da semana de floracion al 09/02/24 los futuros cogollos ya se ven como van creciendo, de floracion rapida me ha dicho el grower y se nota la diferencia con el otro diario.(en el otro diario se puede ver q los cogollos ni forma tienen😅)
Esta semana hice riego foliar con aceite de neem, para evitar plagas.En el suelo regue con micorrizas 1ml x litro de agua, aumente la dosis de agua de 1.8l a 3 litros, para que el mismo riego se drene y asi poder medir el ph y ec.
El ph del drenaje me dio 6.3 y la ec 1100ppm.
Esta semana también quite algunas hojas y ramitas bajas que no valía la pena que se desarrollen.

Likes
13
Share


@Rungood
Follow
Flo +48 ca grossit tellement 😍😍 c'est le début des pop corn sur les têtes l'odeur est démente
Likes
4
Share


@GeminiCQC
Follow
Hbss is 27in tall
ABxRKO is 38.5in tall
I'm starting to run out of height because of the ABxRKO as it finally flowers. Still slight nute issues with the HBSS, but nothing too tough to handle for now. The smells the HBSS give off are absolutely crazy.
Just letting them grow, and watering every day seems to work. Will upgrade to earth boxes for this tent since a little autonomy is nice

Likes
21
Share


@NSABND
Follow
Start of Week 12 😉
Day 86 autumn comes too fast 😵😲😪
Day 88 time is running out 😲😯😧
Day 89 the weather turns to epic fail 💀💀💀
Day 90 the sun comes back again 😍👌 oh lord
Likes
161
Share


@FrontRowAG_BrianG
Follow
START OF WEEK 7 DAY 42
⭐️Nutrients Used⭐️
Front Row AG Part A 4.2g per gallon
Front Row AG Part B 2.8g per gallon
Front Row AG Phoszyme .4g per gallon
Front Row AG Si .5ml per gallon
Front Row AG CleanUp .2g per gallon
This has been an awesome week. Plants have once again almost doubled in size…almost. I cannot stop them from growing out of control and they are suppose to at least double once flower is initiated. So, this week I will completely defoliate all the big fan leaves and after 7 days healing switch to flower.
I have never completely defoliated my plants, but I’m open to new things. Usually I defoliate and lollipop at the 3rd week of flower. Until then I leave them alone with little stress. All in all, I want a full net but also an easier time during harvest so I’m going to remove all the big fan leave’s multiple times this run.
Lights are still on 40% and will gradually get to 75% by week one of flower. All my co2 tanks will be filled this week. I want high temps/high humidity/lots of par/lots of co2. ⭐️THIS IS THE OBJECTIVE⭐️ for the first 6 weeks of flower 👇
1500 on par meter
80-85 degrees
60-65% humidity
1500ppm co2
This is how we get 💪 size colas!
Thanks for stopping by and see you next week.

Likes
28
Share


@Trickybis82
Follow
Hi,
Final few days before harvest with wedding cheesecake. Cannot wait.
Will update soon.
Grape gushers still has a few weeks left before she is ready.
Will be back to update.
