
Likes
Comments
Share

@FicoCG
Follow
Liebe Leute,
Die Woche 8 ist im vollen Gange!!!
Ich habe mir heute die Mühe gemacht und das Vorschaltgerät der Hauptlampe aufs Dach mit einem Blech zum Schutz gelegt, damit die Temperatur etwas runter geht!
Ich habe jetzt für die letzten Wochen die Lampe nochmal auf volle Power gedreht und hoffe, das ich jetzt bei den Außentemperaturen bei nicht mehr als 29 Grad Celsius im Zelt Lande.
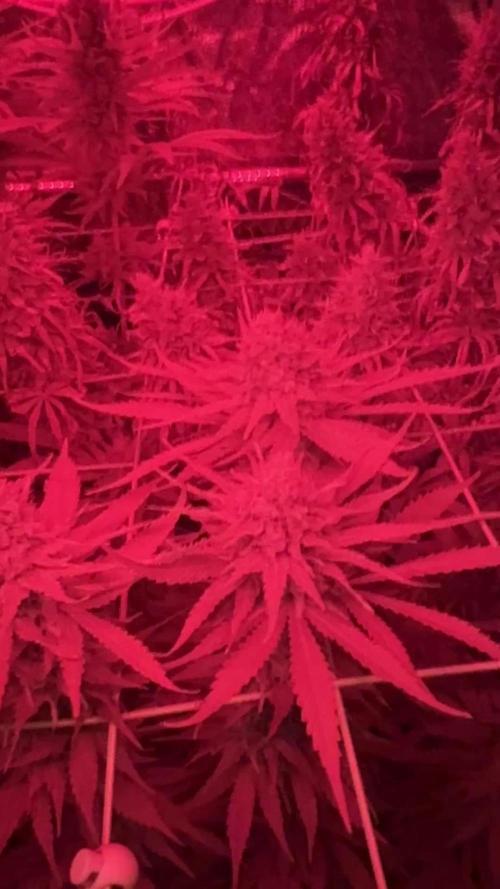
Die GG#4 und Purple Haze, haben den Düngeschock gut verkraftet und gehen top in die letzten Wochen der Blüte.
Leider hat es die Lemon Skunk (Red No.2) etwas erwischt, aber sie müsste es auch bis zum Ende durchhalten.
Die Trichome sind noch klar und warten nur noch darauf zum Höhepunkt zu kommen. Ich ernte aus Erfahrung wegen der Wirkung bei ca. 10% Bernstein. Also die nächsten zwei Wochen Augen ganz weit auf und die Lupe aus der Hose kramen.
Ich hoffe euch gefallen die Bilder und wie die Lady‘s aussehen!
Liebe Grüße, euer Fićo


Likes
3
Share

@Wilstang
Follow
IPM
https://www.arbico-organics.com/product/mite-predator-phytoseiulus-persimilis-plus-sachets/mite-predators
https://www.arbico-organics.com/product/spidermite-destroyer-stethorus-punctillum-adults-larvae/pest-solver-guide-mites

Likes
14
Share


@TPBzh
Follow
I still had some spots on leaves, but look like the calmag is doing the job. New leaves look better for now. It smell stronger, and plants are drinking a bit more now. Not sure, but i think no more than 3 weeks b4 harvesting HulkBerry 1 and the cookies gelato familly. Royal Bluematic 1 seems to take more time, but is growing well.
HulkBerry 2 and mostly Royal Bluematic 2 are really late and weak compared to the others.


Likes
28
Share


@DreamIT
Follow
-Sponsored by:
🎭ZAMNESIA SEEDS🎭-💡VIPARSPECTRA💡-💐GREEN BUZZ LIQUIDS💐-🛠️WEDRYER🛠️
🏁18/6 hello growerz, with today I start the resumption of diaries on GD. I have 13 new genetics in germination and as many diaries. I start by putting the seeds in water for 24 hours, after a day I will put the two seeds in two different jiffies, one with humic acid from greenhouseseeds and the other with just plain water. Get comfortable and follow the updates 😉👋🦄
19/6 The seeds were divided and placed in two different jiffies, one with humic acid and one with water only.
21/6 after another 24 hours in the dark the jiffies were moved under the lamp. let's start the dances!
23/6 the seed in the jiffy with only water has already sprouted and is about to open, while the one in the jiffy does not want to know yet, but we are in no hurry
24/6 the seed in jiffy with humic acid begins to show, I trust it will fully emerge by evening. the other looks a little tired but is fine
25/6 still nothing on the second suit, I'm starting to worry
30/6 despite not being in great shape, the born seed proceeds with its life, while the second one that does not want to be born will give way to a lava cake always of zamnesia
__________________________________________
Personal advertising (contains affiliate links)
__________________________________________
🦄Zamnesia boasts the most complete and accurate site where you can find everything related to cannabis and the "psychedelic" world. Autoflowering, feminized seeds, mushrooms, salvia divinorum, afrodisiacim of everything, and more! ( no affiliate link)
✅https://bit.ly/Zamnesiaseeds
__________________________________________
Did you know that Green Buzz Liquids fertilizers are 100% vegan? A complete line of products ready to give the best to each of your plants! Visit the site and see my journals to see how they work 🦄
🤯 And with the code "dreami t" you will immediately receive a 15% discount on your purchases
✅https: //bit.ly/GreenBuzzLiquidsPro
__________________________________________
👀 Are you looking for a good lamp to start with? 👀
🌞Viparspectra has something more than the others, take a look at their site.
⏩ Use "GDVIP" for an extra discount or "DREAMIT3" for an extra 5 %% discount
👀 Search for it on Amazon
✅Amazon USA: https://amzn.to/30xSTVq
✅Amazon Canada: https://amzn.to/38udUVe
✅Viparspectra UE: bit.ly/ViparspectraUE
✅Viparspectra USA: bit.ly/ViparspectraUS
______________________________________________
🌈 Tired of blowing on your weed hoping it dries quickly? Check out the Wedryer website! You will find a well-made accessory that will help your weed dry in just 8-10 days without the annoying risk of finding mold or other annoyances! (no affiliate links)
✅https: //bit.ly/Wedryer_
______________________________________________
📷🥇Follow the best photos on Instagram 🥇📷
https://www.instagram.com/dreamit420/
Backup
https://www.instagram.com/dreamit4200/
🔻🔻Leave a comment with your opinion if you pass by here🔻🔻
🤟🦄💚 Thank you and good growth 💚🦄🤟
Likes
Comments
Share


@DrGrow420
Follow
The plants have continued to grow very fast this week, easily doubling in size again. I moved them closer to the light to 80 cm from 90cm. Watering as needed and I am keeping the soil surface moist with light watering twice a day.
I fed some Biobizz Biogrow and some organic teas this week.
Low stress training was very effective and the plant responded well except one which stated quite short. I will see if it bounces back or it may be stunted.

Likes
30
Share


@coyote2thick
Follow
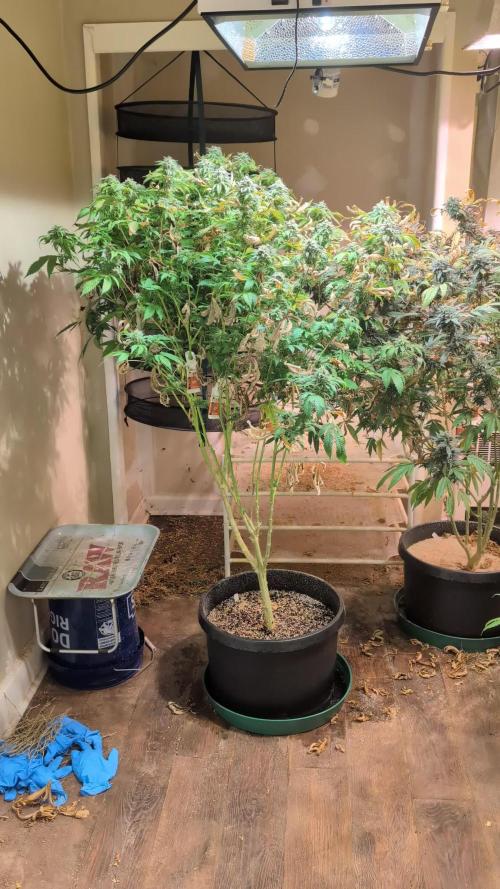
I hung dried for three days and then bagged them up in brown paper bags for two days due to the low temps and humidity before jaring them.

Likes
5
Share


@Deltatigrou0169
Follow
Bonjour à tous,
Très jolie départ sur (21g) (21 de sortie 👍👍👍).
Mise en pots définitive aujourd'hui 😊 c'est parti, maintenant je vais encore plus les bichonner 😊😊😊 j'ai hâte qu'elles grandissent.
Je vous ferai une photo tout les jour pour voir leurs évolution.
Bonne journée à tous 😉

Likes
1
Share


@101Dalmatia
Follow
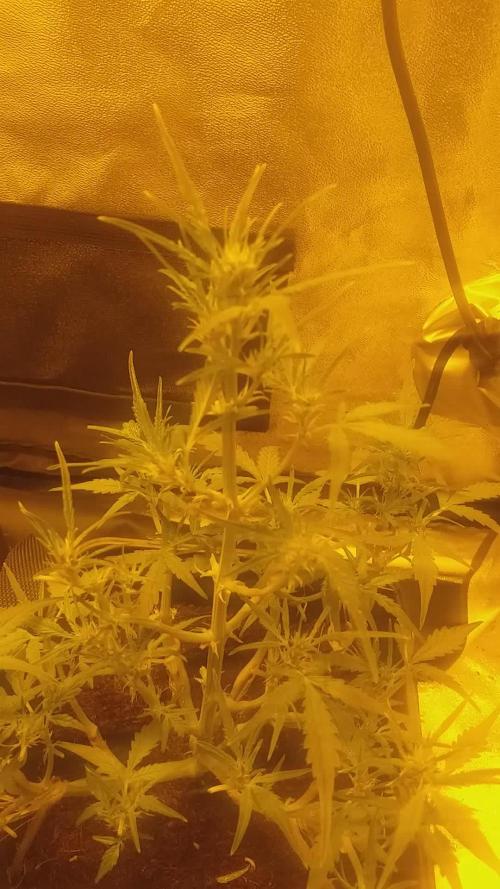
My first grow ,I started with a HPS 600 double ended light Lumatec and at the beginning I knew that summer ☀️ is coming and that I'll have to change to LED ,
Fighting to keep my temperature and humidity at the right range .I made a decision to go with 20 / 4 light cycle.
Likes
18
Share


@Gropadawan
Follow
Day 106, Flower Day 50.
Looked at Trichomes this morning. GSC still showing some glassy/milky look. Bubba is pretty milky colored. Still needs at least a week.
Went on vacation last week. Had somebody else water. They closed the door, so not as good air circulation. Bubba showed powdery mildew. Not yet severe, so I took the plant outside, trimmed off some fan leaves that showed mildew. Then I sprayed the entire plant with a 25% milk solution (whole milk) and let it dry. Back in the tent. Cranked up the inline fans and added a small fan to the Bubba tent. Just need a couple more weeks.

Likes
1
Share

@BAM_BAM
Follow
WE HAVE MITES. I was looking at trichomes and I saw one walking. It looks like they are not spider mites but they are eating the leaves……. I bought predator mites they last 2-3 weeks I will take them out next week so they can die and they can get washed in the trim process.
The Sensi bloom I powder so I am feeding 6.1 grams in the solution. This solution is about 11 Liters per day. The buds are exploding. You can see them pop daily with this overdrive. It is truly the magic in the end the buds get super hard, and THICK.
Likes
59
Share


@JeyGanesha
Follow
Un altra settimana è passata e tutto procede bene.per fortuna non ho più trovato nessun nanners 🙏✌️💪..belle piantine mie, continuate così che farete delle belle pannocchie....
30/8/24 gente ho combinato una bella cazzata.pur avendo esperienza, mannaggia a me,mi sono portato a casa dentro il box, il cazzo di ragnetto rosso... fanculo...
Ho già iniziato a ripulire tutto, box e piante con Neem...li sterminerò tutti 😂..


Likes
54
Share

@Natrona
Follow
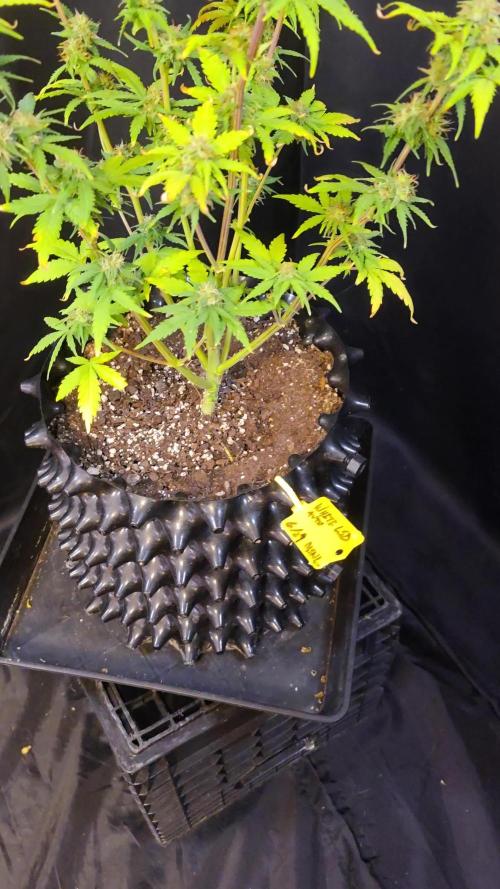
White LSD Auto Feminized Seeds by MSNL
👉Sponsored Grow👈
W7F6 8/4 10-16
Watered at the end of last week and have not watered yet this week. I have been foliar feeding at least once a day with the following blend:
Calmag 15ml
Plant Juice 60ml
GH bloom 5ml
Green Sensation 4ml
Feed was ph 6.37, ppm 784 at 65f.
I ph’d the water down to 6.25 with brought the runoff down to a range of 6.7-7.42 on the plants in the tent. I hope this helps my tent family recover from lockout, but it doesn’t look like it to me. White pushing out more hairs in the buds.
Thank you all for your continued support and encouragement. Your likes and comments motivate me to keep sharing my journey. Let’s continue to learn to grow together!
Stay green, growers love 💚🌿
💫Natrona💫


Likes
62
Share


@Reyden
Follow
Questa luce illumina che è una meraviglia 🤩 non potevo pensare che al 60% copre così bene e uniforme tutta questa superficie, ci sono ben 7 piante per questa volta e vedo che riesce a soddisfarle alla grande 😎🕸️✨🎶 andiamo avanti questa settimana dovrei allenare le tre ragazze di Seeds Mafia e poi la prossima mandiamo tutto a 12 ore piano piano e avanti tutta!!!
Grazie per essere passato e spero che ti piaccia il mio lavoro 😎✨🤞📸🌱🎶🌞💨

Likes
361
Share


@Ju_Bps
Follow
Hello my friendly growmies 👩🌾👨🌾🌲🌲,
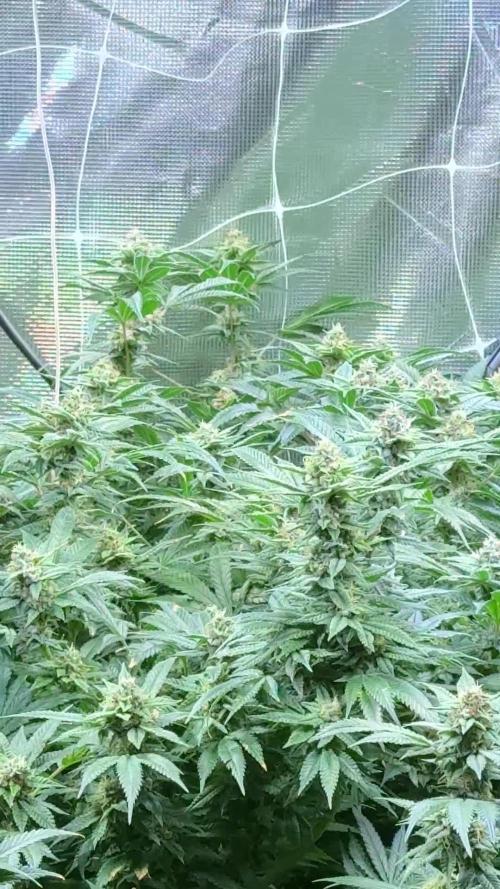
We start to be really close to the harvest 🌲✂️, trichromes not yet ready but soon, I like a few percentage of amber, they are almost totally milky, so probably ready in end next week 🙂🙂
Smeel fruity/diesel
💦 1 watering this week 2.75l/plant
Water + flash clean
Lamp @100% and start to be really close to the plant, but not burning sign for the moment.
Thanks community for follow, likes, comments, always a pleasure 👩🌾👨🌾❤️🌲
Have a nice end years 2022 💜👨🌾👩🌾🎅
See you new year 🍻🥂🥃🥃💨💨
Mars Hydro - TS1000 💡💡
https://www.mars-hydro.com/ts-1000-led-grow-light
Mars Hydro - FC3000 💡💡
https://www.mars-hydro.com/fc-3000-samsung-lm301b-led-grow-light
RQS - Fat Banana Auto 🍌🍌🌲🌲
https://www.royalqueenseeds.com/autoflowering-cannabis-seeds/487-fat-banana-automatic.html
Likes
30
Share


@CanadianFillmore
Follow
Welcome growfessors to another weekly update on the outdoors grow! LSD and Green Crack are budding nicely, with LSD slightly a head. Both ladies got fed Gaia Green power bloom and they got a big drink of water.
Thanks for stopping by growfessors 👽🌳💚

Likes
2
Share


@Mytrichomedgarden
Follow
EL living soil en flora es increible regar con esa sidra viva cambio la forma de resinar de la planta y claramente revivio todo ! la Wifi cookie era macho y lo mate viene todo increible sin deficit de nada esoy muy contento todo organico sin nada d quimico el suelo y los tricomas tienen un olor muy dulce y hasta las hojas transpiran tricomas! MAMA!