


Likes
Comments
Share

@Stonerapaisana
Follow
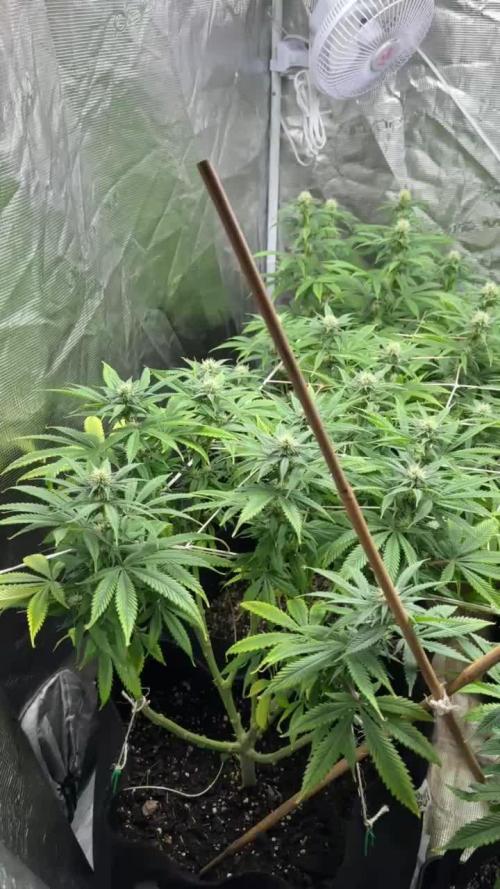
11/08/2025 - Tenho regado apenas com agua mineral com ph 6.2, para não saturar mais com nutrientes. Luz tá a 100%. Agora a ver a acontecer :D
14/08/2025 - Agua e só agua xD

Likes
21
Share


@BrieflyGrowing
Follow
LSTed the plants at the start of the week. Just a simple tie down. Looking good.
Leaves were a bit dark green on all of them except the NL #1 so still no nitrogen feeding. Started BioBizz Grow on NL1 only.


Likes
7
Share


@OwlGang_Uk
Follow
Week 10 - The Plants has shown so much growth within a week those buds are really now starting to form and pack on a scent. I have cut out using the formulex.


Likes
8
Share


@I_Identify_As_A_Dan
Follow
Week 5 of flower for Ztrawberry by Greenhouseseedco
Not too much to report on her, shes just exactly where she should be still got white hairs pushing out.
Shes got around a month to finish off.

Likes
12
Share


@Cannabeast40
Follow
Week 3 and a repot is done and now in day 3. Finally it’s settling down after the repot, which was not pretty at all😂
Hope to get some massive plants this run 🌱
________________________________________________________________________________________
Light from @MarsHydroLED 😎
FC-E6500 EVO🔥
730w±5%⚡️💥
PPE 2.9 μmol/J & PPFD 3.14 μmol/J🔥
Full Spectrum 🌈
WiFi smart connection 😱
Exhaust fan : Mars Hydro 6”.
Heating mat: Mars Hydro “48x20.75”

Likes
Comments
Share

@GoodTimesOrganics
Follow
Hi liebe Community and Welcome Back! 💚🌱 We proud to present the second Strain from Good Times Genetics!
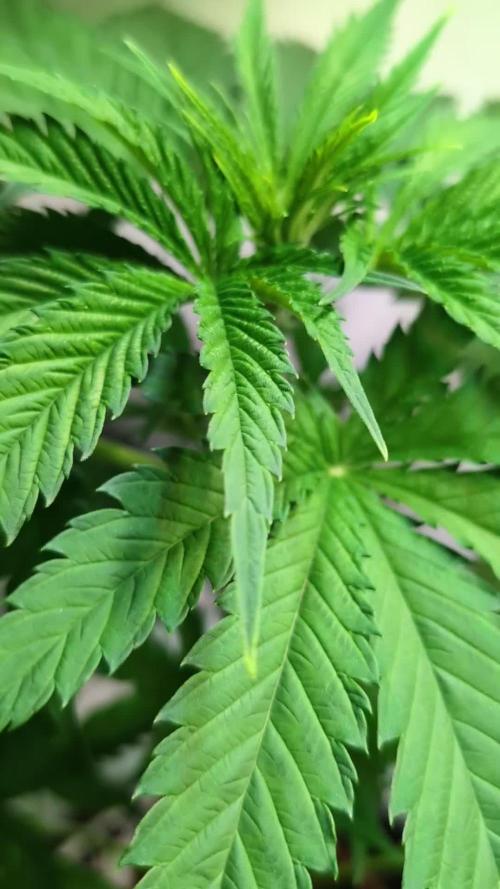
Die Wuchsform der Pflanzen wirkt bis jetzt sehr homogen, es ist zu beachten, dass natürlich die einen etwas schneller wachsen, wie die anderen.
Auch die Stielbreite unterscheidet sich etwas.
Insgesamt wirken die Jungpflanzen allerdings sehr kompakt, was eine gewisse Indica Dominanz vermuten lässt.
Das ist auch so gewollt.
Ich werde immer wieder verschiedene Pflanzen der gleichen Zucht dokumentieren und nach der Geschlechtsbestimmung dann Herausfiltern, welche zwei Pflanzen für die Fertigstellung des Diaries in Frage kommen.
Die Wachstumsbedingungen im Growzelt sind weiterhin am Optimum und Stabil:
———————
🌞 Temp: 23°C
🌚 Temp: 20 °C
💨 RH: 58%
VPD: 0,86 kPa
😎PPFD: 330 mqm
———————
Stay Tuned! 💚
Processing
Likes
25
Share


@SybDarret
Follow
I'm kinda late on the update, week 11 finished on sunday 4, now is feb 9th.
Last time i gave them nutrients was on sunday jan 28th and i'm flushing them since that date.
My intention was to take them down this sunday (11) but I will not be at home that day, maybe I'll cut them on monday 12th.
Maybe on monday i will add week 12 and then when the drying is done I'll update the harvest.
So far it seems like taller plant needs more time, as far as you guys have told me, seems like smaller is ready, but because of time I think I will cut them together.
Also my intention es to create a video to participate on 2F4B contest, i forgot to record the harvesting of LSD25 so this strain is my chance.😀
Likes
17
Share


@BioGrowKing
Follow
Die Woche ist sehr gut verlaufen :) das ist jetzt die letzte blütewoche ^^
Ich spüle seit 2-3 Tagen mit klarem Wasser die Erde durch :)
Nächste Woche schneide ich sie dann ab & lasse sie trocknen :)
Likes
29
Share


@eldruida_lamota
Follow
Ya visteis , cultivo fácil, de principio a fin, pocos errores una pérdida tan solo de 4 ejemplares y por dejadez.
Pero enserio si todo se hace correctamente vais a flipar lo rápido que van y después lo buenas que están.
Humedad en el secado por debajo de 45% y temperatura media de 23 grados.
Hasta aquí es todo fumetillas, que paséis un final de año de lujo entre buenos humos.

Likes
7
Share


@XoticGROW666
Follow
( RUNTZ X F1DURB X GUSHERS )🍬🌈🍨🍧
PURP KICKIN INN END #WEEK4
CANT WAIT TILL THE BUDS SWELL UPP!!
SUPA INTENSE CANDY TERPS THIS ROUND
NOT BIG BUDS BUT SUPA HIGH IN BRIXX LEVEL WITH ALL THE ORGANIC CARBON INPUTS!! PPM 900/1200 1.2 max
(Face Off OG x Watermelon Zkittlez) X (Runtz x F1 Durb x Gushers) 🍉🍬🌈🍧🍨🍦
LIL PRUPLE TINT WIT MOUTH WATERING SUGARY TERPS KICK INN END #WEEK4 BY WEEK 7/8 SHE WILL BE PURPLE PURPLE WIT SUPER INTENSE CANDY MOUTH WATERING TERPS CANT WAIT TILL SEE THEM BUDS SWELL UPP!! PHENO A/B
NOT BIG BUDS BUT SUPA HIGH IN BRIXX LEVEL WITH ALL THE ORGANIC CARBON INPUTS!! PPM 900/1200 1.2 max

Likes
574
Share


@TOTEM
Follow
HARVEST DAY!
162 days after the sprout, and 117 days after the switch.
It makes almost 6 months!! What a never-ending journey!
I chopped down the princess and decided to place the colas on the usual hanging net without trimming them directly.
I just couldn't. Every cola requires at least 30-40 mins to be trimmed properly. I got something like 50 or 60 colas in total.
It's a total pain in the ass believe me!!! There are layers consisting in calyx, leaf, calyx, leaf, and so on. You basically need to work between every couple of small calyxes in order to remove the leaf in the middle, while being very careful to not cut down everything. It's insane!!!!!!
So.... just wait a little more for the final harvest and the smoke report.
They will come, but definitely not now!
In the meantime I uploaded some harvest photos and videos.
;-)
See you soon!!!

Processing
Likes
43
Share


@IndicaRising
Follow
START OF WEEK 4 FLOWERING. NUTRIENTS SAME 4 ML PER LITER RO WATER OF BOTH A & B. 2 ML PER LITER BIG BUD.
MIXED UP 8 LITERS OF NUTRIENT SOLUTION
---------------------------------------------------------------------------------------------------------
Day 64 April 18th - 2019 Both ladies had a little trim to get rid of thick interior.
Day 64 April 18th - 2019 Both Jessica Rabbit & Elly May were fed 1.5 liters of nutrient mix.
Day 64 April 18th - 2019 Temp in tent is @ 78.4° F.
Day 64 April 18th - 2019 Humidity in tent is @ 51%.
Day 64 April 18th - 2019 Jessica Rabbits Coco temp is @ 70.2° F.
Day 64 April 18th - 2019 Elly Mays Coco temp is @ 70° F.
---------------------------------------------------------------------------------------------------------
NOTE - Day 65 April 19th - 2019 The Lady in the coffee can is a clone from the Blue Cookies. The clone was 2 weeks old put in soil in the coffee can
It was put in the tent straight to flower No Veg time at all the clump of leaves at the bottom was how tall it was.
I have been feeding Her the same Nutrients I am using for Coco flowering with the Big Bud for Coco.
---------------------------------------------------------------------------------------------------------
Day 65 April 19th - 2019 Both Ladies are looking good after their little trim.
Day 65 April 19th - 2019 Temp in tent is @ 81.1° F.
Day 65 April 19th - 2019 Humidity in tent is @ 55 %.
Day 65 April 19th - 2019 Jessica Rabbits Coco temp is @ 71.8° F.
Day 65 April 19th - 2019 Elly Mays Coco temp is @ 71.6° F.
Day 66 April 20th - 2019 Ladies are looking good coming alone.
Day 66 April 20th - 2019 Temp in tent is @ 79° F.
Day 66 April 20th - 2019 Humidity in tent is @ 40 %.
Day 66 April 20th - 2019 Jessica Rabbits Coco temp is @ 69.3° F.
Day 66 April 20th - 2019 Elly Mays Coco temp is @ 69.4° F.
---------------------------------------------------------------------------------------------------------
Day 67 April 21st - 2019 Both Ladies received 1 liter pre-mixed solution
---------------------------------------------------------------------------------------------------------
Day 67 April 21st - 2019 The girls are looking fine.
Day 67 April 21st - 2019 Temp in tent is @ 79° F.
Day 67 April 21st - 2019 Humidity in tent is @ 47 %.
Day 67 April 21st - 2019 Jessica Rabbits Coco temp is @ 70° F.
Day 67 April 21st - 2019 Elly Mays Coco temp is @ 70° F.
Day 68 April 22nd - 2019 Ladies are looking good no issues.
Day 68 April 22nd - 2019 Temp in tent is @ 71.2° F.
Day 68 April 22nd - 2019 Humidity in tent is @ 57 %.
Day 68 April 22nd - 2019 Jessica Rabbits Coco temp is @ 67.6° F.
Day 68 April 22nd - 2019 Elly Mays Coco temp is @ 66.6° F.
Day 69 April 23rd - 2019 Both Ladies looking good.
Day 69 April 23rd - 2019 Temp in tent is @ 69.4° F.
Day 69 April 23rd - 2019 Humidity in tent is @ 61 %.
Day 69 April 23rd - 2019 Jessica Rabbits Coco temp is @ 65.7° F.
Day 69 April 23rd - 2019 Elly Mays Coco temp is @ 64.8° F.
Day 70 April 24th - 2019 Both ladies are coming alone.
Day 70 April 24th - 2019 Temp in tent is @ 67.1° F.
Day 70 April 24th - 2019 Humidity in tent is @ 61 %.
Day 70 April 24th - 2019 Jessica Rabbits Coco temp is @ 65.2° F
Day 70 April 24th - 2019 Elly Mays Coco temp is @ 64.0° F.

Likes
15
Share


@MG2009
Follow
02/10/2021
I supper cropped the top 4" down toward lower level to promote auxins to redistribute, also starting 12-12 light cycle should be 8-9 weeks of flowering🙏 if she more than doubles in stretch,then I will need to switch to LED lights to finish


Likes
18
Share


@Chubbs
Follow
420Fastbuds
GelatoAuto
Week 4
What up grow fam. Weekly update on these 3 wonderful ladies. This week I did introduce some nutes and the plants seem to respond amazing. Starting to see little pistols so guessing this will be the last week of veg before the transition into flower. All in all Happy Growing
Likes
2
Share


@Mr_nugs_lover_David
Follow
She looks gorgeous,super healthy and green, she's definitely loving the super soil I prepared for her, seems to be developing very good after the topping let's see how she turns out.
I also applied a selective defoliation to uncover the lower growth on july 25th she was planted on june 22nd so she's 33 days old now,let's see what happens with this beautiful lady😊💚❤️💛 peace ✌️


Likes
31
Share


@MrJones
Follow
MrJones VIPARSPECTRA XS1000 LED
📜 SUMMARY - I have been given the opportunity to run the next generation of LED lights by VIPERSPECTAR, the XS1000! I set up a Stealth Cabnient and moved 3 Cream Manderain Auto XL.s under these lights, the cabinet set up is automated with WIFI light controllers, and INKBIRD Temperature and Humidity Controllers, I am very excited about this opportunity!
Specs and Discount Codes Listed Below.
🔹🔹🔹🔹🔹🔹WEEKLY GOALS 🔹🔹🔹🔹🔹🔹
🌞Environment - 80F and 50%Humidity - using Humidfyer as needed.
💧 Feeding - Feeding with FOOP Canna Organic Nutrient Line
🍃Training / Keeping Stems Stable and Strait
🕷️ IPM - Will be using Green Cleaner" 1 OZ per Gallon, and CannControl from Mammoth alternating between product each month for Integrated Pest Management.
💡 Vegetation & Flower (new) Viparspectra XS-1000 Release on March 15th.
🔹🔹🔹🔹PLANT UPDATES🔹🔹🔹🔹🔹
🌱 Plant #1 - Week 4 this plant is stretching sideways and is about 14 inches wide not.
🌱 Plant #2 - Week 4 this plant is stretching sideways and is about 14 inches wide not.
🌱 Plant #3 - Week 4 this plant is stretching sideways and is about 14 inches wide not.
🔹🔹🔹🔹🔹🔹🔹🔹🔹🔹🔹🔹🔹🔹🔹
▶️Monday 03.15.21 / Rge gurls are recovering well from their topping and training!
▶️Tuesday 03.16.21 / Feed with 30 ounces of FOOP, the girls are doing extremely well!
▶️Wednesday 03.17.21/ Admiring their growth - keep adjusting their tie-downs, the plants are about 14 inches wide - across and about 7 inches tall - there are so many bud sites being produced here and the plant is about to go into flower, I am hoping for amazing results.
▶️Thursday 03.18.21 / Fed tonight with about 30 ounces of FOOP Nutrients - I just can't say enough good things about this product so far!
▶️Friday 03.19.21 / The sister plants of thee ladies are in flower, these girls are entering into flower a little slower due to more aggressive training, but decided to switch them over to the Bloom Regiment! They're kicking ass!
▶️Saturday 03.20.21 / Fed with about 30 ounces of Bloom / FOOP
▶️Sunday 03.21.21 / Fed with about 30 ounces of Bloom / FOOP
🔹🔹VIPARSPECTRA XS1000 LED🔹🔹
Amazon US:
XS1000 10% off: in10MrJones http://yx-8.cn/0y-6
XS1500 5% off: in15MrJones http://yx-8.cn/0yA
XS2000 5% off: in20MrJones http://yx-8.cn/0y2Y
XS4000 5% off: in40MrJones http://yx-8.cn/0y5k
Amazon Canada
XS1000 10% off it10MrJones https://amzn.to/38udUVe
XS1500 5% off: it15MrJones https://amzn.to/3esVUyr
XS2000 5% off: it20MrJones https://amzn.to/3l5zAfg
XS4000 5% off: it40MrJones https://amzn.to/3l7k5Uj