
Likes
Comments
Share

@mihixd
Follow
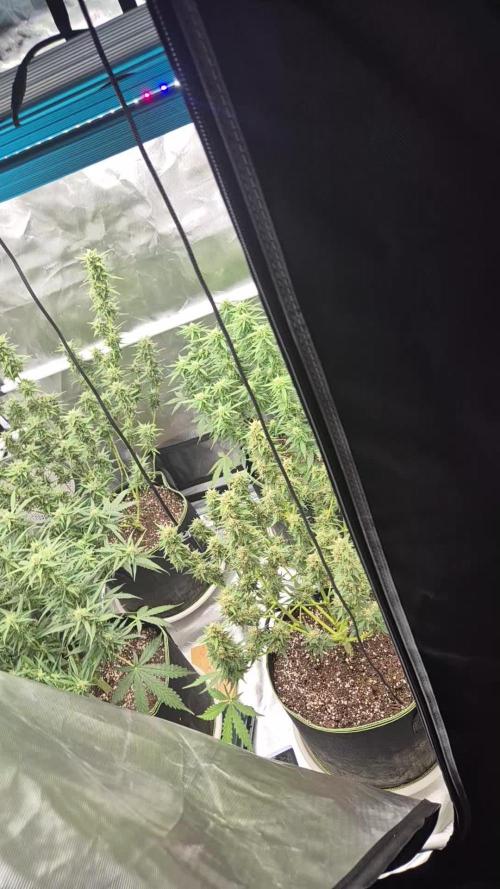
only took pics on d62 this week
D60
10L for 2 with calmag+bloom for smaller plants
10L for 2 with calmag+bloom+gs for bigger plants
d62
big defo on 2 small plants

Likes
18
Share


@Brothersfromweed420
Follow
Bueno por ahora las genéticas van estupendas, espero que disfruten tanto del seguimiento como yo

Likes
22
Share


@spacetimeman
Follow
Jiffy germination peat tablets were used for germination. Seeds were put there straight out of the capsule, I haven't put the seeds into the water as I had done before for previous grows.

Likes
1
Share


@Green_Peace
Follow
Got back from 2 weeks holiday and immediately lollipopped and defoliated all 4 plants heavly. Will wait a few days for them to recover from the battering I gave them before flipping to 12/12.
These plants are at the front and to the right in the timelapse.
Likes
16
Share


@Dr_Rook
Follow
Contando ya los días..
Prácticamente está todo hecho y sólo queda esperar.
Ya sólo estoy regando con agua pura con el ph regulado. Estoy haciendo un lavado de raíces de dos semanas ya que busco el sabor lo más limpio posible.
El clima del exterior está ayudando mucho y he podido mantener la humedad en los parámetros correctos.
Espero cortarlas sobre el finde que viene
Muy contento con lo que veo, la calidad promete 🤩

Likes
12
Share


@Jays_Not_Here_Man
Follow
Did some defoliation this week, not much but enough to create some airflow and unblock a few bud sites. Readjusted my DIY “floating” to take up some of the stretch that had gotten out of control, ❤️ that I can do that!
The frost is real for this strain OMG, week 3 and it’s already as frosty as some of the Autoflower’s I have grown. Temps have been climbing here and there, we’re getting a lot of dry heat so that’s the plus at least, not a lot of humidity at the moment. I’m really wishing I had taken clones from these girls because I’m sure they are going to be insane if they look this good at week 3. 🇨🇦👊❤️

Likes
134
Share


@Sparkles
Follow
Boom Day 28 after flip.
She’s showing off big time.
Cleaned her up real good on day 21 before lights out and will defol a lil bit here and there. Feeding really hard cuz it’s hammer time, some stuff like calcium and Bloom Khaos is almost double what is recommended on the feeding chart. And giving strong teas in between with Flower Finisher (1-5-7) and CytoPlus (0-0-7.5) for that extra kick of K.
Bti for the win! I’ve been brewing AquaBac (in a tea ball) for 24hrs in ph’d water before adding stuff for ‘instant tea’ …I’m seeing one or two fungus gnats flying around and maybe like 3-4 new lil fuckheads on the sticky traps compared to 10-15 before. Was gonna get some nematodes and/or spray the top soil/cover crop with neem oil but I don’t think I have to (for now).
Lights are blasting at 95% and about 13” away and she smells so good.
That’s all for now. Thanks for stopping by and happy gardening 🌱🌱
Likes
Comments
Share

@Hou_Stone
Follow
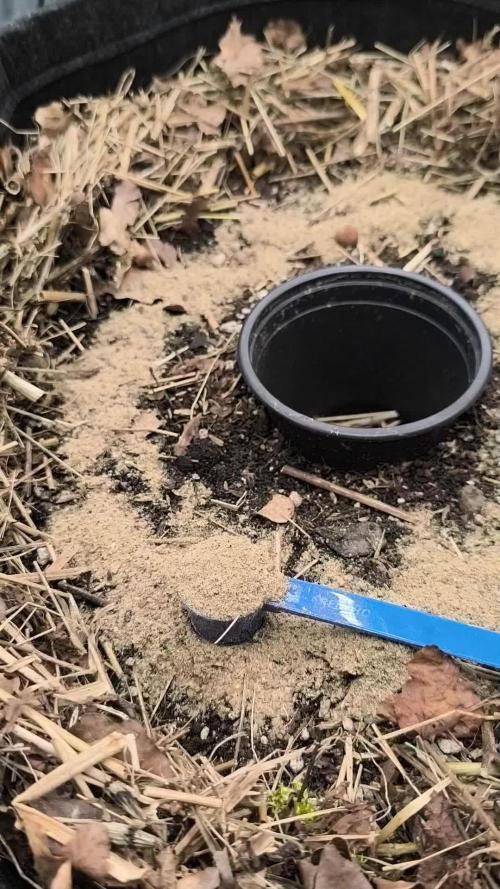
Repoting this week!
First, the new pot, this will be the final pot for my White Widow, a 50L geotextile pot with a substrate I prepared and amended beforehand. I kept a diary about the reciepe of this substrate!
Before transplanting, I added about 75g of BioGrow as a top dressing to provide a good nitrogen boost for the next few weeks.
Then I had to select one of my three FLC. I applied a spoonful of TNC Mycorrplus to the slightly damp roots so it would adhere well. I placed it in the center of the pot and watered like 3L with Bioenhanceur, trying to be gentle during this steps
Now, fingers crossed for what comes next...🤞
Thanks for stopping by!💪💚


Likes
5
Share


@Brickleberry
Follow
July 15 - defoliation, cutted old leaves and small interal branches 💚


Likes
35
Share


@DjDaveAtHome
Follow
Blueberry Headband (2) and a Amhest Sour Diesel (1)from Humboldt Seeds.
https://www.dinafem.org/en/blueberry-headband/
https://www.dinafem.org/en/amherst-sour-diesel/
Lighting
https://www.horticulturelightinggroup.ca/products/260w-qb-v2-led-kit
DWC Nutients
https://generalhydroponics.com/floraseries
FloraGro
FloraBloom
FloraMicro
Diamond Nectar
https://generalhydroponics.com/diamond-nectar
Cal Mag
https://generalhydroponics.com/calimagic
SuperThrive
https://superthrive.com/
Epsom salts


Likes
14
Share


@ThatoneAKguy
Follow
It’s hard to believe this amnesia haze is only in week two of flower! She is kicking butt and LOVING the HLG 550v2 as are her neighbors. I got a little stretch out of her but it appears that’s about it. The colas look like they’ll be about 8-10”. I moved the light down for a day and gave them 85,000 lux and while they are still reaching I don’t think they liked it as much as 65k so I brought it back up. I did take a few of her pie plate sized leaves of just to let a little extra light to the lower sites as well.
Thanks for looking and happy growing!

Likes
65
Share


@Visions
Follow
10/14/19 - manim baked. Time to feed them. Going to start flushing this week! Enjoy a video :) UPDATE* Life happens and we make mistakes. Little too much to drink with a good smoke and a long day at work.... ended up not finishing putting my girls all back in the tent so they were out for a few but only interrupted with light for 3 hours.. Not a big deal since we are this far but live and learn.. Rule 1. Dont get shit faced while taking care of the girls 😂👌😅🤦♂️💁♂️ Anyways will take pictures tonight and then feed the girls.
10/15/19 - watered the girls tonight. No signs of slowing down! Buds fattening and ripening.
10/16/19- updated pictures. Checked the buds. No feeding tonight. Trichomes are mostly milky with a few clear and a tiny amount of amber. Should be around next week when we hit 8 weeks of flowering, we will then determine harvest week. Shooting for 2nd week of November. Girls should be around 11 to 12 weeks in flowering.
10/17/19 - Watering time and updated pics. Milky and clear with a amber here and there. Shes close but needs I'd say 2 weeks more then a flush. Harvest is close. Her buds are getting fat 👌
10/18/19 - Updated pics Day 50. I'd say 2 weeks from now I'll begin flushing. So by mid November these guys will be dried and jarred 💨
10/19/19 - no watering needed. Buds are looking good. Hoping for 3 oz between the 3 bf phantoms. 👌 seeing more cloudy, amber here and there. I believe by 8 weeks we will begin flushing for 1 to 2 weeks. Then 48 hours of darkness before their chops. Will start setting up my tent for drying once it gets closer. Want to keep the rh at 50 to 52 while keeping the air at 70 to 68. I want them to slow dry and depending in how we run the tent, i will trim either on day 3 or 7. I want to give them 10 days of drying for a good fluffy cure. Top shelf bud is the goal for my first phenos.
10/20/19 - Fed the girls. I think this may be the last week and a half of nutrients then flush.
Likes
3
Share


Likes
5
Share


@GODAXE
Follow
18.08.2024
D7 of flowering we got almost nice temp this week, sunny day and nice cool temp at night...except for today the rain shorten the weekend at the camping
4 cut of the black berry and 2 of the fast berry have been take to run a clone chalenge


Likes
1
Share


@Blucha
Follow
These ones going crazy right there!
Week 6 of flowering just a couple day ago they started to bulk up.
I did some defoliation but nothing big
Strong and extraordinary smell of both strains. Two different worlds in tha tent.


Likes
15
Share

@420DeepGrow
Follow
📆 Semana 11
La Auto Pablo Escobar llegó a su punto justo. Tricomas en su mayoría lechosos con un 20% ámbar, los pistilos ya marrones y retraídos. Olor muy penetrante y dulce, con tonos terrosos y algo especiados. La planta respondió muy bien al lavado en la última semana y dejó ver unas flores compactas y bien resinosas. En general, cultivo fácil, ciclo rápido, y muy buena producción para una automática. Ya cortada, colgando para secar en armario con buena ventilación. ¡Muy contento con el resultado! 🔥✂️💨
Seguimos creciendo fuerte 💪!


