


Likes
Comments
Share

@Organic473
Follow
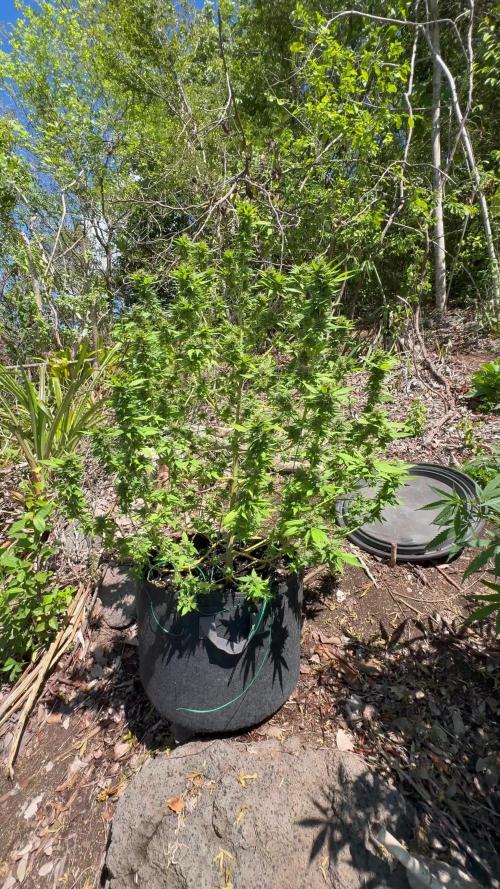
Feeding her regularly as required…I can smell her a mile away on windy days.



Likes
4
Share


@MoneyMorris
Follow
Looking like 3 more weeks until harvest. I’m going to start flushing in about 10-12 days

Likes
9
Share


@BLAZED
Follow
Week 10 (19-8 to 25-8)
19-8
Temps: 21.5 to 26.9 degrees
Humidity: 44% to 52%
20-8
Temps: 22.4 to 28.1 degrees
Humidity: 47% to 56%
21-8
Temps: 20.4 to 26 degrees
Humidity: 39% to 60%
Watering: Both 1500 ml.
Dry Weight #1: Both 2.5 kg.
22-8
Temps: 20.4 to 26.6 degrees
Humidity: 45% to 50%
23-8
Temps: 22.6 to 27.3 degrees
Humidity: 47% to 59%
24-8
Temps: 22.3 to 28.9 degrees
Humidity: 48% to 64%
Watering: Both 1500 ml.
Dry Weight #1: Both 2.5 kg.
25-8
Temps: 21.4 to 25.5 degrees
Humidity: 46% to 64%
The 2 plants are showing some nutrient deficiencies/toxicities, anyone knows whats going on?
I already installed a humidifier so the humidity wont get so low.

Likes
48
Share


@MadeInGermany
Follow
Hey everyone 😁.
Today I start the next aeroponic round 😃.
Since the last 3 runs were with my Gelato (Black Pheno) from Zamnesia, this time I will put my Kosher Tangie Kush Phenotype from Amsterdam Genetic in the Growtool 0.8 😃👍.
Of course, the Gelato (Black Pheno) will continue to be used 👍.
The entire system was cleaned with alcohol and everything checked for functionality :-).
I took 6 cuttings from the little Kosher Tangie Kush mother, of which only one remains in the end (the best).
As always, the water was mixed with osmosis water.
The following was added:
Canna Rizotonic: 3.5 ml per l
Cannazym: 2.5 ml per l
Canna Cal / Mag: approx. 0.2 l per l.
Since this time I want to do a ScrOG with a single plant in the Areo system that fills the whole tent :-).
similar to the second gelato run where I did the ScrOG with 3 plants 👍.
The clones were placed under plastic hoods and sprayed so that they had enough moisture to root.
Now they get 10-14 days to root, then we'll see which one is left over :-).
I wish you all a lot of fun until the next update.
Stay healthy and let it grow 🙏🏻🍀.
You can buy this Strain at
https://www.amsterdamgenetics.com/product/kosher-tangie-kush/
Type:
Kosher Tangie Kush
☝️🏼
Genetics:
Kosher Kush
X
Tangie
👍
Vega lamp: 2 x Todogrow LED CXB3590 COB 55 W
1 x Sanlight S2W 62 W
💡
Flower lamp : 2 x Todogrow LED CXB3590 COB 55 W
1 x Sanlight S2W 62 W
💡 ☝️
Grow Aero System : Growtool 0.8
☝️
Fertilizer:
Canna Aqua Vega A + B , Canna Aqua Flores A + B , Rizotonic, Cannazym, CANNA Boost, Pk 13/14, Canna Cal / Mag, Canna Ph - Grow, Canna Ph-Bloom
☝️🌱
Water:
Osmosis water mixed with normal water (24 hours stale that the chlorine evaporates) to 0.2 EG. Add Cal / Mag to 0.4 Ec Ph with ph- to 5.2 - 5.8
💦 💧

Likes
16
Share


@DaddyPrime2
Follow
5/28 I think she's about to go off.
6/2 she's been droopy leafed for a bit. I backed off on nutrients for over a week. I thought it may have been overwatering but at the same time I don't want to kill off the microbe life in my soil right now by letting it get overly dry. I'm more experienced with coco and the dry back is more aggressive and intense and with soil it's a little different and slower but it als9 cant dry back as

Likes
44
Share


@Kanndera
Follow
Приветствую тебя в моем дневнике!
Это мой первый гроурепорт и первое выращивание. И я буду очень рад, если проходящий мимо гораздо более опытный товарищ, даст свой совет, рекомендацию или просто комментарий. Ведь тогда мои шансы на успех вырастут. Спасибо заранее.
Исходные данные:
Придумал чем занять себя на самоизоляции, тем более что давно хотел за это взяться и выращивать самому, но нужен был толчок к этому. Быстренько набросал схемы, почитал форумы и приступил к делу.
Собрал свой гроубокс, размеры: 200 см высота, ширина 100 см, глубина 70 см.
Прекрасно понимаю, что мои условия не идеальны, но я исходил из того, чтобы собрать это самостоятельно и в короткие сроки, плюс я живу в небольшом городе и некоторые вещи нужно заказывать с доставкой.
Гроубокс стоит на неотапливаемой лоджии. Вентиляция идет прямо на улицу. Пока на улице прохладно внутри стоит инфракрасный обогреватель с терморегулятором от теплого пола. Вдув воздуха в бокс пока пассивный. На выдув стоит вентилятор Вентс 125 с регулировкой оборотов.
Электронный таймер для лампы, первую неделю стоит режим освещения в 24 часа. Есть гигрометр и увлажнитель на 4 литра.
Лампа собрана из 3-х LED прожекторов 6400К, плюс 6 фитоламп и 4 бытовые LED лампы. 4 уровня освещения включаются сверху.
Вентилятор направлен на обогреватель, чтобы равномерно распределять тепло.
Горшок Airpot на 15 литров. Грунт: 65 земля + 20 кокоса +15 перлита. Вода из под крана 7.1 pH, 138 ppm. У отстоенной воды 37 ppm.
Семечка заложена в горшок 3 апреля.
4 апреля сделал пролив горшка водой 1 литра: Отстоенная вода + Восток ЭМ-1 (1мл) + Фитоспорин (0,5 мл)+ Эпин Экстра (0,1 мл).
6 апреля посадил в горшок рядом семечку Авто АК47 (от Семяныча).
8 апреля был пролив водой с Восток ЭМ-1 (1мл).
11 апреля сделал свой CalMag на основе: сульфата магния и нитрата кальция.
Пролил раствором с CalMag 2 мл + 1,5 мл янтарной кислоты + 0,1 мл циркона.
Думаю буду теперь постоянно проливать с водой, под корень и по листу с CalMag 2 мл.
Информация не вся, позже еще добавлю, если будут вопросы по условиям выращивания.

Likes
38
Share


@PolishFarmer
Follow
Hi :) it’s 10th week in my happy grow :) girls looks lovely, Smell is awesome I think terminator does it’s job :)generally I’m so proud of my girls, of course it was not without mistakes but it is my second indoor experience so still learning from mistakes :) this way we will come to perfection :) new project from fastbuds is on the way! check what’s coming! :) happy Sunday for everyone, peace!
Day 66 update resulting decision of defoliation. I treated them well but in my opinion they can catch a big breath now :)
Likes
11
Share


@Microsun
Follow
Flowering is going amazing, this candy cane is growing some very fast weight and caking up with Trichome’s. The sweet and slightly minty berry smell is growing in power day by day, and I’m very happy with how the size of the buds are developing since adding the increase of 2-8-4 and fish bone meal, just a little bit, not too much at all and she’s reacting great, knowing that the candy cane is a larger auto in size makes me a bit sad with the total size of this plant, but in its young age as my very first auto I believe I probably stunted it, but after all this and how she looks now Im more than happy with the growth, yield and quality of it, just speaking now as I do not obviously know how much I Will revive from it, I’m guessing about a ounce. No small bud sites other than maybe one on a lower branch that already has a main top cola on it. The main cola is massive and packing on a lot of size. I’ve switched the light to a hour less now as I am growing 2 photo indica L.A grape and with the season change I am having to fix my temp and humidity more for the photos, so changing to a 17-7 schedule has actually helped quite a lot and also has helped my other autos veg slightly better. But all in all I’m very exited!

Likes
6
Share


@Bakeryguy420
Follow
She in middle of week one flowering recieved a heavy pruning , also adjusted her lst. She started to stretch now hopefully she stretches up a foot more :) all in the end even though one made it I'm still glad :) will order more down the line for sure. Sometimes people we hit or miss with seeds!

Likes
6
Share


@Lovemabud
Follow
The plant went crazy this week, easily doubled its size. Really happy with how its going, nice even canopy after the LST from weeks 2-4. I decided to fertilise this week with some left over Mills nutrients I had from a previous grow. Really think the plant appreciated it. Hopefully it shows me the appreciation with fat juicy buds.


Likes
22
Share


@White_Greengo
Follow
This was my first experience using Mapito and Ebb & Flow, together with the new LED light. The plant turned out to be unusually low. 👌
The variety is quite fragrant, but the smell appeared only in the middle of flowering.
At the time of trimming, the plant smelled of mint candies 😁

Likes
9
Share


@Smokey_J26
Follow
Defoliation again, as you will see, gave the girls plenty of room for air to circulate.
Likes
41
Share


@JeyJo
Follow
Day 79
Heut wurde gegossen mit Dünger und Neemöl
Neemöl wurde auch gespritzt
Day 82
Heute wurde gegossen mit Calmag
Day 84
Heute habe ich bei allen 3 Ladys unten rum leicht entlaubt und einige Triebe entfernt
Anfangs der Woche war es ziemlich kalt und die Ladys haben die Blätter hängen lassen (6grad)
Ende der Woche ist es endlich Warm geworden und sie stehen wieder prächtig da, vereinzelt hab ich Löcher von kleinen Heuschrecken aber noch nicht all zuschlimm.
Ich habe auch die Calmag Menge erhöht da leichte Mangelerscheinungen zusehen waren.
Die Ladys wachsen und gedeihen sehrgut
#1 100cm
#2 120cm
#3 158cm

Likes
10
Share


@TiRobotProds
Follow
J'ai pratiquer sur elles la défoliation extrême qui consiste a enlevé les grosse feuilles nourricière pour permettre une meilleure penétration de la lumière et de la circulation de l'air voyons ce que cela va donner au prochain épisode growers.

Likes
11
Share


@SintrexGrow
Follow
This North Thunderfuck Autoflower is growing at a very rapid growth.
The plant is in week 2. From seed to now the plant is 15days old.
I usually top the soil twice on seedling to support the stem but this time i used a paper clip just to have support from the wind, and i left the wieght of the seedling on the stem. So the plant will grow its stem stronger which at the end it will help a lot with the yield.
Big stem = big buds.
I started feeding this plant early so she has a bit of a boost in the begining due thats an aoutdoor plant with just 12hrs of light from the sun.
Likes
49
Share


@hawkeye_diesel66
Follow
She is truckin right along. I love this stage of flower when little buddlets are all over her. If the genetics of fast buds are all like this, I may have found a new autoflower place, I do want to try some memphosto genetics though. I'm always hearing and seeing those big plants they throw out. Not many picture's this week got busy and had to play catch up.
Likes
3
Share


@SgtDoofy
Follow
Had a pretty serious gnat infestation this week. I noticed some movement in the runoff water after feeding. After taking video I made a 2:1 water to peroxide mixture to spray down the bucket and into the overflow trays of both plants in the tent. I also added a gnat traps and a low tent to help dry the soil and prevent gnats from hanging out there.


Likes
9
Share

@UnorthadoxDude
Follow
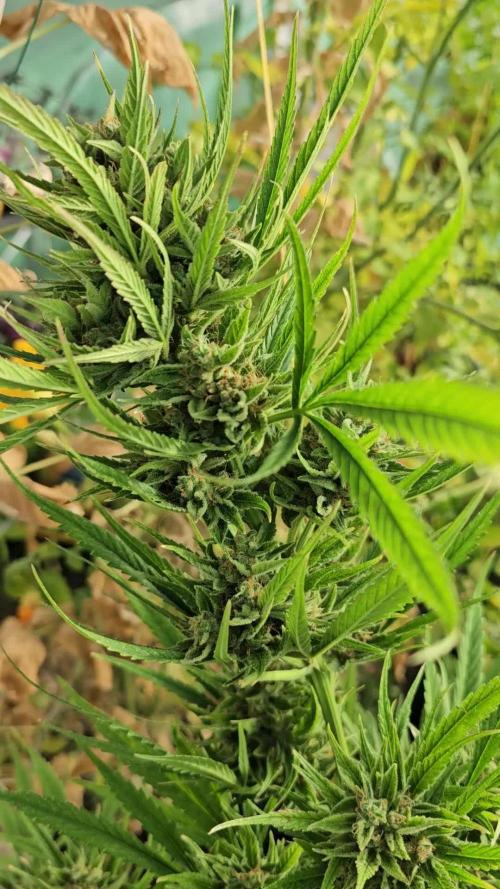
Welcome to week eleven for Franka, an Auto Fractal by Divine Seeds.
Day 71 - photographed
Day 74 - photographed and took a video
Day 76 - photographed
Thanks to Shogun for providing the nutrition for this grow, and to Divine Seeds for providing the seeds.
If you are not already a part of the cannabis community on X (formerly Twitter), I recommend joining! I have the same username over there.
