


Likes
Comments
Share



Likes
10
Share


@barlobruz
Follow
7/6/2021
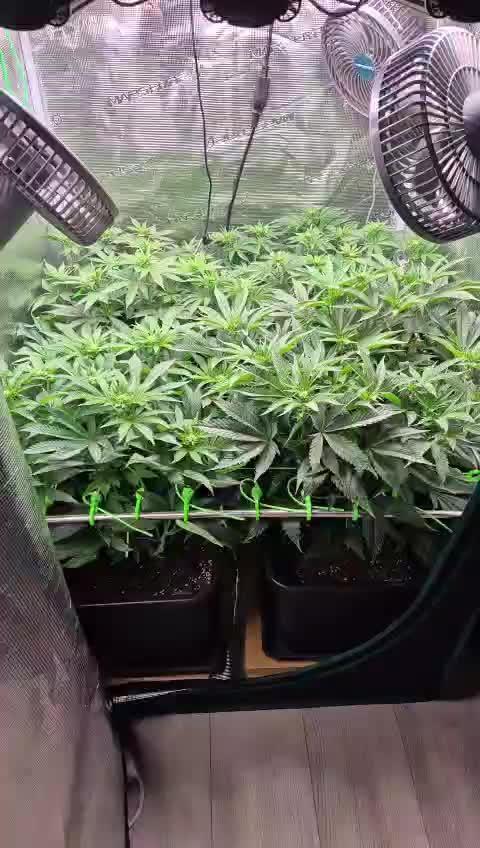
- Trimmed lower fan leaves as they were being blocked completely, and a few tips were yellowing.
- Continuing to lightly bend the upper branches so the lowers can catch up.
- Bought some Gaia Green veg + bloom dry fertilizers as I expect I'll be flipping to flower soon.
7/7/2021
- Watered in a little bit of Gaia Green's veg fertilizer.
- Foliar fed w/ DIY kelp extract.
- Yellowing/browing on a new leaf, can't identify what it is.
- Staked down the branches on the upper mains this evening to open her up for more light penetration, she was gettin' real bushy.
7/9/2021
- Trimmed out middle to expose canopy

Likes
21
Share



Likes
14
Share

@Kirsten
Follow
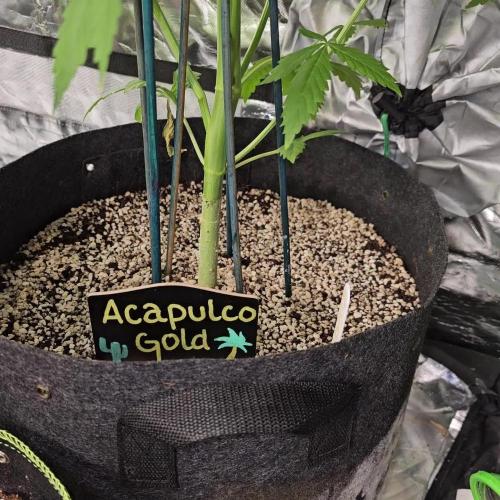
This week, the plant is feeding heavily and has grown well.
I super cropped the main stem to help with the plant becoming too tall. It has taken very well.
The plant was becoming very tall so I thought this would be something to try out.
Here's what I did this week.
18.7.25:
I watered with 2ltrs of dechlorinated water PH'd to 6.4, containing the following nutrients;
💜 2ml Ecothrive Trace
PH: 6.4
PPM: 365
22.7.25:
I watered with 3ltrs of dechlorinated water PH'd to 6.6 with;
💜 1 TSP Sea K
PH: 6.6
PPM: 485
25.7.25:
I watered with 2ltrs of dechlorinated water PH'd to 6.5, containing the following nutrients;
💜 2ml Ecothrive Trace
💜 1/4 TSP Ecothrive Biosys
PH: 6.5
PPM: 361
28.7.25:
I watered with 6.5ltrs of dechlorinated water PH'd to 6.0 with;
💜 7ml Trace
💜 1.5 TSP Ecothrive Biosys
PH: 6.0
PPM: 351
Thank you for checking in this week and hanging out in the comments 😁💚✌️🌱🙌

Likes
4
Share


@TrippyFreeman
Follow
Man at this point we are bushed out and everyone needed a defoil like crazy
Changed my lights spectrum to flower
I also went full tilt into the nute line I’m now running the base micro bloom and grow added bud candy b52 and big bud


Likes
12
Share


@H2Smith
Follow
📅 23.04-21 (Flo day 57)
📜 trichome analysis: not ready to flush.
⚗️ 1.85
💦 6.2
🌊 40L
📏 cm
📅 24.04-21 (Flo day 58)
📜 removing 30l from the system, the plants drank 30l. 60l filling. EC dropped to 1.83 at 1:00 AM. Trichome analysis: not ready to flush.
⚗️ 1.88
💦 6.2
🌊 30L
📏 cm
📅 25.04-21 (Flo day 59)
📜 trichome analysis: not ready to wash. Plants have drunk 40l at 8:00 PM 50l at 11:00 PM
⚗️ 1.77
💦 6.2
🌊 50L
📏 cm
📅 26.04-21 (Flo day 60)
📜 Set Ph 6.1 to the Ph Controller.
⚗️ 1.79
💦 6.18
🌊 30L
📏 cm
📅 27.04-21 (Flo day 61)
📜 Trichome analysis: Not ready yet.
⚗️ 1.80
💦 6.10
🌊 45L
📏 cm
📅 28.04-21 (Flo day 62)
📜 drained 50 liter from the RDWC system. Objective EC 1.60. Add 175ml total care
⚗️ 1.78
💦 6.10
🌊 35L
📏 cm
📅 29.04-21 (Flo day 63)
📜 -------------------- Nothing to say
⚗️ 1.67
💦 6.10
🌊 40L
📏 cm
_____________________________________________________
📅 Day - 📜 Note - ⚗️ EC -💦 PH -🌊 Water -📏 Height
Equipment:
Idrolab 12 bucks
Chiller teco Hy500
weather controler with Co2 : PRO-LEAF BECC-B2
Bavagreen 720w
Bavagreen 720w
Bavagreen 240w
Bavagreen 240w
Nutrients and PH controller: PRO-LEAF PHEC-B2
Nutrients: Green House feeding - powder feeding hybrids | Powder feeding boost
Extractor: primaklima PK250-1 PK250-L1 x2
System and roots care: Idrolab Total care

Likes
69
Share


@Natrona
Follow
*****DIVINE SEEDS *****
*****FRACTAL*****
SPONSORED GROW
Week 5 This week 5/5-5/11
Germination April 6.
Vegetation
Week 1 water only
Week 2 water only
Week 3 added recharge and TPS1 increased ppm to 570.
Week 4 continues with recharge and TPS1. I added Fox Cal mag increasing ppm to 685 - 805.
Week 5
TPS1 9ml/gal
Recharge 5 ml/gal
Fox Cal-mag 5 ml/gal
This was an exciting week for my ladies. It started out with the usual feed and defoliation and training. With my upcoming vacation, I am going to be hardening off these ladies to relocate to their outside location. I checked the expected weather forecast for the week. Looks good to start hardening off. Partly cloudy with temps in the low to mid 80s just like in their tent. So that’s good. Night temperatures were in the 50-60s. This is much cooler than what they are used to as our house is at 73. They need to get used to what mother nature will provide. Our summers are hot and humid. I had planned to bring the plants back in the sunroom but since conditions were similar, I let them stay outside every night. And every night but 2 it rained. I did not water or feed nutrients this week.
I am attempting the scrog technique on all plants. I am using a peony cage as the support structure. The cages are about 2 feet high. This may not be enough side or top support as she grows and may have to resort to tomato cages.
Took pics May 6, 9, & 11 Fractal is a vigorous gal and gets very bushy after defoliation & training. Divine Seeds recommends keeping its Fractal profile wider and flatter. To achieve this, I am aggressively pinning down each branch coming off the main stalk while defoliating regularly to keep the top open. Today she has a beautiful, mounded canopy showing multiple bud sites. Her nodes are close but starting to spread out a bit. They remain even and balanced.
Thank you @DivineSeeds
Thanks for the visits, likes and comment, I appreciate all the plant love💚.
Have fun & love what you grow 💚
Sending you good vibes of love, light and healing 💫
💫Natrona 💫
***FRACTAL***
Rating:
Fractal is an especially psychedelic strain that Divine Seeds developed for esoteric and mystical experiences, meditation and creativity. A potent and vivid landrace variety from Southern India was crossed with a sticky leaning Indica (mostly Afghani), then Skunk #1 joined this company. Their progeny underwent multiple selection experiments, until its massive built, resin concentration and hypnotizing powers reached an ultimate level. The result is now known as Fractal – resinous, spicy and productive. Best choice for commercial growing: a compromise between bigger yields and fast ripening! A great source of hashish that has something incense-like to its musky smell.
Indoors expect 170 сm height, out of doors plants grow up to 200 сm. Fractal fits for all types of growing environment: grow boxes, hydroponic or aeroponic setups, outdoor plantations, balconies, terraces and green houses. For more weight it is recommended to train Fractal plants to broaden their structure and limit their vertical growth. For that purpose use ScroG or SoG, LST, FIM or topping, supercropping or mainlining – there are no limitations for the strain itself, but certainly low-stress methods are recommended to smaller samples. Fractal has an inherent immunity to molds and insect pests, but since its colas are thick, protect your plants from stale air. Also during rainy weeks your plantation may need to be covered. Ready for outdoor harvesting in October. Big and dense buds the color of olive, hunter green heavily coated with crystals.
Whole Fractal buds smell hashy and earthy, while cedar and fruity hints are noticeable on breaking. Measure your portion carefully: the potency is above average! With Fractal you experience an overall stoning that either keeps you put or slows your motion down, also vertigo is possible. However, in moderate dosage the impact is described as a pleasant sensation of well-being and placidity. Perfect for spending a night by a bonfire without talking, therefore is more often enjoyed as a solo smoke. Efficiently relieves muscle spasms and seizures, inflammations, combats insomnia and increases your appetite. Up to 3 hours of altered state of mind can be expected. Best consumed at night time.
Pots: 5gallon Air pots
Soil Fox Farm Happy Frog Amended with worm castings, dolomite lime and mychorihiza
Seeds provided by Divine Seeds
Divine Seeds breeding company
The link to Fractal Feminized Seeds
Fractal - Divine Seeds breeding company
The link to Fractal Auto Seeds
Auto Fractal - Divine Seeds breeding company
=================================
Equipment: AC Infinity
CLOUDLAB 844 – Advance Grow Tent 48”x48”x80”
CONTROLLER 69 PRO – Grow Tent Controller
CLOUDLINE LITE 6 - Inline Fan 6"
IONBOARD S44 – LED Grow Light Board 400W
CLOUDRAY S6 – Oscillating Circulation Clip Fan
Carbon Filter 6”
Nutrients: Total Plant Solution
TPS1
Canopy
Signal

Likes
13
Share


@Ksouth1
Follow
Last week went well. She is done stretching and is just stacking on bud mass and trichomes. Very pleased with this strain so far. Thank you Seedsmans for the great testers. This beauty would have done great in a 5 gallon pot. Still has some time to go, but I can't wait. The smell is getting stronger and I am looking forward to trying her out. Happy I have more seeds to grow. She responded great to topping and lst training. I did some minor defoilation this past week and am just watching her do her thing. Until next time happy growing to everyone!

Likes
21
Share


@Eponymus29
Follow
Two weeks!! Ladies looking great, no nutes needed so far... I've been watering every other day with nothing but voodoo juice, I might be giving them a couple weeks more before flipping them into 12/12!!


Likes
11
Share


@Andres
Follow
she seems happy outdoors .. without any problem just pat patience ... nothing more information for now......

Likes
10
Share


@w33dhawk
Follow
Moin ihr growmies, und ein knackiges Highfive in die Runde!
Diese Woche war die letzte vegi Woche alles läuft soweit bestens habe die Pflanzen jetzt auf die blüte Phase vorbereitet Entfernung von Fächer blättern und Wachstum was nicht relevant ist da es nach unten wächst. Sonnst ist nicht viel los die Damen bekommen alle 3tage 3L Wasser sind schon ziemlich durstig, hier und da mal ein wenig Lst um den Baldachin gleichmäßig zu halten ab nächster Woche ist dann 12/12 licht Plan angesagt......!

Likes
33
Share


@Darksoul
Follow
Week 5 - Same nutes from previous week. 2 more weeks of vega i think.
Look ate the shape of the plant and the wires to hold she down.
I have toped my plants 2 times over the past 2 weeks, and now all of their have the "H" shape in the base


Likes
10
Share

@Chubbs
Follow
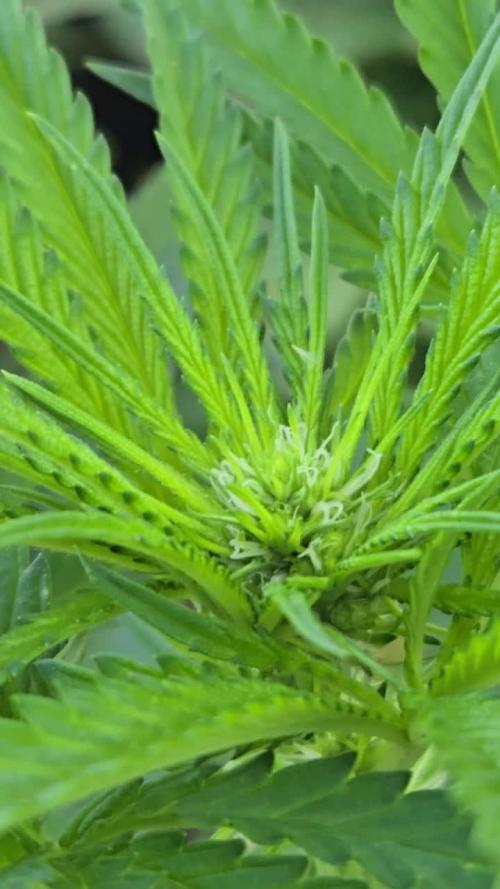
Weekly update fam. We got preflowers, so we all know what that means. The flower stage of the plant cycle has started. I'm extremely happy the way these have grown requiring no special treatment what so ever. They're getting attacked by some pest but I'll spay and hopefully get that under control before to late into flower. I generally don't like to spray past week 3 of flower. All in all Happy Growing

Likes
31
Share


@BigBadLion
Follow
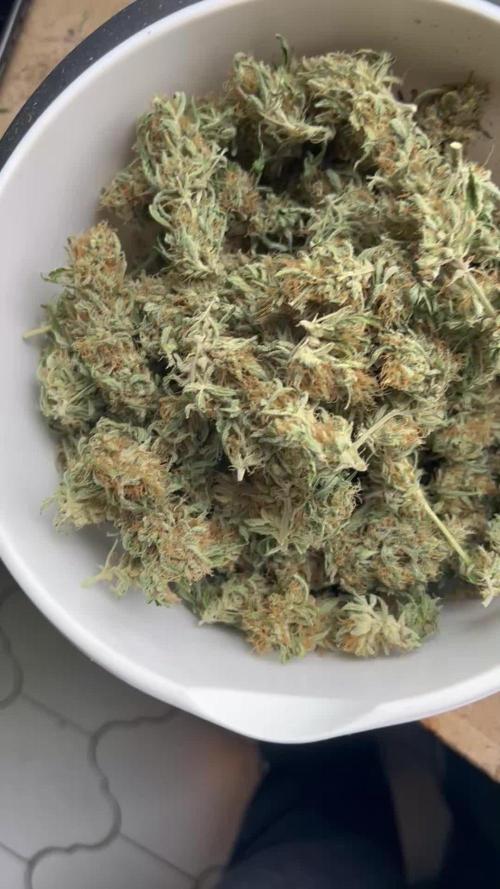
Happy 4:20 everyone! 🙌 I hope everyone's doing well and please remember to stay safe!
The buds in my plant are getting bigger! Two of the side branches of Pistachio could not hold the weight of the buds (you can see when they fall on the timelapse!) so I had to "hang" them to the tent, yikes! 👽
I also increased the amount of Silver PK by 0.5 but I believe the PPM was a little too high, so next week I'll try lowering the dose of CalMax to see if that helps.
Some of the trichomes on the leafs are starting to turn ambar (while the rest of the plant are transparent or very milky) so I suppose the girls are getting there! They need a liiiiittle more time since there are still some immature hairs, specially on Matcha. The leaves of Pistachio are also turning lighter in color and I've been removing them everytime one pops up.
Anyway, see you all in my next update! 👍


Likes
35
Share


@Master_weeda
Follow
Bonjour à tous les padawans et les maîtres jedis
Pour cette semaine je prévoit de pratiquer comme technique spéciale le LST et juste un arrosage.
Pour cela comme à mon habitude j'attend le cinquième noeud ou que je juge la plante robuste.
Je profite que cette semaine qui va être relativement calme pour faire un LST appliqué et vous faire un rappel de ce qui est pour moi la meilleure technique pour arroser une autofloraison et la façon dont je pratique le LST.
En suivant ces quelques simples conseils vous obtiendrez un résultat optimal tout au long de votre culture :
Le cannabis est une plante qui n’aime pas recevoir un léger arrosage en continu. Il est impératif de l’arroser en grosse quantité, puis d’attendre que la terre soit bien sèche avant d’arroser à nouveau!
Pour calculer la quantité d’eau nécessaire à chaque plante, suivez cette règle :
Le volume d’eau à donner lors de chaque arrosage doit représenter au moins environ un quart du volume du pot !!
Exemples :
pour un pot d’1L, donnez 0,25L d’eau à chaque arrosage pour un pot de 4L, donnez 1L d’eau à chaque arrosage pour un pot de 12L, donnez 3L d’eau à chaque arrosage pour un pot de 30L, donnez 7,5L d’eau à chaque arrosage !etc…
Pour donner un tel volume d’eau, il est souvent nécessaire d’arroser en deux (voir trois) fois, lentement et uniformément sur toute la surface. Disposez de bonnes coupelles sous les pots, celles ci se rempliront d’eau qui remontera dans le pot par capillarité en moins d’une journée. Il est également très important d’utiliser un bon terreau de qualité, avec une bonne capacité de rétention d’eau mais qui assure également un bon drainage (celui ci doit contenir de la perlite, et/ou de la coco, etc..)
Il vous faut alors maintenant attendre quelques jours en sous-pesant régulièrement les pot avec vos bras. Quand ils seront redevenus très légers, vous pourrez arroser à nouveau !!
En effet, comme l’eau pèse beaucoup plus lourd que la terre, un pot gorgé d’eau pèse plusieurs fois le poids d’un pot d’une plante prête à être arrosée. Avec un peu d’entraînement, vous apprendrez donc très rapidement à sous-peser vos pots pour savoir quand une plante a soif.
C’est une technique à la fois très facile et très efficace, et qui peut être appliquée à toutes les plantes en pots !
En arrosant de cette façon, en général vous devrez arroser vos plantes tous les 3 à 6 jours.
Pour cette semaine 3 au jour 17 ma plante fais 12 centimètres et son cinquième noeud apparaît je décide donc de pratiquer un LST sur ma plante.
Pour ce j'utilise du fil de fer galvanisé que je plante directement dans le substrat en faisant attention de ne pas endommagé les racines car n'oublions pas que ce qui pousse dessus pousse aussi dessous.
Jour 17 je pulvérise du une solution composé d'une cuillère à café de savon noir mou dilué dans un litre d'eau en prévention d'éventuels nuisibles.
Je corrige mon LST suivant la pousse de ma plante ...
Pour ma par c'est la manière dont je procède. Comme promis petit rapel de:
Quand commencer à appliquer la technique LST
De nombreux cultivateurs commencent la manipulation dés que les plantes possèdent entre 3 et 6 nœuds ou une paire de feuilles. Durant cette première étape de la croissance, le tronc encore flexible est pliable sans risque qu’il ne se casse, même si au fur et à mesure du développement de la plante il sera de plus en plus difficile de le plier. Nous pouvons continuer à guider la croissance des branches durant toute la culture, même durant la floraison, ce qui pour cette étape représente un grand avantage face à la taille, qui n’est pas du tout recommandé une fois que la formation des têtes commence, cela stressera en effet la plante, ce qui aura pour effet de retarder la récolte.
Comment appliquer la technique de guidage LST
Si nous sommes prudents, la flexibilité naturelle des fibres du cannabis permet de plier leur tronc et branches avec une relative facilitée, même durant la floraison des plantes.
En utilisant une corde fine, nous pouvons accrocher la pointe de la plante à la base du pot par exemple ou à un tuteur que nous aurons planté dans le substrat. Nous plierons le tronc avec précaution et nous le fixerons avec la corde, à partir de là, nous pouvons augmenter progressivement la tension de la corde, chaque jour un peu plus, jusqu’à obtenir la position souhaitée. Soyez attentif à la réaction de la plante, essayez de ne pas appliquer trop de pression sur la corde et rappelez-vous que la flexibilité des branches peut varier d’une plante à l’autre.
Pour obtenir de meilleurs résultats, il suffit de suivre quelques règles simples. Pour commencer, nous devons choisir une corde fine mais pas trop pour ne pas blesser les troncs au fur et à mesure qu’ils grandissent et qu’ils deviennent plus gros.
Nous pouvons utiliser des crochets en plastique souple ou de n’importe quelle autre matière flexible pour éviter d’endommager les plantes. Spécialement en intérieur, utiliser des cordons en plastique de couleur (voir les diaries de @Silky) est très pratique pour voir facilement les accroches et faciliter le travail au milieu du réseau formés par les cordes, les tuteurs, les mailles ou les supports que nous aurons dans la culture. Bien entendu, en culture extérieure et surtout en guerilla nous ferons juste le contraire et nous utiliserons des matériaux de couleur qui n’attirent pas l’attention pour que notre jardin reste discret.
Pour stresser les plantes au minimum, la mieux est de réaliser ces manipulations le soir ou juste après que les lampes en intérieur s’éteignent, ce qui leur permettra de se remettre durant la nuit. Normalement, le jour suivant nous pourrons observer comme les pointes des branches que nous avons pliées se dressent de nouveau vers le haut à la recherche d’une source de lumière.
Que la force soit avec vous