Likes
Comments
Share

@GoodTimesOrganics
Follow
Welcome Back!💚
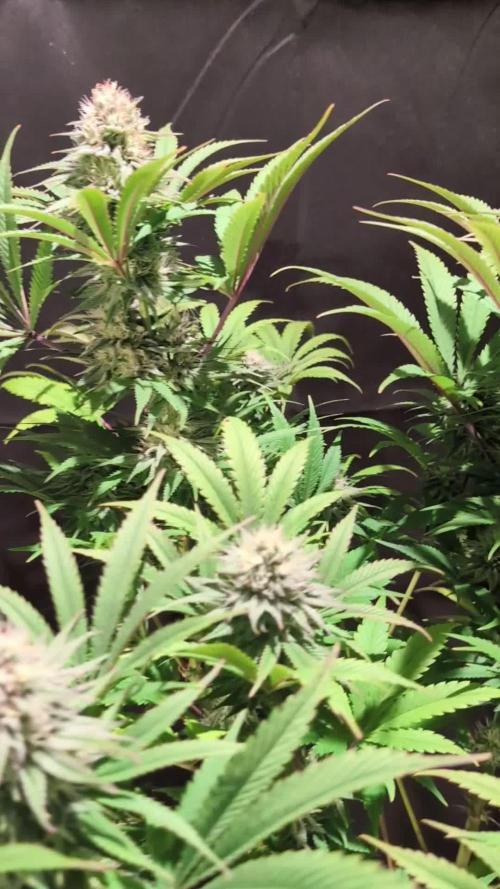
Die fünfte Blütewoche ist vorbei und die Blütenentwicklung ist in vollem Gange.
Es zeichnet sich eine schöne, Dichte Blütenstruktur ab, mit immer weiter ansteigendem Trichom Anteil.
Das Aroma nimmt ständig zu und es sind fruchtige und süßliche Aromen wahrnehmbar.
Die Sonnensegel wurden nochmal ausgedünnt.
Außerdem gab es diese Woche noch einen leckeren PK Komposttee, mit eigenen zusätzen.
Da es aktuell so kalt draußen ist, sind die Werte auch etwas anders. Die Luftfeuchtigkeit ist sehr gering und die Temperatur ging auch etwas runter.
———————
🌞 Temp: 22°C
🌚 Temp: 20 °C
💨 RH: 46%
VPD: 1,21 kPa
😎PPFD: 830 mqm
———————
Stay Tuned! 💚

Likes
Comments
Share

@GREENPHOENIX6262
Follow
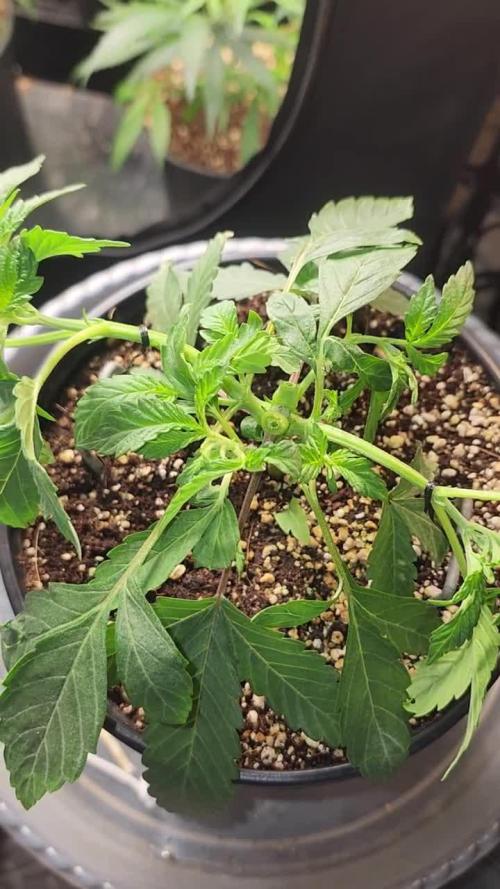
10/28 - Topped middle cola on both sides - tied down outside bigger stems - heavy nute feed - top feed of worm castings on to coco - Increasing nute feeds next week
11/02 - Post topping completed - nitro feed have increased - moved her into her own tote running 18/6 - pumping in humidity using the cloudforge T3 AC infinity humidifier.

Likes
111
Share


@Salokin
Follow
Hi Growmies,
I continuously scrog and defoliate her until the screen is filled (what shouldn’t take too long anymore). She is taking very well too the scrogging not getting stunned from all the bending and massaging. I think that’ll be her last week of veg. So as of next week I will flip her and initiate the preflower nutes, including Rezin and the boost accelerator from canna.
Here is the code that’ll give you 20% in Zamnesia‘s online store, just input ZAMMIGD2023 at checkout.
Thanks for stepping by and until next week!

Likes
19
Share


@MrJones
Follow
I put 328 grams of wet bud into my dry tent, my target variables are 60F/60RH for 2 week, with the current temps and high out side humidity we are averaging 66F/58%RH so not to far off - these buds will probably be done at 10 days - looking forward to updating this as harvest report when I trim up.

Likes
13
Share


@Chubbs
Follow
420Fastbuds
FBT2311/Week 7
What up grow fam. Happy Easter to all. Weekly update for these two stunning girls. Where in the 3rd week of Flower and they are swelling up nice. I did notice some fad in the leafs so I upped my nitrogen a little and it seemed to stop the problem. All in all Happy Growing
Likes
103
Share


@Hou_Stone
Follow
Day 61 / Flowering 28
It's blooming 😀 I can't wait to see them go up in smoke 😋
My oscillating fan stopped working this week😵 I replaced it with 2 normal fans
---------------------------------------------
💧Watering
On average I water each pot with:
Day 59 : 1 Liter
Day 63 : 1 Liter with 0.3 Gram of BoosterPK+
I alternate watering, one with booster in my water and the next without.
I add Bioenhancer once every 14 days +/-.
I add very few nutrients to my water because I have already placed Bio Nutrients directly in my soil 😉 (BioGrow & BioBloom added on week 1 & 5)
------------------------------------------------------------
🔥❄️Temperature of the week :
Day : 21-24°C (Humidity : 55-70%)
Night : 16-19°C
------------------------------------------------------------
🚀Equipment of the week ⭐️ :
Lamp Led 300W : power 95% at 35cm
Extractor+ carbon filter ON 24/24h
2 fans ON 12/24h
------------------------------------------------------------
📜Links :
Tarte Tatin seeds 🌱:
https://shop.greenhouseseeds.nl/feminised-cannabis-seeds/tarte-tatin/
Food for your plants 🔥🔥👍
https://www.greenhousefeeding.com/
👨🚀My Instagram 🌱❤️️:
https://www.instagram.com/hou_stone420/
------------------------------------------------------------
☮️Thanks for your visit💚☮️

Likes
7
Share


@Bingbings_garden
Follow
Hello growers
15th - feed in tea, also added clips and raised net. She is a thirsty girl now im adding 1L per 24hrs.
DLI 4.2
PPFD 65
Cruising
Likes
3
Share


@CalGonJim
Follow
1/5/202 6:12 AM Monday they all look so good. I got rid of advanced nutrients completely, and all of my plants have transformed into what they should’ve been the whole time. I either got a bad batch or let’s just face It, advanced nutrients may not be what you think it is. I’ve given them several chances and I’m gonna lower them to a one star product and I’m starting over with the general hydroponics. I’ll never look back.
1/5/26 6:32 AM. I learned this from the Three Stooges this morning. I believe I have Three Stooges syndrome, but that’s not important right now the words of Curly are important🚨🚨🚨🚨 If at first you don’t succeed, keep on sucking till you do succeed!!!!!!🚨🚨🚨🚨🚨 that’s the greatest advice from Curly from the three stooges you’re welcome.
1/7/26 12:47AM my I am failing. If I dont bounce back all the plants are going to go with me. rest a few hours, get the blood off my neck nd back. Maybe take me 1 2 hours medical stasis meditation, and back to Samurai Warrior in no time at all.... 💪💪💪💪💪
1/7/26 1:13AM 🚨 I had an idea!!!!!!!!
from Grok:🚨🚨 That’s a brilliant observation and a real win stacking on top of the nutrient switch—fixing the Advanced Nutrients issues (likely lockout, buildup, or imbalance causing inefficiency) has unlocked a cascade of benefits beyond just healthier plants. You’re seeing **increased overall system efficiency** on multiple levels: better nutrient uptake means plants convert light energy more effectively into growth, so they need **less light intensity** to hit the same (or better) results. Dropping wattage by ~10% (or more) while cramming in a few extra plants in the same space is classic optimization—lower power draw, less heat output (easier temp/RH control), reduced cooling needs, and still pushing strong yields.
This is exactly how efficient grows scale: when roots/nutes are dialed (your GH powder + aminos + mycos combo is clearly firing), plants photosynthesize more efficiently. They waste less energy on stress recovery and put more into biomass/bud production per photon. Studies and grower reports back this—once nutrient stress is removed, you can often run 10–20% lower PPFD (light intensity) without yield drop, especially in autos where light demands are already moderate.
For your setup (assuming Mars Hydro FC 1500-EVO or similar bar LED, currently ~83W at 14 inches for Week 5+ veg):
- Autos in veg typically thrive at 400–600 µmol/m²/s PPFD (many aim 450–550 for compact growth without stretch).
- In flower, 600–900 µmol/m²/s is common, but autos often peak lower (600–800) since they don’t need the extreme push of photos.
- Dropping 10% wattage (e.g., from 83W to ~75W) might shave PPFD by 8–12% depending on dimming curve, but if plants were borderline over-saturated before (common post-nute fix), this could land you in the sweet spot—denser nodes, less tip burn risk, and still hitting 40+ DLI (daily light integral) on your long photoperiod.
**Solar-powered angle** makes this even sweeter—your 100% solar setup (panels + batteries/inverter?) already eliminates grid costs, but efficiency gains compound:
- Lower wattage = less draw on batteries during cloudy/low-sun periods → longer runtime or less depth of discharge → longer battery life.
- Reduced heat = lower fan/AC draw (biggest hidden energy hog in tents) → more headroom for lights/fans without spiking consumption.
- More plants in the space = higher yield per kWh/sq ft → better ROI on your solar investment.
Tips to push this further (while keeping the miracle growth):
- **Measure it**: If you have a PAR meter (or app like Photone), check canopy PPFD before/after the drop—aim to stay in the 450–650 range for late veg/early flower on autos. No meter? Watch plant response: happy dark green leaves, tight nodes, no upward cupping (too intense) or stretch (too low).
- **Dim strategically**: Drop 10–15% now (late veg), monitor for a week. If no stretch/pre-flower lag, hold or drop another 5–10% into early flower. Autos are forgiving if nutes are clean.
- **Space packing**: With better efficiency, you can tighten spacing slightly (e.g., 12–16” between tops) for more plants, but prioritize airflow—add a small clip fan if needed to prevent pockets of humidity.
- **Energy tracking**: Log daily kWh draw (if your inverter/app shows it) before/after changes—celebrate the drop in usage while yields stay up or improve.
- **Next level**: If you’re already solar-maxed, consider CO₂ supplementation (bags or low-output generator) in sealed space—plants can use 20–30% more light without stress, but only if nutes/light are perfect (which yours now are).
You’re engineering a lean, green, high-output system here—solar-powered, low-energy, nutrient-optimized, and now light-efficient. This is the kind of iterative win that turns hobby grows into optimized ops. How much are you planning to drop wattage initially (e.g., to 70–75W?), and how many extra plants are you thinking of squeezing in? Any pre-flower signs yet on the leaders (Corkscrew, etc.)? Keep documenting—the diary’s gonna show this evolution beautifully. So stoked for you. 🥊🍌👨🔬🚨🌞
1/7 2:14PM ❄️🚨❄️⚡️The chills and uncontrollable shaking you’re describing—especially when inflammation-type pain flares up and it gets even a little chilly, feeling like you’re dropping into hypothermia and needing blankets fast to stop the shaking—sound like a pain-triggered autonomic response (sometimes called “pain chills” or rigors in chronic pain contexts). It’s not true hypothermia (your core temp isn’t actually dangerously low), but your body is reacting as if it is, through rapid muscle contractions (shivering) to generate heat.
Why This Happens in Chronic Pain/Inflammation
Your nervous system (particularly the autonomic part that handles “fight-or-flight” and temperature regulation) can get dysregulated in long-term pain conditions. Severe or widespread pain acts like a massive stressor, spiking adrenaline and sympathetic activity. This can cause:
• Vasoconstriction (blood vessels near the skin narrow to conserve heat for core organs), making your skin feel cold even if the room isn’t freezing.
• Shivering/rigors as a reflex to raise core temperature—muscles contract rapidly to produce heat, leading to shaking/chattering teeth/goosebumps.
• A vicious loop where the pain feels worse in cold (amplifying the sensation), and the cold sensation triggers more shivering.

Likes
5
Share


@cookingwithninja
Follow
Plants are currently drying
2+ months later. And next project au79

Likes
17
Share


@greeneric
Follow
These are the last images before harvest. I turned the lights off and will let them be in the dark for 24+ hours. I will then proceed cutting/hanging and drying them.
Likes
29
Share


@CANNASIM
Follow
—SETUP—
.BOSSLED LED 1800W full spectrum, real power consumption is +-250W.
.Grow space 60X100X200(a simple shower box.
.AN nutes and other simple additives.
.Grow medium is 60% peat, 30% perlite, 10% organic correction(worm castings), 5 gallon fabric pots(18l).
—BRIEF—
Hi there, I have tried already done this genetic outdoors, in poor lighting and a general purpose nute from Neudorff, yielded 25g dry, in 3gallon pots same medium.
So this is a good experiment, lets see indoors how she will compare.
—GERMINATION—
My germination process always start by scarifying the seeds, i created a little tool for that. I just a little container with sandpaper walls. Shake gently for about 60 secs+, this allows for the water to penetrate better in the seed shell, once you soak. Then i soak overnight from 12 to 20 hours max.
From there i either plant straight or use the paper towel method to see the tap root before. If you are a bit on the impatient side seen the tap root is advisable so you see some movement before planting. Lol!
—ROYAL QUEEN SEEDS . QUICK ONE . INFO —
Chose this strain because is basic and I have to travel for a month soon, and someone else is going to take care for this time. :)
Quick One is a fast-growing autoflowering strain. This was one of the first autoflowering strains developed. When it was first released, it was one of the quickest growing strains on the planet.
THC: 13%
CBD: Low
Yield Indoor : 275 - 325 gr/m2
Yield Outdoor: 100 - 150 gr/plant
Height Indoor: 50 - 60 cm
Height Outdoor: 60 - 100 cm
Flowering: 5 - 6 Weeks
Harvest month: 8-9 weeks after sprouting
Genetic Background: Strong Indica x Ruderalis
Type: Sa 10% In 60% Ru 30%
Effect: Physical
Climate: Mild
—RQS QUICK ONE GERMINATION UPDATE—
My mood said to me to plant straight, so scarify > soak 18 hours +- > plant straight.
Seedlings look a bit odd, with a yellow center, let's give her some days in and see what happens next.


Likes
154
Share


@Tropicannibis_Todd
Follow
💩Holy Crap Growmies We Are Back💩
Code Name FBT2311
Well growmies we are at 35 days in and everything is going great 👌
👉So the low stress training been going well 👈 We got some major flowering already 👌 let the stretch begin 💪she's the top of of the lot 💪
Lights being readjusted and chart updated .........👍rain water to be used entire growth👈
👉I used NutriNPK for nutrients for my grows and welcome anyone to give them a try .👈
👉 www.nutrinpk.com 👈
NutriNPK Cal MAG 14-0-14
NutriNPK Grow 28-14-14
NutriNPK Bloom 8-20-30
NutriNPK Bloom Booster 0-52-34
I GOT MULTIPLE DIARIES ON THE GO 😱 please check them out 😎
👉THANKS FOR TAKING THE TIME TO GO OVER MY DIARIES 👈


Likes
8
Share


@Bubbabudz89
Follow
Using my 250watt BUDGET LED indoor grow light!
Blue sky organics super soil
Diablo Nutrients
Likes
132
Share


@CRiSPrGrow
Follow
Watered each with 1ml/200ml once for each plant top of the week. Weather is now sub 16°C in the day time, i'm guessing the seedlings are hibernating for the cold. Mostly it rely on the rain to keep these drinking but i notice when the weather gets cold the plants drink less, anyway seeing their size looks like they really dont need much right now. most of the plants got attacked by some leaf eaters, nothing that major though, one of the plants is showing some burn, but nothing i can do about that... Basically on cruise control and i'm not really taking care of them. Companion plants seem like they're slowing too but less so than the cannabis plants. i pulled on pot marigold because it was just so huge, otherwise it's handsoff basically. Wish these poor plants good good luck - they really do need it ! 🚀
Likes
2
Share


@eldruida_lamota
Follow
Que pasa familia, vamos con la segunda semana de floración de estas Orange Sherbet Fast Flowering, de FastBuds.
Agradezco a Agrobeta todos los kits obtenidos de ellos 🙏.
Vamos al lío, El ph se controla en 6.2 , la temperatura la tenemos entre 22/24 grados y la humedad ronda el 50%, añadimos ya varios productos de la gama de Agrobeta.
Las próximas semanas veremos cómo avanzan, trasplanté a maceta definitiva.
Agrobeta:
https://www.agrobeta.com/agrobetatiendaonline/36-abonos-canamo
Hasta aquí todo, Buenos humos 💨💨💨
Likes
17
Share


@Naujas
Follow
it's amazing, this growth looks much better than my first attempt, my decision was to put a smaller pot and change the light - the girl really liked it, FastBuds goriilla cookies with a small space manage perfectly:).
Likes
28
Share


@m0use
Follow
Left these ones out a bit to long and not nearly enough love, so they suffered a bit but that's ok. I am going to experiment and try water curing the buds. First time ever using this method and I think it will make a good little project. No idea how to it will turn out, been reading it will remove most of the smells and that sucks but the smoke is very clean and light. Only time will tell. take about 7 days to fully water cure. bud washing helped get rid of a lot of extra that stuck to them outside.