


Likes
Comments
Share

@Borberad
Follow
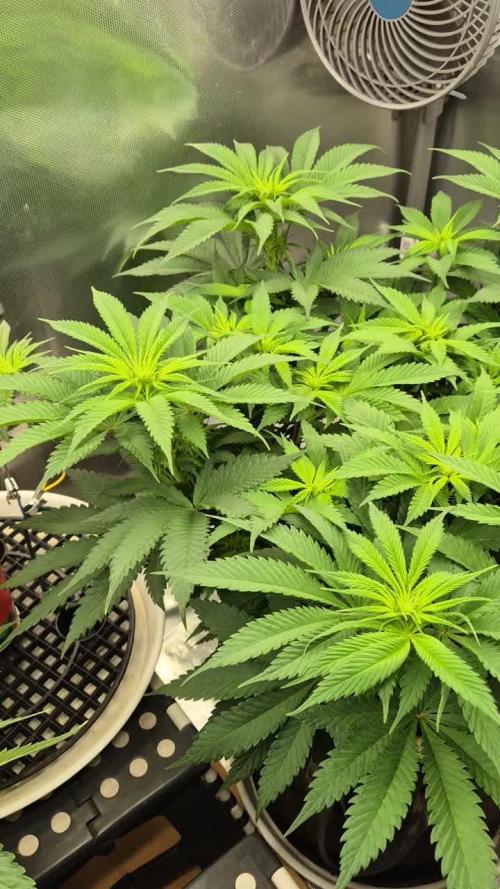
Die zweite Woche der Blüte beginnt und das Blümchen hat sich gut entwickelt. Der Stretch hält sich in Grenzen dafür werden die Äste immer kräftiger denke mal dies Blümchen werde ich nicht viel stützen müssen.

Processing
Likes
1
Share


@DocChronic420
Follow
This week in our organic grow we are introducing Fox Farms beastie blooms into the garden to help initiate flower production and to help boost up the nutrients the plant is receiving as all “feedings” are beneficial teas.


Likes
249
Share


@Metatronix
Follow
A big hello to all the cannabis growing gardeners...and all the other visitors that came across my grow journal.
Just on harvest day I was summoned on a long quest...around 700 km. will be away for three days. I will update this diary as fast as i"m back. For now just the photos as no time for anything.
----------------------------------------------------------------------------------
Now cannabis smell is overpowering in my grow room I can finally write something about Spider Farmers 6-Inch Inline Fan with Smart Controller and Carbon Filter :)
As my grow room gets really stinky at times i always invest in a top shelf carbon filter almost twice the size of the one provided by Spider Farmer, to my shock Spider Farmer carbon filter absorbs the smells wonderfully well.
No smell leaks and that just when the fan is running at 5 out of 10 levels of output. The smart controller is something completely new to me, and had a lot of fun experimenting with it during the veg and early flower, when the smell began i needed it to run full time at level 4 or 5 to rid the fragnance.
All in all the whole combo is a great deal. If you are not as keen on technology the set without the controller is awesome on it's own. But to have some extra options open, the controller at the device throws at you a ton of settings you can use to optemiase you grow enviornment.
The SE 7000 is hanged at 40 cm. over the canopy and runs at 520W.
This whole grow's main sponsor is Spider Farmer. You can easily obtain all the great grow equipment we use at: spider-farmer.com
A big thank you to Jessie and the whole Spider Farmer crew for supporting me with the newest technological advancements in horticulture. Thanks to them what i do here is possible.
Thank you Zamnesia for giving me the opportunity to try out your stock.
zamnesia.com/uk/7686-zamnesia-seeds-do-si-dos.html
20% discount code: ZAMMIGD2023
Plagron did send us their Contest package for the Power Buds competition .
Thank you for your visit, please leave a like and hope to see you beck here in about a week.
Likes
28
Share


@Mtmtc
Follow
Another week growmies, closing the year with low stress training for the ladies. Managed to control the infestation of the fungus gnats I had at the beginning of the grow. With The sticky traps, I also added Diatomaceous earth on the top layer. Also I did another method, with water, soap & baking soda mixed in a small container.

Likes
7
Share

@Nillenium
Follow
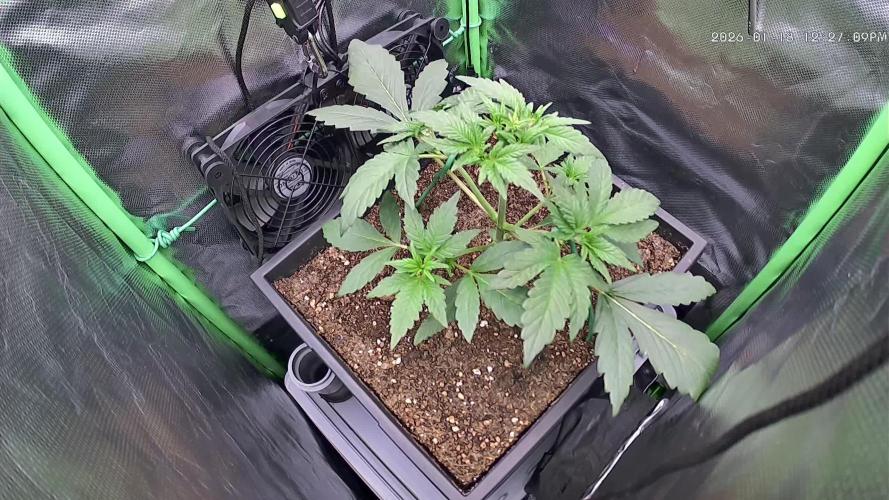
Diese Woche lief alles Problemlos. Dem Haupttrieb wurden weiterhin immer wieder die Sonnensegel entfernt und es wurde ein bißchen LST gemacht um die Fläche etwas besser auszunutzen. Es gab ein Orgatrex / Baktrex Topdressing und prophylaktisch gab es noch mal Culinex gegen Trauermücken.
Likes
9
Share

@Mr2toke
Follow
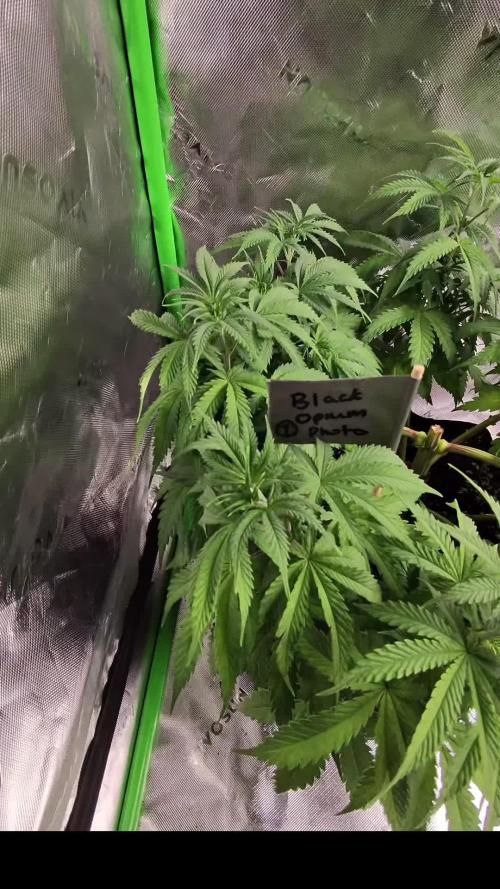
Week 8 - 11/05/26
She got a well needed stripping and had her branches readjusted.
Improved light penetration, improved airflow. she needs to get some more height on her.
3 more weeks left in veg i think, then she'll be ready.

Likes
5
Share


@Naujas
Follow
Hello :) this is my second growth in nature this year, the first one was drowned...... but I hope it won't happen again and I will try to do it with car flowers :) I will leave the little ones on the balcony for another week :) and then they will move to their permanent place :) so far the girls look quite good, knowing that it's only been a week:).
Likes
Comments
Share


@ShiokaraiGenetics
Follow
Week two of flower nothing exiting happening yet. The plants are very healthy and happy for the most part. The Purple Shah #2 has a slight mag def I have not been able to keep up with but nothing major.

Likes
52
Share


@Ultraviolet
Follow
Its time to prepare for war. *Blows bagpipe*
FISH SH!T THE ORGANIC SOIL CONDITIONER (used twice before and always noticed instantly)
Fish Shit is a living product! It provides a complex Microbial profile that includes thousands of different species of bacteria, fungi, and protozoa. This profile is closer to a natural ecosystem than anything you will find on the market. Fish Shit helps release essential oils and terpenes which contribute to the building of a myriad of flavonoids. Flavanoids play a key role in the development of the most potent aromas and tasteful flavors of a plant and its fruit. Fish Shit contains beneficial microorganisms that help plants maximize nutrient uptake. It does this by transforming nutrients into more usable forms and keeping these nutrients in the soil longer. During photosynthesis plants naturally produce exudates (chemicals that are secreted through their roots). Through these exudates, plants can attract the types of good bacteria that are beneficial to them at different points in their growing cycle. These good bacteria cover the roots and act as a barrier to the invasion of disease-causing organisms that may harm the plant.
What Are Enzymes?
Before we dive headfirst into how, exactly, enzymes can benefit cannabis plants, it helps to understand a little about what these microscopic proteins do. Essentially, enzymes facilitate chemical reactions. They do so by binding with a substrate and forming or breaking molecular bonds. In this context, the substrate is the molecule upon which an enzyme acts to boost the efficiency of a reaction.
•substrate /sŭb′strāt″/
•noun
•The material or substance on which an enzyme acts. A surface on which an organism grows or is attached. An underlying layer; a substratum.
Enzymes are proteins with complex 3D shapes that feature regions called active sites. When the substrate binds to these active sites, it forms an enzyme-substrate complex that causes a chemical reaction to take place, temporarily changing the structure of the enzyme and ultimately causing molecules to either come together or break apart. As a result, molecular products are released, and the enzyme returns to its original shape.
Specific enzymes are capable of binding with certain substrates, as the substrate fits into the active site more or less via a lock-and-key principle. Although, new research suggests a more accurate theory of "induced fit", in which enzymes and substrates undergo structural changes to facilitate the reaction.
If you take the human body as an example, we have an abundance of enzymes in our saliva and digestive system. These molecules bind with substrates in these regions (food particles), working to break down the food we eat into usable parts before converting them to energy.
Enzymes in cannabis work in a similar way to the example highlighted above. Typically, enzymes occur in soil naturally, but if your soil mix is lacking organic material, or you're growing hydroponically, then adding enzymes directly to the substrate is crucial.
By using them in cannabis growing, enzymes not only help break down essential nutrients into smaller, more readily available pieces, but they also support the digestion of dead root cells, clearing a direct path for nutrients.
Overall, enzymes make it easier for your cannabis plants to absorb all the elements they need to reach their full potential. For growers, a plant that reaches its full potential means a bucketload of juicy buds come harvest. This is essential if you want to reuse a pot with old systems left over like mine.
Common plant enzymes include:
•Cellulase
•Xylanase
•Beta-glucosidase
•Hemicellulase
•Amidase
Amino acids are a crucial, yet basic unit of protein, and they contain an amino group and a carboxylic group. They play an extensive role in the gene expression process, which includes an adjustment of protein functions that facilitate messenger RNA
Nitrogen, phosphorus, and potassium are the three main pillars of nutrient solutions and fertilizers, but there are countless other nutrients that your cannabis plants need to produce the best possible harvest. Amino acids are one of them.
You may have noticed that amino acids get a lot of attention from bodybuilders and other athletes. That’s because they play a key role in the synthesis of protein, which, as you probably know, is super important for sports recovery and muscle growth. Amino acids are the building blocks of protein and the foundation of both plant and animal life.
But what do amino acids do for cannabis?
WHY IS PROTEIN IMPORTANT FOR CANNABIS?
Just like proteins are important for the human body, they are equally important for the growth and development of plants.
For example, proteins help plants:
•Facilitate the growth of intracellular plant structures
•Promote energy generation
•Stimulate metabolic processes
•Facilitate the absorption and transportation of nutrients
So, where do plants get these vital proteins from? Well, unlike humans, plants can’t source proteins or amino acids from other organisms. Instead, they need to create their own amino acids, and then use these to build protein. That's why gardeners, much like athletes, go wild for amino acid supplements.
Amino acids help plants by…
• Increasing their production of chlorophyll, which ultimately improves their ability to photosynthesize
• Serving as an easily absorbable form of nitrogen
• Stimulating the synthesis of key vitamins
• Improving their resistance to pests and diseases
• Boosting the strength of their cells
Amino acids also serve as the precursors to auxins, a group of plant hormones produced in the meristems—the apex of the stems where new leaves and stems are born.
Auxins play a key role in the plant, activating genes for plant growth and development by triggering a multitude of vital plant functions. In other words, they determine what its size and architecture will look like. Auxins influence the development of branches, flowers, and roots, and even help to regulate the photoperiod response of the plant.
Some amino acids, like cysteine, also work together with antioxidants like glutathione to help cannabis plants deal with oxidative stress, which can be caused by high-intensity lighting, some nutrient solutions, and high levels of CO₂.
Unlike humans, plants can synthesize all the amino acids they need to survive and develop properly. Unfortunately, however, amino acid synthesis is a really high-energy process, and plants may struggle to produce enough amino acids when exposed to stress.
WHAT FACTORS AFFECT A PLANT’S ABILITY TO SYNTHESISE AMINO ACIDS?
Any kind of stress can affect a plant’s ability to produce enough amino acids.
This includes:
• Drought
• Temperature extremes
• Poor soil health
• Pests
• Diseases
• Poor lighting
• Lack of space
• Poor root health
WHAT DOES ALL OF THIS MEAN FOR WEED PLANTS?
If you want to push your plants to their extreme in terms of floral growth and resin production, you should look into amino acid fertilizers. By making amino acids readily available to your plants, they’ll be able to use crucial energy to grow and bloom, rather than focusing on synthesizing amino acids themselves. Game of Inches, this is another Plants can absorb amino acids via their roots and leaves. They can also benefit from amino acids during both their vegetative and flowering phases. The fastest way for plants to absorb amino acids is via their leaves. The foliar application of amino acids is believed to improve the transportation of nutrients, increase transpiration, and boost photosynthesis. Hence, I recommend feeding your plants with foliar amino acid fertilizers. When doing so, however, carefully measure the amount of fertilizer you use, as—like with any nutrient—overfeeding can damage your plants.
FOLIAR FEED AND SOIL SOAK
• 1 crushed queen anne carrot
• Add 2 tbsp of NPK Raw powdered water-soluble cane molasses
• 20ml h2o2
• 1 crushed radish
• 0.25 tsp NPK Enzymes
• 0.25 tsp NPK Amino Acids
• 50ml coconut water ( nature's own amniotic fluid packed with amino, enzymes )
+ The sound of songbirds.
Onto the predators
1250 -Green Lacewings
Lacewings are extremely voracious predatory insects that feed on several pests. In adulthood, it feeds on pollen and nectar. In the larval stage, it feeds on aphids, thrips, and mealybugs at all stages of growth. It can also attack spider mites in moderate quantities. It is initially an aphid predator, but very effectively controls thrips and mealybugs infestations. It is so voracious that in the absence of prey, it will feed on its congeners. Lacewings are cannibalistic if there is no food available for them. It is therefore important to introduce them into an infestation situation, and not just preventively.
•congener /kŏn′jə-nər/
•noun
•A member of the same kind, class, or group.
•An organism belonging to the same taxonomic genus as another organism.
•A thing of the same kind as. or nearly allied to, another; specifically, in botany and zoology, a plant or an animal belonging to the same genus as another or to one nearly allied.
Ideal temperature 20°C – 26°C
Ideal humidity 60% – 70%
Predatory stage life cycle 21 days
Introduction rate 4 weeks
Storage Refrigerator
Use Immediately
Are there any specific instructions on how to use this predator?
Lacewings are available on small paper cards that you can hang to plant stems. On the cards are dozens of eggs ready to hatch. There are also sterile eggs they can feed on once they have hatched before they are ready to disperse in the foliage. It is important to use them quickly upon receipt to avoid cannibalism. If you don't use them right away, you can store the cards in the refrigerator for 24 to 48 hours to prevent the eggs from hatching too quickly. Avoid storing them for longer than this or you risk losing eggs. 1250 eggs are divided into 7.5 cards, 2500 eggs on 15 cards, and 5000 on 30 cards. The application rate is one card per square meter of growing surface.
Is this predator best used for preventive or curative treatments?
Lacewings are used as a curative solution.
Anything else I should know?
Lacewing eggs hatch approximately 24-72 hours after the cards are exposed to room temperature. When they emerge, the lacewings are just 1.5-2 mm long. They are very small so they are difficult to see. Once hatched, they will stay on the cards for a few hours and then disperse in the foliage. You quickly lose sight of them if you have not witnessed the hatching.
They then live in the foliage for about 3 weeks. Often, you will see them towards the end of their larval cycle. After feeding for 3 weeks, they will triple and even quadruple in size. At that point, they are easier to see. But they remain very discreet insects, it is not abnormal not to see them.
Egg carcasses left behind on the cards do not disappear after the hatching has happened. It's normal to see eggs still on the cards. Visually it is very similar before and after hatching.
Also, on the boxes, there are sterile ephestia eggs which are used to feed the lacewings once hatched. Not all lacewing eggs are viable either. Only a certain percentage of lacewing eggs will hatch. Once hatched, the eggs are white. You can observe this using a magnifying glass.
With,
5000 Stratiolaelaps Scimitus
It is used to prevent or control thrips pupae, fungus gnats larvae, and root mealybugs in the soil. It can also be used for red mites in bird farms or hen houses. The adult is about 1 mm long and is medium brown with a beige triangle on its back. Another fun fact about them is they can survive without prey. They can eat algae and plant debris. This is why they can reproduce and stay in plants for long periods.
Ideal temperature 15°C – 23°C
Predatory stage life cycle 18 days
Introduction rate 2 weeks
Storage Room temperature
Use Within one week
Are there any specific instructions on how to use this predator?
Sprinkle directly on the growing media. They can live in all types of substrates like potting soil, coconut fiber, rock wool, cedar mulch, etc. Stratiolaelaps establish easily so they are permanently fighting pests. One introduction is generally enough unless you have an infestation. In this case, introduce them at least twice at a 2-week interval for best results. If you grow your plants in a 100% mineral substrate, it will have to be released more often since there is less organic matter than in traditional soil.
Do I need to take any specific precautions?
Stratiolaelaps breed in the top layer of the soil. So it is important not to disturb them in the first days following their introduction. They don't like temperatures below 8 ° C. So be sure not to introduce them in a water-saturated or cold environment. Release them 24-48 hours after your last watering. They are very sensitive to chemical acaricides and diatomaceous earth. These methods are incompatible with their use.


Likes
42
Share


@AsNoriu
Follow
Day 21. I post one day earlier, but its a huge week for them.
Cleared space, install chicken wire fence.
Added worm castings, epsom salt, mono potassium, calcium nitrate , Great White, Biosys and hope they will be ok.
Next visit in two weeks.
Root system was good, couple girls had mini root bound on the bottom, so timing was perfect !
Sherbet was strongest, purple haze weakest, both Apples were ok too.
Happy Growing !!!


Likes
25
Share

@DogDoctorOfficial
Follow
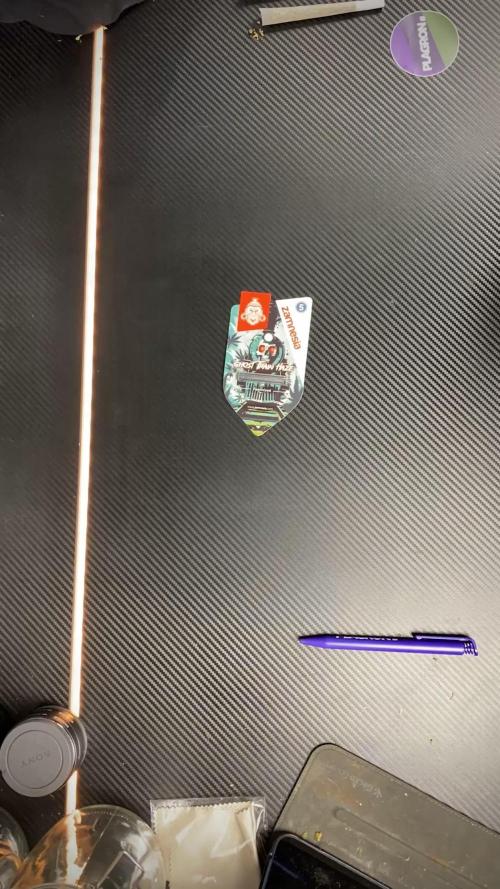
Ghost Train Haze — Harvest / Trim / Cure
Part 2 — Trimming, Resin & First Cure
First of all, once again, sorry for dividing this harvest into three different parts. But honestly… there was just no way to fit this entire experience into one single update without rushing it.
This run became something special for us.
So instead of throwing everything into one giant report, we wanted to slow things down and give each phase the attention it deserves.
Part 1 was about harvest day itself — especially the frozen plant and the preparation for the future ice water hash runs.
Now in Part 2, we focus on the monster of the room.
The big Ghost Train Haze girl.
The giant.
And damn… she was beautiful.
⸻
The Giant Finally Ready
After drying slowly and patiently, she finally reached that moment every grower waits for:
the stem click.
Not bending anymore.
Not soft anymore.
That perfect dry snap telling us she was finally ready for trimming.
And honestly, seeing this massive plant hanging there fully dried was already rewarding by itself.
Huge flowers. Dense structure. Long spears everywhere. Frost absolutely covering the plant from top to bottom.
At this point, we brought out the Trim Bin, got comfortable, and of course…
Mr. Baggy joined the session too.
Because trimming alone is trimming.
But trimming with the homies becomes part of the memory.
⸻
Trimming This Beast
Once we started separating the branches and working through the flowers properly, one thing became immediately obvious:
This plant was ridiculously frosty.
And I mean ridiculously.
Possibly the frostiest plant in the entire room.
Every touch released resin.
Every nug felt sticky.
Scissors getting glued together constantly.
Gloves turning darker and shinier minute after minute.
The flowers themselves came out incredibly dense and compact too. Heavy in the hand. Proper weight to them. Not airy at all despite the sativa influence from Ghost Train Haze.
And visually?
Beautiful.
Silver-covered calyxes.
Orange hairs fading perfectly into the resin layer.
Chunky flowers with that classic “don’t squeeze too hard or you’ll ruin the trichomes” feeling.
This girl truly felt like a reward after the full cycle.
⸻
The Trim Bin Surprise
One thing we absolutely loved during this trimming session was watching how much resin naturally collected inside the Trim Bin.
By the end of the session, the amount of loose trichome heads sitting underneath the screen was honestly crazy.
No dry sift machine.
No mechanical shaker.
Just trimming.
And still…
A beautiful golden layer of resin waiting for us underneath.
Of course, finger hash also started building up naturally while trimming. Sticky gloves. Sticky fingers. Sticky scissors. The classic signs of a happy trimming session.
Then came one of our favorite moments of the day.
⸻
Playing The Drums — Moroccan Style
At the end, we decided to have some fun with the trim itself.
Using the dry material almost like traditional Moroccan drum-sifting techniques, we gently worked the trim leaves and remaining material to knock off even more trichomes.
Simple. Relaxed. Traditional-inspired.
And honestly?
It worked beautifully.
What we collected afterward turned into a gorgeous little hash bar that looked and smelled incredible.
We didn’t even bother weighing it.
Sometimes not everything needs numbers.
Some things are simply for the experience.
For the ritual.
For the future session.
For curiosity.
For enjoyment.
And this one definitely earned its place for later tasting sessions.
⸻
Final Dry Weight
After everything was trimmed, cleaned, and separated, the final dry flower weight from this single plant came to:
294.9 grams dry
Honestly?
We’re extremely happy with that.
Almost 300 grams from a single plant in this run is something we can absolutely appreciate.
Especially considering this entire project was:
* 12/12 from seed
* Minimal training
* Minimal intervention
* Natural structure
* Mostly observation and guidance
Just letting the plant express herself while giving her the right environment.
And she rewarded us massively.
⸻
Storage & Cure — Different Approaches
Once trimming was done, we started organizing the curing process using different storage methods.
This time we decided to split the flower between:
* Glass jars
* Metal Zamnesia containers
* Grove Bags
Each one has its own purpose and philosophy.
Glass Jars
The classic.
Simple, reliable, proven for decades.
Perfect for manual burping and personally controlling the curing environment yourself. They also allow us to visually inspect the flowers easily during cure.
⸻
Metal Containers
The Zamnesia metal containers feel more protective physically and also help reduce light exposure completely.
They feel solid. Clean. Almost laboratory-like.
A very nice option for preserving flower while keeping things discreet and protected.
⸻
Grove Bags
These are probably the most modern approach we tested in this run.
The idea behind Grove Bags is that their “TerpLoc” technology supposedly regulates humidity internally while allowing gas exchange in a controlled way.
The theory is that they naturally maintain flower within the ideal curing range around:
58–62% RH
without constant burping.
So now we’re extremely curious to compare all three methods later during the smoke review phase:
* Does one preserve terpenes better?
* Does one keep the flower softer?
* Does aroma evolve differently?
* Does cure quality actually change?
We’ll definitely revisit this in Part 3.
⸻
The Frozen Plant — Flower Comparison
After finishing the main giant plant, we also trimmed and cured the material that came from the frozen/hash-focused plant from Part 1.
This was important for us because we wanted to compare:
* Flower from the “normal dried” plant
vs
* Flower from the plant intended mainly for extraction
And surprisingly?
The terpene profiles feel extremely similar.
Same family. Same identity. Same Ghost Train Haze soul.
Maybe slight differences in intensity or texture, but overall the profile remained very recognizable between both plants.
Which honestly gives us a very good feeling about the future hash quality too.
The frozen plant itself ended up giving:
58.5 grams dry
Plus whatever was already separated and reserved through the frozen material process itself.
So overall, absolutely worth it.
⸻
Macro Photography & Focus Stacking
During all this, we also continued working on our macro photography experiments.
Some of the photos shared in this update were actually focus-stacked images made from:
* 112 photos
* 96 photos
* 33 photos
For people unfamiliar with focus stacking:
Macro photography has extremely shallow depth of field. When you photograph trichomes closely, only tiny portions stay in focus at once.
So instead, we take dozens — sometimes over a hundred — separate images with different focus points and merge them together afterward in software.
The result is a final image where the entire flower or trichome field becomes sharp at the same time.
It takes time.
It takes patience.
But honestly, we love the process.
Because cannabis truly deserves to be appreciated up close.
⸻
Trimming Timelapses
We also recorded trimming timelapses so people can better see the workflow behind everything.
Not just the glamorous final nug shots.
But the actual process:
* separating branches
* cleaning flowers
* resin building up
* trim collecting
* the mess
* the rhythm
* the work itself
Because behind every beautiful cured flower, there are hours of patience nobody usually sees.
⸻
What Comes Next — Part 3
The next and final report will focus on:
* Full smoke review
* Cure evolution
* Drying process explained deeper
* Flavor profile
* Terpene expression
* Effects
* Overall experience with Ghost Train Haze
* Personal reflections after living with this cultivar
That final report will close the entire Ghost Train Haze journey properly.
⸻
Thank You
And as always…
Huge thanks to everybody who stopped by this journey.
To the breeders behind these genetics.
To the companies making nutrients, LEDs, gear, and tools possible.
To the platforms that allow growers to share their passion openly.
To the community members constantly supporting each other.
To the OG followers.
To the new followers.
To the silent viewers.
To the growers.
To the curious people.
To the skeptics.
To the lovers.
To the haters too.
If this grow made somebody stop scrolling for even a few seconds and appreciate the plant differently…
that already means something to us.
From grower to growers.
See you all in Part 3.
📡 DELETED @ 1K Please stay tuned.we never quit https://www.youtube.com/@TheDogDoctorOfficial NEW 🙏 Thank you for your patience and continued support.
FOR DISCOUNT CODES AND MORE JUST FOLLOW THE LINK https://website.beacons.ai/dogdoctorofficial
📲 Don’t forget to Subscribe and follow me on Instagram and YouTube @DogDoctorOfficial for exclusive content, real-time updates, and behind-the-scenes magic. We’ve got so much more coming, including transplanting and all the amazing techniques that go along with it. You won’t want to miss it.
GrowDiaries Journal: https://growdiaries.com/grower/dogdoctorofficial
Instagram: https://www.instagram.com/dogdoctorofficial/
YouTube: https://www.youtube.com/@dogdoctorofficial Deleted by Youtube - https://www.youtube.com/@TheDogDoctorOfficial NEW
Vimeo : https://vimeo.com/dogdoctorofficial Under construction stay tuned ⸻
Explore the Gear that Powers My Grow
If you’re curious about the tech I’m using, check out these links:
🔆 Lighting & Environmental Control
• Future of Grow — Advanced LED lighting technology
https://www.futureofgrow.com/
DISCOUNT CODE: DOG20
• Lumiflora — Under-canopy LED lighting
https://lumiflorade.com/
• TrollMaster — Environmental controllers and automation gear (past collaboration)
⸻
Genetics
• Zamnesia Seeds — Genetics used in this project
https://www.zamnesia.com/
⸻
🌱 Soil, Substrates, Boosters & Root Support
• Plagron — Substrates, bio mixes, and supportive products
https://plagron.com/en/
⸻
🎒 Storage, Curing & Preservation
• Grove Bags — Curing and storage solutions
https://grovebags.com/
⸻
📸 Photography Equipment & Tools
(Not sponsors, but part of my creative toolkit)
• Sony A6700
• Sony full-frame macro lens + few more
• Stacking photography workflow - learning
• iPhone (for behind-the-scenes shots)
We’ve got much more coming as we move through the grow cycles. Trust me, you won’t want to miss the next steps, let’s push the boundaries of indoor horticulture together!
As always, this is shared for educational purposes, aiming to spread understanding and appreciation for this plant. Let’s celebrate it responsibly and continue to learn and grow together.
With true love comes happiness. Always believe in yourself, and always do things expecting nothing and with an open heart. Be a giver, and the universe will give back in ways you could never imagine.
💚 Growers love to all 💚
📸 P.S. – The Eye Behind the Lens
All photos in this diary (for now — except for the ones showing the camera, which I took with an iPhone) are taken with a Sony A6700 paired with a Sony full-frame macro lens and a few more.
Photography is part of the story — it’s how we share the fine textures, the glow, and the quiet details that words can’t always capture.
I’ve also started experimenting with photo stacking — a technique where multiple images, each taken at a slightly different focus point, are layered together to create one perfectly sharp image from front to back.
It’s not digital enhancement or AI; it’s pure photography — a way to reveal the plant’s beauty in microscopic depth, from trichome to petal.
You’ll even see a few shots of "ghost me" capturing the shots — camera, lens, setup — because every grow deserves not just to be cultivated, but documented like art.
FOR DISCOUNT CODES AND MORE JUST FOLLOW THE LINK https://website.beacons.ai/dogdoctorofficial
NEW DISCORD - Official Server Invite Link : https://discord.gg/ksjAkA5T74
Likes
13
Share


@UK420hydrogrow
Follow
Ok guys had a bad week this week plants have been really affected went away took my eye of ball for 5 days plants ph has fucked up and caused alot of damage to leaves etc checked ph run off @6.4 so going to flush with 5.8 to hopefully get these babies back to normal also maybe a ec problem think may have been feeding too much I am a newby learning has a go so any advice help etc feel free to comment

Likes
2
Share


@Lacremelabs
Follow
I planted 3 seeds to germinate, but only one sprouted. Sad.
After it emerged in the coco, the first watering was done with aloe vera juice. The next day, it was irrigated with Azospirillum, a bacteria that promotes plant growth, fixing N.
The third watering was done with an aerated tea consisting of mycorrhizae, molasses, and worm castings.
The fourth watering was done with fertilizer, with a ppm of 700. I used Plant Prod and Calcium Nitrate.
For the fifth watering, I repeated the tea, and finally, another watering with fertilizer, with a slightly lower ppm (541).
All waterings maintained a pH between 5.5-5.8.

Likes
17
Share


@420DeepGrow
Follow
📆 Semana 5:
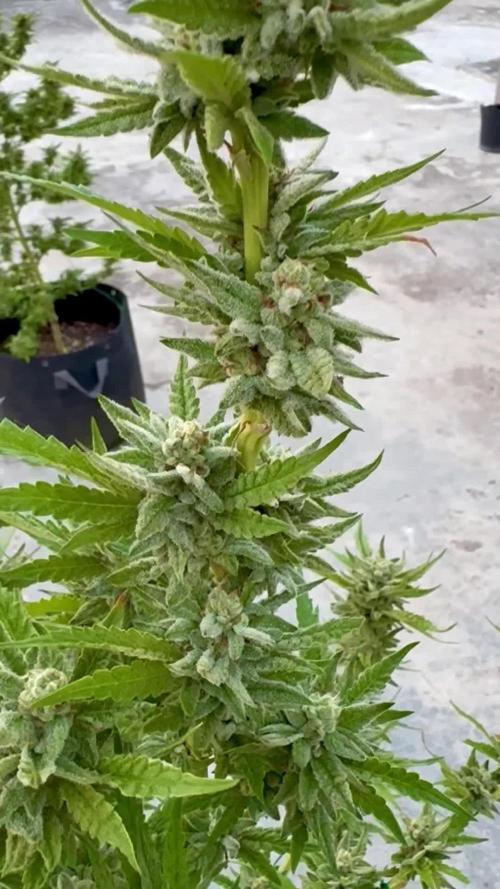
La Blue Zushi está entrando en su mejor momento. Los cogollos empiezan a formar unas colas gordas y compactas, y el aroma ya se vuelve más complejo: mezcla de frutas dulces y un punto funky muy interesante.
Los Adlite de Mars Hydro están sacándole todo el potencial, con una luz muy homogénea que hace que incluso las puntas más alejadas estén produciendo resina. Se nota cómo mejora la estructura y la densidad de las flores bajo estos paneles, ¡una pasada!
La nutrición sigue de la mano de XpertNutrients, y el resultado salta a la vista: hojas bien verdes, tallos fuertes y sin signos de bloqueo o deficiencias. La planta se mantiene sana y empuja con fuerza hacia el final.
Ahora toca seguir mimándola para que termine de explotar en las próximas semanas.


Likes
18
Share


@Pokan187
Follow
Everything is going smoothly, the buds are getting bigger day by day
All the girls are bug free, they are still looking green
The G13 has the strongest smell followed by the Runtz and the GDP doesn’t smell like anything for now


Likes
6
Share


@Saltoa
Follow
hello yesterday the top of my plants,they look happy .. I can water them today.I can tell the name of the song to those who are curious :)