
Likes
Comments
Share


Processing
Likes
8
Share


@Salgeezi
Follow
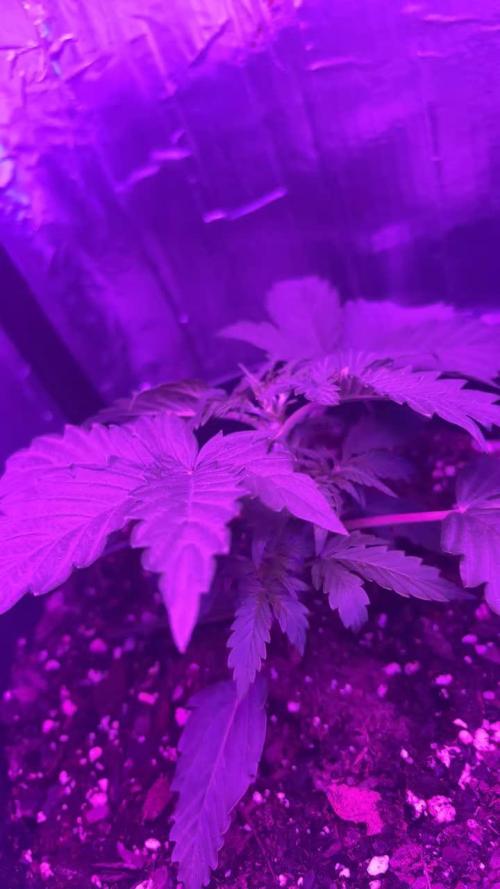
From the looks of it. I am in early stages of root rot. Plant is not growing as fast as it was at all. It can be a few things. Light penetration into the bucket. My water temps are around 70f. So I think that's okay. I had some extra mylar from a grow I did years ago. Cut pieces to go over the kids hopefully that helps.
I took out all additives besides CalMag. They were fouling the rez as usual. Dropping the Ph as usual. I think it's also the cause of the root rot. I have sprayed soaked with h202 and have added it to the reservoir after a cleaning and a water change. Looks a bit better.
I'm located in Canada and I cannot find hydroguard anywhere. Which kinda sucks. Any alternatives would be great. Thanks
Likes
12
Share


@ZalySk
Follow
Buds aren't as big as the other autos, but she may swell up in the next week or two. That being said she has way more bud than the other ones with all her branches, and she smells so so good. I wish I could Harvest and cure this right now but I'm probably going to have to wait till December to get a fantastic, cured smoke from it.
I feel bad that she's been kind of yellow her whole flowering life and she would have appreciated a little bit more food. Definitely a heavy feeder in flower.
D81, she's leaning a bit now, the final weight is pulling her to the side. Four days until the official done date and I think she's ready, bit she'll have to wait. The berry will be drying next week, and the blue dream will be the week after. Chop on day 90 or 91 I think.

Likes
10
Share


@eldruida_lamota
Follow
Que pasa familia, vamos con la cosecha de estas Lemonpaya de FastBuds.
Por dónde empiezo, fue una variedad que me resultó complicada cultivar y a nada que alimentada lo marcaba las flores son bien compactas y van llenas de resina, tienen tonos verdes bonitos, y tiene unos aromas afrutados bastante marcados con toques citricos.
Es muy complicada a mi parecer, es de ciclo de 2 meses y medio, pero bien agradecida aún así.
Hasta aquí todo, Buenos humos 💨💨💨

Likes
5
Share


@DeepRootsGrowTrees
Follow
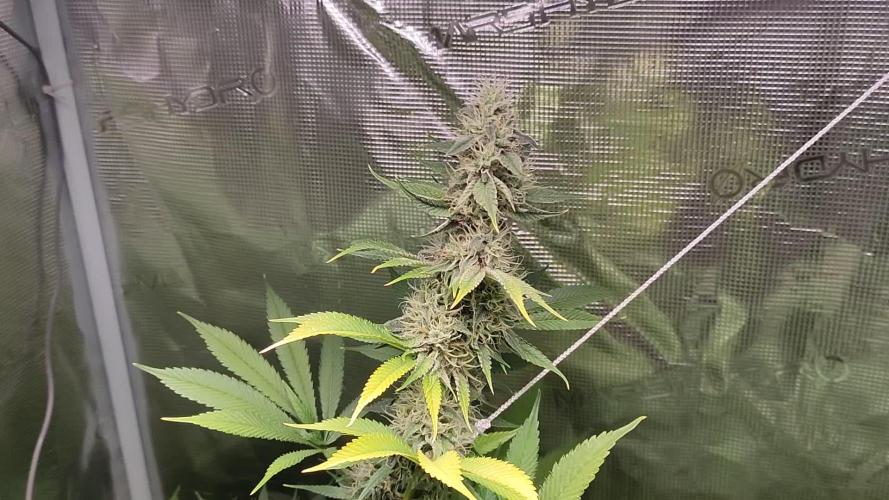
CHERRY COLA AUTO / FASTBUDS
WEEK #13 OVERALL
WEEK #8 FLOWER
This lady is grown inside I did a full diary on this strain already If you want to look at the plant in veg however now she grown inside and almost done with her flower stage as you can see her beautiful deep purple buds just covered in trichomes that are super sticky and the aroma coming off her is amazing!! Stay Growing!!
Thank you for taking a look it's much appreciated!!!
Thank you FASTBUDS!!
FASTBUDS / CHERRY COLA AUTO


Likes
8
Share


@weed_gastro
Follow
They had their flush almost 2 weeks ago, they smell so f-)king awesome!!! They also fattened up, I'm surprised but I'm also really curious about the yield.
One of the plants made no purple color at all, but I think that one is the most fat and sticky lady😎
I'll be back soon with a harvest update, thanks for reading 💚

Likes
6
Share


@Nomad
Follow
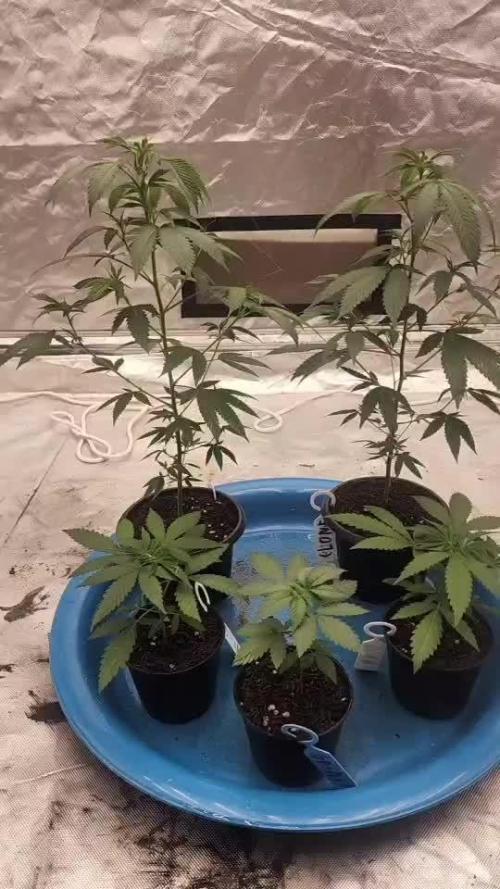
This was the first time ive ever grown and trained the plants and mainlining was a new experience. Im not training my new grow but mainlining is something i would do again for sure.


Likes
18
Share


@Kachow
Follow
We have pulled 4 of the 9 Gorilla Cookies as they looked ready, the other 5 we will monitor and pull as required.
Some of the Buds look really awesome and they are sticky and smelly :)
The 5 left in the tent are on an H20 only diet and will now have more room and light until they get chop chop :)
Likes
2
Share

@REDSTUMPZz
Follow
*** SS.3 WEEK 3
- RS 11 # 1
- RS 11 # 2
- GRAPE SLURRI (CLONE) # 1
- GRAPE SLURRI (CLONE) # 2
- GODFATHER * PLCG S1 SHE SMELL LIKE COCOA NIBS


Likes
14
Share


@CalGonJim
Follow
seeds:
Montel Iced Tea, Body Count, Bubbles Blueberry F4, Ricky’s Hash Plant, Black Tangi Tea → standouts / "otherworldly"
These are clearly your current stars — better structure, resin, and overall quality than most of the others you've tried.
Auto Flowers:
Humboldt Seed Company — best autos you've grown. Extremely resinous, especially the OG Triploid. Top tier for autos.
Fast Buds — very close second. Super fast, nice flavors, reliable. You like them a lot but note they're in a different class (not fair to directly compare to Humboldt).
Why RQS Strains Underperformed
The 7/10 rating and "needed a lot of power to switch to flower" comment is classic for some RQS genetics, especially certain autos or hybrids. Possible reasons:
Genetics: Some RQS lines are finicky about light schedules or have slower/more reluctant flowering responses. Mike Tyson 2.0 and Corkscrew apparently needed the 12/12 flip to finally push.
Light/Environment: With five tents running, light penetration, spectrum, or intensity might not have been ideal for these particular strains. Autos can be sensitive to stress during the transition.
Nutrient response: They may have needed more phosphorus/potassium or different ratios to bulk up properly.
The fact that you had to force Corkscrew into 12/12 at week 20 and it's now only "OK" suggests it was a slower or lower-yielding pheno for your conditions.
Strong Performers
Brothers Grimm → These sound like the real winners in your tent right now. Brothers Grimm has a reputation for unique, high-quality landrace-influenced genetics with excellent resin and flavor profiles. "Otherworldly better" is high praise — they clearly thrive in your setup.
Humboldt Seed Company autos → Excellent choice for resin production. OG Triploid is a standout for trichome density.
Fast Buds → Reliable, fast, flavorful — a safe, consistent auto line.
Recommendations Going Forward
Double down on what works:
Keep running more Brothers Grimm (especially the ones you loved).
Stick with Humboldt for autos when you want maximum resin.
Fast Buds for speed and flavor.
3/30 4am Pink Kush CBD is SLOW.... she never really recovered from early problems, I LOVE this strain, smoke and smell are 10/10. I blew it up early from problems that are NOT MY FAULT. so there.
4/1 12pm We're gonna need a bigger TENT!!!💐🌼Humboldt Seed company email today...Im doing this!!! https://californiahempseeds.com/garden-seeds/
4/3 2:17AM BUSY NIGHT working on playing with colors, im pretty sure I smoked myself retarded...


Likes
11
Share


@Nenodiflowers
Follow
Birşeyler ters gitti istedigim verimi alamadım ama trichomeler çok iyi gelişti
Likes
21
Share


@Jays_Not_Here_Man
Follow
A-Day 60, B&C Day 56
A is fattening up! She never did stretch, but then again I had her tied and splayed pretty far out. She has been thirsty, I have been feeding a dose close to 1000 ppm every other feed which has been every other day for her. During the lower feeds, ppm has been around 400. Her tricomes are mostly clear, with some cloudy starting to show. She still has a couple of weeks to go.
B- is going to be a producer! She has so many tips and they are all fattening and developing at about the same rate, she is going to be a beast! Did a defoliation on her, she is appreciating the extra light penetration 😎💨
C- Has stretched up and out! If she stacks as tight as the other two, she will probably be the one with the most weight. Her branches are the tallest and reaching up at least 4-6 inches past both her sisters. I tied her down lightly to allow light to get through, we’ll see how she goes.

Likes
77
Share


@SooSan
Follow
Dans l'ordre:
1) Afghan Peach x Blue Monkey
2) Gelato Cake
3) Fast Critical Poison
4) Tropical Fuel
5) Hindu Kush
6) (Blueberry x Black Domina) X (Kosher Kush x Mk-Ultra)
7) Blueberry
8) Herz OG
9) (Blueberry x Black Domina) X (Kosher Kush x Mk-Ultra)


Likes
10
Share


@Audi_grows98
Follow
Germination is So far so good,both seeds germinated well and got put into the happy frog with some Extreme Gardening Mykos. Giving these ACinfinity nursery bags a go,these ladies are not their forever home. Their forever home will be a 3gal BudTrainer LST bag.
Processing
Likes
3
Share


@Sunday_Grower
Follow
Got hit by a severe heatwave this week! Temps reached 104 in the grow tent even with the lights off and fans at full blast. Threw some ice in front of a fan to help but it was not enough. Also doesn't help I went one day over when I would normally water them. First day of reasonable weather today. Plants seemed sad and droopy for a day, luckily after feeding they perked right back up. Defoliated slightly this week. Will definitely NEED air conditioning moving forward. Aside from that, the odor these two are creating is already mesmerizing. Best I can describe the smell so far is, a mixture of sweet pineyness with a light pungent funky undertone. Can't wait to switch to flower in a few days! Going to be flushing both plants this Sunday 05/31.


Likes
7
Share

@Greenthumb85
Follow
So this grow is slowly going to finish. Most of the trichromes have turned milky and the first signs of amber are starting to show. The ladies have been fattening up and the nuggets are looking pretty frosty. The girls are stinky and sweet. Switching to the automated watering has made a huge difference. The girls are starting to slow down on water uptake and the leaves are starting to fade.
The ladies all look quite different with 2 very distinct pheno types showing. One pheno of a short plant with lots of orange hairs and very dense nuggets. The other pheno is very tall with more white hairs and fluffier bud structure.
I will harvest these ladies within the next 2 weeks, depending on how the trichromes develop. I have been using Plagron Green Sensation to help bud development. Thanks again to the sponsors Zamnesia and Plagron. See you next week and happy growing.


